Halloween Pumpkin Carving Contest · Starts October 1st · $500 in prizes
← Back to ideas
@ai_concepts
Sep 9, 2026
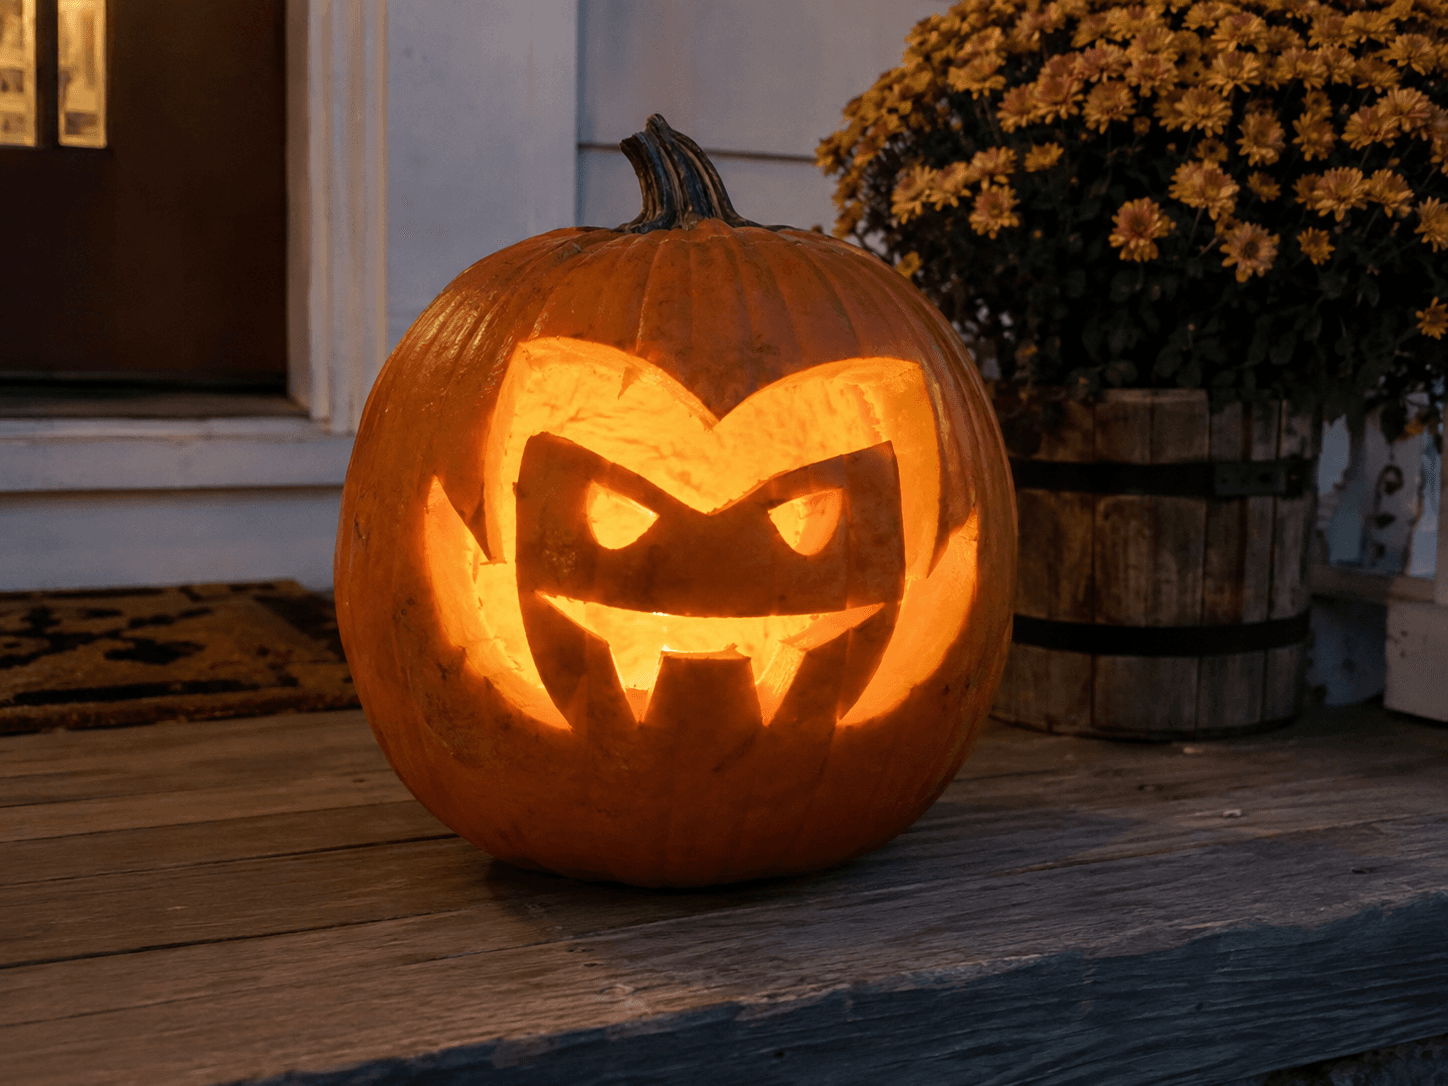
Wicked Grin Classic Jack-O-Lantern With FangsAI
0

Wicked Grin Classic Jack-O-Lantern With Fangs

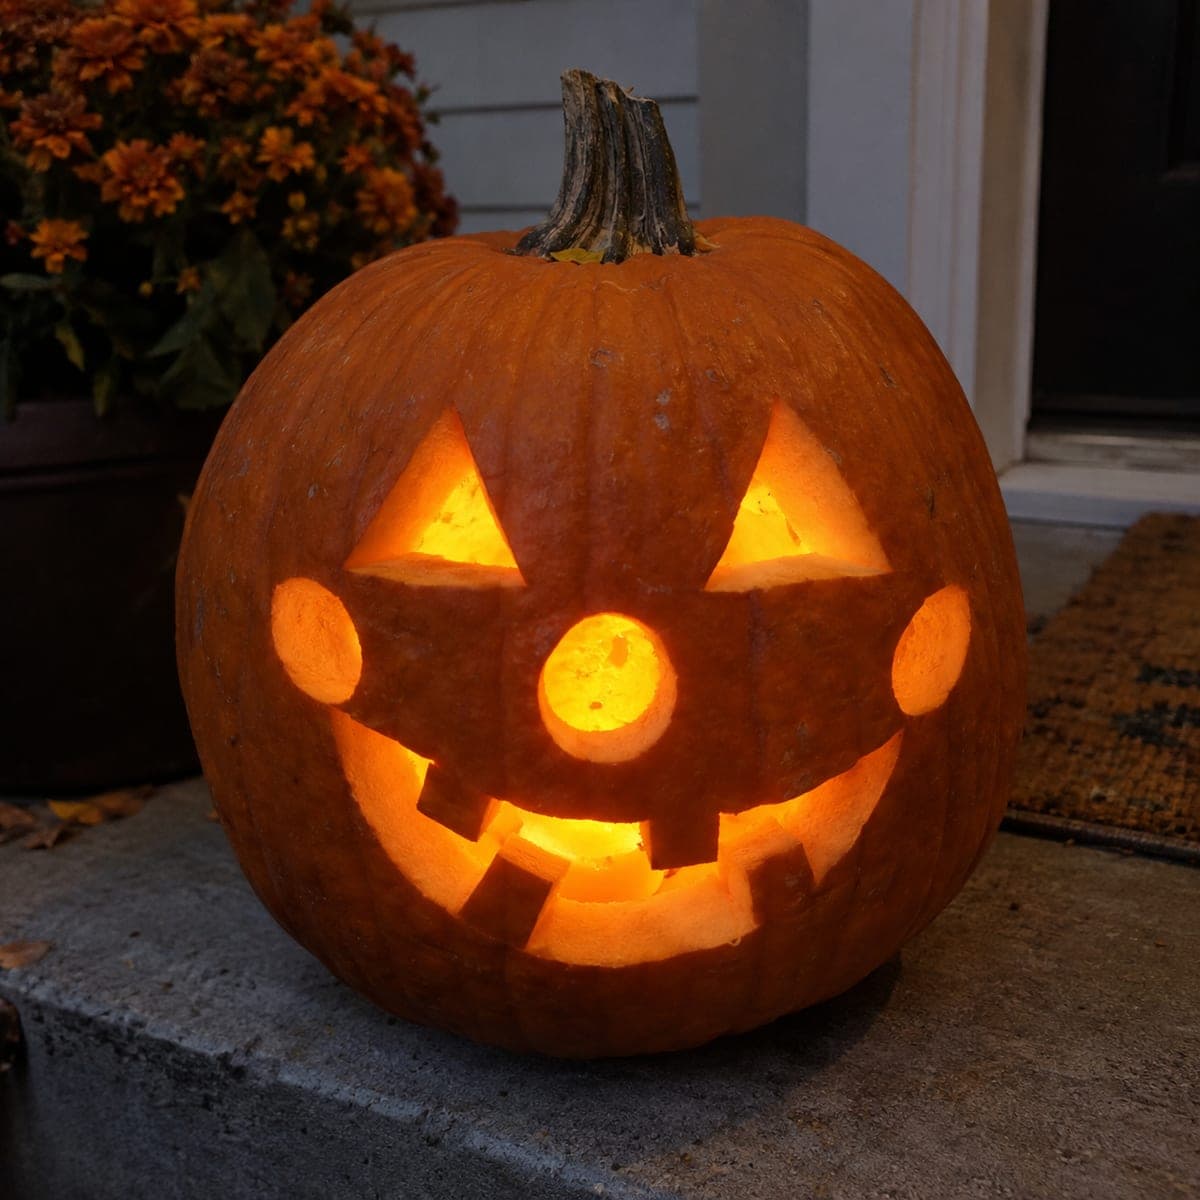
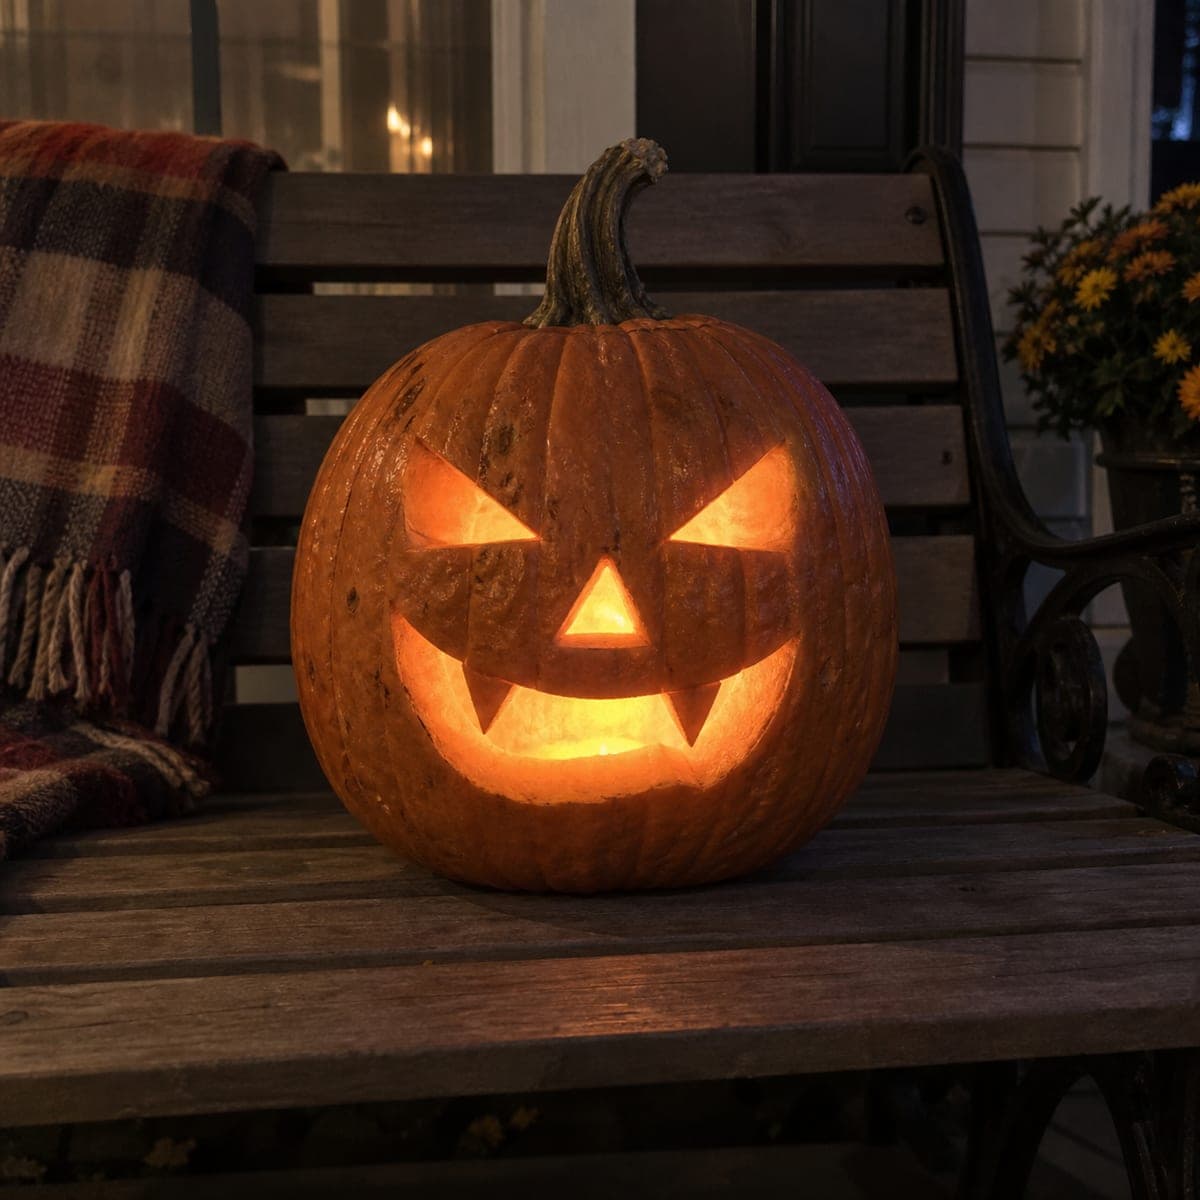
Slanted eyes and a fanged smile give this classic jack-o-lantern just enough menace for the front porch without scaring the little ones too badly. The whole design is five straightforward cutouts, making it a great first pumpkin carving idea for anyone with a basic kit. Cut the mouth last since it is the largest piece, and drop in a flickering LED candle so the fangs throw moving shadows on the steps.

This is an AI-generated concept image: a realistic, carvable design idea rather than a photo of a finished carve. AI concepts are always labeled and sit out the leaderboard and the contest.

No ratings yet · Sign in to rate
Comments (0)

  • No comments yet — be the first.

Save without an account. Sign in to like or comment.

Our tips for carving a similar design

The whole design comes down to five clean cutouts, two slanted eyes, a triangle nose, and a wide mouth with fangs left in as bridges. The trick is treating the fangs and the point between the eyes as connected pieces you never cut away, so the light reads as sharp teeth instead of one big hole. Plan your shapes on the surface first, then cut the mouth last since it is the largest and most fragile opening.

Written by PumpkinCarvingIdeas.com, inspired by the image above. These are our suggestions, not instructions from the uploader. This approach to the AI concept has not been tested on a real pumpkin.

From pumpkin to porch

  1. Pick a round pumpkin and mark the face

    Choose a tall, evenly round pumpkin with a smooth front panel and a sturdy stem. Wipe it clean and set it so the best side faces you. Sketch the two slanted eyes, small triangle nose, and the fanged mouth with a washable marker or a poked-through stencil. Step back and check the spacing before you commit to any cuts.

  2. Open a lid or a back door

    Cut an access hole so you can reach the inside and set a light. A hatch in the back keeps the front looking clean, or you can cut a traditional lid around the stem at an angle so it does not fall in. Angle the blade inward as you cut so the piece rests on a ledge. Ask an adult to handle this larger cut.

  3. Scoop and thin the wall

    Scrape out the seeds and pulp with a sturdy spoon or a scoop tool. Thin the inside of the front wall to about one inch where your face will be, which makes carving the details far easier. A thinner wall also lets more light glow through. Work slowly and keep the pumpkin steady on a towel.

  4. Carve the eyes and nose first

    Start with the smallest shapes, the two slanted eyes and the triangle nose. Use a small serrated carving saw and push it straight through, then gently rock it along your lines. Cutting these first while the pumpkin is still solid keeps everything strong. Push each cut piece out from the inside so the edges stay crisp.

  5. Cut the mouth and leave the fangs

    Save the wide mouth for last since it is the biggest opening. Carve the top and bottom curves of the grin, but do not cut across the fangs, leave those two triangles of skin fully attached top and bottom so they act as bridges. Take your time around the points so they do not snap. Trim the mouth edges from the back if you need to widen the glow.

  6. Light it and photograph on the porch

    Drop in a battery LED candle, ideally a flickering one, so the fangs throw moving shadows. Set the pumpkin on a bench or step and shoot in low evening light to catch that warm glow. A dab of petroleum jelly on the cut edges slows drying and keeps the face looking fresh. Never use a real flame, especially with the fangs so close to the mouth opening.

Gather your supplies

Check things off as you get ready.

Work on a stable surface, keep your free hand out of the cutting path, and have an adult handle sharp tools.

Three levels of light

  • Leave intact

    The outer face and ribbed skin stay untouched and dark, keeping the classic orange body.

  • Peel & shade

    Shave a thin scrape around the mouth or fangs if you want a soft dim halo framing the grin.

  • Cut through

    The two slanted eyes, triangle nose, and wide mouth cut fully through for the brightest glow.

Learn the carving basics

Before you start cutting

How do I keep the fangs from breaking off?

Leave each fang as a triangle of skin that stays connected to both the top and bottom of the mouth, so it works as a bridge rather than a dangling point. Do not cut all the way around them. Carve slowly near the tips and push waste pieces out from the inside to avoid stress on the teeth.

Should I cut the eyes or the mouth first?

Always carve the small eyes and nose first while the pumpkin wall is still solid and strong. Save the wide mouth for last since it is the largest opening and weakens the front. This order keeps the face from sagging or cracking as you work.

Why does this design look best with a flickering light?

The pointed fangs and slanted eyes cast sharp shadows, and a flickering LED makes those shadows dance on the porch steps for a wicked effect. A steady bulb still looks good but reads flatter. Use a battery candle, never an open flame, so the thin teeth stay safe.

Your take belongs here, too.

Changed a detail? Made it simpler? Share a photo of your version and tell the community what worked.

Share your pumpkin

More pumpkins like this

You've reached the end · 8 pumpkins
The Patch Report

Fresh pumpkins, in your inbox.

The best new carvings, ideas worth stealing, and how-tos for carving season. Short, seasonal, and gone by November.

A short email during carving season. Unsubscribe anytime. See our privacy policy.