Halloween Pumpkin Carving Contest · Starts October 1st · $500 in prizes
← Back to ideas
@ai_concepts
Aug 25, 2026
Wolf Face Etched Pumpkin CarvingAI
0

Wolf Face Etched Pumpkin Carving

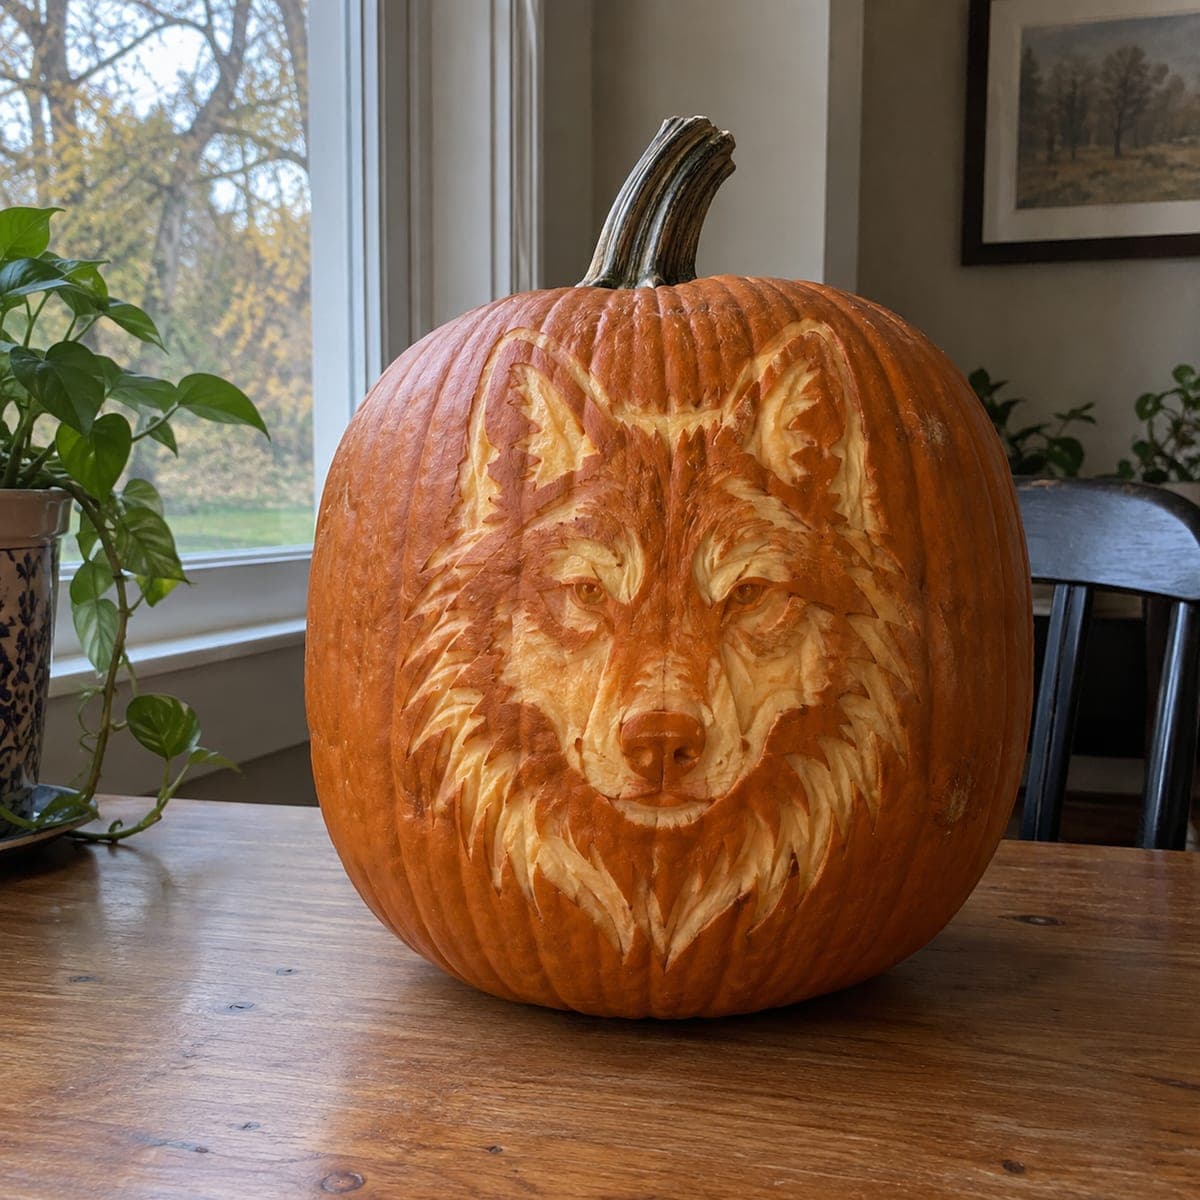
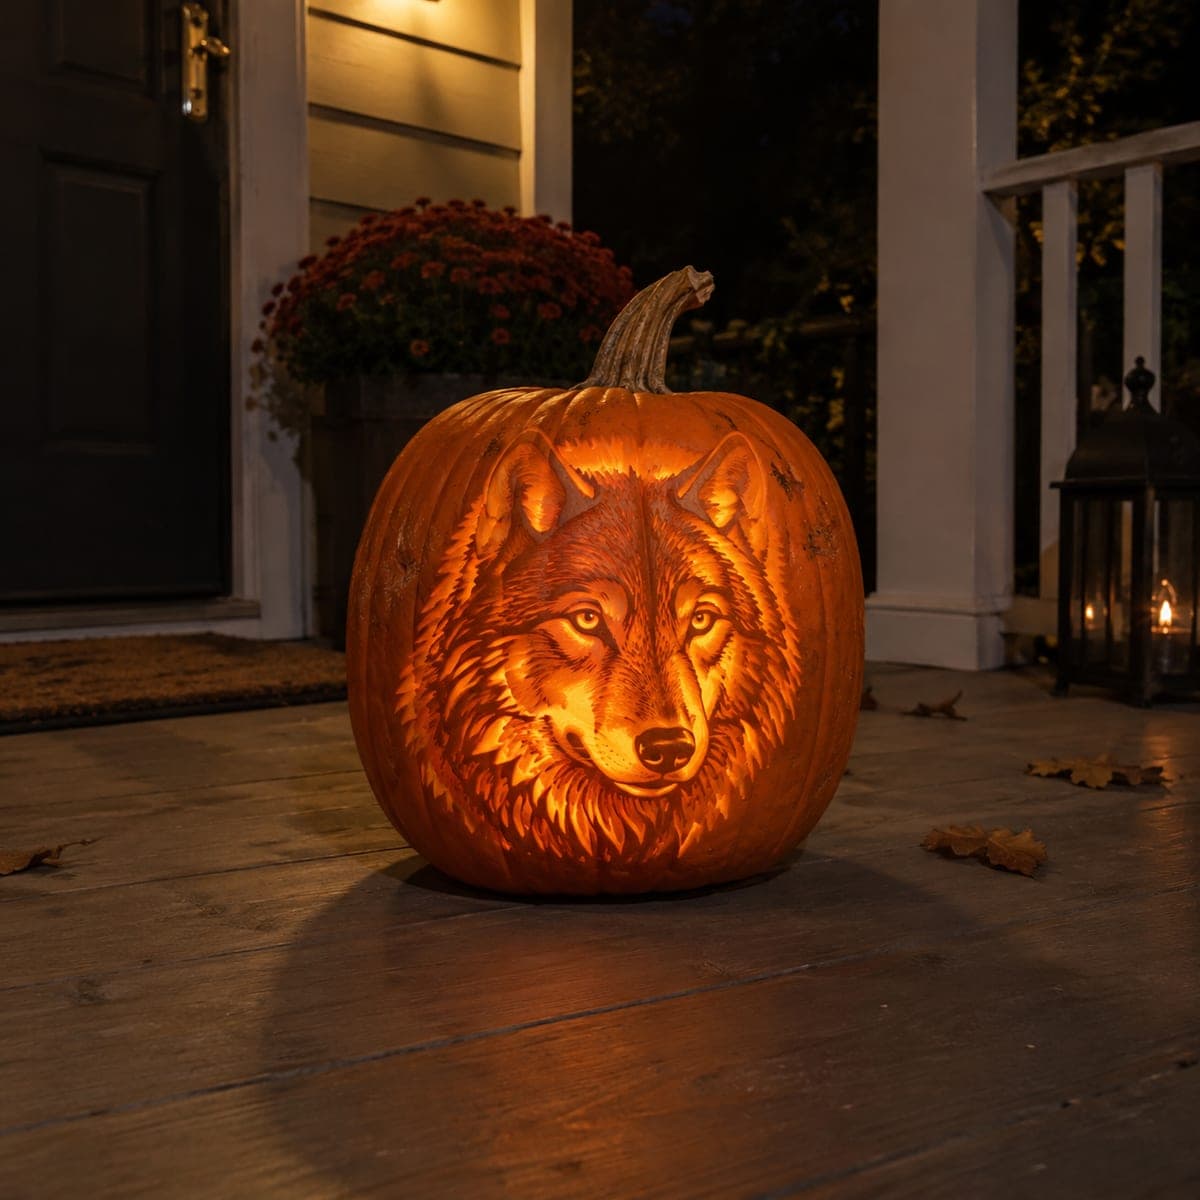
A wolf stares straight ahead from this pumpkin, its ruff, ears, and muzzle rendered in feathery etched strokes that expose the pale flesh beneath the skin. The fur effect comes from hundreds of short pulls with a V-gouge, always following the direction the coat would grow. Because nothing is pierced, the design shows beautifully in daylight; add an interior light at night for a subtle backlit glow.

This is an AI-generated concept image: a realistic, carvable design idea rather than a photo of a finished carve. AI concepts are always labeled and sit out the leaderboard and the contest.

No ratings yet · Sign in to rate
Comments (0)

  • No comments yet — be the first.

Save without an account. Sign in to like or comment.

Our tips for carving a similar design

The whole effect here is surface etching rather than cutting all the way through, so the wolf reads as feathery fur even with no light behind it. The core trick is peeling away only the outer skin in short directional strokes so pale flesh glows against the dark orange background. Plan it as a shading map first, deciding which areas stay dark, which get lightly skinned, and which get scraped down thinnest.

Written by PumpkinCarvingIdeas.com, inspired by the image above. These are our suggestions, not instructions from the uploader. This approach to the AI concept has not been tested on a real pumpkin.

From pumpkin to porch

  1. Pick a smooth pumpkin and clean the lid

    Choose a pumpkin with a broad, even front and few blemishes, since etching shows every dent. Cut a wide lid from the bottom instead of the top so the stem stays intact and the fur near the crown reads cleanly. Scrape the inside wall down to about one inch thick on the front so light can pass through later. A thinner wall etches more easily and glows better at night.

  2. Transfer the wolf pattern

    Tape your wolf stencil smoothly over the front, snipping the edges so it hugs the curve. Use a poking tool to dot along every fur line and the eyes, nose, and ear edges. Pull the paper and connect the dots lightly with a washable marker if the pattern feels sparse. Keep the eyes and nose clearly marked, since they anchor the whole face.

  3. Score the outline and shading zones

    With a small detail knife, lightly trace the outer edge of the wolf and the borders between light and dark fur. Do not cut deep, just break the skin so your etched strokes stop at clean lines. Mark which zones will stay full dark skin, which get a shallow skin peel, and which get scraped thinnest. This map keeps you from over-etching the darker patches around the muzzle and eyes.

  4. Etch the fur with a V-gouge

    Switch to a V-shaped gouge and pull hundreds of short strokes, always following the direction the coat grows. Start at the ruff and work outward so the fur fans away from the face. Vary your pressure so some pulls barely skim the skin and others dig to bright flesh, which creates depth. Keep your free hand behind the blade and take breaks so your grip stays steady on the fine work.

  5. Deepen the face and eyes

    Around the eyes, brow, and muzzle, scrape a touch deeper to make those planes glow brighter than the surrounding fur. Leave a thin ridge of untouched skin for the dark pupils and the nose top so the stare stays sharp. Soften the transitions by feathering shorter strokes where light fur meets dark. Step back often to check that both eyes match and the gaze reads straight ahead.

  6. Light it and photograph

    Since this is an etched design, it looks great on a shelf in daylight with no light at all. For night, set a battery LED puck or string inside for a soft backlit glow through the thinned areas. Never use a candle, as the heat dries and warps the fine etching. Snap your photo near a window in soft light to show off the fur texture.

Gather your supplies

Check things off as you get ready.

Work on a stable surface, keep your free hand out of the cutting path, and have an adult handle sharp tools.

Three levels of light

  • Leave intact

    The dark background around the wolf and the pupils, nose top, and deepest fur shadows stay as untouched skin.

  • Peel & shade

    The main ruff, cheeks, and forehead fur get a shallow skin peel for a soft mid glow.

  • Cut through

    Nothing is cut fully through on this design; the brightest look comes from scraping the eyes and muzzle planes thinnest rather than piercing.

Learn the carving basics

Before you start cutting

Do I need to cut any holes for this to work?

No, this is an etched portrait, so all the detail comes from removing skin at different depths rather than piercing the wall. That is why it displays so well in daylight. If you want a stronger night glow, just scrape the front wall thinner from the inside.

How do I keep the fur from looking messy?

Always pull your gouge in the direction the coat grows, fanning out from the center of the face. Use your stencil lines as guides for where the fur changes direction at the ruff and ears. Consistent short strokes read as fur, while random long ones look scratchy.

This is a concept image. Can a real pumpkin actually hold this detail?

Yes, an etched wolf like this is realistic on a real pumpkin because nothing thin is left dangling or pierced. The fur is just shallow surface work, which is sturdy. Just thin the wall gently and avoid gouging all the way through so the face stays intact.

Your take belongs here, too.

Changed a detail? Made it simpler? Share a photo of your version and tell the community what worked.

Share your pumpkin

More pumpkins like this

You've reached the end · 8 pumpkins
The Patch Report

Fresh pumpkins, in your inbox.

The best new carvings, ideas worth stealing, and how-tos for carving season. Short, seasonal, and gone by November.

A short email during carving season. Unsubscribe anytime. See our privacy policy.