Halloween Pumpkin Carving Contest · Starts October 1st · $500 in prizes
← Back to ideas
@ai_concepts
Jul 12, 2026
Yorkshire Terrier Glowing Pumpkin PortraitAI
0

Yorkshire Terrier Glowing Pumpkin Portrait

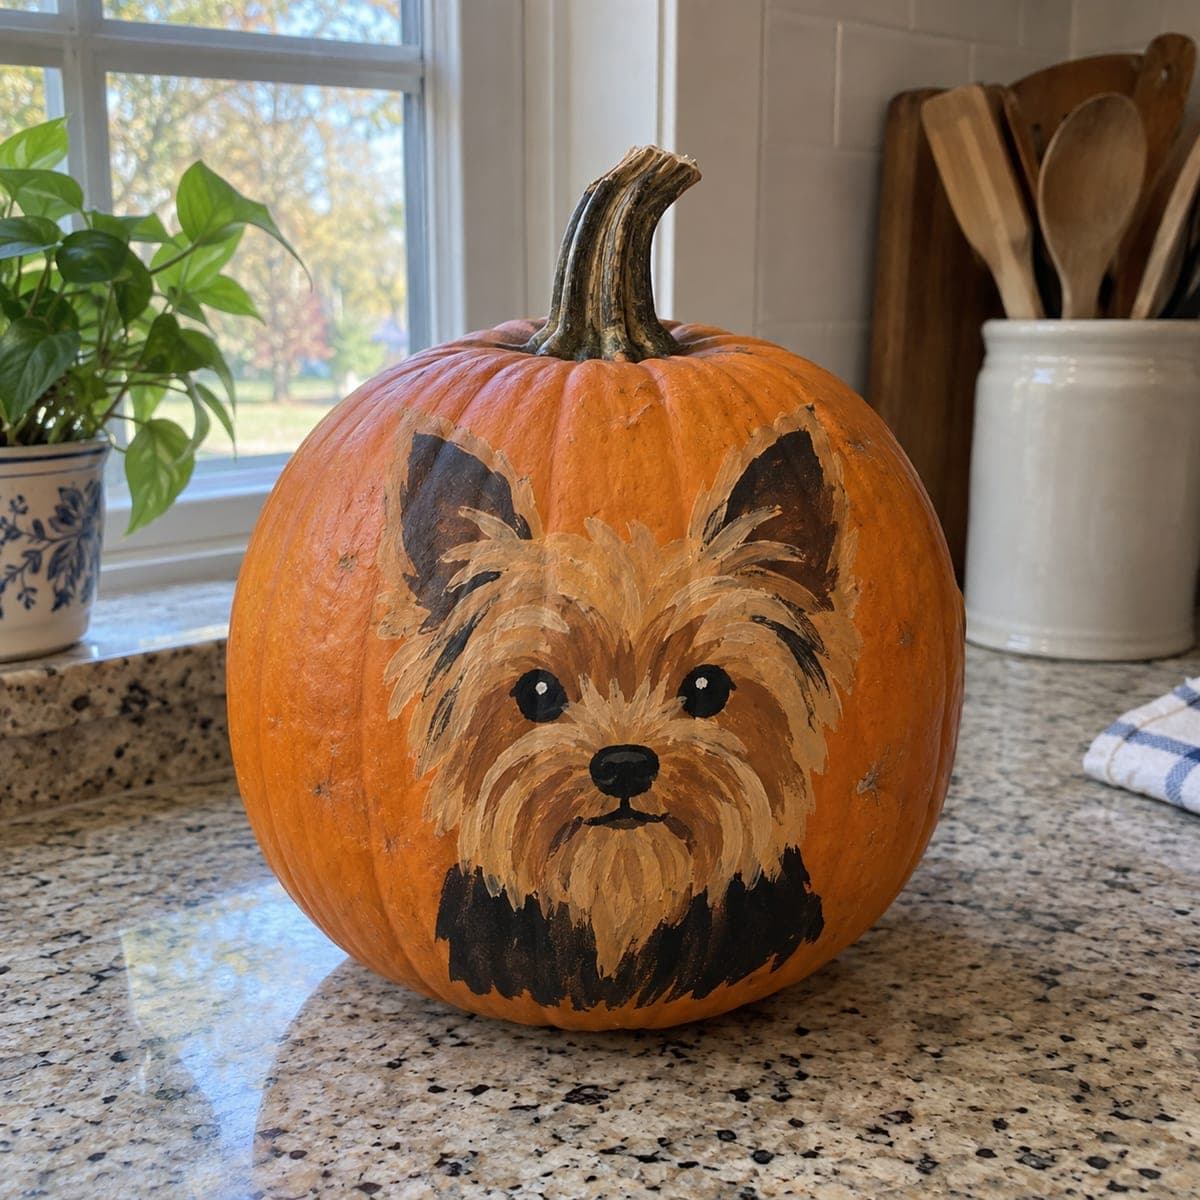
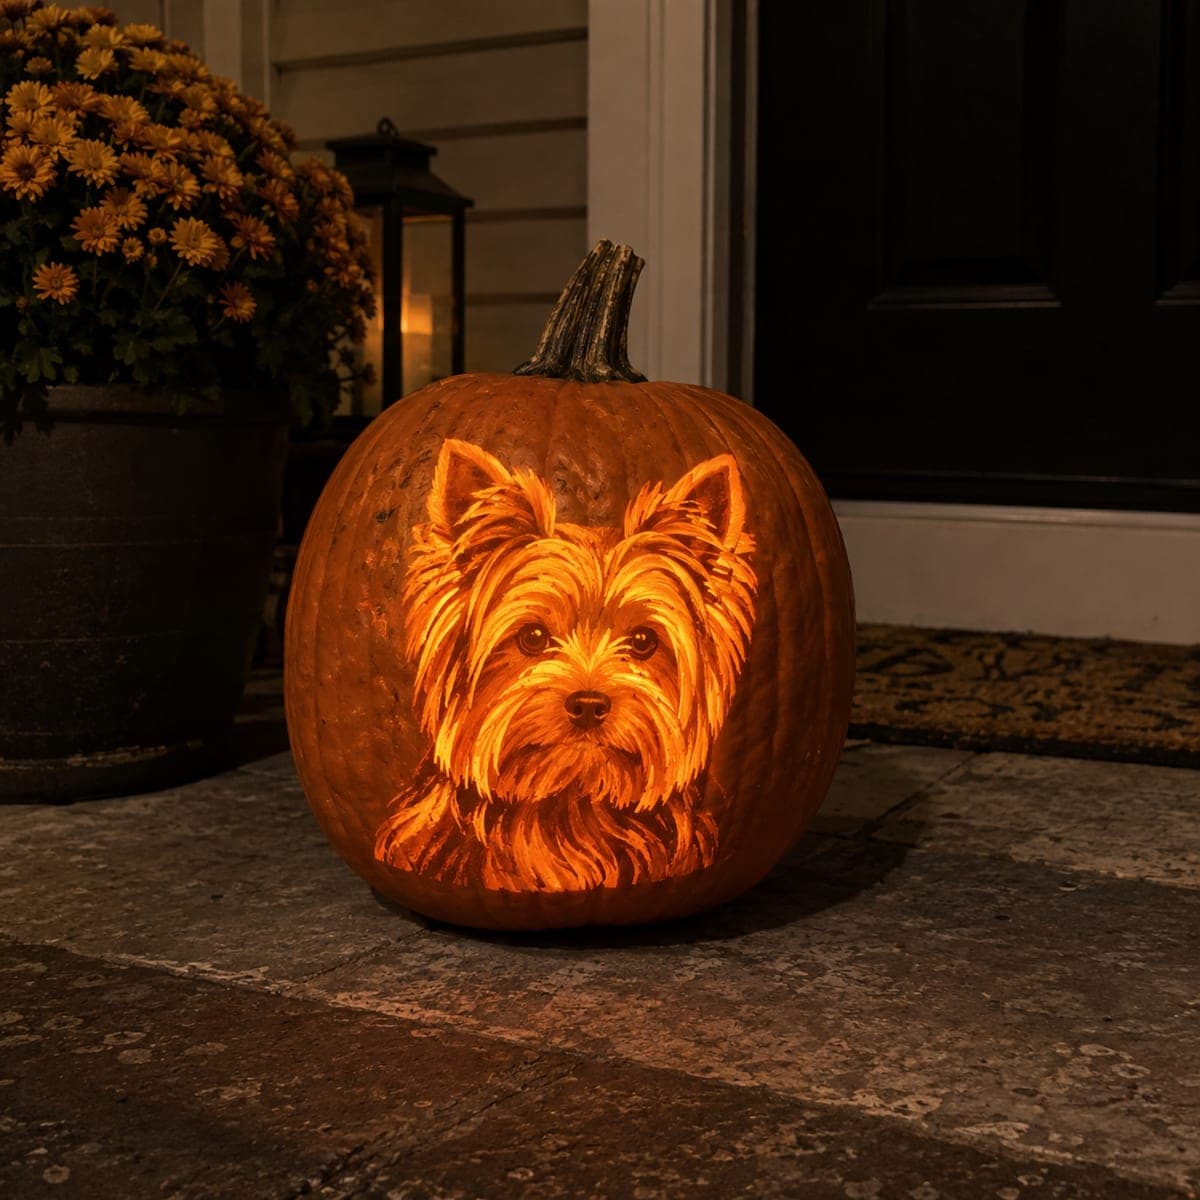
This Yorkie portrait is etched hair by hair into the pumpkin wall, and when lit from inside the long silky coat seems to shine from within. Every strand is a fine shallow stroke at slightly different depths, which is what creates the layered fur glow. Use a V-gouge for the hair lines and thin the eye and nose areas most so they read darkest. A stunning way to memorialize a beloved small dog on the porch.

This is an AI-generated concept image: a realistic, carvable design idea rather than a photo of a finished carve. AI concepts are always labeled and sit out the leaderboard and the contest.

No ratings yet · Sign in to rate
Comments (0)

  • No comments yet — be the first.

Save without an account. Sign in to like or comment.

Our tips for carving a similar design

This design is built almost entirely with shallow surface shading rather than cutouts, so the long Yorkie coat looks like it glows from inside. The trick is varying the depth of each fur stroke: light peels for pale silky strands, deeper thinning where the coat should shine brightest, and dark untouched skin in the gaps between locks. The eyes and nose stay nearly untouched so the face reads with a real expression.

Written by PumpkinCarvingIdeas.com, inspired by the image above. These are our suggestions, not instructions from the uploader. This approach to the AI concept has not been tested on a real pumpkin.

From pumpkin to porch

  1. Transfer a clean portrait pattern

    Since this is a concept image, start from a Yorkie photo or a printed portrait stencil sized to your pumpkin's flattest, largest face. Tape it down and poke closely spaced dots along the outline of the ears, muzzle, eyes, nose, and the main clumps of fur. Focus your dots on the boundaries between light and dark areas rather than every single hair. Peel the paper and lightly connect the key shapes with a washable marker so you have a road map before any blade touches the skin.

  2. Hollow and thin the pumpkin wall

    An adult should cut the lid from the bottom or back so the front face stays intact, then scoop the inside until the front wall is about one inch thick. A thinner wall lets peeled areas glow evenly. Scrape the interior smooth with a loop tool so no ridges block the light. Set your LED light inside briefly to check for thick spots and shave them down before you start the surface work.

  3. Map the fur with a V-gouge

    Use a small V-gouge to draw the main direction of the coat, working outward from the face in the direction the hair falls. Keep these first passes shallow and follow the natural flow, longer strokes down the body and shorter ones around the muzzle and ears. Space the lines so dark skin remains between them, which is what separates one lock from the next. Work in patient rows and step back often to read the shapes.

  4. Build depth for the glowing coat

    Go back over the areas that should look brightest, the top of the head and the chest, and remove a touch more skin so those strands glow warmer. Vary your depth slightly from stroke to stroke so the fur looks layered instead of flat. Leave the recessed gaps between hair clumps untouched so they stay dark. This depth contrast is the whole illusion, so keep testing with the light inside as you go.

  5. Shade the face and set the eyes

    Thin the skin gently around the muzzle and cheeks so the face reads soft and pale. Leave the eyes and nose almost fully intact, only lightly peeling small highlights, so they stay the darkest points and give the dog its expression. Keep any fine whisker or eyelash lines as shallow scratches with bridges of skin between them so nothing crumbles. Resist cutting all the way through anywhere on the face.

  6. Light it and seal the surface

    Wipe away marker lines and pat the carving dry. Rub a thin coat of petroleum jelly over the peeled fur to slow drying and deepen the glow. Drop a warm LED puck inside, never a candle, and set the pumpkin at eye level on the porch. Photograph it after dark against a dark background so the coat's shine stands out.

Gather your supplies

Check things off as you get ready.

Work on a stable surface, keep your free hand out of the cutting path, and have an adult handle sharp tools.

Three levels of light

  • Leave intact

    The recessed gaps between fur clumps, plus the eyes and nose, stay as untouched dark skin for depth and expression.

  • Peel & shade

    Most of the coat is shallow peeled fur that glows soft orange, with the muzzle and cheeks kept pale.

  • Cut through

    Keep true cutouts to none or a few tiny slivers only; this portrait relies on shading, not open holes.

Learn the carving basics

Before you start cutting

Do I need to cut any holes at all for this to glow?

Not really. The glow comes almost entirely from thinning the wall and peeling the skin at different depths. Save full cutouts for tiny accents if anything, and only make them after the shading is done so the face does not weaken.

How do I keep the fur from looking like one flat blur?

Vary the depth of your V-gouge strokes and leave dark skin in the gaps between locks. Deeper passes glow brighter and shallow ones stay dim, which reads as layered strands. Check with the LED inside frequently and add depth only where you want more shine.

Why keep the eyes and nose dark instead of carving them out?

On a portrait the darkest points give the animal its expression and sense of dimension. If you cut the eyes and nose through, they would blast bright and flatten the face. Leave them nearly intact so they anchor the glowing coat around them.

Your take belongs here, too.

Changed a detail? Made it simpler? Share a photo of your version and tell the community what worked.

Share your pumpkin

More pumpkins like this

You've reached the end · 8 pumpkins
The Patch Report

Fresh pumpkins, in your inbox.

The best new carvings, ideas worth stealing, and how-tos for carving season. Short, seasonal, and gone by November.

A short email during carving season. Unsubscribe anytime. See our privacy policy.