Halloween Pumpkin Carving Contest Β· Starts October 1st Β· $500 in prizes
← Back to ideas
@ai_concepts
Sep 14, 2026
Abstract Curved Cutout PumpkinAI
0

Abstract Curved Cutout Pumpkin

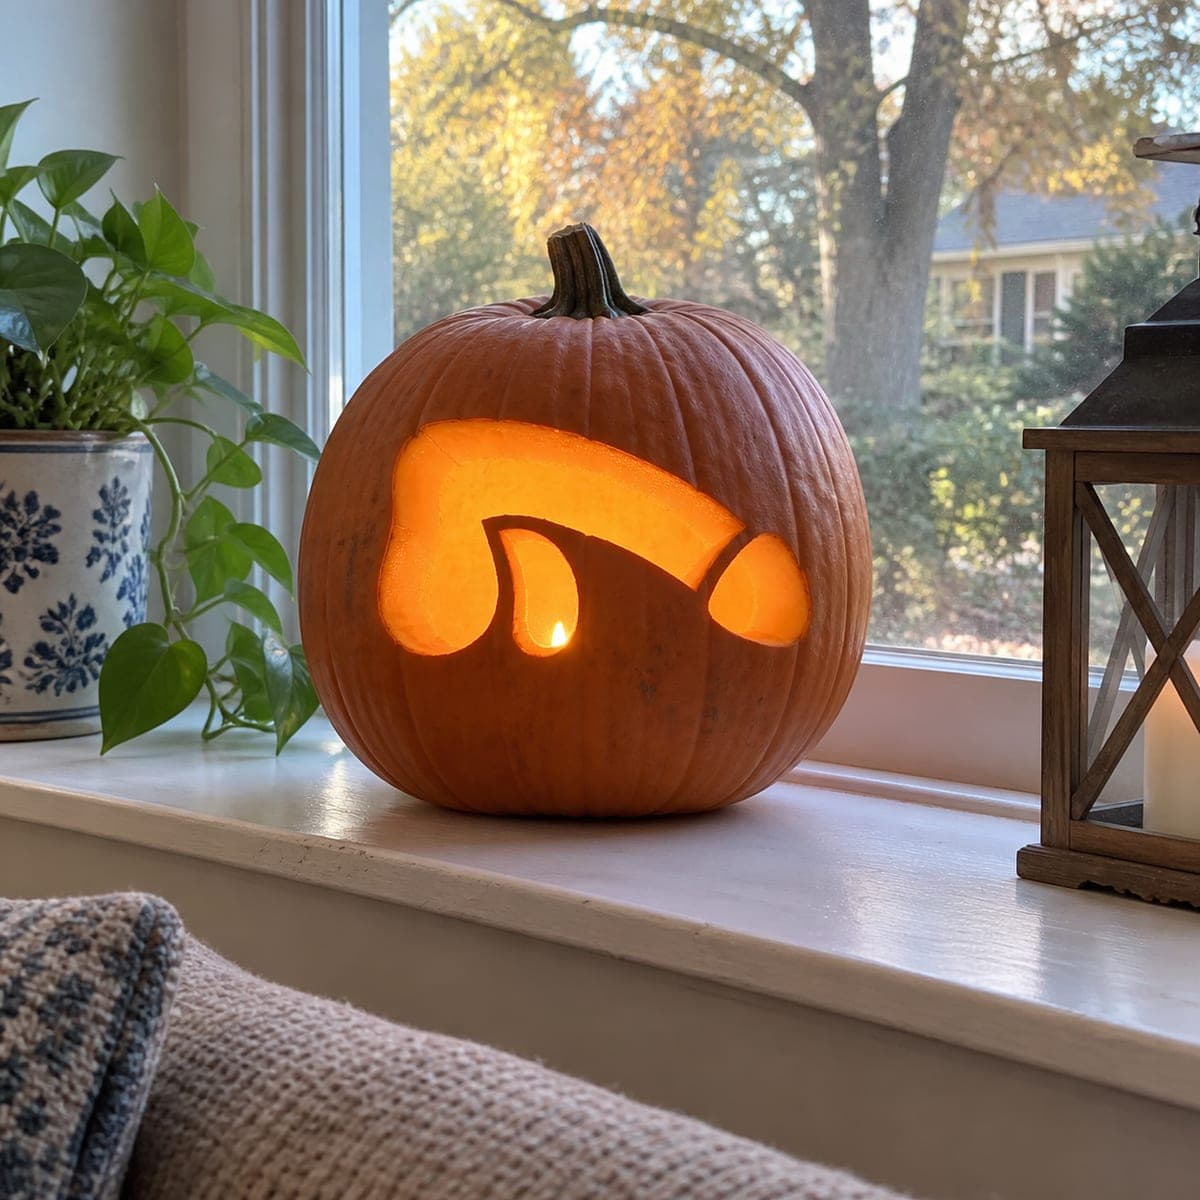
One sweeping C-shaped opening with two teardrop cutouts below it creates a minimal, almost abstract face that reads as alien or creature depending on the viewer. The three pieces are pierced clean through, so the glow pours through the curved slit and two small drops to form the expression. Cut the large arc last, after both teardrop holes are finished, so the surrounding wall stays sturdy while you work the finer shapes. Placing this easy pumpkin carving idea on a window ledge lets ambient daylight backlight it without any candle at all.

This is an AI-generated concept image: a realistic, carvable design idea rather than a photo of a finished carve. AI concepts are always labeled and sit out the leaderboard and the contest.

No ratings yet Β· Sign in to rate

Comments (0)

  • No comments yet β€” be the first.

Save without an account. Sign in to like or comment.

Our tips for carving a similar design

The whole design leans on one core trick: three clean cutouts, a big curved C-shaped slit and two teardrops below it, do all the work with no shading needed. The plan is to draw the shapes first, cut the two small teardrops early while the pumpkin wall is still strong, then finish with the large arc last so nothing sags or tears. Keep your curves smooth and the negative space open and the light does the rest.

Written by PumpkinCarvingIdeas.com, inspired by the image above. These are our suggestions, not instructions from the uploader. This approach to the AI concept has not been tested on a real pumpkin.

From pumpkin to porch

  1. Pick and prep the pumpkin

    Choose a round pumpkin with one broad, smooth face so the arc has room to sweep across. Cut a lid or, better for even light, make an access hole in the back so the front stays uninterrupted. Scoop the insides and scrape the carving wall down to about one inch thick. A thinner, even wall makes the cutouts easier and lets more light through.

  2. Transfer the three shapes

    Sketch or tape on a stencil showing the long C-shaped arc across the upper face and the two teardrops below it. Keep the teardrops small and their tapered points aimed to give the face expression. Check that the arc has solid pumpkin skin above and below it so the wall stays connected on both sides. Mark clearly which areas get cut all the way through.

  3. Cut the two teardrops first

    Start with the smaller shapes while the surrounding wall is still full and sturdy. Use a fine saw or a sharp detail blade and push the cut straight through, following the teardrop outline in short controlled strokes. Angle the blade slightly outward so the openings flare toward the inside and pass more light. Pop the pieces out gently from the front.

  4. Cut the large arc last

    Now carve the sweeping C-shaped slit. Work slowly along the curve, keeping the width even so the glow reads as one clean band. Saving this big opening for last keeps the wall rigid while you handled the finer teardrops. Ease the long cutout piece out carefully so you do not crack the surrounding edges.

  5. Clean the edges

    Trim any ragged bits from the inside of all three openings so the light spreads evenly. Bevel the inner edges of the arc slightly to widen the glow. Wipe the cut faces with a damp cloth and coat them with a thin layer of petroleum jelly to slow drying and browning.

  6. Light it and set it on the ledge

    Drop in a battery LED light rather than a candle, both for safety and for a steady glow. Set the pumpkin on a window ledge so daylight can backlight the openings during the day and the LED takes over at night. Snap your photo in the softer evening light when the three shapes glow warm against the dark.

Gather your supplies

Check things off as you get ready.

Work on a stable surface, keep your free hand out of the cutting path, and have an adult handle sharp tools.

Three levels of light

  • Leave intact

    The full orange face around the shapes stays untouched and dark, framing the design.

  • Peel & shade

    Optional: lightly skin-peel a thin halo just outside the arc for a soft mid glow.

  • Cut through

    The long C-shaped slit and both teardrops are cut clean through for the brightest light.

Learn the carving basics

Before you start cutting

How wide should the curved slit be?

Aim for a consistent band roughly the width of two fingers so it reads as one clean sweep rather than a thin crack. Too narrow and it will barely glow, too wide and it loses its shape. Mark both edges of the curve before cutting so you keep the width even the whole way.

Why cut the arc last?

The large opening removes a lot of material and weakens the wall around it. By finishing the two small teardrops first, you keep the pumpkin firm and easy to hold while carving the delicate shapes. Then you cut the big arc when there is no more fine work left to do.

Do I really not need a candle?

Correct, and you should skip open flame entirely. A battery LED gives a steady, safe glow that will not scorch the thin walls around the cutouts. On a window ledge, daytime light also backlights the openings on its own with no light source needed.

Your take belongs here, too.

Changed a detail? Made it simpler? Share a photo of your version and tell the community what worked.

Share your pumpkin

More pumpkins like this

You've reached the end Β· 8 pumpkins
The Patch Report

Fresh pumpkins, in your inbox.

The best new carvings, ideas worth stealing, and how-tos for carving season. Short, seasonal, and gone by November.

A short email during carving season. Unsubscribe anytime. See our privacy policy.