Halloween Pumpkin Carving Contest · Starts October 1st · $500 in prizes
← Back to ideas
@ai_concepts
Sep 25, 2026
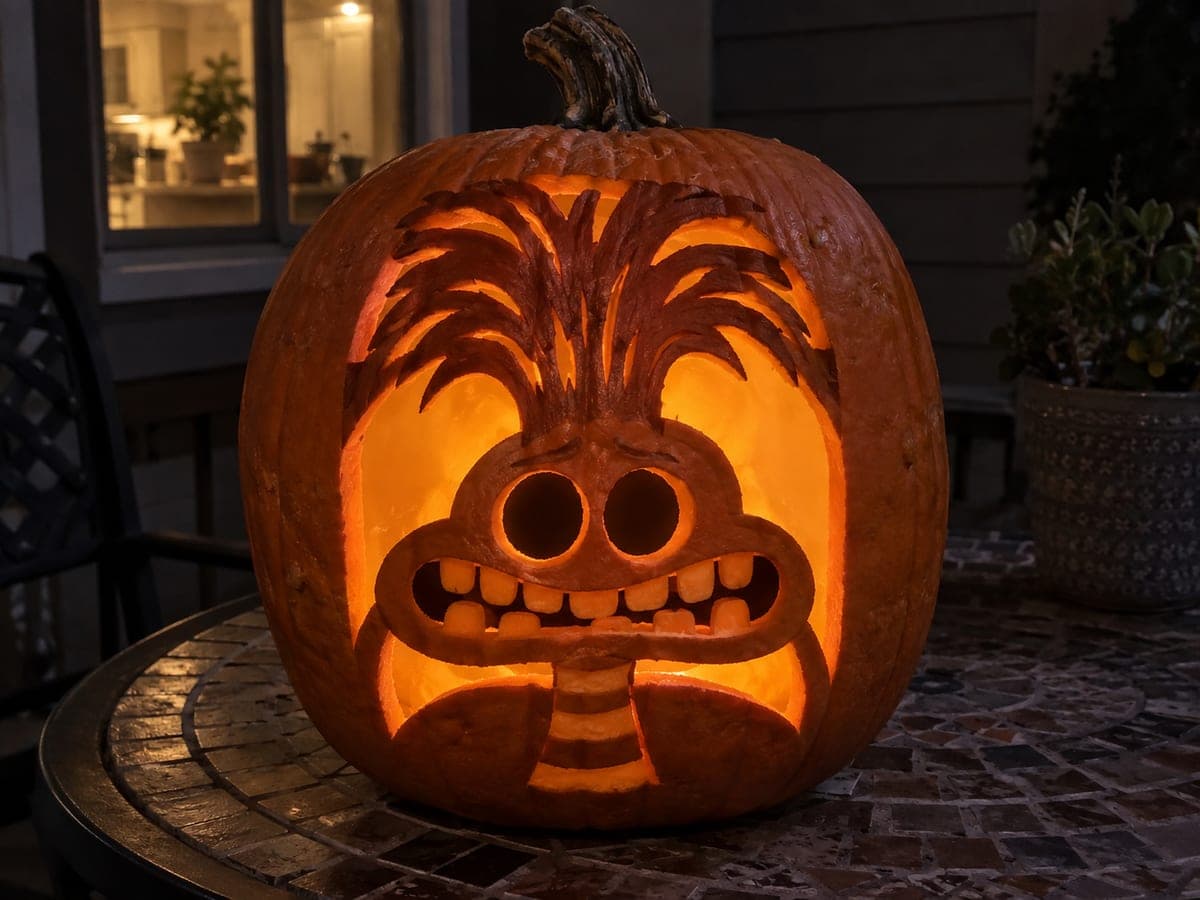
Anxiety Head-and-Shoulders Silhouette PumpkinAI
0

Report this carving

Tell us what is wrong. Reports are private.

Anxiety Head-and-Shoulders Silhouette Pumpkin

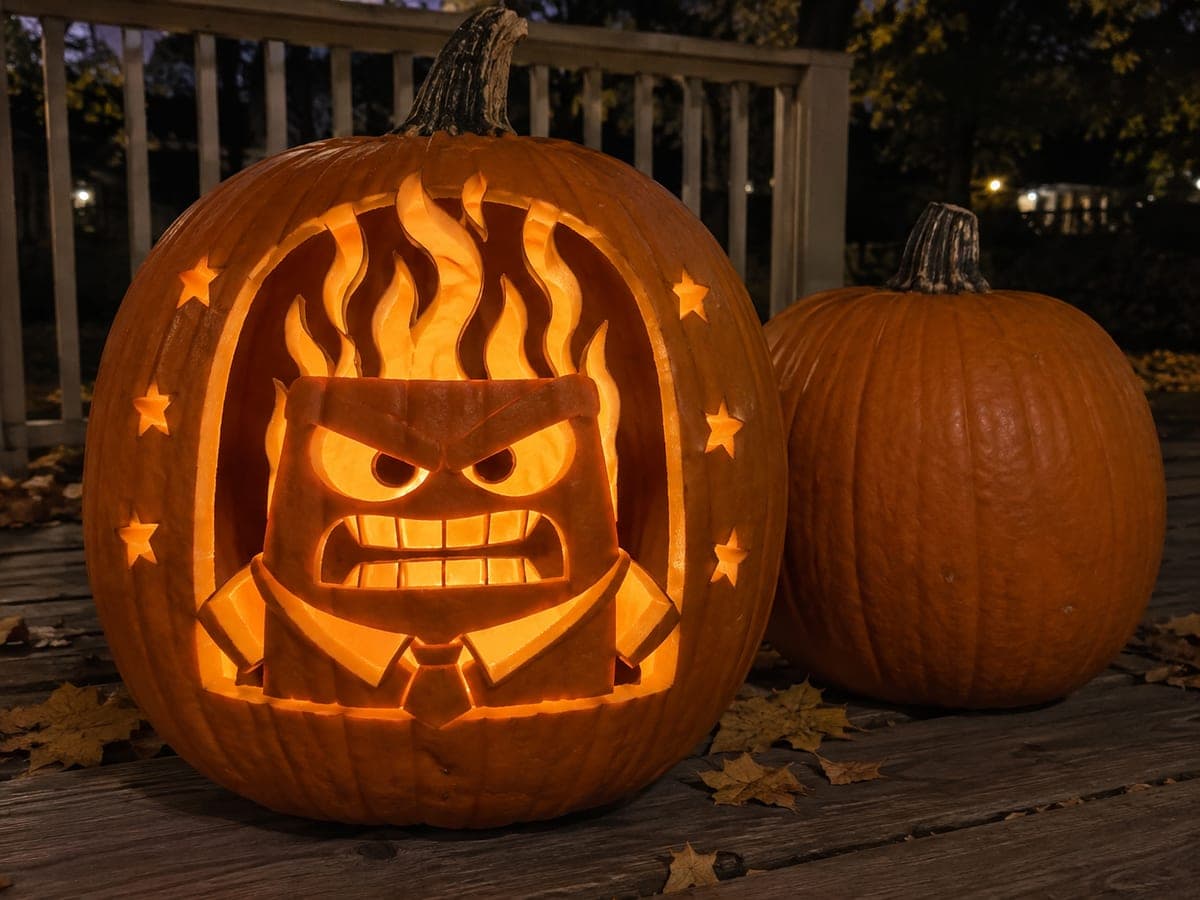
At hard difficulty, this Anxiety pumpkin carving idea keeps the full head-and-shoulders silhouette inside an arch, with hair broadly joined at the top, shoulders touching both sides, and neck and torso rooted at the base. Character features are true open holes and pupils are joined by wide vertical bars. Carve the arch opening first, then the body silhouette, and finish with the interior facial holes to keep the retained piece stable throughout.

No ratings yet · Sign in to rate
Comments (0)

  • No comments yet — be the first.

Save without an account. Sign in to like or comment.

Our tips for carving a similar design

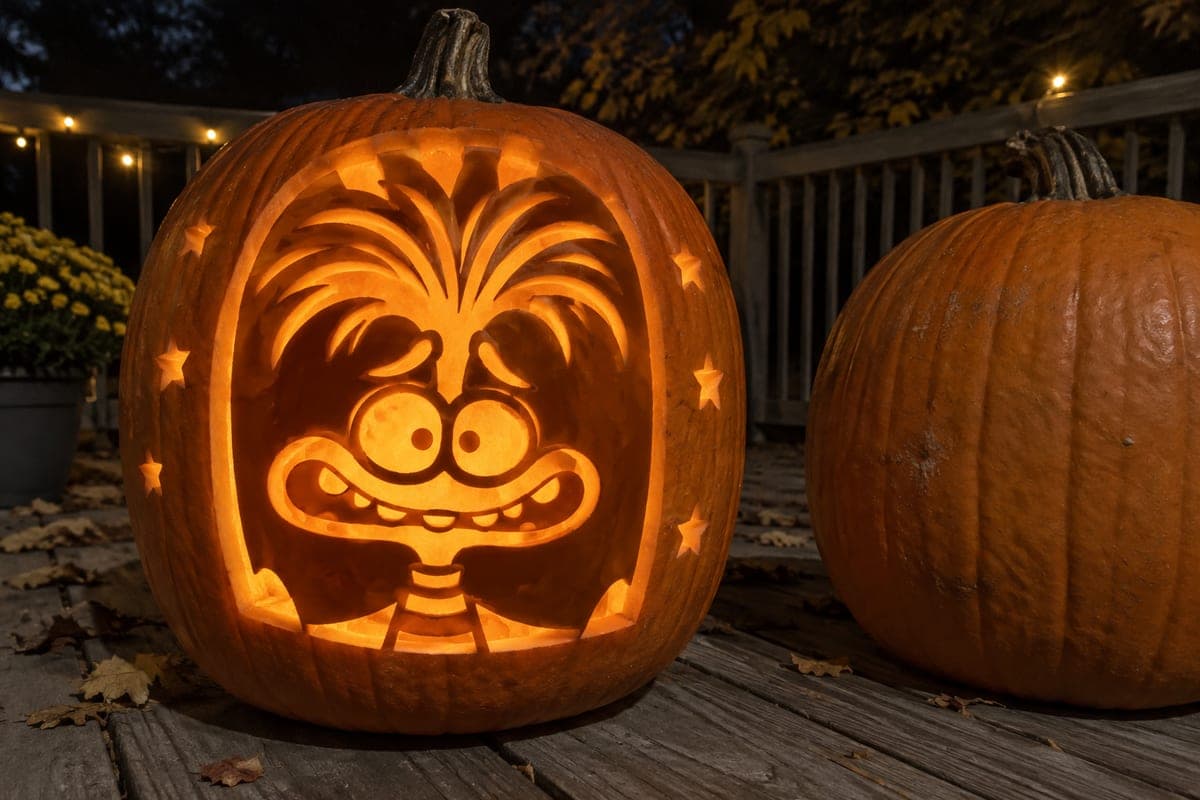
The full head-and-shoulders retained silhouette sits inside a large arch opening, with hair broadly joining the top of the arch, shoulders spanning both sides, and the neck and torso rooting into the base. Facial features are true open holes inside the retained silhouette, and the pupils connect by wide vertical bars so they stay intact. Carving the arch first, then the body outline, and finishing with the interior face holes keeps the piece stable at every stage.

From pumpkin to porch

  1. Transfer and plan the cut order

    Scoop to 3/4 inch and dry the exterior. Transfer the full stencil by pin wheel, marking the arch edge, the silhouette boundary, the interior face holes, and each pupil bar clearly. Write the cut order on paper before you begin: arch, then body outline, then face holes.

  2. Cut the arch opening

    Open the large arch first with a narrow detail saw. The arch forms the outer glowing frame of the design. Leave the hair at the top broadly attached to the arch edge and keep the shoulder contacts at each side intact throughout this pass.

  3. Cut the body silhouette boundary

    Work around the outside of the head-and-shoulders silhouette to remove the rind between the character body and the arch edge. This creates the glowing halo gap between the silhouette and the arch wall. Move slowly around the hair and shoulder contact points to avoid severing the three attachment bridges.

  4. Cut the interior face holes

    With the silhouette isolated, carefully cut the eyes, nose, and mouth as true open holes inside the retained head. Adults handle all cutting here. Keep each hole cleanly separated from the others by solid retained rind.

  5. Cut the pupil bars

    Add the wide vertical pupil bars across the eye openings. Each bar is a narrow retained strip left when you cut around it from both sides. The bars must be at least 3/8 inch wide or they will flex and break.

  6. Light and check

    Place an LED light inside and look for even illumination around the full arch and through all interior face holes. The silhouette should appear as a dark shape surrounded by glow. Shift the LED closer to the arch wall if the character shadow looks too dim.

Written with AI to match this design

Gather your supplies

Check things off as you get ready.

Work on a stable surface, keep your free hand out of the cutting path, and have an adult handle sharp tools.

Three levels of light

  • Leave intact

    The full head-and-shoulders silhouette body, pupil bars, and rind between facial features stay as solid dark retained shapes

  • Peel & shade

    None on this silhouette design

  • Cut through

    The arch opening, the gap around the silhouette, and all interior face holes are cut fully through

Learn the carving basics

Before you start cutting

How do I make sure the silhouette does not just fall inward when I finish the boundary cut?

The three attachment bridges at the top (hair), both sides (shoulders), and bottom (torso) prevent the silhouette from falling. Always leave these bridges intact and confirm they are solid before removing the last section of the outline cut. If a bridge feels thin, widen it by adjusting the design boundary inward slightly.

The gap between the silhouette and the arch wall is very narrow in some areas. Is that a problem?

Any gap that is narrower than 1/4 inch will barely glow and may crack. If the stencil places the silhouette very close to the arch edge in certain spots, adjust the silhouette boundary slightly inward when marking to create a wider, more consistent gap.

Can I add shallow-backed texture to the character silhouette for more detail?

Yes, and it works well. Score the hair slot lines or collar shapes with a linoleum cutter before opening the arch so the shell is still rigid. These shallow-backed details will glow at a slightly lighter tone than the full-depth silhouette surface and add nice internal texture.

Your take belongs here, too.

Changed a detail? Made it simpler? Share a photo of your version and tell the community what worked.

Share your pumpkin

More pumpkins like this

You've reached the end · 8 pumpkins
The Patch Report

Fresh pumpkins, in your inbox.

The best new carvings, ideas worth stealing, and how-tos for carving season. Short, seasonal, and gone by November.

A short email during carving season. Unsubscribe anytime. See our privacy policy.