Halloween Pumpkin Carving Contest · Starts October 1st · $500 in prizes
← Back to ideas
@ai_concepts
Sep 25, 2026
Asymmetric Creepy Pumpkin Face With Jagged Cheek SlitsAI
0

Report this carving

Tell us what is wrong. Reports are private.

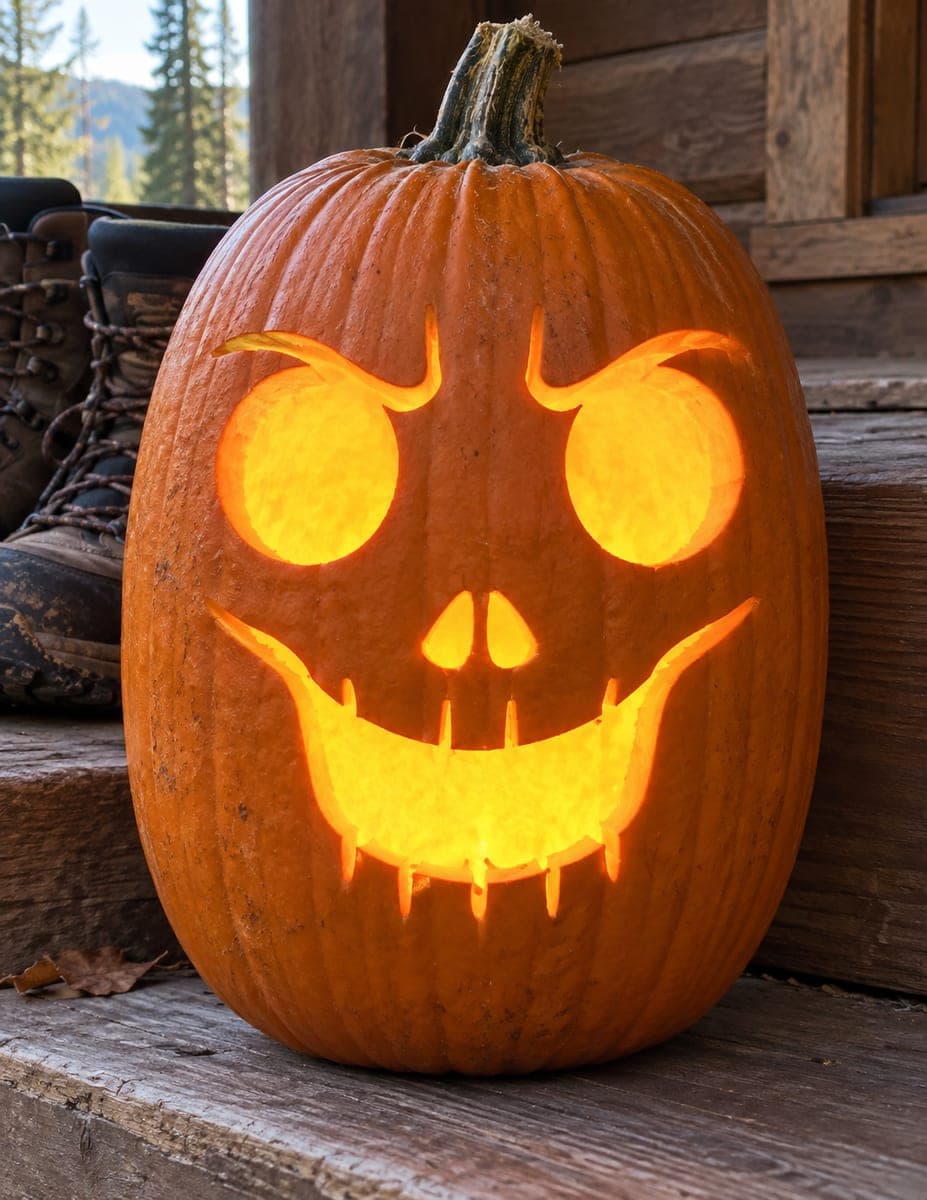
Asymmetric Creepy Pumpkin Face With Jagged Cheek Slits

Deeply asymmetrical eyes divided by broad connected vertical bars, twin teardrop nostrils, a wide grin of sixteen separate rectangular and triangular gaps, and twenty jagged cheek and forehead slits cut from substantial rind make this the most demanding creepy pumpkin face in the collection. Substantial rind between every opening keeps the entire shell from collapsing: plan a minimum 14mm bridge between adjacent cuts before you begin. Transfer the full pattern to the pumpkin surface with a poking tool before making a single cut.

No ratings yet · Sign in to rate
Comments (0)

  • No comments yet — be the first.

Save without an account. Sign in to like or comment.

Our tips for carving a similar design

With over fifty individual openings and a strict 14mm minimum bridge requirement, this design demands full pattern transfer before any cutting begins. The eyes divided by connected vertical bars are structurally dependent on those bars staying wide. Work through the jagged cheek slits first as they are the most exposed, then move inward to the eyes, nostrils, and grin.

From pumpkin to porch

  1. Transfer the complete pattern with a poking tool

    Scoop to an even inch. This design absolutely requires a full paper template. Print or draw every element: asymmetric eyes with vertical bars, twin teardrop nostrils, sixteen grin apertures, and twenty jagged cheek and forehead slits. Transfer every outline with a pin tool. Measure all bridges before cutting anything.

  2. Cut the twenty jagged cheek and forehead slits first

    Work from the outermost slits inward, cutting each jagged slot with a sharp detail knife that handles the angular direction changes. Keep 14mm minimum between every slit and its nearest neighbor. Adults only throughout this design.

  3. Carve the asymmetric bar-divided eyes

    Cut each eye's outer boundary completely, then cut the interior apertures on either side of each connected vertical bar. The bars are the structural pillars of the eyes: cut the apertures around them, never through them. The asymmetry between the two eyes is intentional and should be preserved exactly as planned.

  4. Cut the twin teardrop nostrils

    Two teardrop shapes placed symmetrically as nostrils. Cut from the broad end toward the pointed tip, approaching the tip from both sides to meet cleanly. Keep a solid rind bridge between the two teardrops.

  5. Carve the sixteen-gap grin

    The wide grin is composed of sixteen separate rectangular and triangular apertures. Mark all sixteen positions before cutting any. Work from the left corner to the right, cutting each aperture fully and checking bridge width after every third cut. No gap should share a rind wall with an adjacent one.

  6. Check all bridges, then light

    Before inserting any light, do a full bridge check: press gently on every section and listen for creaking. Reinforce any thin bridges from inside with wooden toothpicks and wood glue. A strong LED inside will light this display, casting complex shadow patterns that shift as you move around it.

Written with AI to match this design

Gather your supplies

Check things off as you get ready.

Work on a stable surface, keep your free hand out of the cutting path, and have an adult handle sharp tools.

Three levels of light

  • Leave intact

    Eye bar pillars, 14mm bridges between all slits, rind between the two nostrils, and all grin gap separators remain solid and dark

  • Peel & shade

    None, all glow from through-cuts

  • Cut through

    Twenty jagged slits, multiple apertures in both asymmetric eyes, two teardrop nostrils, and sixteen grin apertures are all cut through

Learn the carving basics

Before you start cutting

Why does the minimum bridge increase to 14mm for this design instead of the usual 10-12mm?

The sheer number of openings means each remaining rind section supports more structural load than on a simpler design. At 14mm, bridges have enough mass to resist the slow dehydration and micro-cracking that begins within 24 hours of carving. Thinner bridges on a design this dense almost always fail before the display window ends.

How do I keep the eye bar pillars perfectly vertical?

Mark each bar's full length as a thick rectangle on the template and transfer it to the pumpkin. The bars are the negative space you preserve, not the shapes you cut. Cut along both sides of each bar, leaving the bar itself intact. A ruler pressed against the surface as a guide helps keep each cut parallel.

What is a realistic time estimate for carving this design from scratch?

A practiced expert carver should plan for four to six hours of active carving plus time for template preparation and bridge checks. It is best done over two sessions: template work and cheek slits in the first session, eyes, nostrils, and grin in the second. Fresh eyes catch structural problems that fatigue misses.

Your take belongs here, too.

Changed a detail? Made it simpler? Share a photo of your version and tell the community what worked.

Share your pumpkin

More pumpkins like this

You've reached the end · 8 pumpkins
The Patch Report

Fresh pumpkins, in your inbox.

The best new carvings, ideas worth stealing, and how-tos for carving season. Short, seasonal, and gone by November.

A short email during carving season. Unsubscribe anytime. See our privacy policy.