@hallowharvest
Sep 7, 2026
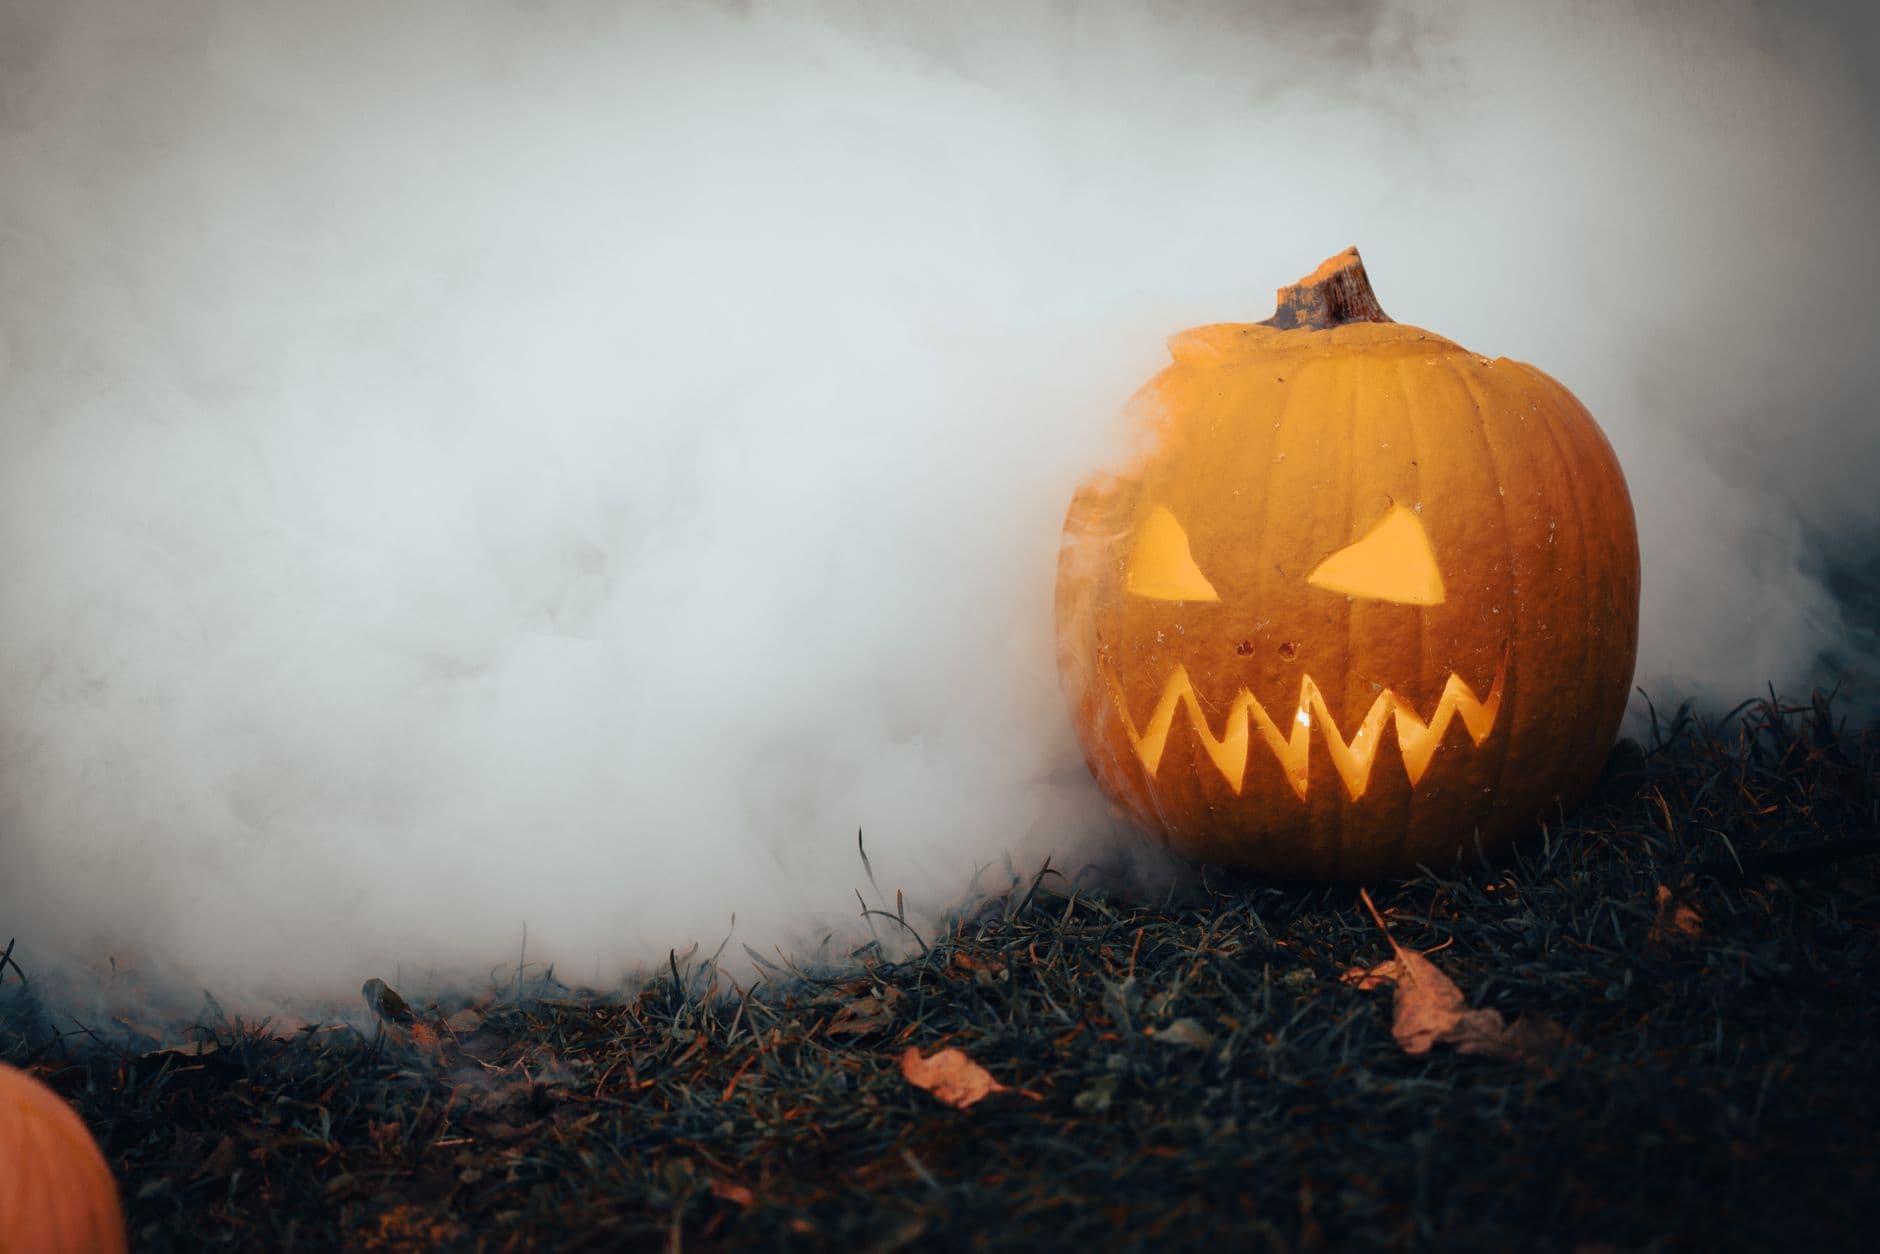
The whole effect here comes from three simple shapes cut clean through the shell, angled eyes and a wide zigzag mouth that let the LED glow blast out. Keep the eyes as sharp triangles and give the mouth even, alternating teeth so the grin reads from across the yard. Everything else stays as untouched skin, so the light really pops against the dark orange.
Written by PumpkinCarvingIdeas.com, inspired by @hallowharvest's photo above. These are our suggestions, not instructions from the uploader, and this approach hasn't been tested on their exact carve.
Choose a round pumpkin with a smooth front and a flat enough base that it will not roll. Cut a lid from the bottom or the back rather than the top so the stem stays intact for that classic look. Scoop the insides and thin the front carving wall to about one inch so your tools glide through. A thinner wall makes the zigzag teeth much easier to cut cleanly.
Print or draw the angled eyes, small nose triangles, and the wide toothy mouth, then tape the paper flat against the pumpkin. Poke along the lines with a pin or a fine tool to leave a dotted guide on the skin. Space the mouth teeth evenly so each point lines up with a valley on the row below. Step back and check the layout is centered before you cut anything.
Start with the smaller shapes while the shell is still strong. Use a small serrated carving saw and let the blade do the work with gentle pressure, keeping the triangle corners crisp. Push the cut pieces inward and out so the edges stay clean. Adults should handle all the sharp tools here.
Save the big mouth for last since it removes the most material and weakens the front. Cut each tooth as a full triangle, following your dotted line and turning the pumpkin as you go rather than twisting your wrist. Work slowly at the points so they do not snap off. Remove the whole mouth panel in one piece if you can, then tidy the edges.
Drop in a battery LED or a string of warm LED lights, never a candle, and face the brightest side forward. If you want the misty look in the photo, set a small fog machine or a dish of dry ice with warm water nearby, keeping electronics dry and away from kids. Place the pumpkin on grass or bare ground for that low, creeping glow. Snap your photo at dusk when the light contrast is strongest.
Wipe the cut edges and rub them with a little petroleum jelly to slow drying and browning. Store the pumpkin somewhere cool and out of direct sun between showings. If the teeth start to curl, a short soak in cold water can perk them back up. A well kept carve like this can look sharp for several days.
Check things off as you get ready.
Work on a stable surface, keep your free hand out of the cutting path, and have an adult handle sharp tools.
The full body of the pumpkin stays as untouched skin so the face glows against a dark orange shell.
Optional shallow scraping just around the mouth or eyes can add a faint halo, but this design mostly skips peeling.
The angled eyes, tiny nose dots, and the wide zigzag mouth are cut all the way through for the brightest glow.
Thin the front wall to about one inch and cut the mouth last so the shell stays strong while you work. Take the points slowly and turn the pumpkin instead of twisting the blade. If a tooth feels fragile, leave a touch more thickness at its base for support.
Cutting the lid from the bottom or back keeps the stem looking natural, just like the pictured pumpkin. It also lets you set the pumpkin down over the light rather than lowering a light inside. Either way, angle the cut inward so the cap does not fall through.
A small fog machine or a bowl of dry ice with warm water will produce that low drifting mist. Keep any electronics and the light source dry and set up outdoors with adult supervision. Photograph quickly since the fog thins out fast.
Changed a detail? Made it simpler? Share a photo of your version and tell the community what worked.
The best new carvings, ideas worth stealing, and how-tos for carving season. Short, seasonal, and gone by November.





Comments (0)