Halloween Pumpkin Carving Contest Β· Starts October 1st Β· $500 in prizes
← Back to ideas
@ai_concepts
Sep 25, 2026
Sinister Grinning Jack-O-Lantern With Seven Tooth SlotsAI
0

Report this carving

Tell us what is wrong. Reports are private.

Sinister Grinning Jack-O-Lantern With Seven Tooth Slots

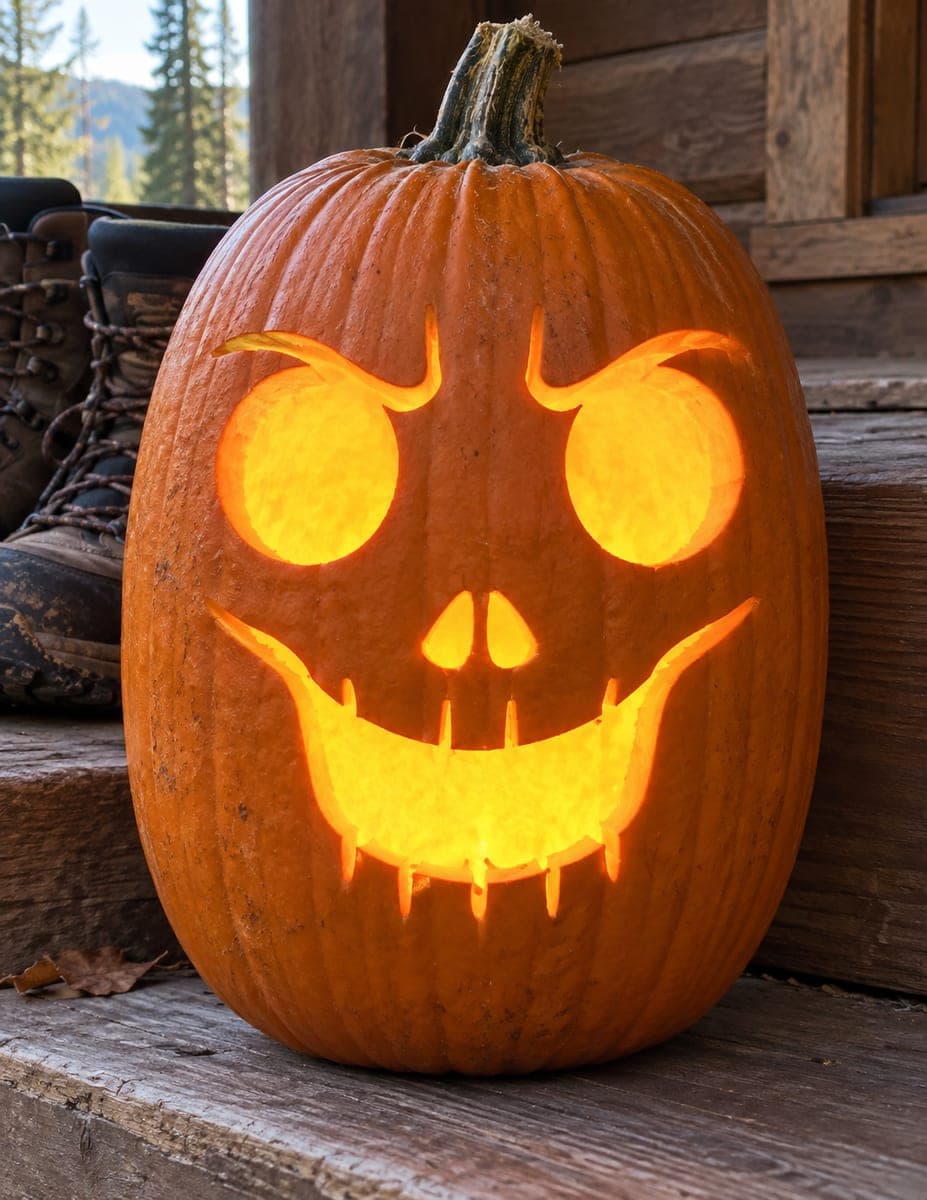
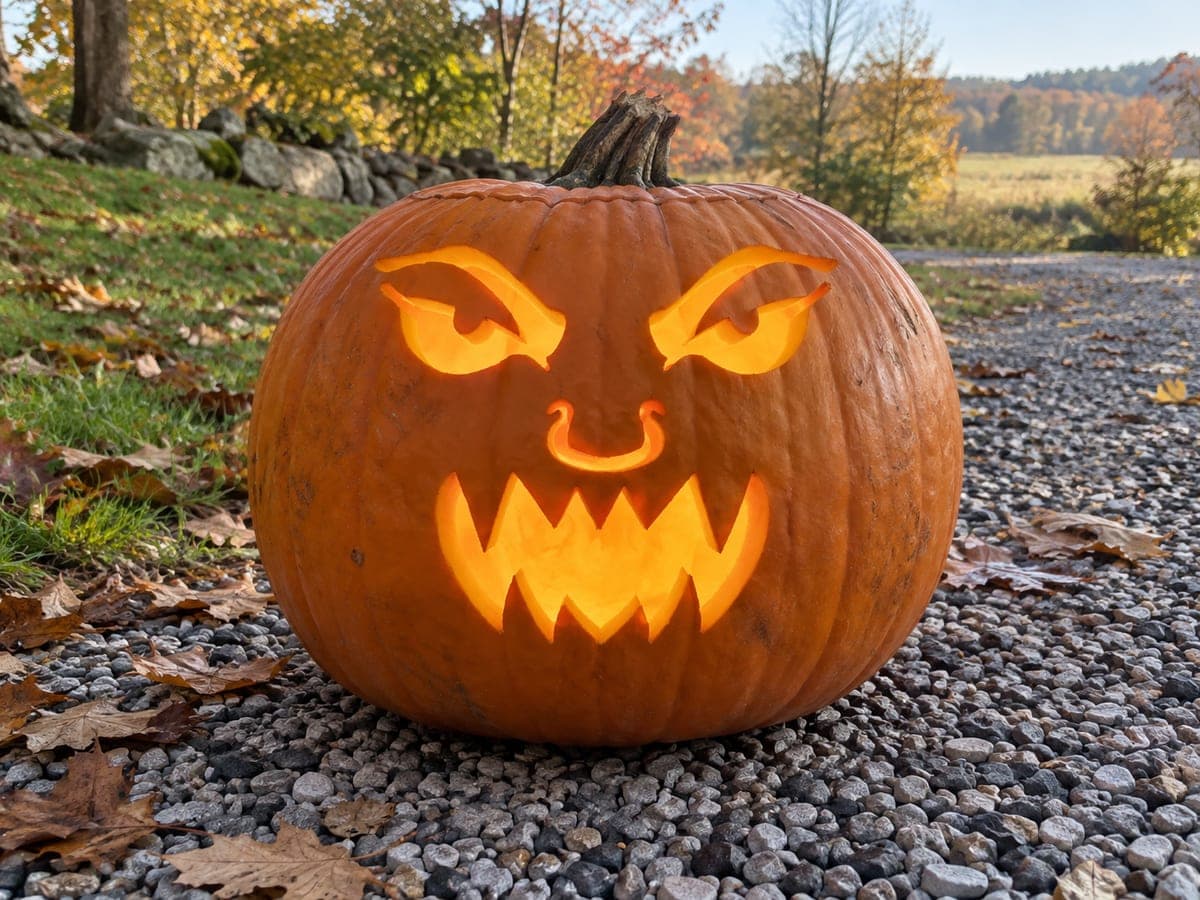
Narrow arched eye holes and seven separate vertical tooth slots forming a wide crescent grin make this intermediate creepy pumpkin carving idea look genuinely unnerving. Cut the arched eyes first so the expression is established before you tackle the mouth, then cut each tooth slot as a separate opening with solid uncut rind between every pair so no two slots merge. The resulting wide grin reads as a row of dark teeth glowing individually rather than one continuous mouth. Set against a dark surface at night, the arched eyes and uneven slot grin create a deeply unsettling face.

No ratings yet Β· Sign in to rate

Comments (0)

  • No comments yet β€” be the first.

Save without an account. Sign in to like or comment.

Our tips for carving a similar design

The sinister impact of this design comes from two specific design decisions: narrow arched eye holes that read as calculating and hostile, and a row of seven separate tooth-slot openings with solid uncut rind between every pair, so each slot glows individually like a dark, rectangular tooth. Cutting the eyes first establishes the expression, then each tooth slot is cut individually without ever merging two slots into one continuous opening.

From pumpkin to porch

  1. Hollow the pumpkin

    Cut the lid from the base and scoop until the inner wall is a consistent inch thick. This design places seven openings close together across the lower face, so a firm, uniform wall is important to keep the rind from flexing as the tooth slots are cut one by one.

  2. Transfer the full design

    Tape the template and trace the two arched eye outlines and all seven tooth-slot outlines with a stylus. Once the paper is removed, mark the solid rind strips between every pair of tooth slots, since each strip must survive intact to keep the slots reading as separate teeth. These six bridges between seven slots are the structural core of the design.

  3. Cut the arched eyes

    Start with the narrow arched eye openings. Follow the arched upper edge of each eye carefully: the arch shape creates the calculating, sinister quality of the expression. Cut the lower edge of each eye as a straighter, more horizontal line to maintain the narrow proportions.

  4. Cut the tooth slots individually

    Mark the starting point of the first slot and cut it as a standalone opening, stopping well before the rind strip on each side. Repeat for each of the remaining six slots, treating every one as an independent opening. Never cut through the bridge between two slots, even if the gap looks narrow. If the bridge looks at risk, widen the adjacent slot slightly inward rather than outward.

  5. Clean the slot edges

    Use a thin paring knife to clean the inside of each tooth slot and each eye opening. Smooth, even slot edges are important: ragged slots can visually merge with the rind strips between them when lit, blurring the individual tooth effect.

  6. Light and display

    Insert a battery LED and view the face in low light. Each of the seven tooth slots should glow individually as a distinct rectangle of light against the dark uncut rind strips, forming a wide, unnerving crescent grin. Display at eye level on a dark surface for full effect.

Written with AI to match this design

Gather your supplies

Check things off as you get ready.

Work on a stable surface, keep your free hand out of the cutting path, and have an adult handle sharp tools.

Three levels of light

  • Leave intact

    All solid rind between tooth slots and surrounding the eyes stays dark, including the six critical strips between the seven slots

  • Peel & shade

    None, only full cutouts are used

  • Cut through

    Both arched eye openings and all seven individual tooth-slot openings are cut completely through for full interior glow

Learn the carving basics

Before you start cutting

How wide should each rind strip between tooth slots be?

Aim for at least 8 mm. The slots curve along the crescent mouth, so plan the spacing evenly across the full arc before cutting any slot. If the total mouth arc is not wide enough to fit seven slots with 8 mm bridges between them, reduce to five or six slots rather than narrowing the bridges below safe width.

How do I cut a narrow arched shape without the saw skipping off the curved rind?

Make a small pilot hole at one end of the arch with a poker or drill bit before inserting the saw. Start at the pilot hole and cut the straight lower edge first, then pivot at the corner and follow the arch. Short pull strokes on the curved section give you much better directional control than long continuous strokes.

The tooth slots are so close together. How do I avoid cutting through a bridge?

Cut each slot only up to a marked stopping point set 2 mm short of the bridge on each side. Then use a fine craft knife or linoleum cutter to shave those last 2 mm of each slot end precisely, keeping the blade parallel to the bridge face. This two-stage approach for the slot ends is the safest way to get tight spacing without losing a bridge.

Your take belongs here, too.

Changed a detail? Made it simpler? Share a photo of your version and tell the community what worked.

Share your pumpkin

More pumpkins like this

You've reached the end Β· 8 pumpkins
The Patch Report

Fresh pumpkins, in your inbox.

The best new carvings, ideas worth stealing, and how-tos for carving season. Short, seasonal, and gone by November.

A short email during carving season. Unsubscribe anytime. See our privacy policy.