@the_gourdfather
Sep 5, 2026

The dare
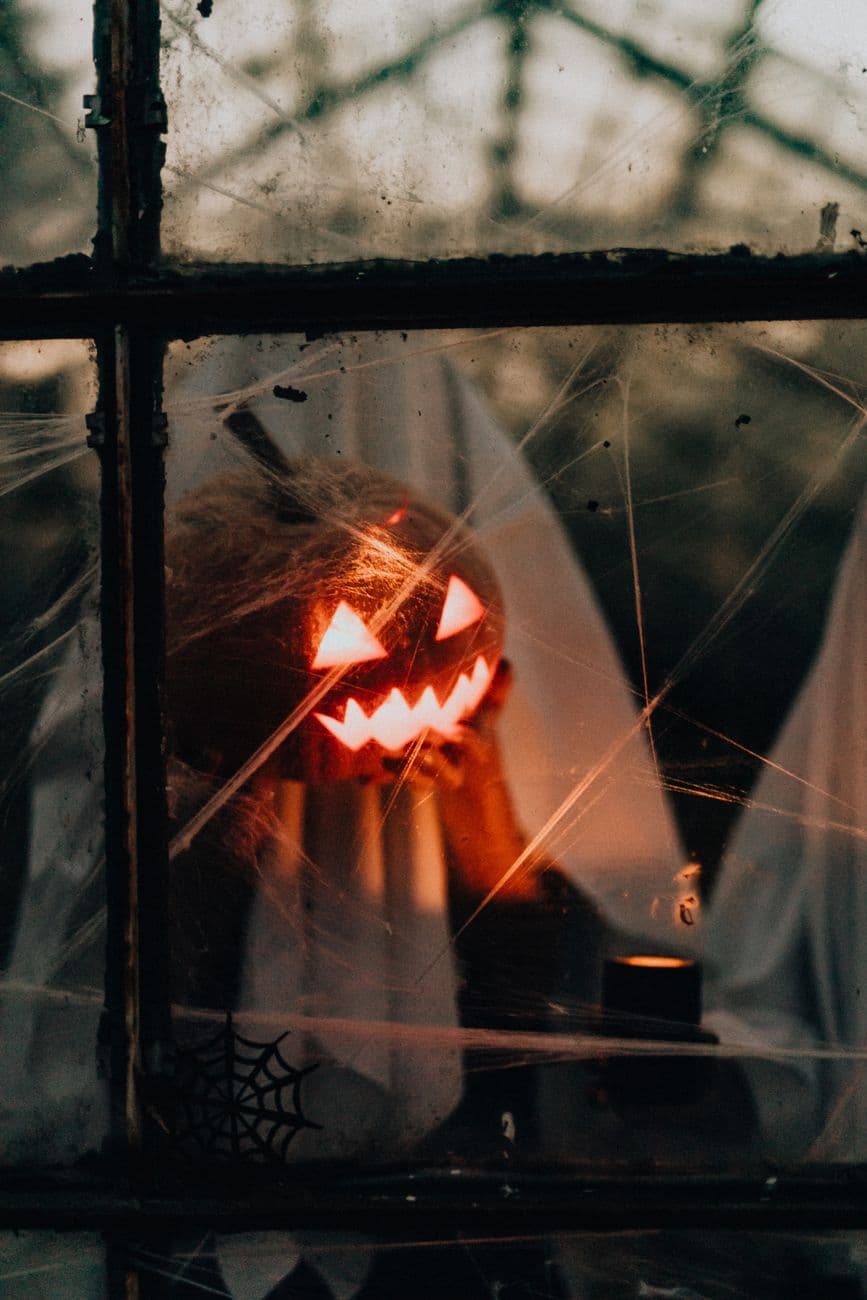
A zigzag grin and slanted eyes burning red from a single candle. Shot in the dark where it does its best work.
No ratings yet · Sign in to rate
A zigzag grin and slanted eyes burning red from a single candle. Shot in the dark where it does its best work.
The whole effect here comes from three sharp triangle eyes and a wide zigzag mouth cut clean through the shell so the light burns bright red. The trick is keeping every point of the zigzag crisp and leaving plenty of pumpkin wall between the openings for strength. Plan the face large and low so the glow reads well in a dark room.
Written by PumpkinCarvingIdeas.com, inspired by @the_gourdfather's photo above. These are our suggestions, not instructions from the uploader, and this approach hasn't been tested on their exact carve.
Choose a round pumpkin with a smooth, unblemished front that faces where people will see it. An adult should cut the lid at an angle so it wont fall in, then scoop out the seeds and pulp. Thin the inside carving wall down to about one inch where the face will go so the tools push through easily. A thinner wall also lets more light escape through the cuts.
Sketch or tape a stencil with two upper slanted triangle eyes, a smaller nose triangle, and a wide zigzag mouth. Keep the mouth centered and low on the belly of the pumpkin where the surface is flattest. Poke the outlines with a pin or use a dotting tool so you have a clear guide. Double check the zigzag points line up before you cut anything.
Start with the smaller shapes since they are easier to control and give you a feel for the pumpkin. Use a small serrated carving saw and let the blade do the work with gentle strokes. Cut each triangle fully through, then push the piece out from the inside. Keep the points sharp by finishing each corner from both directions instead of forcing one long cut.
Save the biggest opening for last so the pumpkin stays sturdy while you work. Cut the top edge of the zigzag as one connected line, then the bottom edge, working point to point. Leave a little pumpkin between the top and bottom teeth so the row of triangles holds together. Push the waste out carefully and clean up any ragged edges with the tip of your saw.
For the smoky band across the middle of this design, use a shallow scraping tool to peel just the skin below the eyes without cutting through. This dim glow adds depth between the bright cutouts and the dark shell. Keep the peeled area even and blend the edges so it looks like a natural shadow. Go slow, since you can always remove more but cannot put skin back.
Drop in a battery LED, and a red or amber one will match the burning look in the photo. Skip real candles, since they scorch the shell and are a fire risk. Turn off the room lights and photograph against a dark cloth so the face pops. Move the light closer or farther inside to fine tune how strong the glow reads.
Check things off as you get ready.
Work on a stable surface, keep your free hand out of the cutting path, and have an adult handle sharp tools.
The untouched orange shell across most of the face and body stays dark and solid.
The scraped band of skin below the eyes gives a dim orange shadow that adds depth.
The two slanted eyes, the nose triangle, and the full zigzag mouth cut through for the brightest red glow.
Leave a solid strip of pumpkin between the top and bottom rows of triangles rather than cutting one giant opening. Carve the mouth last so the shell stays strong while you handle the pumpkin. If a point feels fragile, widen the gap slightly rather than forcing a razor thin tooth.
That warm red comes from the light source, not the pumpkin itself. A red or amber LED shining through thin flesh reads as a burning glow, especially in a dark room. A plain white LED will look more classic orange, so pick the color that matches the mood you want.
Yes, tilt each eye triangle so the inner points sit lower and closer together, which gives the face its mean expression. Cut the outer edges a touch larger than the inner ones to keep the slant obvious. Test the angle with your stencil before cutting since it sets the whole attitude of the face.
Changed a detail? Made it simpler? Share a photo of your version and tell the community what worked.
The best new carvings, ideas worth stealing, and how-tos for carving season. Short, seasonal, and gone by November.







Comments (0)