Halloween Pumpkin Carving Contest · Starts October 1st · $500 in prizes
← Back to ideas
@ai_concepts
Sep 25, 2026
Asymmetric Sneering Pumpkin With Scar and Diamond HolesAI
0

Report this carving

Tell us what is wrong. Reports are private.

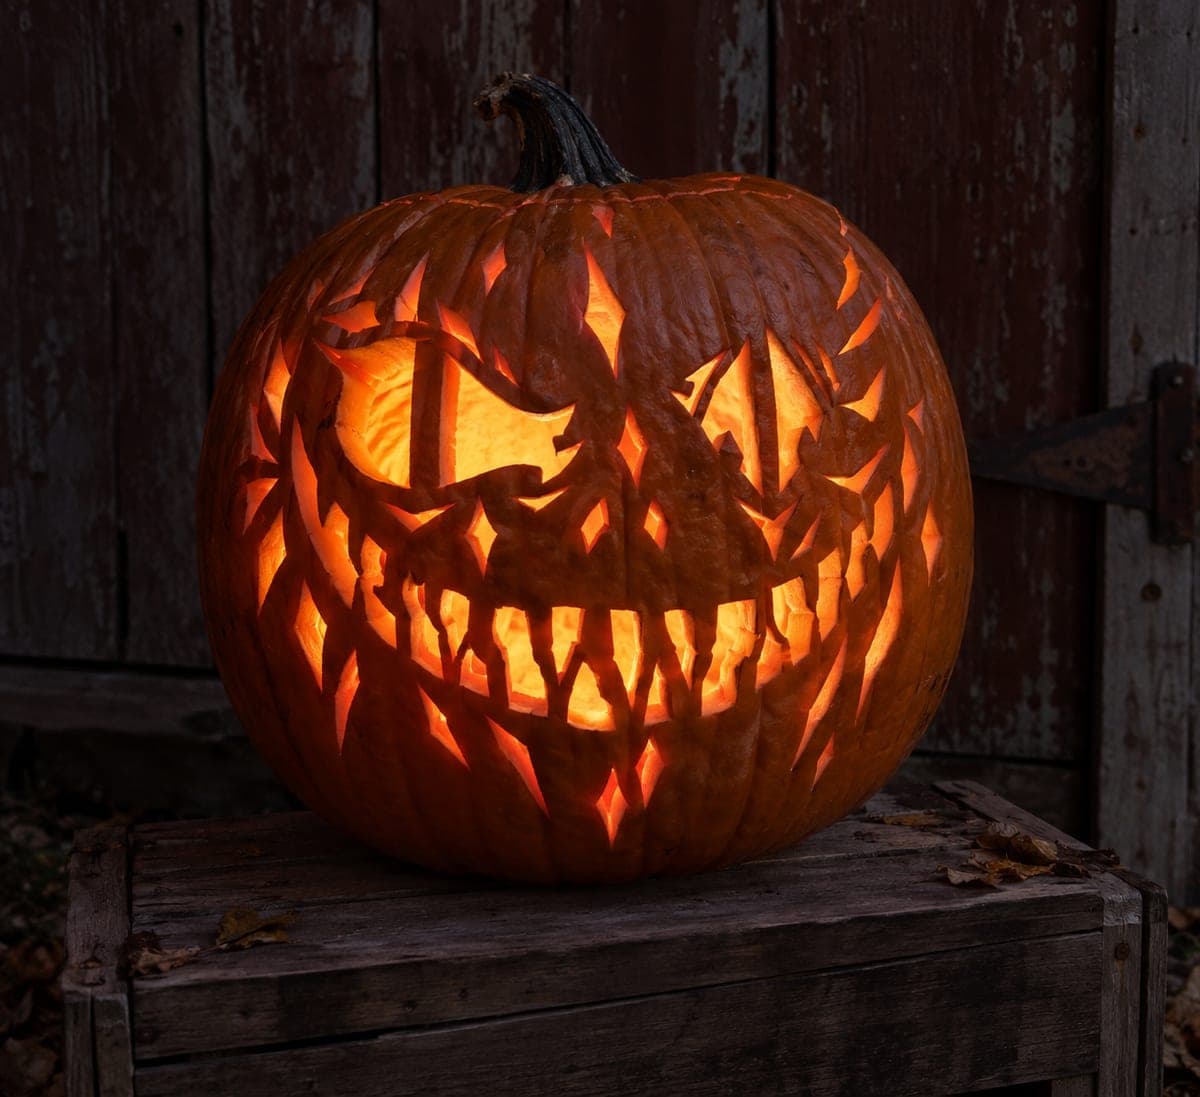
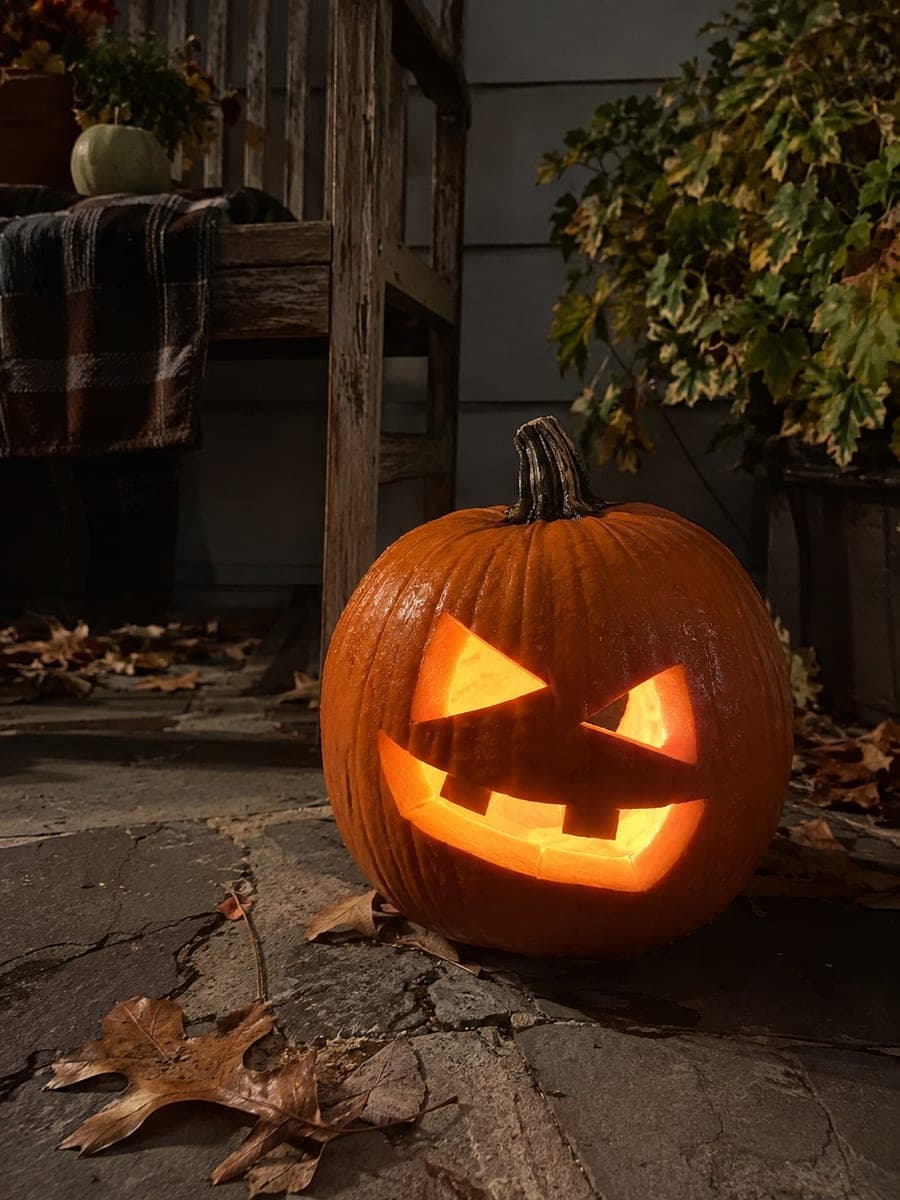
Asymmetric Sneering Pumpkin With Scar and Diamond Holes

Deeply asymmetrical eye apertures each divided by a sturdy central bar, a pair of small nostrils, a wide asymmetric grin from sixteen separate tooth gaps, and twenty tapered scar and diamond holes around the face make this an expert mean pumpkin face where every element adds to the sinister asymmetry. The central bars in the eye windows are structural anchors for the entire shell, so plan them at a full 14mm width or wider. Map all twenty scar and diamond holes before cutting to ensure they never share a rind wall with a tooth gap or nostril.

No ratings yet · Sign in to rate
Comments (0)

  • No comments yet — be the first.

Save without an account. Sign in to like or comment.

Our tips for carving a similar design

Deep asymmetry in every element, from the mismatched eye apertures to the uneven grin, defines this design. The central vertical bars inside each eye window are the structural backbone of the whole carving, and they must be planned at a minimum of 14 mm before the first cut is made. Map all twenty scar and diamond holes on paper before transferring.

From pumpkin to porch

  1. Prepare and assess

    Hollow from the back and thin the wall evenly to 1.8 cm. Look for any surface cracks or soft spots before marking, since this design has no room for structural weakness. Dry the face thoroughly.

  2. Transfer the full design

    Print a complete template and transfer every element with a poking tool: both asymmetric eye aperture outlines with vertical bar positions, two nostril holes, all sixteen tooth gap positions along the asymmetric grin arc, and all twenty scar and diamond hole positions. Measure every bridge. No element should share a rind wall thinner than 10 mm with a tooth gap or nostril.

  3. Cut eye windows and bars

    Cut the outer frame of each eye window as a series of straight angular segments. Then remove the rind on either side of each central vertical bar, leaving both bars intact at minimum 14 mm width. The asymmetric eye apertures should now look like two differently sized framed windows.

  4. Cut nostrils and grin

    Remove both small nostril holes with a detail blade. Then cut the sixteen tooth gaps along the asymmetric grin arc, working from the outer corners inward on both sides. Leave consistent rind bars between each gap.

  5. Cut scar and diamond holes

    Work through all twenty tapered scar and diamond holes, starting with those nearest the outer edge of the face and working inward toward the mouth. This order keeps the most structurally critical rind zones intact as long as possible.

  6. Light and evaluate

    Place a bright LED inside and check the overall silhouette from two meters away. The asymmetric grin and mismatched eye windows should read immediately as a sinister mask. Tighten any ragged cut edges with a fresh detail blade before final display.

Written with AI to match this design

Gather your supplies

Check things off as you get ready.

Work on a stable surface, keep your free hand out of the cutting path, and have an adult handle sharp tools.

Three levels of light

  • Leave intact

    All intact rind including the vertical eye bars, the rind gridwork between tooth gaps, and the scar hole borders stays dark.

  • Peel & shade

    None.

  • Cut through

    Both asymmetric eye apertures (with central vertical bars retained), both nostrils, all sixteen tooth gaps, and all twenty scar and diamond holes are cut through.

Learn the carving basics

Before you start cutting

How do I prevent the sixteen tooth gaps from causing the grin area to sag or buckle?

Keep every rind bar between tooth gaps at a consistent width of at least 8 mm and cut no more than four consecutive gaps before pausing to check that the bars are all still stable. Avoid thinning the inner wall behind the grin below 1.5 cm.

One vertical eye bar is narrower than 14 mm after cutting. Is it salvageable?

A bar between 10 and 14 mm can still hold if the surrounding cuts are finished carefully and the pumpkin is not moved aggressively. Reinforce it from inside with a flat strip of masking tape pressed flush against the rind. Below 10 mm, the risk of mid-display collapse is high and a design revision is safer.

Should the asymmetry in the grin be subtle or obvious?

Obvious. The grin should rise noticeably higher on one side, with more tooth gaps leaning toward the curled-up corner of the mouth. Subtle asymmetry in a design this complex reads as inconsistency rather than intention.

Your take belongs here, too.

Changed a detail? Made it simpler? Share a photo of your version and tell the community what worked.

Share your pumpkin

More pumpkins like this

You've reached the end · 8 pumpkins
The Patch Report

Fresh pumpkins, in your inbox.

The best new carvings, ideas worth stealing, and how-tos for carving season. Short, seasonal, and gone by November.

A short email during carving season. Unsubscribe anytime. See our privacy policy.