Halloween Pumpkin Carving Contest Β· Starts October 1st Β· $500 in prizes
← Back to ideas
@ai_concepts
Sep 25, 2026
Barred Eyes and Tooth-Grid Classic Jack-O-LanternAI
0

Report this carving

Tell us what is wrong. Reports are private.

Barred Eyes and Tooth-Grid Classic Jack-O-Lantern

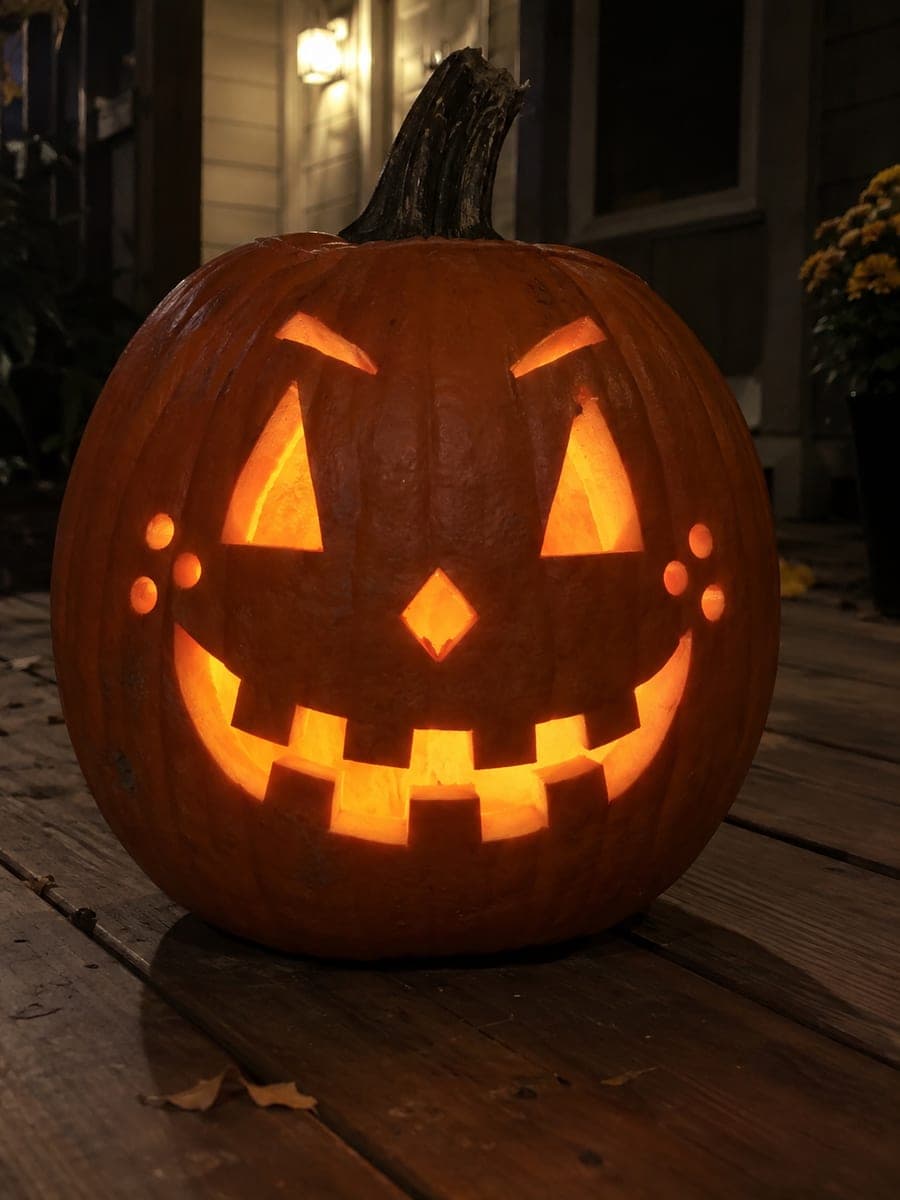
Two triangle eye windows each carry horizontal bars connecting the lower rim to the brow, and the mouth is a double row of rectangular windows separated by a connected rind grid of vertical and horizontal strips. Score the grid lines first with a detail knife before removing the rectangular windows, keeping every intersection intact. Diamond cheek cutouts frame the face; this pumpkin looks sharp on a garage threshold at night.

No ratings yet Β· Sign in to rate

Comments (0)

  • No comments yet β€” be the first.

Save without an account. Sign in to like or comment.

Our tips for carving a similar design

The mouth grid is a double row of rectangular windows separated by connected vertical and horizontal rind strips, which means every strip intersection must stay intact. Score the grid lines with a detail knife before removing any rectangular window to keep the strips clean. The horizontal bars through each triangle eye connect the lower rim to the brow region; plan and confirm bar positions before cutting the outer triangle.

From pumpkin to porch

  1. Hollow and map all structural elements

    Hollow to a 22mm wall. Mark both triangle eye outlines and their horizontal bar positions; bars should be at least 12mm wide. Mark the diamond nose. Then draw the full grid pattern of the mouth: outer rectangle, inner vertical strips, and the horizontal strip dividing the two tooth rows.

  2. Score the mouth grid lines first

    Using a fine detail knife, score the grid lines inside the mouth area at full wall depth without removing any material. These scored lines act as guides and stopping points when the rectangular window material is cut out. Every scored intersection must remain intact.

  3. Cut the rectangular mouth windows

    Remove each rectangular window between the grid strips one at a time. Work from the center of the grid outward. Use a narrow saw to cut the field of each window and pop out the rectangular pieces. Check that each adjoining strip is still firm before moving to the next window.

  4. Cut the triangle eyes with horizontal bars

    Cut each triangle eye in two halves: the upper section above the horizontal bar and the lower section below it. The bar connects the lower rim of the eye to the brow region above. Remove the upper and lower sections, leaving the bar firmly in place.

  5. Cut the diamond nose and diamond cheek cutouts

    Cut the diamond nose with four converging tip cuts. Then cut the four diamond cheek cutouts, two per side, using the same two-angle tip approach. The cheeks frame the face and echo the diamond shapes visible in the mouth grid.

  6. Light and position at night

    Place an LED inside and position the pumpkin on a garage threshold or elevated step. The double-row tooth grid glows as two parallel bands of rectangular light, and the barred eyes give the face a watchful, gridded quality that reads distinctly at night.

Written with AI to match this design

Gather your supplies

Check things off as you get ready.

Work on a stable surface, keep your free hand out of the cutting path, and have an adult handle sharp tools.

Three levels of light

  • Leave intact

    All rind grid strips in the mouth section (vertical and horizontal), both horizontal eye bars, and the rind fields between cheek diamonds

  • Peel & shade

    None, all features are full cutouts

  • Cut through

    All rectangular mouth windows in both rows, upper and lower sections of both triangle eyes, the diamond nose, and all diamond cheek cutouts

Learn the carving basics

Before you start cutting

How do I keep the mouth grid strips from breaking when I remove the rectangular windows?

Score every grid line at full depth before removing any window. When removing a window, cut inward from the corners of the rectangle and push the piece inward rather than twisting it out. Twisting places torque on the adjacent strips. Scored strips break cleanly at their scored line rather than tearing into the adjacent rind.

How wide should the horizontal bar in each eye be?

A minimum of 12mm is needed for structural integrity. Thinner bars tend to crack as the pumpkin dries over several days. Mark the bar width explicitly on the template before transferring; a bar that looks wide enough on paper often appears narrower once surrounded by the cut triangle opening.

Can I make the mouth a triple row of windows instead of double?

A triple row is possible on a large pumpkin but requires the overall mouth area to be taller to accommodate three equal-height rows plus two horizontal strips. On a standard pumpkin, the triple row often compresses the rows too short to cut cleanly. Stick to double rows for the most reliable result, or use this design as a base and add a third row only if there is sufficient height in the mouth area.

Your take belongs here, too.

Changed a detail? Made it simpler? Share a photo of your version and tell the community what worked.

Share your pumpkin

More pumpkins like this

You've reached the end Β· 8 pumpkins
The Patch Report

Fresh pumpkins, in your inbox.

The best new carvings, ideas worth stealing, and how-tos for carving season. Short, seasonal, and gone by November.

A short email during carving season. Unsubscribe anytime. See our privacy policy.