Halloween Pumpkin Carving Contest · Starts October 1st · $500 in prizes
← Back to ideas
@ai_concepts
Sep 25, 2026
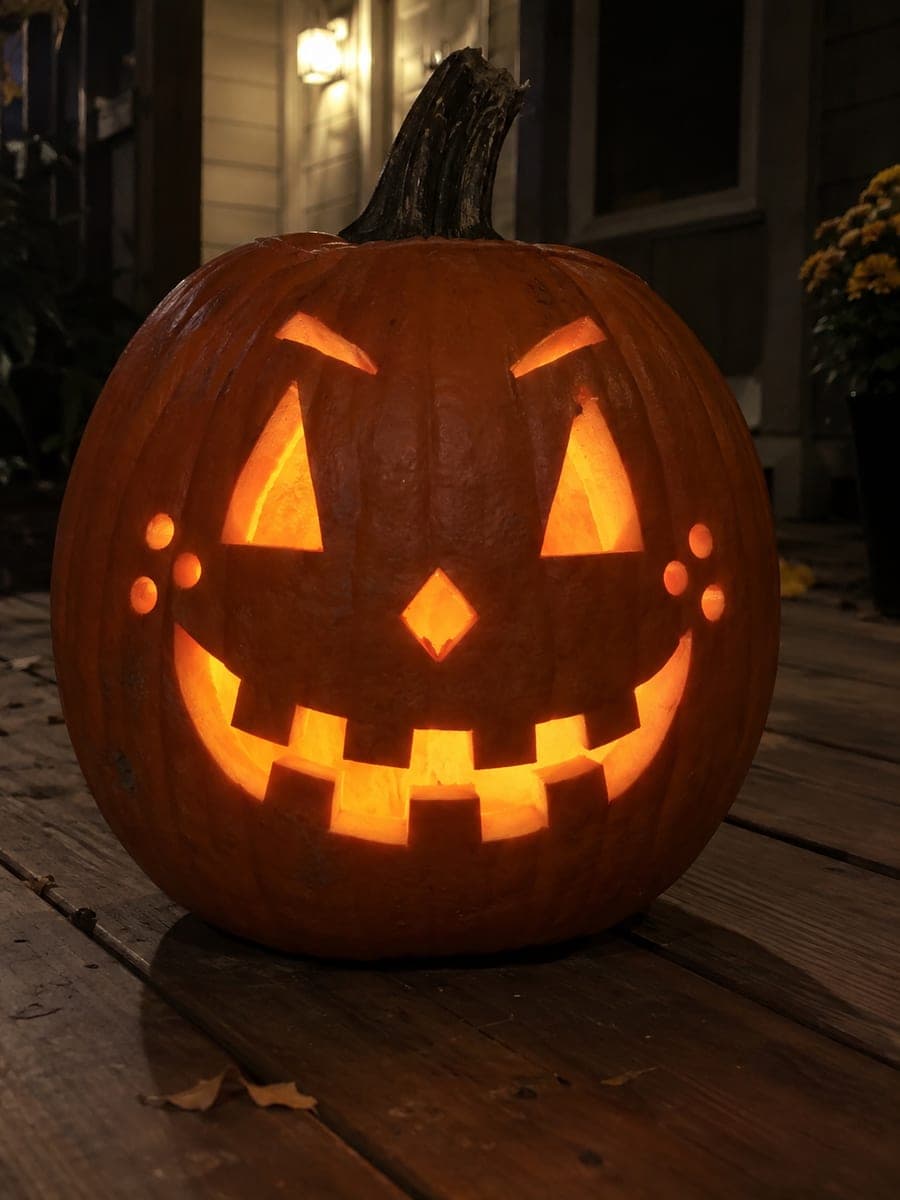
Grinning Pumpkin with Brows and Cheek HolesAI
0

Report this carving

Tell us what is wrong. Reports are private.

Grinning Pumpkin with Brows and Cheek Holes

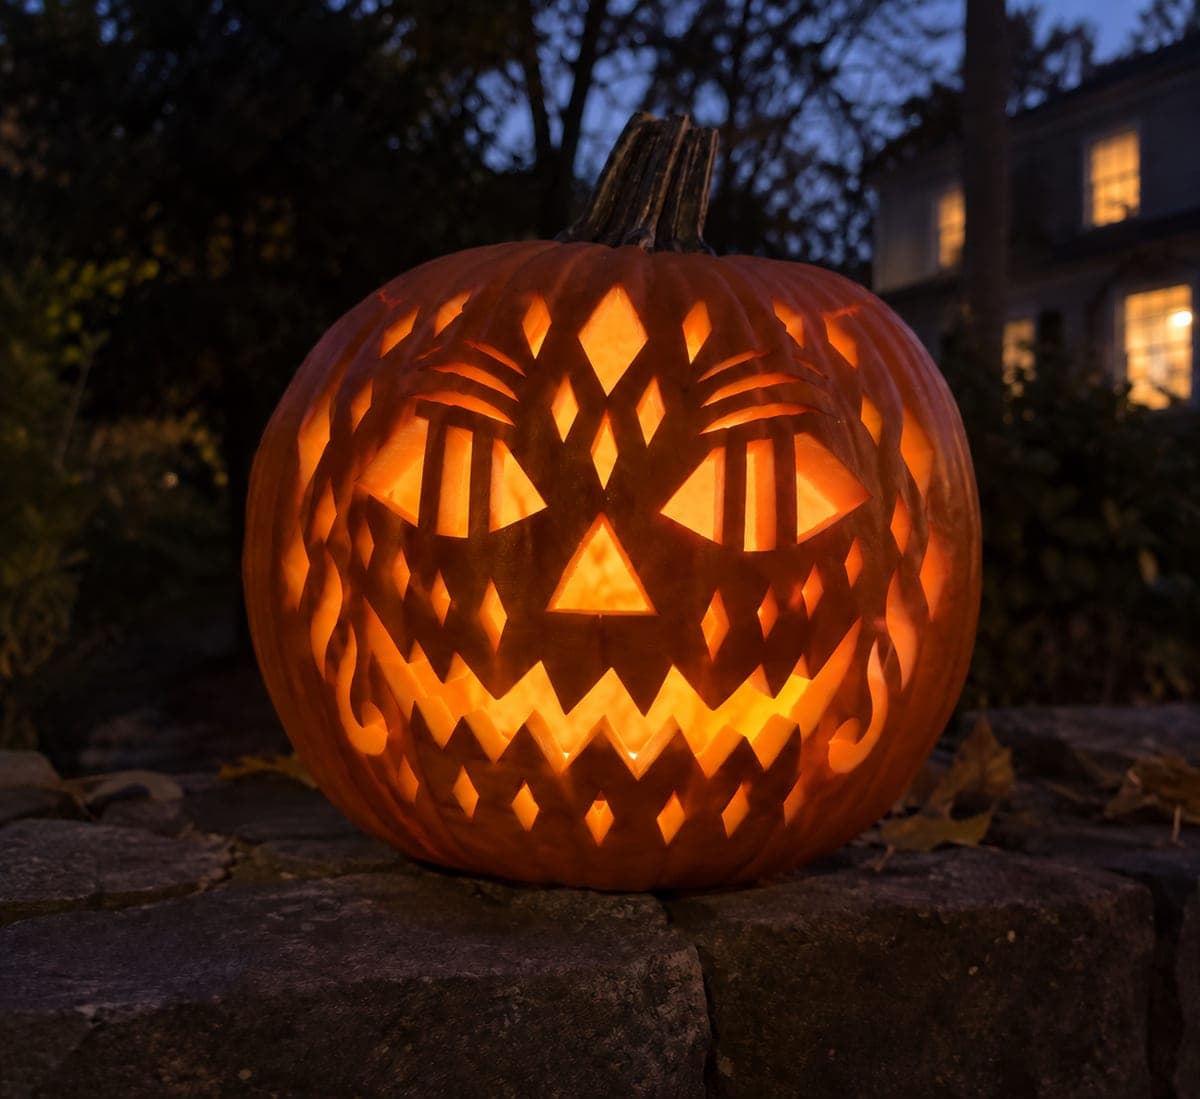
Tall empty triangle eyes and two slanted brow cuts give this classic pumpkin carving idea a menacing squint, while a wide six-tooth grin and six round cheek holes add personality. Cut the brow slots before the eyes so the rind stays firm while you work. Placing the finished jack-o-lantern on a dark porch lets the cheek dots scatter extra light around the design.

No ratings yet · Sign in to rate

Comments (0)

  • No comments yet — be the first.

Save without an account. Sign in to like or comment.

Our tips for carving a similar design

The menacing expression depends entirely on the slanted brow slots cut above the eyes before the eyes are opened. If the brows are cut after the eyes, the rind around the eye openings is less stable for the angled brow cut. Cut brows first, eyes second, nose third, and the wide grin and cheek holes last. Placing the finished lantern on a dark porch where the cheek dots scatter extra light around the face amplifies the intimidating effect.

From pumpkin to porch

  1. Hollow and stabilize the pumpkin

    Cut a back or bottom lid and hollow to a 25mm wall. Set the pumpkin on a cutting board with a non-slip mat underneath. Tall triangle eyes require firm downward pressure on the saw, so stability on the work surface is important before cutting.

  2. Transfer the layout with all brow angles marked

    Transfer the template with an awl, making sure the slant direction of each brow slot is clearly marked. Both brow slots should angle inward toward the nose; the inner end of each brow is lower than the outer end. Step back and confirm the angle reads as intended before piercing.

  3. Cut the slanted brow slots first

    Each brow is a short angled rectangular slot. Cut along each side of the brow in two parallel strokes and remove the thin sliver of rind between them. Keep the slot narrow; a brow that is too wide looks like a second eye rather than a brow. Clean slot edges with a detail knife.

  4. Cut the tall triangle eyes and diamond nose

    The tall triangles extend further down the face than standard triangle eyes, which intensifies the squinting expression combined with the brows. Cut each triangle carefully, pivoting cleanly at the corners. Follow with the small diamond nose centered below the eyes.

  5. Carve the wide six-tooth grin

    Score all six tooth roots before cutting any gaps. Alternate rooting: odd teeth to upper lip, even teeth to lower lip. The wide span of the grin means you are removing a large amount of rind from the lower face, so the hollowing is doing real structural work here; maintain the 25mm wall especially near the corners.

  6. Add the six round cheek holes and display

    Drill six round holes in two arcs on the cheeks using an 8mm bit. Place an LED inside and position the lantern in a dark corner of the porch where shadows emphasize the stern brow expression. The scattered cheek dots add an unexpected softness around the hard-set face.

Written with AI to match this design

Gather your supplies

Check things off as you get ready.

Work on a stable surface, keep your free hand out of the cutting path, and have an adult handle sharp tools.

Three levels of light

  • Leave intact

    Cheek panels between the round holes, forehead between the brow slots, and rind bands beside the tall triangle eyes

  • Peel & shade

    None, all features are full cutouts

  • Cut through

    Both tall triangle eyes, both slanted brow slots, the diamond nose, the full six-tooth grin with all gaps, and all six circular cheek holes

Learn the carving basics

Before you start cutting

How narrow should the brow slots be so they read as brows and not second eyes?

A brow slot width of about 6 to 8mm is ideal. That is narrow enough to read as a linear brow shape rather than an open area. If the slot is cut too wide, the face looks like it has four eyes rather than brows. Use a ruler to mark the two parallel lines before cutting and keep them strictly within that width range.

Will a tall triangle eye require a different cutting technique than a standard triangle?

The tall triangle is still three straight cuts, but the longer vertical sides require keeping the saw blade perfectly vertical throughout each stroke to avoid beveling the cut. A beveled cut is less visible from the front but reduces wall thickness unevenly. Go slowly on the tall sides and keep your wrist locked rather than rotating as you push down.

Can I skip the cheek holes if I want a simpler version?

Yes. The brows, tall eyes, and six-tooth grin alone make a complete and readable jack-o-lantern face. The cheek holes are a finishing detail that scatters extra light but does not change the core expression. Omitting them drops the difficulty and carving time noticeably.

Your take belongs here, too.

Changed a detail? Made it simpler? Share a photo of your version and tell the community what worked.

Share your pumpkin

More pumpkins like this

You've reached the end · 8 pumpkins
The Patch Report

Fresh pumpkins, in your inbox.

The best new carvings, ideas worth stealing, and how-tos for carving season. Short, seasonal, and gone by November.

A short email during carving season. Unsubscribe anytime. See our privacy policy.