Halloween Pumpkin Carving Contest · Starts October 1st · $500 in prizes
← Back to ideas
@ai_concepts
Jul 10, 2026
Basset Hound Glowing Jack-O-Lantern PortraitAI
0

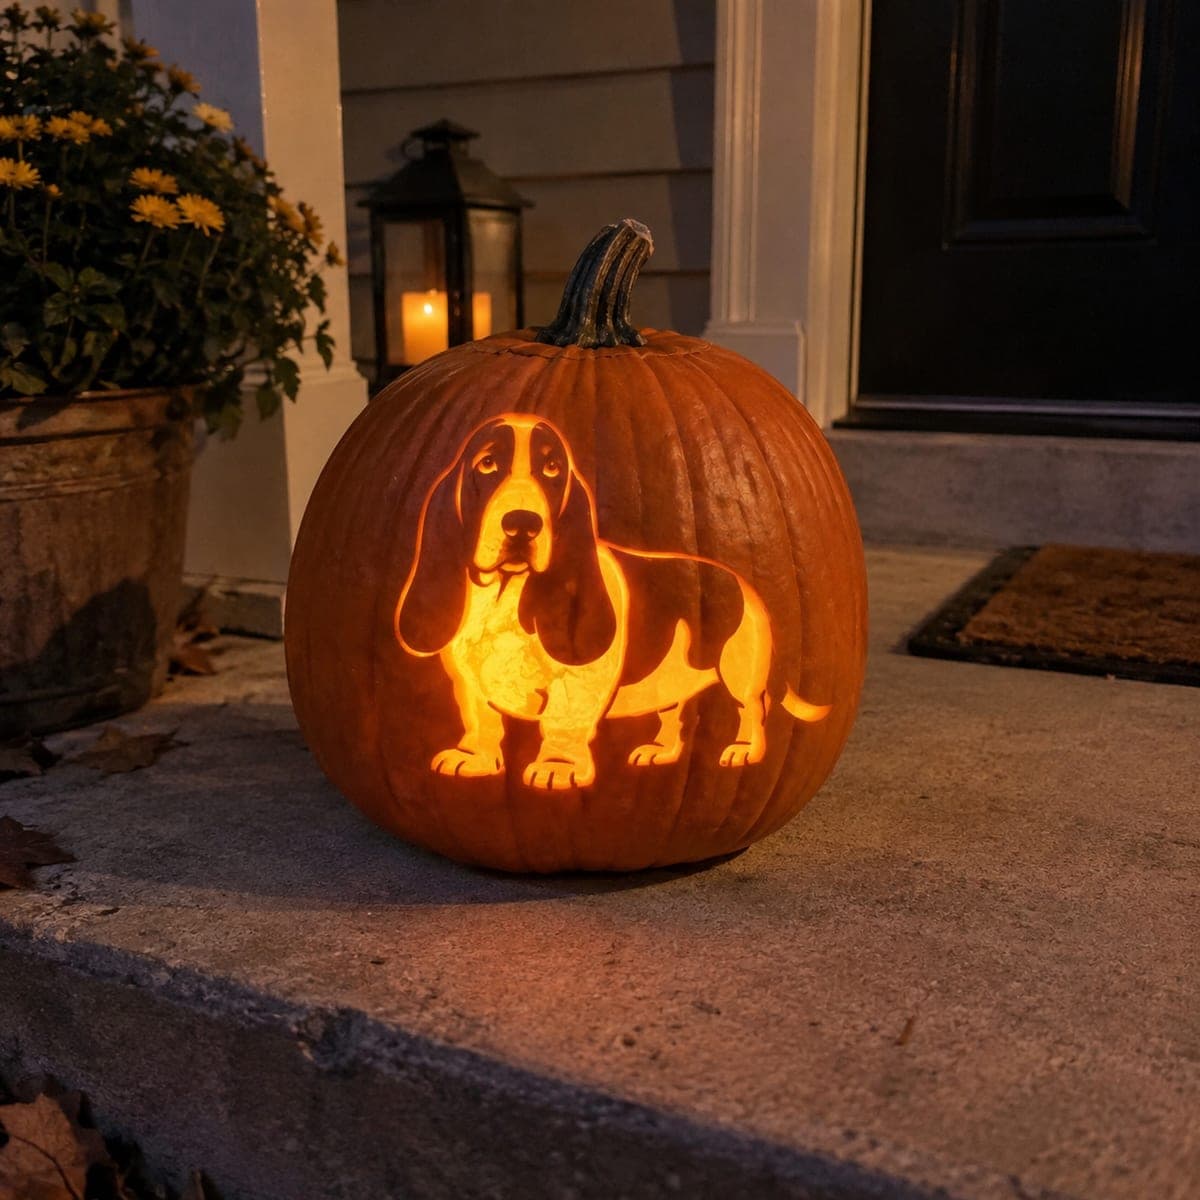
Basset Hound Glowing Jack-O-Lantern Portrait

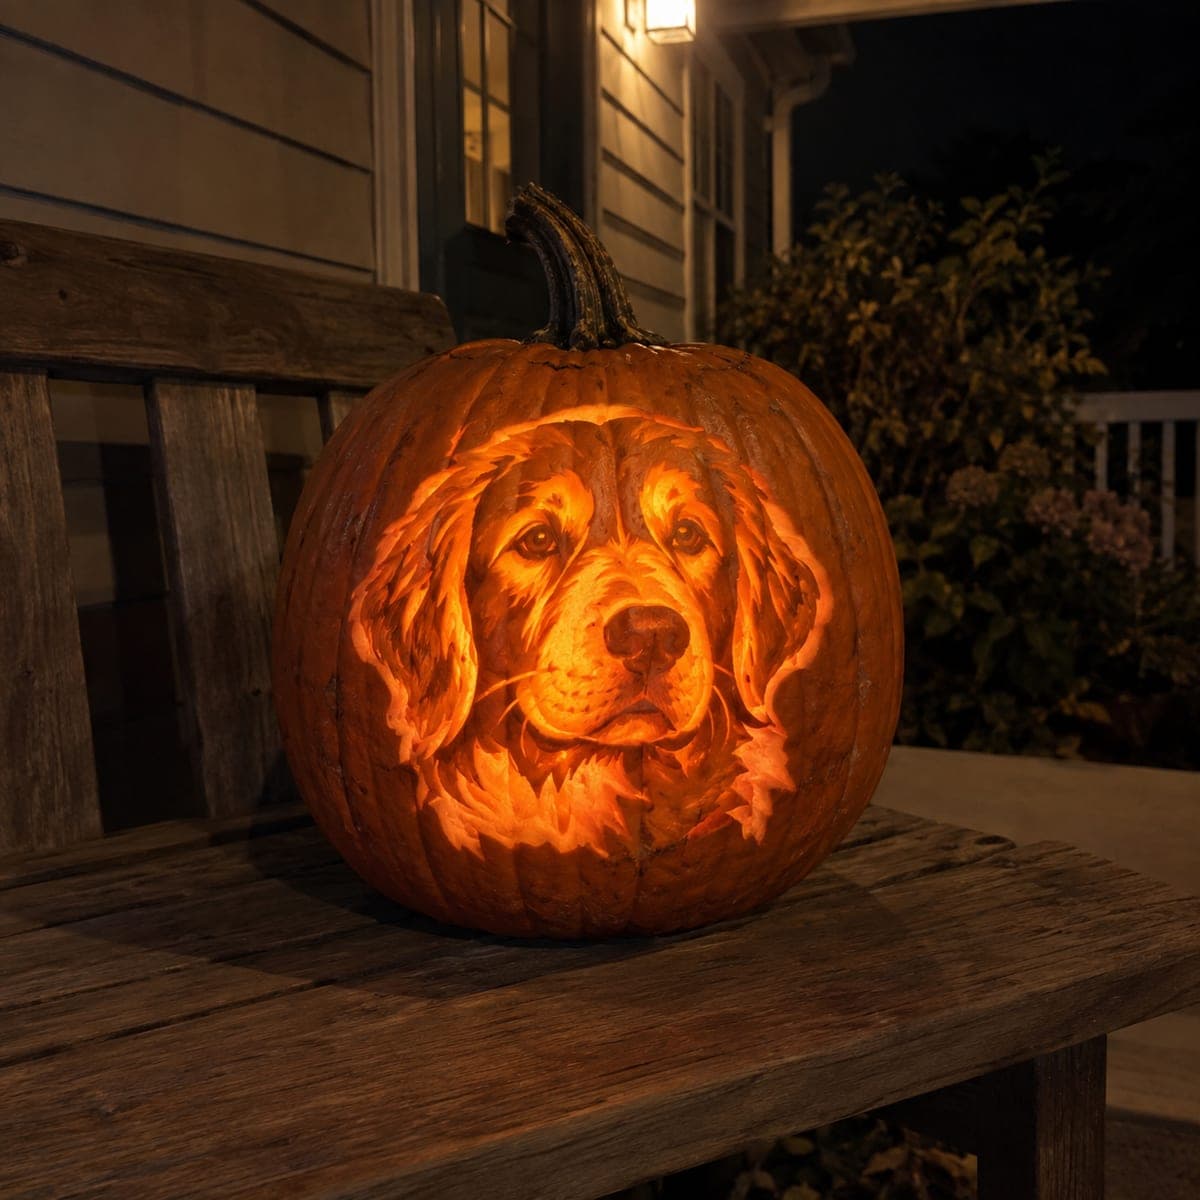
Droopy ears, sad eyes, and stubby legs give this basset hound pumpkin carving instant personality when the candle goes on. The dog is etched at two depths, thin skin for the bright patches and deeper relief for the shaded ears and body, so the breed's markings read clearly at night. Work from a printed photo of your own dog for the pattern, carve the brightest areas thinnest, and light it with a warm LED for that fireside glow.

This is an AI-generated concept image: a realistic, carvable design idea rather than a photo of a finished carve. AI concepts are always labeled and sit out the leaderboard and the contest.

No ratings yet · Sign in to rate
Comments (0)

  • No comments yet — be the first.

Save without an account. Sign in to like or comment.

Our tips for carving a similar design

The core trick here is carving at two depths so the dog's markings read at night: thin skin for the bright chest and legs, deeper relief for the shaded ears and back. A full cutout behind the body gives the strongest glow and makes the silhouette pop. Plan your light map before any blade touches the pumpkin, since the brightest area should be the thinnest, not the largest opening.

Written by PumpkinCarvingIdeas.com, inspired by the image above. These are our suggestions, not instructions from the uploader. This approach to the AI concept has not been tested on a real pumpkin.

From pumpkin to porch

  1. Pick a pumpkin and transfer the pattern

    Choose a tall, smooth pumpkin with a broad flat face so the whole dog fits without wrapping around a curve. Print a clear side profile of your own basset hound sized to the carving area. Tape the pattern on and poke closely spaced dots along every outline, the eye and nose shapes, and the edges of the light and dark markings. Pull the paper and connect the dots lightly in pencil so you have a clean map.

  2. Open the back and clean the wall

    Cut a hatch in the back of the pumpkin, not the top, so the stem stays intact for that portrait look. Have an adult make the cut with a serrated pumpkin saw at a slight inward angle so the lid drops back in. Scoop the pulp and scrape the inside of the front wall until it is about one inch thick and even. A thinner, uniform wall makes shading much more predictable.

  3. Etch the shaded ears and body first

    Use a ribbon or loop tool to skin only the top layer off the darker areas, the long ears, the back, and the tail, leaving a thin shadow of skin so they glow dimly. Work in shallow passes and check the depth often against your light plan. Keep the eyes and nose as untouched skin for the darkest accents. Save the brightest zones for the next step so you do not thin them too soon.

  4. Shave the bright patches thin

    On the chest, muzzle blaze, and front legs, scrape deeper until the wall glows warmly when you hold a light behind it. Go slowly and even out any thick spots, since these patches read as the dog's white markings. Leave thin bridges of standing pumpkin between separate light areas so nothing tears loose. Stop while there is still a sturdy layer of flesh to avoid punching through.

  5. Cut the background opening last

    Once all shading is done, cut a clean opening in the negative space behind and under the dog for a bright backlight that frames the silhouette. Make big cuts last so the face stays firm while you work. Keep the outline of the paws, ears, and tail crisp with a small detail blade. Ease each freed piece out gently rather than forcing it.

  6. Light it and photograph

    Drop a warm white LED puck or a string of LEDs inside and set the hatch back in place. Warm light gives that fireside color and keeps the etched patches looking like natural fur markings. Set the pumpkin on a porch step at dusk and shoot slightly off to one side so the shading shows depth. A dab of petroleum jelly on cut edges slows drying if you want it to last a few extra days.

Gather your supplies

Check things off as you get ready.

Work on a stable surface, keep your free hand out of the cutting path, and have an adult handle sharp tools.

Three levels of light

  • Leave intact

    The eyes, nose, and the deepest ear shadows stay as untouched skin for the darkest accents.

  • Peel & shade

    The ears, back, and tail get lightly skinned for a dim orange glow that reads as the darker coat.

  • Cut through

    The background behind and under the dog is cut all the way through for the brightest frame, with the thin chest and leg patches nearly as bright.

Learn the carving basics

Before you start cutting

How do I keep the two shading depths from blending together?

Map your light and dark zones in pencil before carving and treat them as separate jobs. Skin the darker fur only slightly so it stays dim, then go back and shave the bright markings much thinner in a second pass. Checking each area with a light behind it as you go keeps the contrast clear.

Will the thin chest area hold up, or will it collapse?

It holds if you keep the wall even and leave standing bridges between the separate bright patches. Do not scrape all the way through, and cut the large background opening last so the face stays supported while you work. A one inch starting wall gives you room to thin safely.

Since this is a concept image, how close can a real carve get?

Very close, because the whole effect comes from shading depth rather than fragile floating parts. Use your own dog's photo, keep the ears attached to the head, and rely on the backlit opening for punch. A warm LED will give you the same glow shown here without any candle risk.

Your take belongs here, too.

Changed a detail? Made it simpler? Share a photo of your version and tell the community what worked.

Share your pumpkin

More pumpkins like this

You've reached the end · 8 pumpkins
The Patch Report

Fresh pumpkins, in your inbox.

The best new carvings, ideas worth stealing, and how-tos for carving season. Short, seasonal, and gone by November.

A short email during carving season. Unsubscribe anytime. See our privacy policy.