Halloween Pumpkin Carving Contest Β· Starts October 1st Β· $500 in prizes
← Back to ideas
@ai_concepts
Jul 27, 2026
Bearded Leprechaun Pumpkin Carving With Lucky CloverAI
0

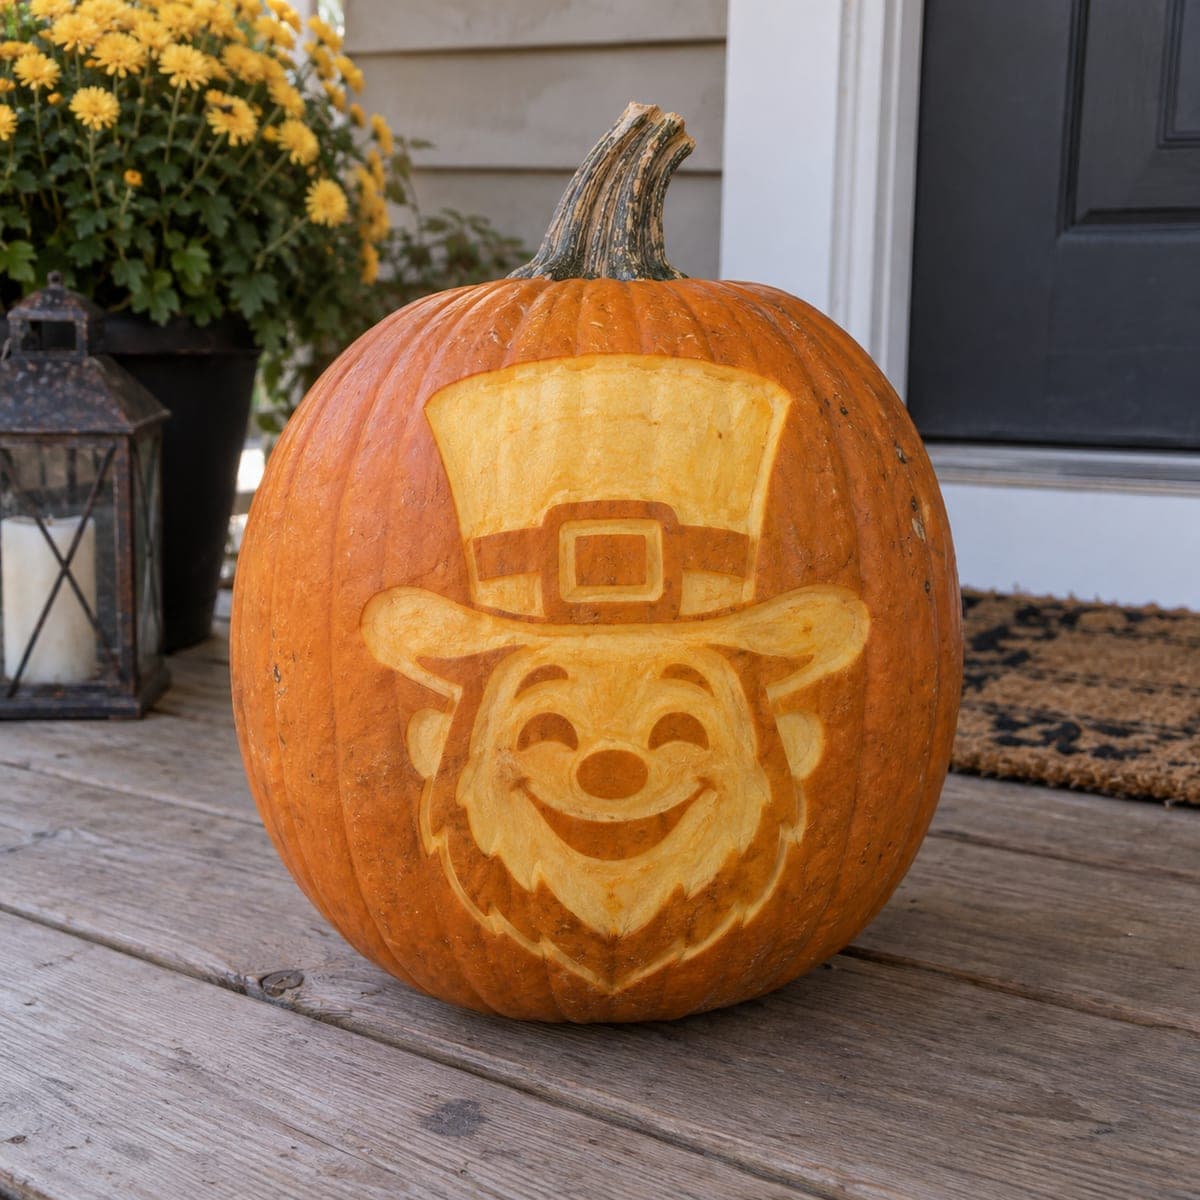
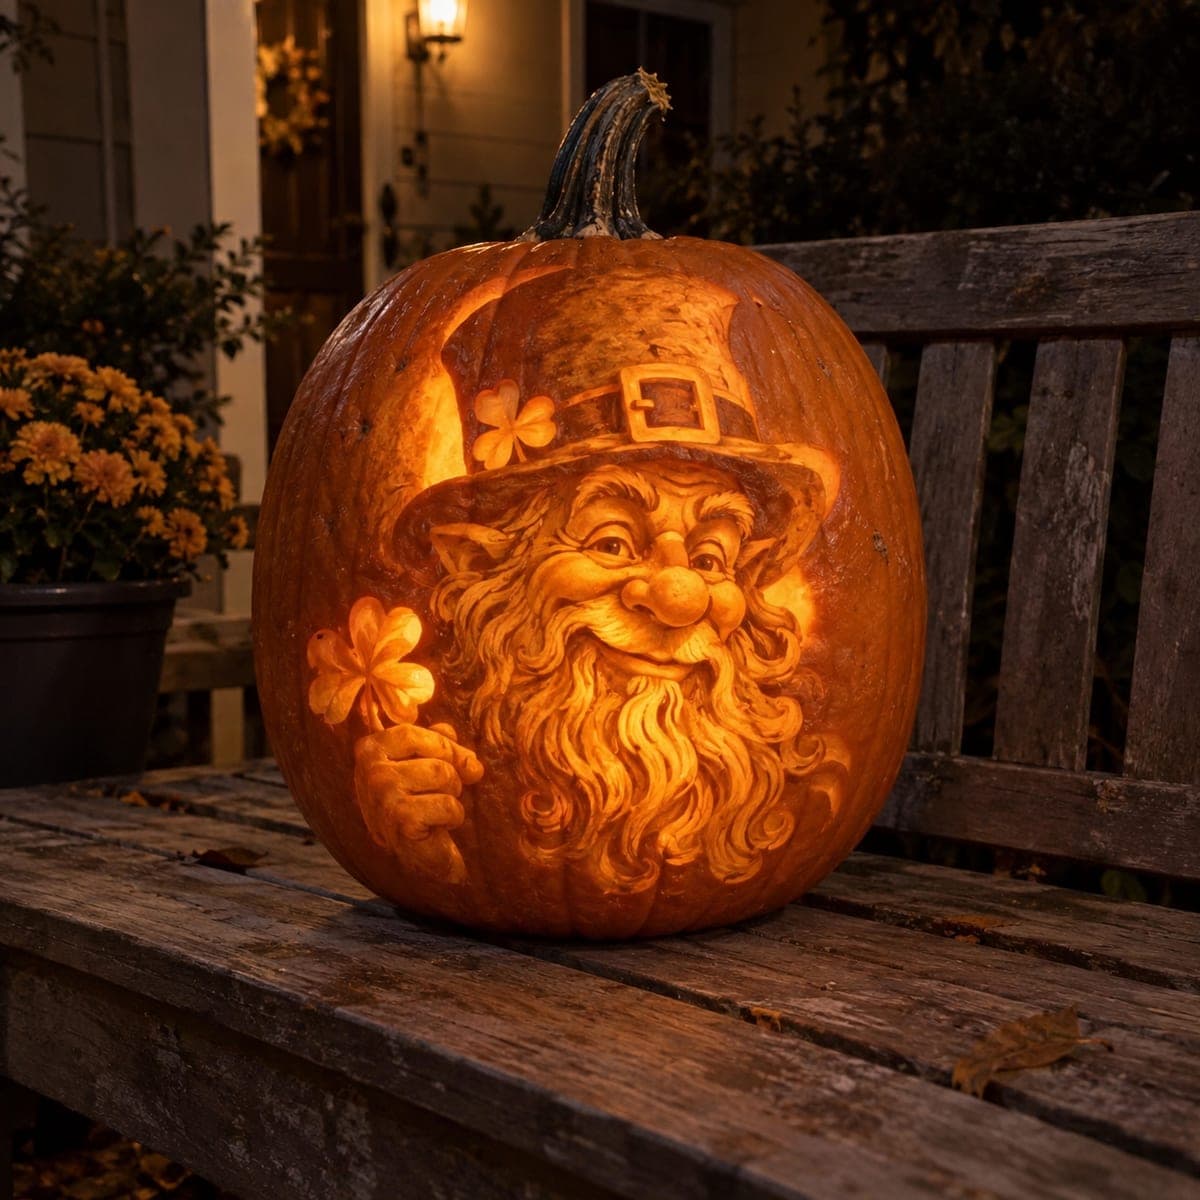
Bearded Leprechaun Pumpkin Carving With Lucky Clover

A grinning leprechaun with a buckled hat, flowing beard, and a four-leaf clover in hand is sculpted across this glowing pumpkin in full relief. The curls of the beard are carved as overlapping ribbons at different depths, which is what makes the light roll through them so convincingly. Rough in the face proportions first, since the eyes and nose anchor everything else, then spiral the beard strands around them. A single warm bulb placed low inside pushes light up through the thinnest cuts.

This is an AI-generated concept image: a realistic, carvable design idea rather than a photo of a finished carve. AI concepts are always labeled and sit out the leaderboard and the contest.

No ratings yet Β· Sign in to rate

Comments (0)

  • No comments yet β€” be the first.

Save without an account. Sign in to like or comment.

Our tips for carving a similar design

This design is built almost entirely from shaded relief rather than open cutouts, so the whole face and beard glow as one soft sculpture. The core trick is carving the beard curls as overlapping ribbons at slightly different depths, which lets the light roll from strand to strand. Plan to rough in the face first, since the eyes and nose set every other proportion, then spiral the beard and hat details around that anchor.

Written by PumpkinCarvingIdeas.com, inspired by the image above. These are our suggestions, not instructions from the uploader. This approach to the AI concept has not been tested on a real pumpkin.

From pumpkin to porch

  1. Transfer the pattern and set the face

    Pick a large, fairly round pumpkin with a smooth front and clean out the inside until the wall is about one inch thick. Tape your leprechaun stencil in place and poke or trace the main outlines: hat brim, eyes, nose, and the edge of the beard. Start by roughing in the face proportions, since the eyes and nose anchor everything else. Keep these lines light so you can adjust before any deep cutting.

  2. Skin the broad shaded areas

    Use a ribbon or loop tool to peel the skin off the cheeks, forehead, nose, and the rounded top of the hat. Vary how deep you scoop so raised areas like the cheeks and nose tip stay closer to the surface and glow brighter. Leave the darkest skin untouched where you want shadow, such as the deep hat and the eye sockets. Work slowly and step back often to read the light as you go.

  3. Sculpt the beard ribbons

    Spiral the beard strands around the face as overlapping ribbons, carving each one to a slightly different depth. Round the top edge of each curl and dig a little deeper along the lines where curls tuck under one another. This depth change is what makes the light roll through the beard convincingly. Keep the thinnest passes near the beard tips where you want the strongest glow.

  4. Detail the hat, clover, and eyes

    Define the hat band and buckle with clean shallow relief, leaving the band skin darker than the buckle face. Carve the four-leaf clover in the leprechaun's hand and the small clover on the hat by thinning the wall so they read as bright shapes without fully punching through. Leave narrow uncut bridges between petals so the clover holds together. Shade the eyes lightly rather than cutting them open, keeping a dark rim for expression.

  5. Open only the brightest accents last

    Once all the shaded relief is done, cut fully through only the few spots that should be the brightest, such as the very centers of the clover leaves or a thin highlight along the beard. Save these open cuts for last so the pumpkin stays strong while you handle it. Make each opening small and support the surrounding surface with your free hand. Test the light and widen sparingly if you want more glow.

  6. Light it and take the photo

    Set a single warm LED bulb low inside the pumpkin so light pushes up through the thinnest cuts and into the beard. Battery LEDs are safer and steadier than a candle for a detailed relief piece like this. Coat exposed carved areas with a little petroleum jelly to slow drying and keep the shading crisp. Shoot in low light on a porch or bench so the sculpted glow stands out.

Gather your supplies

Check things off as you get ready.

Work on a stable surface, keep your free hand out of the cutting path, and have an adult handle sharp tools.

Three levels of light

  • Leave intact

    The deep hat body, eye sockets, and shadow lines tucked under the beard curls stay dark skin.

  • Peel & shade

    The cheeks, nose, forehead, hat brim, and the flowing beard ribbons are skin-peeled for a warm mid glow.

  • Cut through

    Only tiny accents like the clover leaf centers and a few beard highlights are cut fully through for the brightest light.

Learn the carving basics

Before you start cutting

This is shown as a concept image, so can a beard this detailed really be carved?

Yes, as long as you treat it as relief rather than open cuts. The beard is shaded by peeling and scooping skin at different depths, which keeps the pumpkin wall intact and strong. Only a handful of tiny accents are cut all the way through, so nothing thin is left dangling.

How do I keep the four-leaf clover from falling apart?

Carve most of the clover as thinned relief so it glows without being fully open. If you do cut through the leaf centers, leave narrow uncut bridges between each petal and along the stem. Those small bridges hold the shape together and barely show once the pumpkin is lit.

What light setup makes the beard glow roll the way it should?

Use a single warm white LED placed low inside the pumpkin so light travels upward through the thinnest beard cuts. A low, single source creates the directional glow that reads as depth across the curls. Avoid candles, since the fine relief work dries fast and open flame is a fire risk near thin walls.

Your take belongs here, too.

Changed a detail? Made it simpler? Share a photo of your version and tell the community what worked.

Share your pumpkin

More pumpkins like this

You've reached the end Β· 8 pumpkins
The Patch Report

Fresh pumpkins, in your inbox.

The best new carvings, ideas worth stealing, and how-tos for carving season. Short, seasonal, and gone by November.

A short email during carving season. Unsubscribe anytime. See our privacy policy.