Halloween Pumpkin Carving Contest · Starts October 1st · $500 in prizes
← Back to ideas
@ai_concepts
Sep 8, 2026
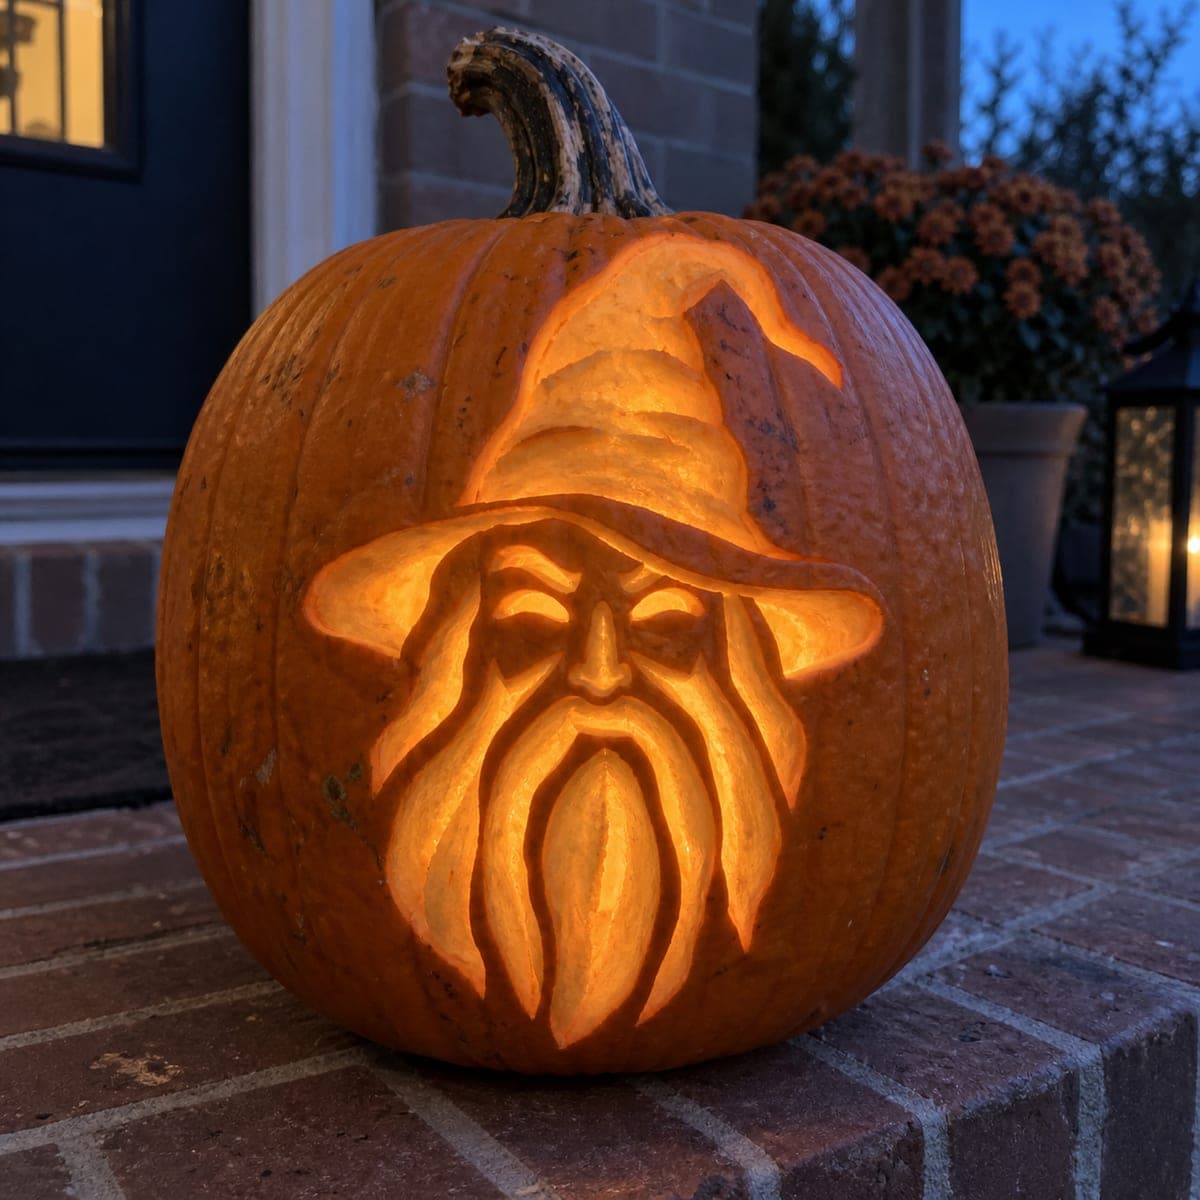
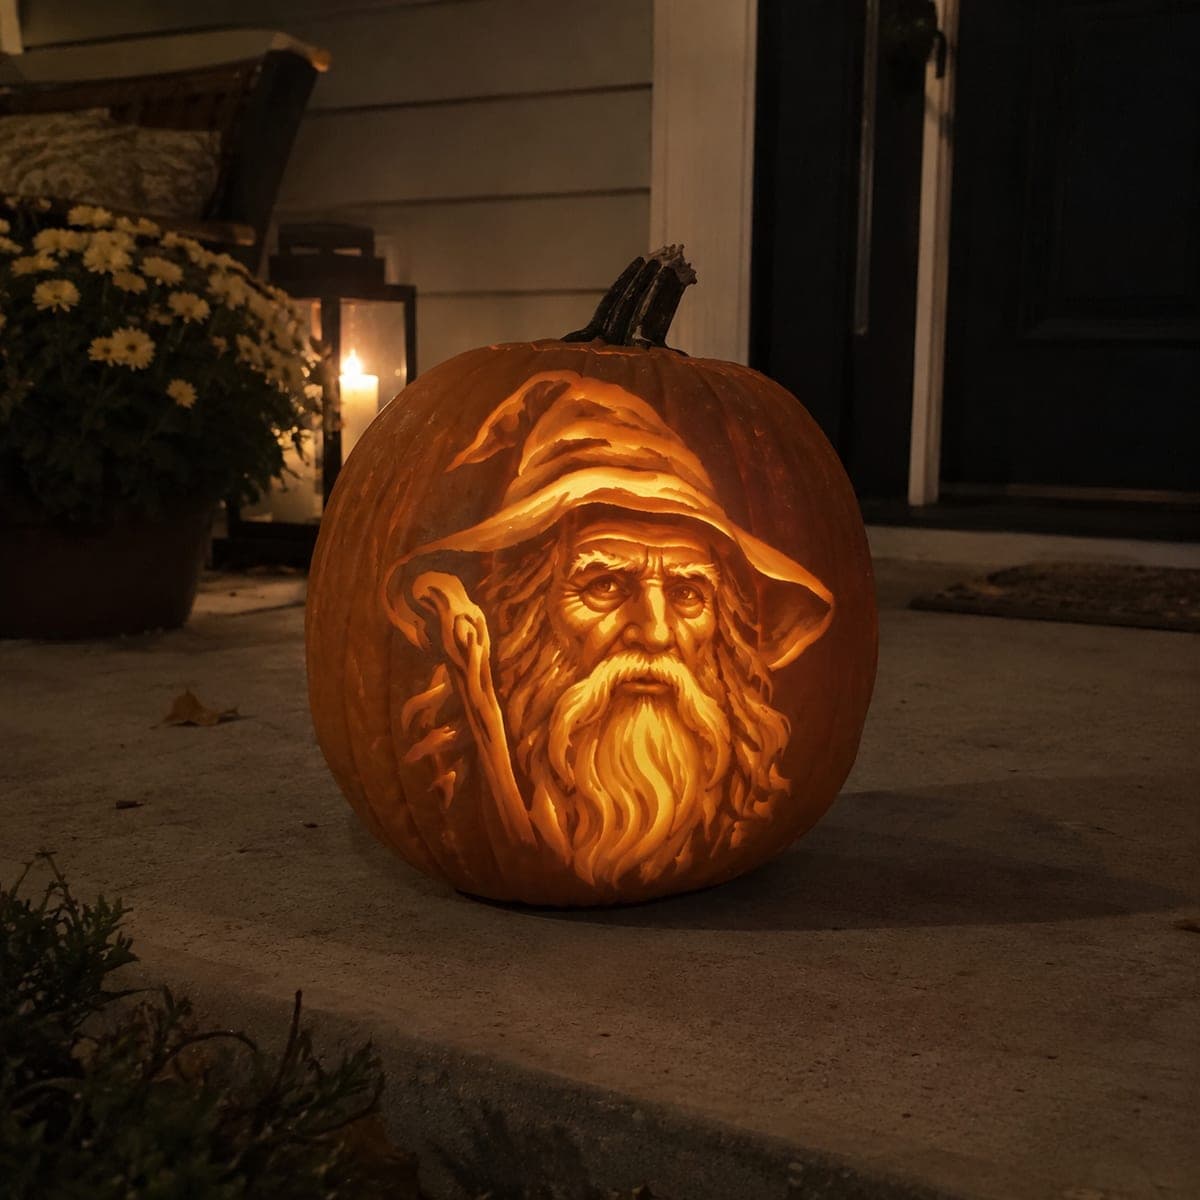
Bearded Wizard Pumpkin With Pointed HatAI
0

Bearded Wizard Pumpkin With Pointed Hat

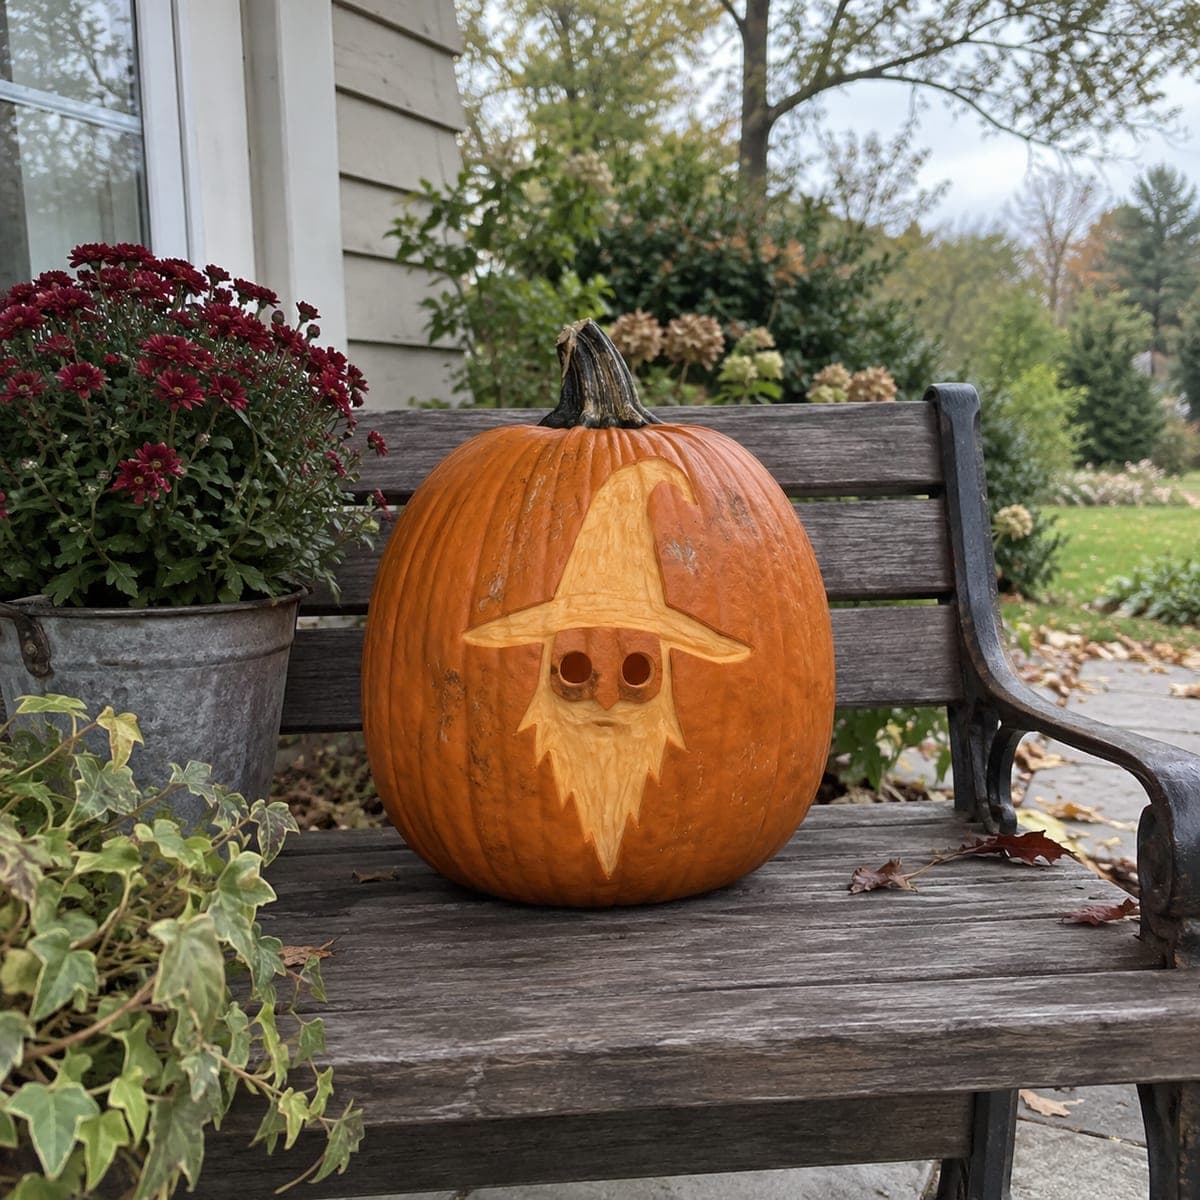
A wizard's face peers out from under a wide-brimmed pointed hat, his long beard etched in flowing strands down the front of the pumpkin while two drilled eyes add depth. The mostly surface-carved design shows well in daylight on a bench or step. Peel the hat and beard shapes first, texture the beard with light downward strokes, and bore the round eyes with a drill bit or apple corer for clean circles.

This is an AI-generated concept image: a realistic, carvable design idea rather than a photo of a finished carve. AI concepts are always labeled and sit out the leaderboard and the contest.

No ratings yet · Sign in to rate
Comments (0)

  • No comments yet — be the first.

Save without an account. Sign in to like or comment.

Our tips for carving a similar design

The core trick here is contrast between peeled skin and untouched rind, so the wizard shows up in full sunlight rather than relying on a glow. You peel the hat and beard down to a glowing orange layer, texture the beard with shallow strokes, and drill two clean round eyes for the only true cutouts. Think of it as a shading study first and a lantern second.

Written by PumpkinCarvingIdeas.com, inspired by the image above. These are our suggestions, not instructions from the uploader. This approach to the AI concept has not been tested on a real pumpkin.

From pumpkin to porch

  1. Prep and transfer the design

    Pick a tall pumpkin with a smooth, flat front panel so the hat and beard have room to flow downward. Cut a lid or a bottom access hole and scrape the inside wall behind the face down to about one inch thick. Tape your wizard stencil to the front, then poke closely spaced dots along every outline with a poker tool. Peel the stencil away and connect the dots with a marker so you have a clear map before any blade touches the skin.

  2. Outline the hat and beard

    Using a small detail knife or a lino-style gouge, score along the outer edges of the hat brim, the tall pointed crown, and the beard strands. Keep these cuts shallow, just through the skin, since these areas will be peeled rather than cut through. Take your time on the pointed hat tip and the fork of the beard where the lines get thin. These scored borders will keep your peeling neat and stop it from wandering.

  3. Peel the hat and beard to a glow

    Switch to a shallow scoop or a ribbon tool and remove the skin inside the hat and beard shapes, taking off only the orange outer layer. Aim for an even depth so the light passes through as a soft, uniform glow. Leave the face itself, meaning the nose and cheeks, as raised untouched rind so it stays a bit darker and stands forward. Work slowly near the borders so you do not undercut the crisp edges you just scored.

  4. Texture the beard strands

    Give the beard life with light downward strokes that follow each strand from the chin to the tips. Vary the pressure so some grooves go slightly deeper than others, which creates a flowing, hand drawn feel. A U-gouge works well here, but a spoon edge dragged carefully will do in a pinch. Keep every stroke shallow so you do not break through the wall.

  5. Drill the two round eyes

    The eyes are the only full cutouts, so save them for near the end when the pumpkin is still sturdy. Have an adult use a drill bit or an apple corer to bore two matched circles for clean, deep eye holes. Steady the pumpkin against your body or a towel and push slowly so the tool does not skate. Clear any pulp from behind the holes so light shines straight through.

  6. Light it and photograph

    Drop in a battery LED puck, warm white looks best against the orange glow. Because this design shines in daylight, set it on a weathered bench or a porch step where the peeled hat and beard catch the sun. For evening shots, a low side light will make the drilled eyes pop and the beard texture cast tiny shadows. Mist the cut edges with water and refrigerate overnight when not on display to keep it fresh longer.

Gather your supplies

Check things off as you get ready.

Work on a stable surface, keep your free hand out of the cutting path, and have an adult handle sharp tools.

Three levels of light

  • Leave intact

    The wizard's nose and cheeks stay as untouched skin so the face reads darker and pushes forward.

  • Peel & shade

    The pointed hat and the flowing beard are skin-peeled for a soft mid orange glow.

  • Cut through

    The two round eyes are drilled all the way through for the brightest points of light.

Learn the carving basics

Before you start cutting

How do I keep the beard strands from looking messy?

Score the outer beard border first, then peel the whole shape to an even depth before you add texture. Pull your gouge in one direction, from the chin down to the tips, following the natural flow. Vary the depth slightly between strands so it looks hand drawn rather than mechanical.

Why drill the eyes instead of cutting them with a knife?

A drill bit or apple corer gives you two clean, matched circles that would be hard to freehand with a blade. It also bores deep, straight holes so light shines through evenly. Have an adult run the tool and go slowly so it does not skid across the skin.

This is a concept image, so will a real pumpkin hold up?

Yes, the design is structurally safe because almost all of it is shallow peeling, not open cutting. The only through cuts are the two small drilled eyes, which leave the wall strong. Keep the beard texture shallow and save the eyes for last so the front stays sturdy.

Your take belongs here, too.

Changed a detail? Made it simpler? Share a photo of your version and tell the community what worked.

Share your pumpkin

More pumpkins like this

You've reached the end · 8 pumpkins
The Patch Report

Fresh pumpkins, in your inbox.

The best new carvings, ideas worth stealing, and how-tos for carving season. Short, seasonal, and gone by November.

A short email during carving season. Unsubscribe anytime. See our privacy policy.