Halloween Pumpkin Carving Contest · Starts October 1st · $500 in prizes
← Back to ideas
@ai_concepts
Sep 1, 2026
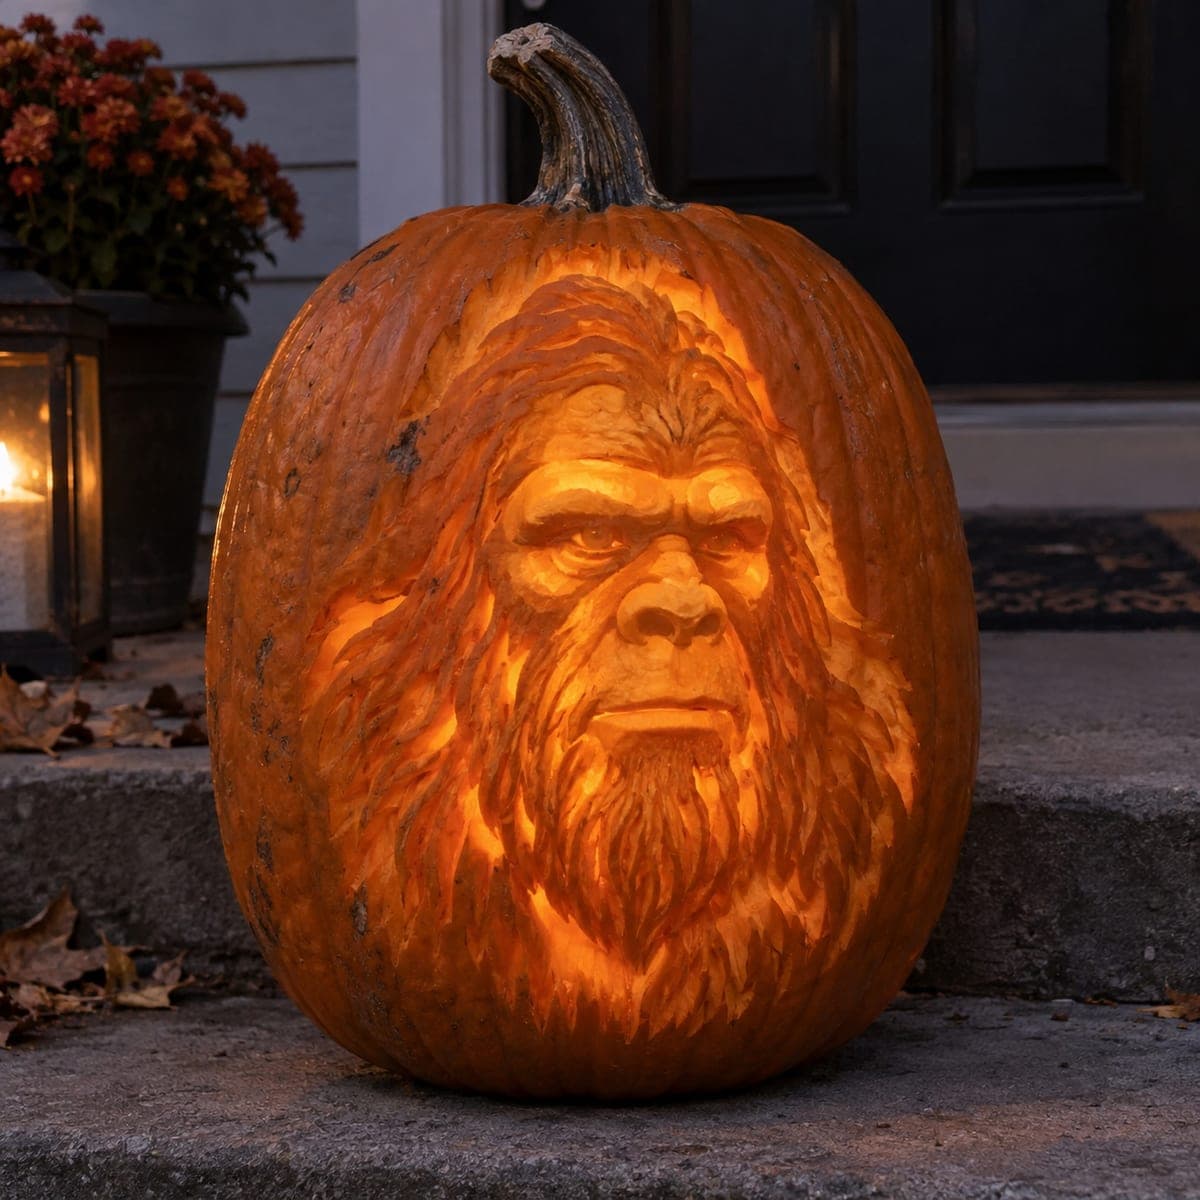
Bearded Wizard Face Shaded Pumpkin CarvingAI
0

Bearded Wizard Face Shaded Pumpkin Carving

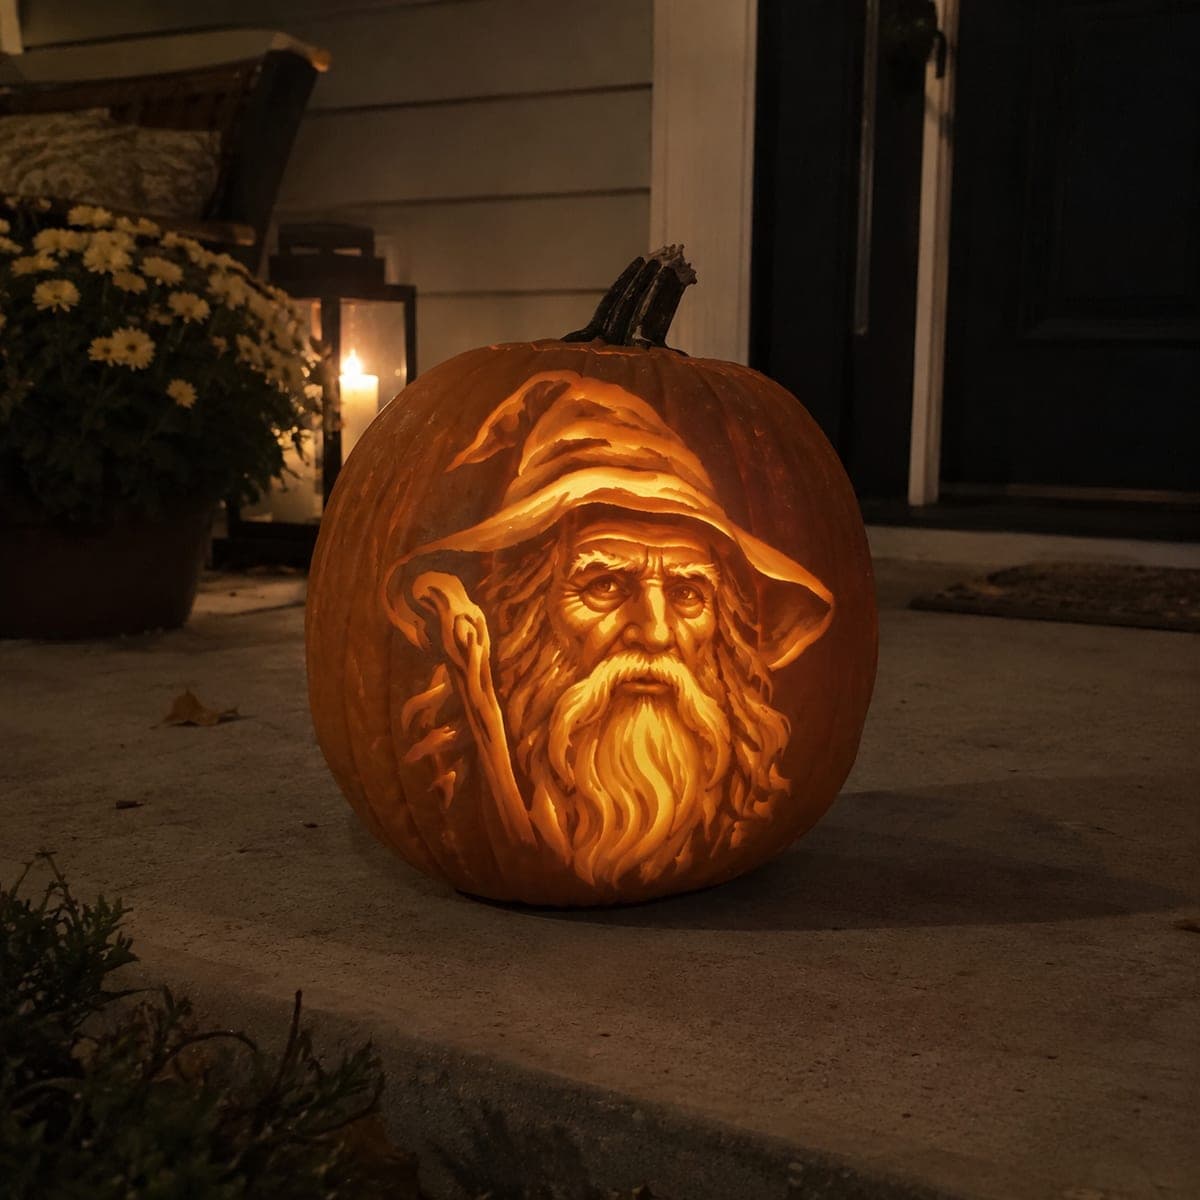
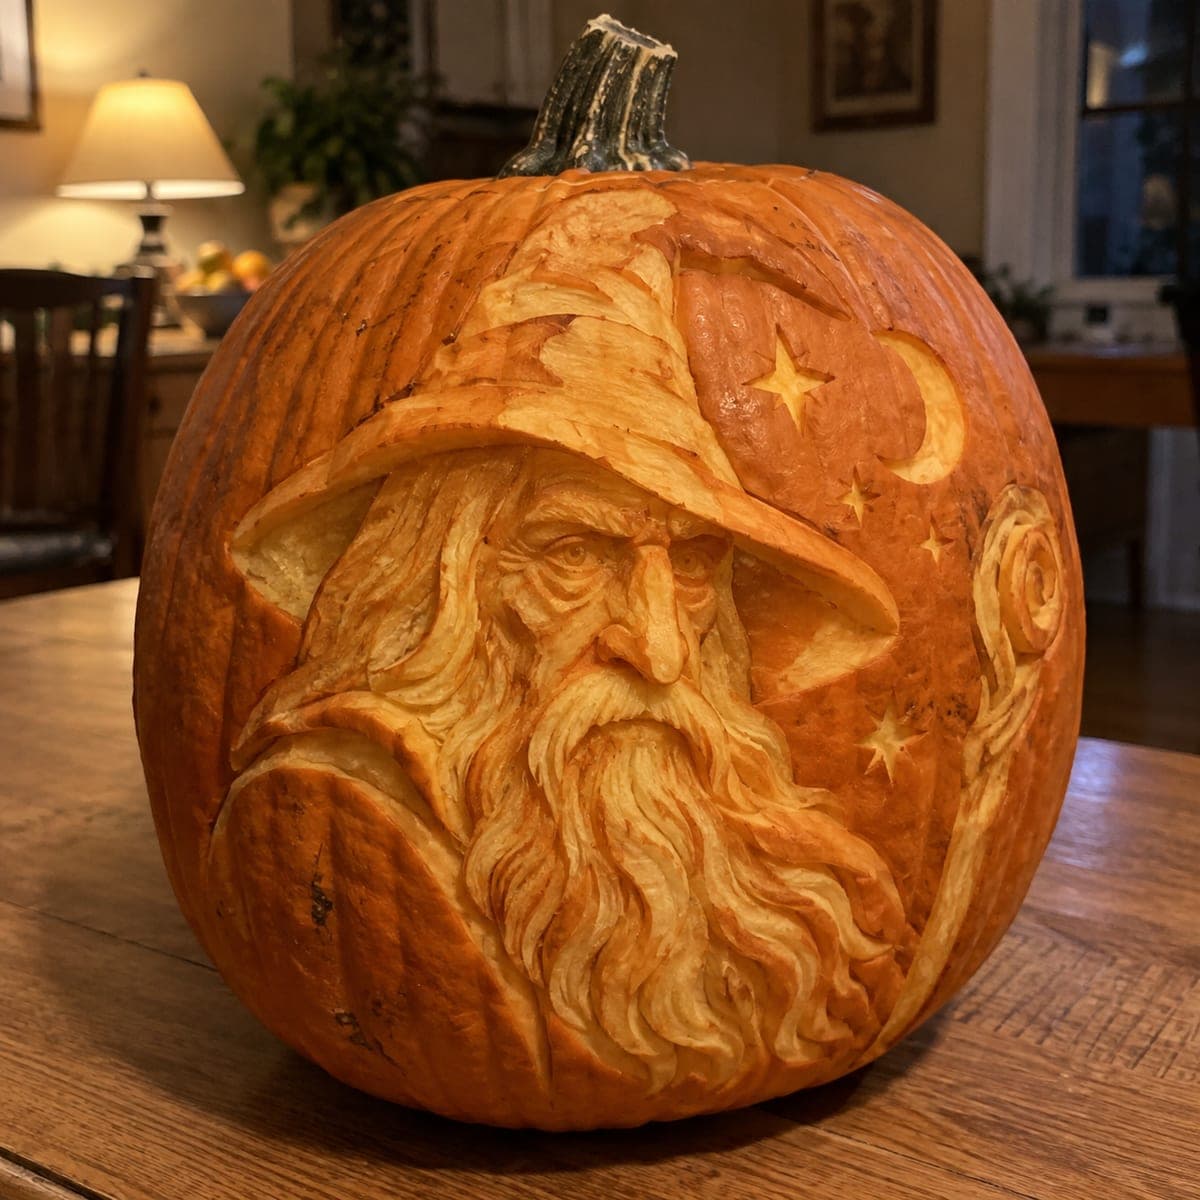
A wise old wizard with a pointed hat, flowing beard, and gnarled walking staff gazes from this etched pumpkin, the face carved in layered relief that gives the beard and hat folds a lifelike three-dimensional quality. This fantasy pumpkin carving idea suits fans of classic folklore and works well as a front-porch accent piece alongside potted mums. Use a stylus transfer to map the face first, then carve the beard in long sweeping strokes with a medium loop tool, deepening the shadow areas around the eyes and mouth last. Warm candlelight accentuates the age and wisdom etched into the carved face.

This is an AI-generated concept image: a realistic, carvable design idea rather than a photo of a finished carve. AI concepts are always labeled and sit out the leaderboard and the contest.
No ratings yet · Sign in to rate

Comments (0)

  • No comments yet — be the first.

Save without an account. Sign in to like or comment.

Our tips for carving a similar design

The core trick here is relief shading, where you scrape away the pumpkin skin to different depths instead of cutting all the way through. Deeper scraping glows brighter, so the beard, hat folds, and lined face are built entirely from varied depths of peeled surface. A design like this could be planned as one large etched panel on the front face, with only a few small true cutouts to add spark.

Written by PumpkinCarvingIdeas.com, inspired by the image above. These are our suggestions, not instructions from the uploader. This approach to the AI concept has not been tested on a real pumpkin.

From pumpkin to porch

  1. Prep the pumpkin and light

    Pick a large pumpkin with a smooth, flat front area for the face. Cut a wide access hole in the back or bottom rather than the top so the carved front stays intact, and scrape the inside wall behind the face down to about one inch thick. A thinner wall lets more light pass through your shaded areas. Set a battery LED inside for testing, never a candle near all that thin relief.

  2. Transfer the wizard design

    Tape a printed wizard stencil over the front and trace the main lines with a stylus or poking tool, marking the hat, eyes, nose, and beard flow. Keep the outer edges of the hat and beard as your boundary so you know where dark skin should stay. Peel the paper and go over faint lines with a washable marker if needed. A clear map now saves guesswork once you start scraping.

  3. Rough in the shading zones

    With a medium loop tool, lightly scrape the skin off the areas meant to glow, starting shallow across the whole face and beard. Work in long sweeping strokes following the direction of the beard and hat folds. Do not commit to full depth yet, just establish which zones are lit and which stay dark. Step back often to read the shapes.

  4. Deepen the beard and hat folds

    Go back over the brightest areas, the beard streams and the highlights on the hat, and scrape them thinner so they glow more strongly. Leave ridges of thicker material between strands to create the layered, three dimensional look. Keep the wall even and avoid punching through unless you want a bright spot. Test with the LED in a dark room as you go.

  5. Carve the shadow details last

    Save the deepest shadow lines around the eyes, brows, mouth, and the folds of the staff for the end. Use a small detail knife or fine loop to press in these dark creases, keeping them narrow so they read as wrinkles and wisdom lines. Cut any small true openings, like glinting eyes, only now so the surface stays strong while you work. Clean up stray edges with a soft brush.

  6. Light it and photograph

    Place a warm white LED inside and view the pumpkin in a dark spot to judge the balance of light. Add a second small light if the beard looks dim compared to the face. Set it on a porch step beside potted mums for a folklore feel. Mist the cut surfaces with water and refrigerate overnight to keep the fine relief crisp.

Gather your supplies

Check things off as you get ready.

Work on a stable surface, keep your free hand out of the cutting path, and have an adult handle sharp tools.

Three levels of light

  • Leave intact

    The outer hat brim, the darkest background, and the deep shadows around the eyes and staff stay as untouched skin.

  • Peel & shade

    The face, hat body, and most of the beard get skin-peeled at shallow depth for a soft mid glow.

  • Cut through

    Only tiny accents such as the eye glints or a bright beard highlight are cut fully through for the strongest light.

Learn the carving basics

Before you start cutting

This is shown as a concept image, so can a pumpkin really hold this much detail?

Yes, a portrait like this is achievable through relief shading rather than full cutouts. The key is scraping the skin to varied depths so the whole face stays as one connected surface. Because almost nothing is cut clear through, the pumpkin wall keeps its strength.

How do I keep the beard strands from looking flat?

Leave raised ridges of thicker skin between the scraped strands so light passes unevenly. Scrape the valleys thinner and the ridges thicker to build contrast. Following the natural sweep of the beard with long strokes gives it that flowing, layered look.

Will a shaded carving like this dry out fast?

Peeled surfaces do dry quicker than a plain jack-o-lantern, so plan to display it within a day or two. Mist the exposed areas with water and store it in the fridge overnight when you can. A coat of petroleum jelly on the scraped areas also slows shrinkage.

Your take belongs here, too.

Changed a detail? Made it simpler? Share a photo of your version and tell the community what worked.

Share your pumpkin

More pumpkins like this

You've reached the end · 8 pumpkins
The Patch Report

Fresh pumpkins, in your inbox.

The best new carvings, ideas worth stealing, and how-tos for carving season. Short, seasonal, and gone by November.

A short email during carving season. Unsubscribe anytime. See our privacy policy.