Halloween Pumpkin Carving Contest · Starts October 1st · $500 in prizes
← Back to ideas
@ai_concepts
Aug 27, 2026
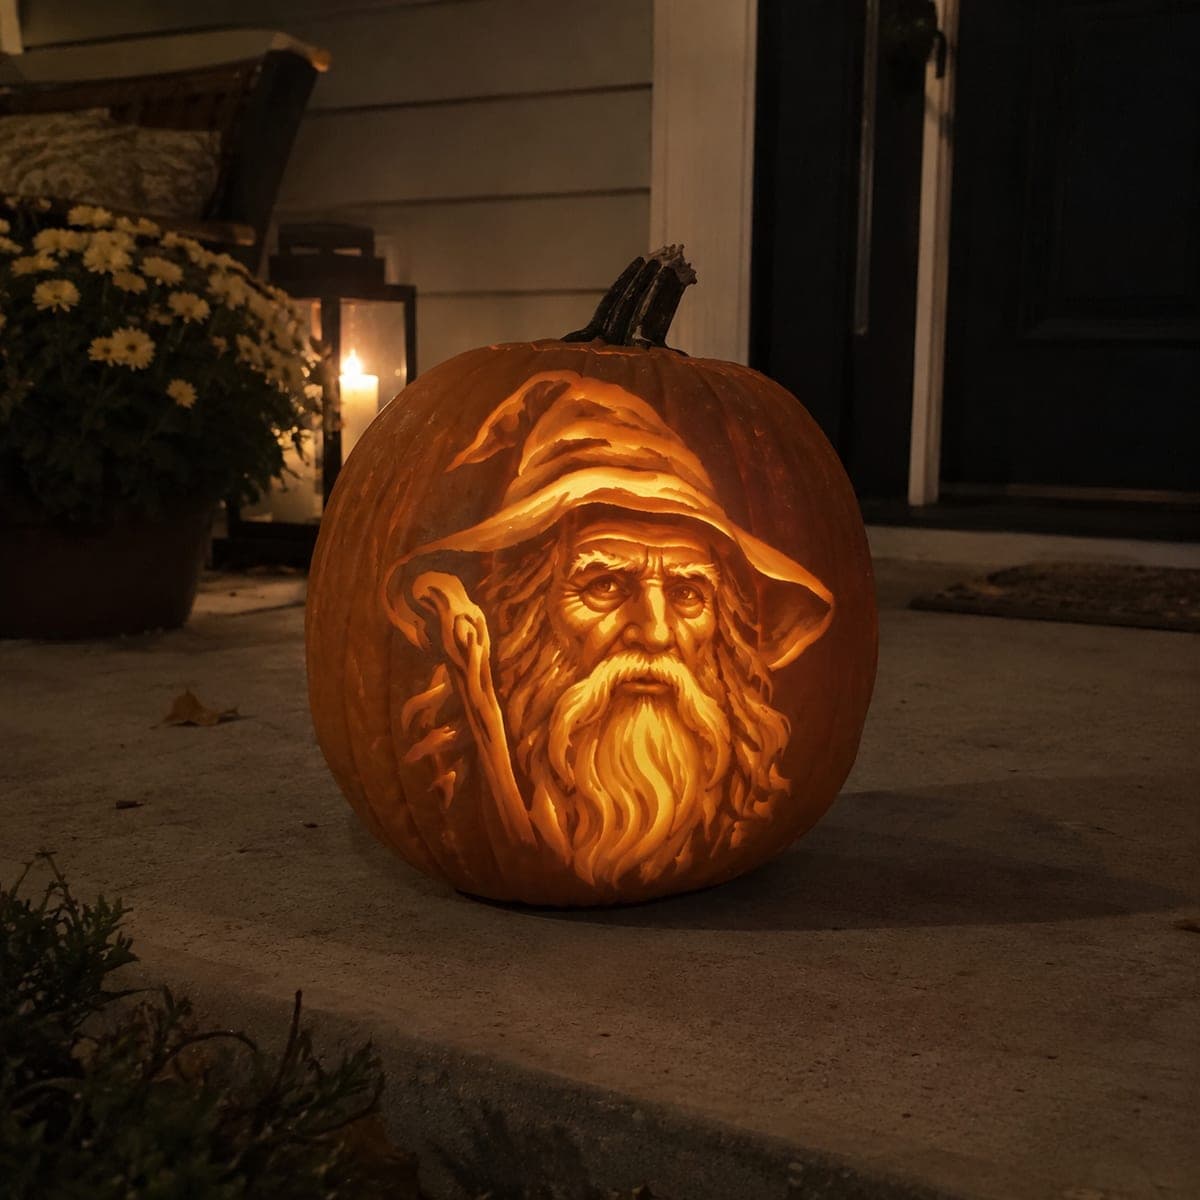
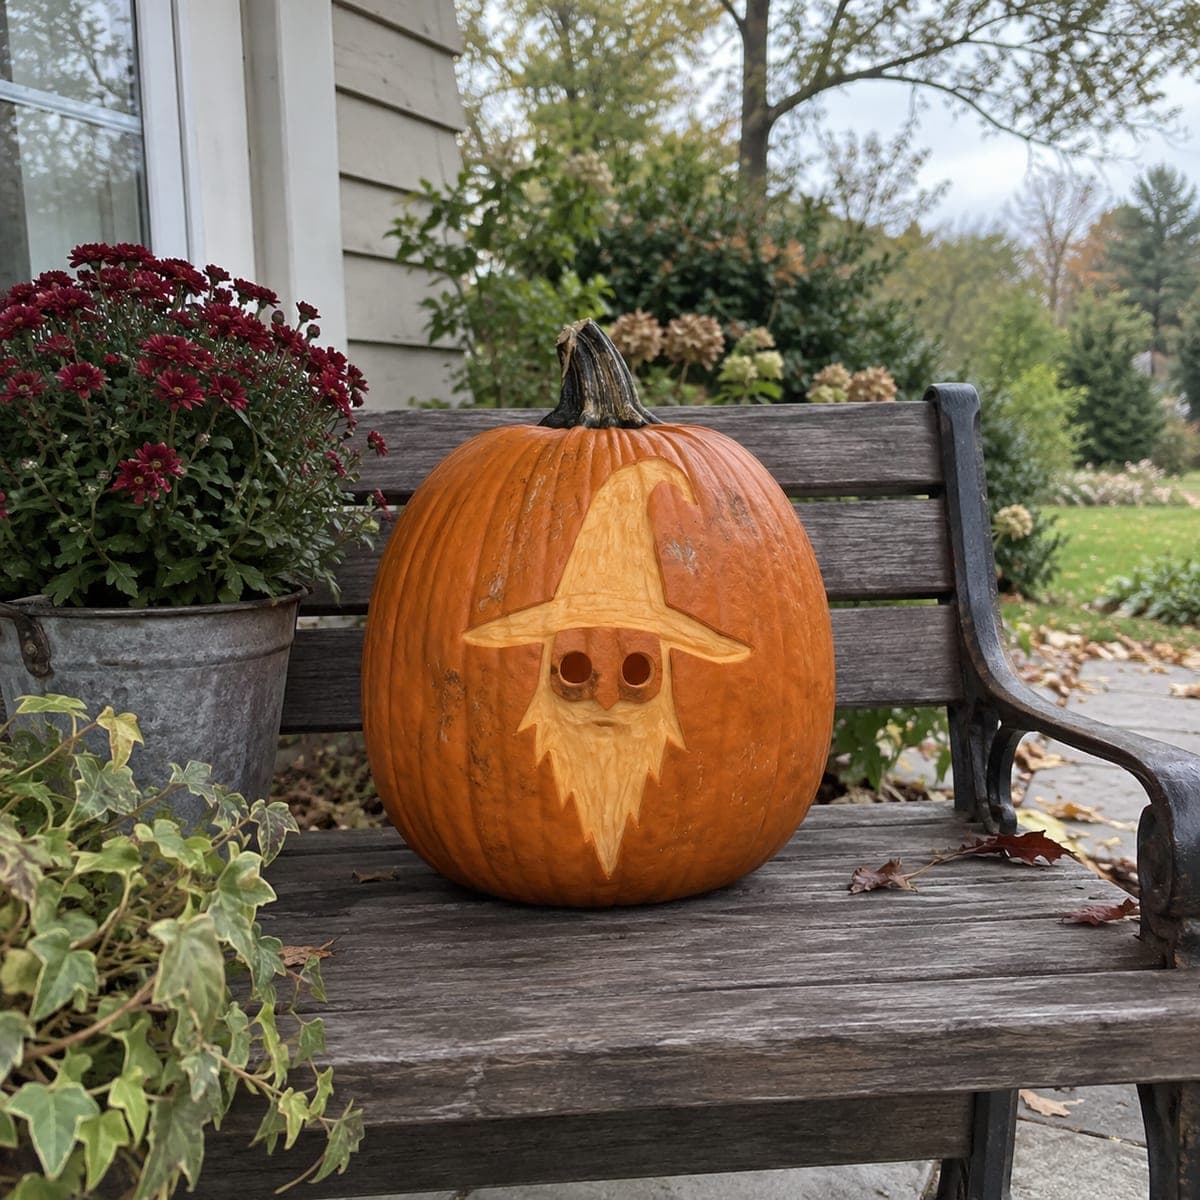
Bearded Wizard Jack-O-Lantern With Pointed HatAI
0

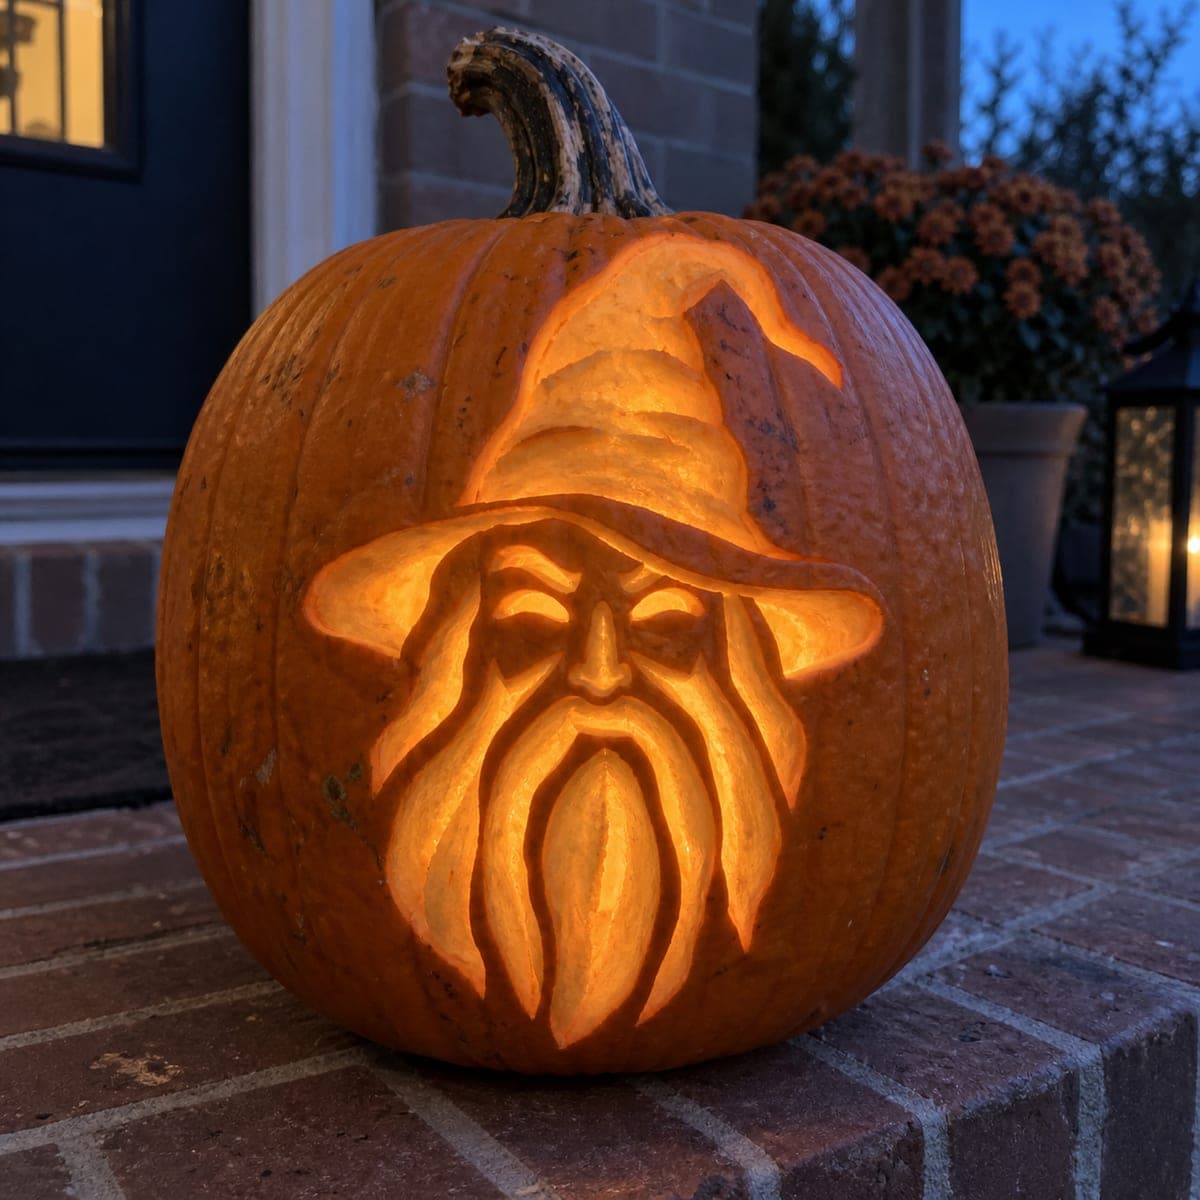
Bearded Wizard Jack-O-Lantern With Pointed Hat

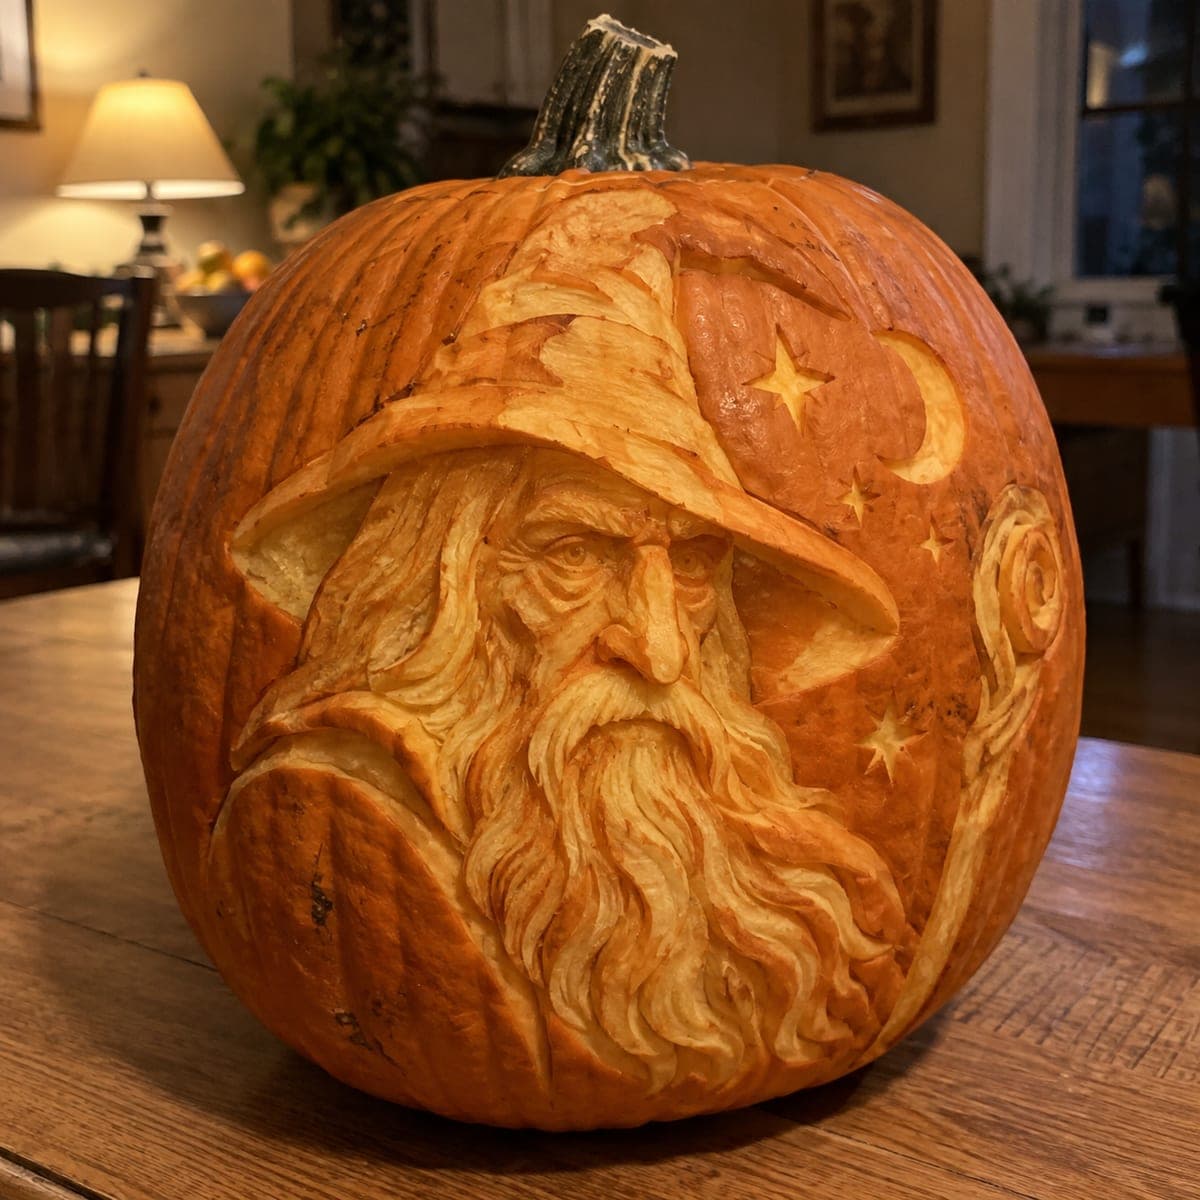
A stern wizard face fills this jack-o-lantern, framed by a floppy pointed hat with a bent tip and a long beard carved in flowing glowing strands. The design mixes deep shading on the hat brim and beard with darker raised skin for the eyes, giving the face real dimension at night. Carve the beard strands last, pulling long strokes downward so they stay parallel. Ideal for fantasy fans and Halloween party entryways.

This is an AI-generated concept image: a realistic, carvable design idea rather than a photo of a finished carve. AI concepts are always labeled and sit out the leaderboard and the contest.

No ratings yet · Sign in to rate
Comments (0)

  • No comments yet — be the first.

Save without an account. Sign in to like or comment.

Our tips for carving a similar design

The core trick here is relief shading, where you peel away the skin at different depths so the beard strands and hat glow while the eyes and brow stay dark and raised. The plan is to save full cutouts for a few small light lines and treat most of the face as a shaded portrait. Long parallel strokes on the beard are carved last so they stay clean and flowing.

Written by PumpkinCarvingIdeas.com, inspired by the image above. These are our suggestions, not instructions from the uploader. This approach to the AI concept has not been tested on a real pumpkin.

From pumpkin to porch

  1. Transfer the stencil and plan your depths

    Pick a tall, smooth pumpkin so the wizard has room from hat tip to beard. Tape the pattern on and poke through the outlines with a pin or transfer tool. Before you cut, mark which zones stay skin, which get peeled, and which get cut through. This planning keeps the face from turning into a jumble of lines.

  2. Gut and thin the carving wall

    An adult should cut a lid from the bottom, not the top, so the stem curl stays intact for looks. Scoop the insides and scrape the front wall down to about one inch thick. A thinner wall makes shading glow evenly and takes far less effort. Even out any high spots inside so light spreads smoothly.

  3. Peel the beard and hat for the mid glow

    Use a loop or ribbon tool to shave off just the outer skin across the beard, the hat body, and the brim. This exposed flesh glows a soft orange when lit. Keep the depth consistent so the whole beard reads as one flowing mass. Leave narrow ridges of deeper flesh between sections to suggest folds in the hat.

  4. Leave and shape the dark features

    Keep the skin fully intact on the eyes, the heavy brow, the nose bridge, and the outlines that separate face from beard. These untouched areas stay dark and give the stern face its dimension. Round the edges slightly where dark meets peeled skin so shadows fall naturally. Resist cutting here, the contrast is what makes him look three dimensional.

  5. Carve the beard strands last with long strokes

    Now cut the thin bright lines that define individual beard strands. Pull each stroke downward in one long, steady motion so the strands stay parallel and never cross. Leave small bridges of skin between strands so the beard does not collapse into one big hole. Cut the few open eye slits and any full cutouts at the very end when the pumpkin is most fragile.

  6. Light it and photograph

    Drop in a battery LED puck or string, never a candle, since flames scorch thin shaded areas. Set it low so light rises up through the beard and hat. Shoot at dusk on a porch step or by a lantern for that warm entryway glow. Mist the cut edges with water and refrigerate overnight to keep the wizard fresh for party night.

Gather your supplies

Check things off as you get ready.

Work on a stable surface, keep your free hand out of the cutting path, and have an adult handle sharp tools.

Three levels of light

  • Leave intact

    The eyes, heavy brow, nose bridge, and the outlines dividing the face stay as untouched skin for deep shadow.

  • Peel & shade

    The full beard mass, hat body, and floppy brim get skin-peeled for a soft mid orange glow.

  • Cut through

    A few thin beard strand lines and the narrow eye slits are cut through for the brightest accents.

Learn the carving basics

Before you start cutting

This is an AI concept image, so can a real pumpkin actually look like this?

Yes, the effect is achievable with relief shading rather than heavy cutting. The glow comes mostly from peeled skin, not open holes, which is very doable on a real pumpkin. Just keep bridges between beard strands so nothing structural gives way.

How do I keep the long beard strands from looking messy?

Carve them last and pull each cut in one downward stroke so the lines stay parallel. Start from the top of each strand and follow the natural taper toward the tip. Leaving thin walls of skin between strands keeps them crisp and prevents the beard from merging into one bright blob.

Why leave the eyes and brow uncut when everything else glows?

The stern expression depends on contrast between dark and lit areas. Untouched skin over the eyes and brow reads as shadow at night, which makes the face look carved in relief. If you cut those out, the wizard loses his depth and just looks like a hole.

Your take belongs here, too.

Changed a detail? Made it simpler? Share a photo of your version and tell the community what worked.

Share your pumpkin

More pumpkins like this

You've reached the end · 8 pumpkins
The Patch Report

Fresh pumpkins, in your inbox.

The best new carvings, ideas worth stealing, and how-tos for carving season. Short, seasonal, and gone by November.

A short email during carving season. Unsubscribe anytime. See our privacy policy.