Halloween Pumpkin Carving Contest · Starts October 1st · $500 in prizes
← Back to ideas
@ai_concepts
Sep 14, 2026
Bearded Religious Portrait PumpkinAI
0

Bearded Religious Portrait Pumpkin

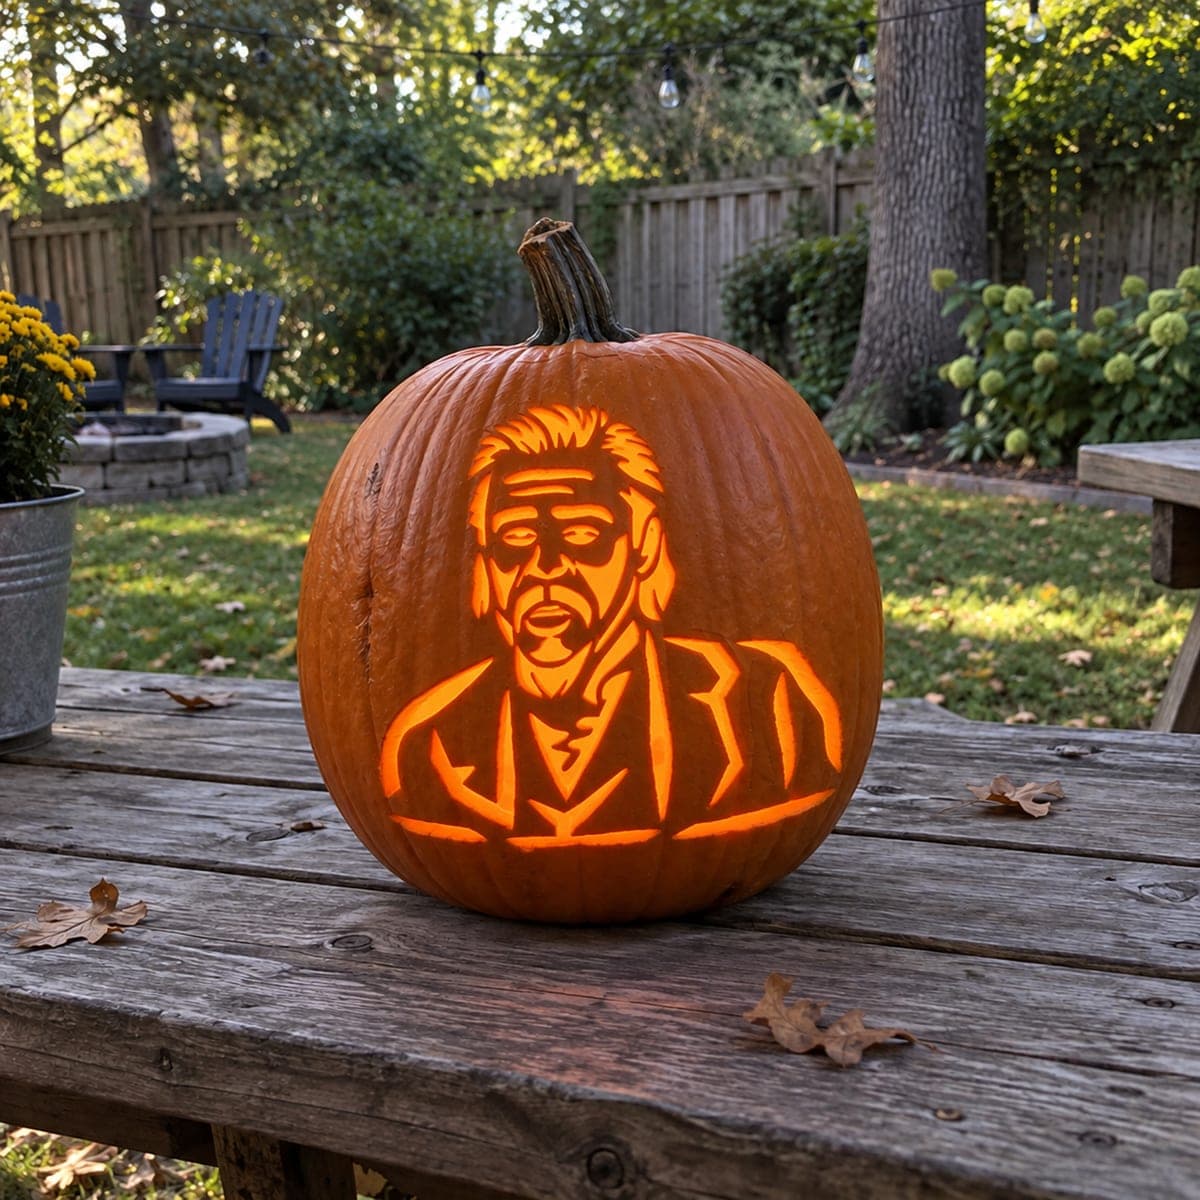
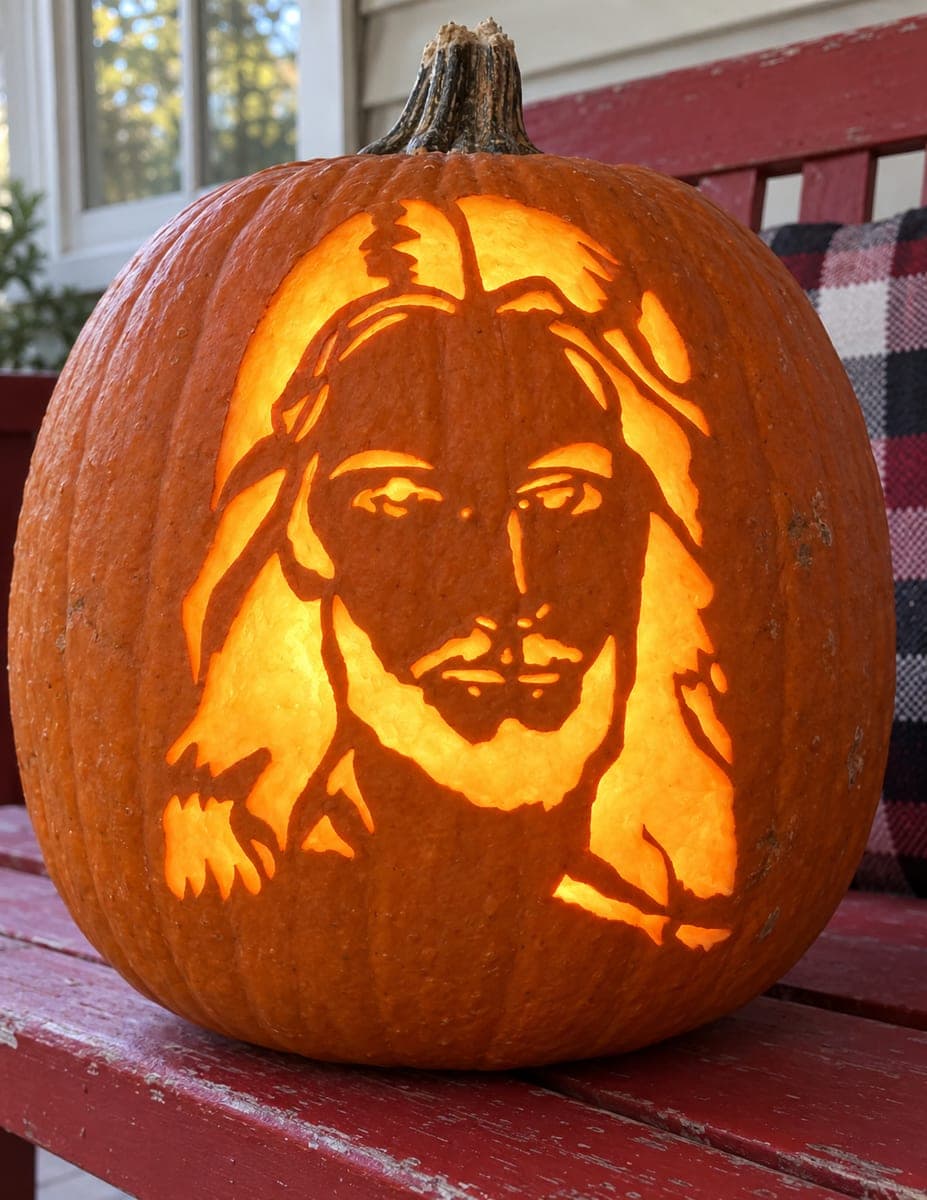
Long wavy hair parts in the center and frames a bearded face with calm eyes, the entire portrait rendered in flowing cut lines that trace hair strands, eyebrows, and facial contours. The lines glow individually rather than as filled regions, giving this faces pumpkin carving idea an etched, line-art quality. Use a fine-pointed pumpkin saw or linoleum cutter to trace the thinnest hair lines, working from the top of the head downward so your hand rests on unworked rind throughout.

This is an AI-generated concept image: a realistic, carvable design idea rather than a photo of a finished carve. AI concepts are always labeled and sit out the leaderboard and the contest.

No ratings yet · Sign in to rate
Comments (0)

  • No comments yet — be the first.

Save without an account. Sign in to like or comment.

Our tips for carving a similar design

The core trick here is line-art carving, where the whole face is built from individual flowing cutouts that read as hair strands and contours rather than large open windows. Instead of scooping out big shapes, you cut thin channels that each glow on their own. Plan to keep plenty of unworked rind between lines so the portrait holds together and the features stay recognizable.

Written by PumpkinCarvingIdeas.com, inspired by the image above. These are our suggestions, not instructions from the uploader. This approach to the AI concept has not been tested on a real pumpkin.

From pumpkin to porch

  1. Pick a tall pumpkin and clean the inside

    Choose a large, smooth-faced pumpkin with a broad flat area for the portrait. Cut a lid or a bottom access hole and hollow the inside, scraping the carving wall down to about one inch thick. A thinner, even wall makes fine lines easier to cut and lets more light through. Dry the surface before you transfer the pattern.

  2. Transfer the line-art pattern

    Tape a printed portrait stencil smoothly over the face, clipping darts into the paper so it lies flat on the curve. Use a poking tool to dot along every hair strand, eyebrow, eye, and beard line. Because this design is all thin lines, dot closely so you can connect them later. Peel the paper and check that the whole face is readable in dots before you cut.

  3. Start the thin hair lines at the top

    Switch to a fine-pointed pumpkin saw or a linoleum cutter for the hair strands. Begin at the crown and work downward so your hand always rests on unworked rind, never on freshly cut lines. Cut each strand as a slim channel and leave rind bridges between neighboring strands so the hair does not collapse into one big hole. Take your time and reposition the pumpkin rather than twisting your wrist.

  4. Carve the face contours and eyes

    Move to the eyebrows, eye outlines, nose, and the lines that shape the cheeks and beard. Keep these cuts narrow and connected to the design logic, since the calm expression depends on clean, steady lines. Cut the small eye openings carefully and leave the surrounding skin intact so the gaze stays soft. Save any slightly wider openings, like the mouth gap, for after the delicate lines are done.

  5. Add shading with skin peels

    For soft midtones on the cheeks and forehead, use a shaving tool or the loop end of a ribbon tool to peel away only the outer skin without going through the wall. These peeled patches glow a dim orange and help the flat face feel rounded. Keep peels subtle so they support the lines instead of competing with them.

  6. Light it and photograph

    Set a battery LED puck or string inside, never a candle, since the thin lines and one inch wall dry out fast. Test the glow in a dark room and touch up any line that reads faint by widening it slightly. Mist the cut edges and refrigerate overnight between displays to keep the fine work crisp. Photograph at dusk so the line-art detail shows against the darker skin.

Gather your supplies

Check things off as you get ready.

Work on a stable surface, keep your free hand out of the cutting path, and have an adult handle sharp tools.

Three levels of light

  • Leave intact

    The background and the broad areas between hair strands and facial contours stay as untouched dark skin.

  • Peel & shade

    The cheeks, forehead, and beard get gentle skin peels for a dim orange glow that suggests rounded shading.

  • Cut through

    The thin hair strands, eyebrows, eye lines, and mouth are cut through so each line glows brightest.

Learn the carving basics

Before you start cutting

This is a concept image, so can a portrait this detailed really be carved?

Yes, a similar line-art portrait is carvable if you keep every strand thin and leave rind bridges between neighboring lines. The picture is an AI concept, so no real pumpkin exists, but the technique of cutting individual glowing lines is sound. Just avoid removing large connected areas that would leave the face sagging.

How do I keep the fine hair lines from tearing or collapsing?

Work from the top down so your hand rests on solid rind, and cut each strand as its own narrow channel. Always leave a strip of uncut skin between adjacent lines to act as a bridge. A fresh, sharp fine-point blade tears far less than a dull one.

Should I use shading or only cut lines?

A mix works best. The line cutouts carry the drawing, while light skin peels on the cheeks and forehead add soft midtones that make the flat face look rounded. Keep the peels gentle so they do not overpower the crisp lines.

Your take belongs here, too.

Changed a detail? Made it simpler? Share a photo of your version and tell the community what worked.

Share your pumpkin

More pumpkins like this

You've reached the end · 8 pumpkins
The Patch Report

Fresh pumpkins, in your inbox.

The best new carvings, ideas worth stealing, and how-tos for carving season. Short, seasonal, and gone by November.

A short email during carving season. Unsubscribe anytime. See our privacy policy.