Halloween Pumpkin Carving Contest Β· Starts October 1st Β· $500 in prizes
← Back to ideas
@ai_concepts
Sep 14, 2026
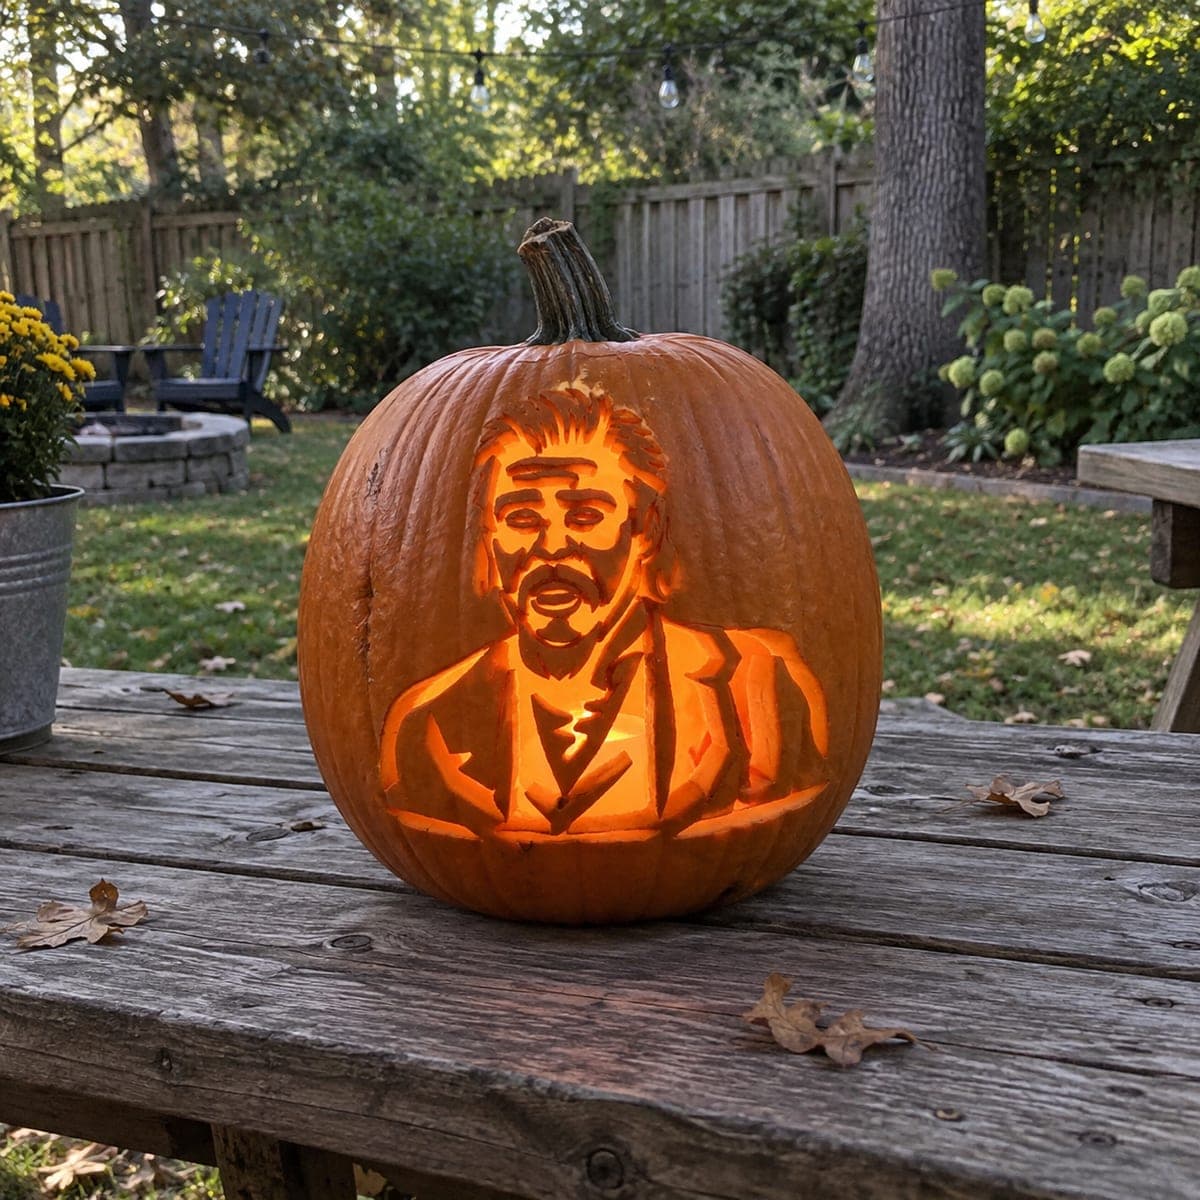
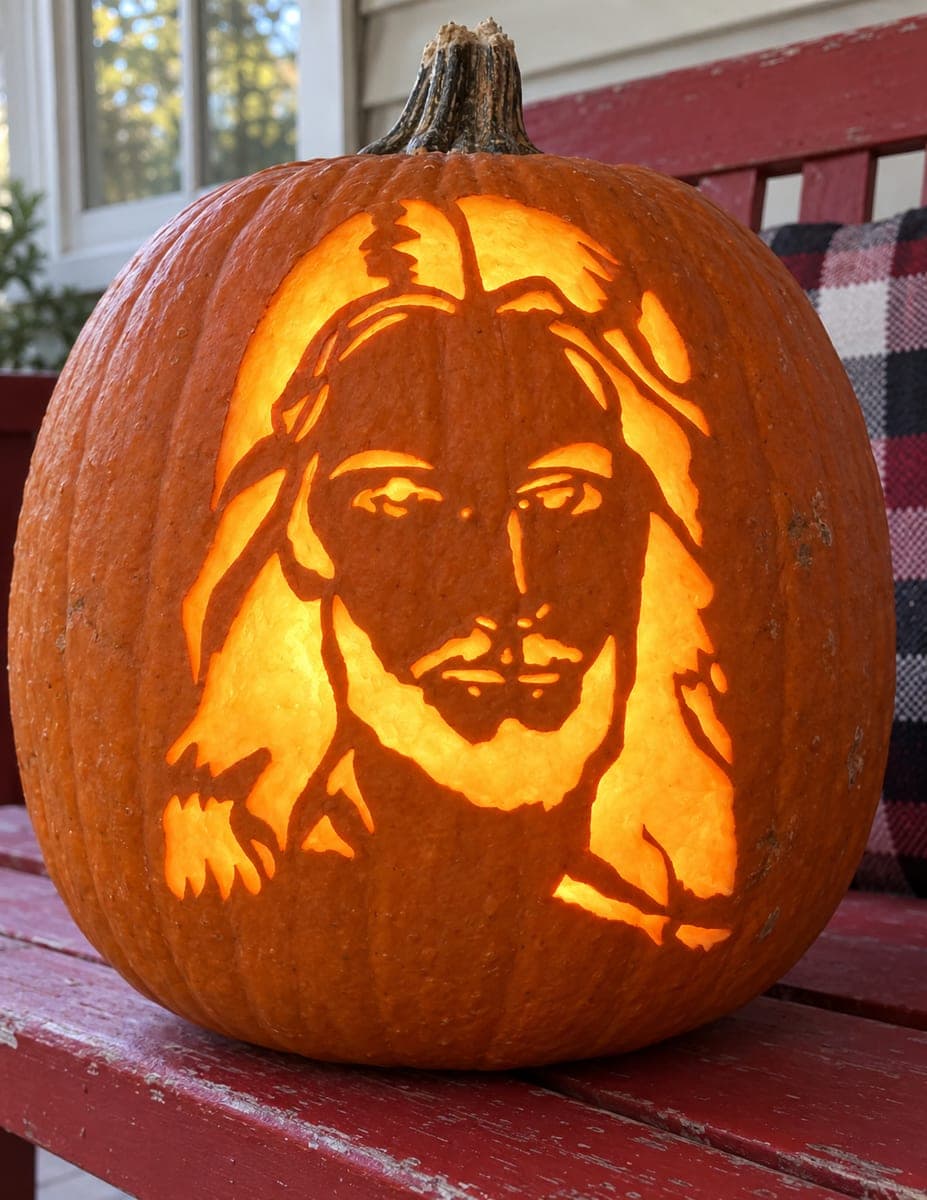
Bearded Man in a Suit Pumpkin
1/2
AI
0

Bearded Man in a Suit Pumpkin

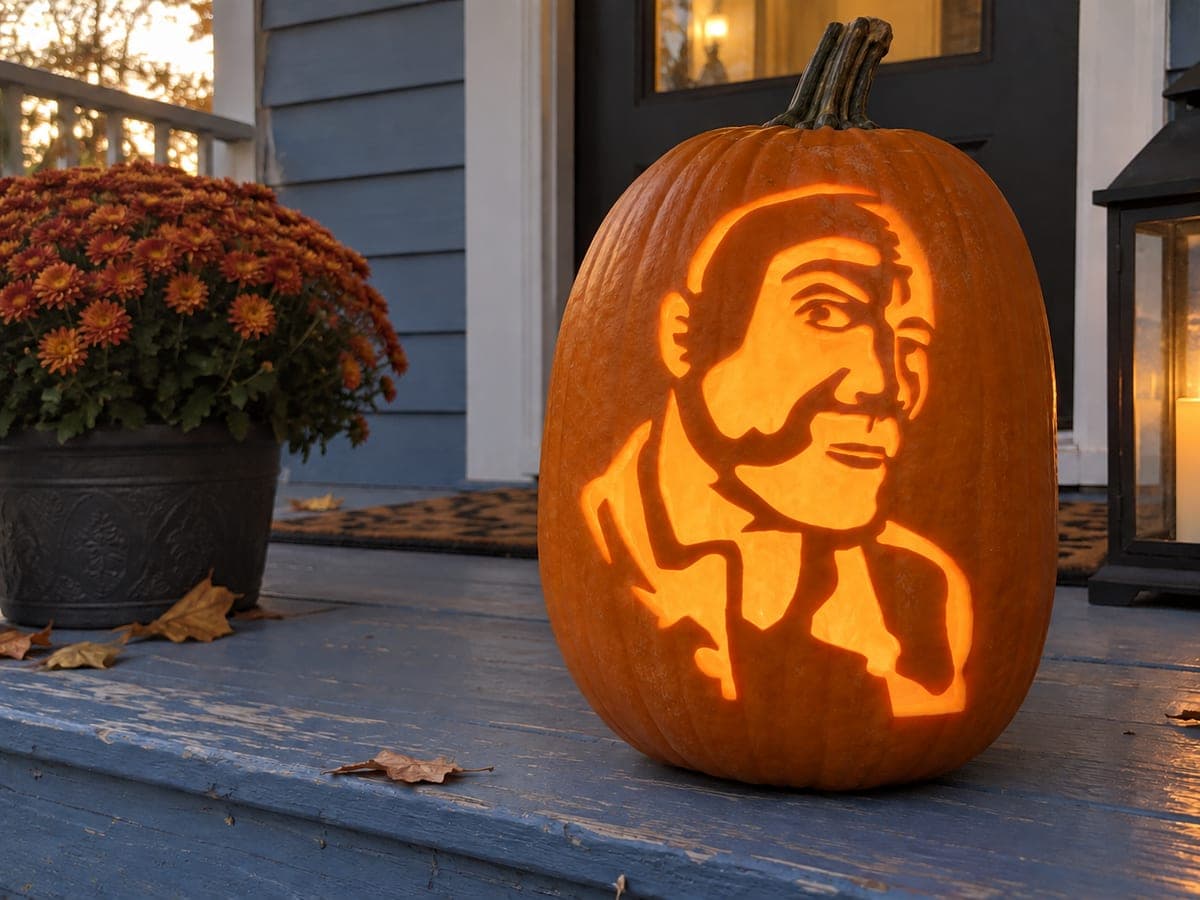
A bearded man in a suit pumpkin carving idea shows a three-quarter bust portrait with close-cropped hair, a full beard rendered in wavy carved lines, broad jacket lapels, and a realistic facial expression achieved through careful tonal variation. The shading technique removes skin at different depths, with brighter highlights on the forehead and cheeks and darker preserved areas defining the beard and hair. Scrape the forehead and cheekbone highlights deepest first, then work outward into the beard, stopping often to check with an LED how each zone reads against its neighbors.

This is an AI-generated concept image: a realistic, carvable design idea rather than a photo of a finished carve. AI concepts are always labeled and sit out the leaderboard and the contest.
No ratings yet Β· Sign in to rate

Comments (0)

  • No comments yet β€” be the first.

Save without an account. Sign in to like or comment.

Our tips for carving a similar design

This design leans on tonal carving rather than pure cutouts, so the whole face is read through how deep you scrape rather than what you punch through. The core trick is treating the pumpkin skin like a gray scale: skin left dark, shallow scrapes glow dim, and only a few thin lines get cut all the way through. Plan your brightest zones on the forehead and cheeks and keep the beard and hair as your darkest anchors.

Written by PumpkinCarvingIdeas.com, inspired by the image above. These are our suggestions, not instructions from the uploader. This approach to the AI concept has not been tested on a real pumpkin.

From pumpkin to porch

  1. Prep the pumpkin and pick a flat spot

    Choose a large pumpkin with a broad, smooth front face so the portrait has room to read. Cut a lid from the bottom or the back rather than the top, which keeps the front skin uninterrupted and makes an LED easy to swap. Scoop the inside thoroughly and thin the carving wall to about one inch on the front so shading light comes through evenly. Dry the surface before you transfer your pattern.

  2. Transfer the portrait pattern

    Tape a printed stencil snugly over the front and poke or trace the main outlines: the face shape, hairline, beard edge, and jacket lapels. Mark which zones are highlights, which are mid tones, and which are the few full cutout lines. Use a light pencil or a dotted transfer so you can still see the map after the paper comes off. Step back and confirm the face sits centered and slightly high, since portraits read better above the pumpkin's midline.

  3. Scrape the brightest highlights first

    Using a ribbon or loop tool, gently shave the forehead and cheekbone highlights the deepest so they glow strongest. Work in smooth, even passes and keep the skin thin but never breaking through in these zones. Stop often, drop in an LED, and check how the bright areas read against the darker skin around them. It is easier to go deeper later than to undo a spot you scraped too far.

  4. Build the mid tones outward

    Move into the softer areas of the face, neck, and jacket with shallower scrapes for a dimmer glow. Leave the beard and hair mostly as untouched skin so they stay dark and frame the lit face. Carve the wavy beard lines as narrow grooves rather than open cuts, which keeps that texture readable without weakening the wall. Vary your pressure to blend one tone into the next instead of leaving hard edges.

  5. Cut the few accent lines last

    Save the small full cutouts, such as sharp lapel edges or a few bright separation lines, for the very end when the surrounding skin is already shaped. Keep these cuts thin and short, and leave uncut bridges of skin between them so the face does not sag. Cutting these openings last protects the thin shaded areas from cracking while you work. Clean each opening with a fresh, careful pass so the light edges look crisp.

  6. Light it and photograph

    Set a battery LED inside, warm white or amber for a natural skin glow, and avoid open flame near the thin shaded wall. View it in a dark room and touch up any zone that reads too flat by scraping a hair deeper. Coat cut edges with a little petroleum jelly to slow drying and keep the tones looking fresh. For photos, shoot at dusk so the carved face glows while the background stays soft.

Gather your supplies

Check things off as you get ready.

Work on a stable surface, keep your free hand out of the cutting path, and have an adult handle sharp tools.

Three levels of light

  • Leave intact

    The hair and full beard stay as untouched skin so they read dark and frame the face.

  • Peel & shade

    The face, neck, and jacket get scraped at varying depths, with the forehead and cheeks deepest for the brightest glow.

  • Cut through

    Only a few thin accent lines, like the lapel edges, get cut all the way through for sharp bright highlights.

Learn the carving basics

Before you start cutting

This is shown as a concept image, so can a portrait like this really be carved?

Yes, a design like this is achievable, though the pictured pumpkin is an AI concept and no real one exists. The key is treating it as a shading project, not a cutout project, so almost everything is scraped rather than punched through. Keep the wavy beard lines as narrow grooves and save the few true openings for last to keep the wall strong.

How do I keep the face from looking flat?

Flatness usually comes from carving every zone to the same depth. Scrape the forehead and cheeks deepest, ease into softer mid tones on the neck and jacket, and leave the beard as dark skin. Check often with an LED so you can see each tone against its neighbors and blend the transitions.

What size and wall thickness should I aim for?

Pick a large pumpkin so the face has room for detail, and thin the front wall to about one inch. A thinner wall lets your shallow scrapes glow instead of staying dark. Too thick and the mid tones will barely show, too thin and the thin areas can crack.

Your take belongs here, too.

Changed a detail? Made it simpler? Share a photo of your version and tell the community what worked.

Share your pumpkin

More pumpkins like this

You've reached the end Β· 8 pumpkins
The Patch Report

Fresh pumpkins, in your inbox.

The best new carvings, ideas worth stealing, and how-tos for carving season. Short, seasonal, and gone by November.

A short email during carving season. Unsubscribe anytime. See our privacy policy.