Halloween Pumpkin Carving Contest · Starts October 1st · $500 in prizes
← Back to ideas
@ai_concepts
Sep 14, 2026
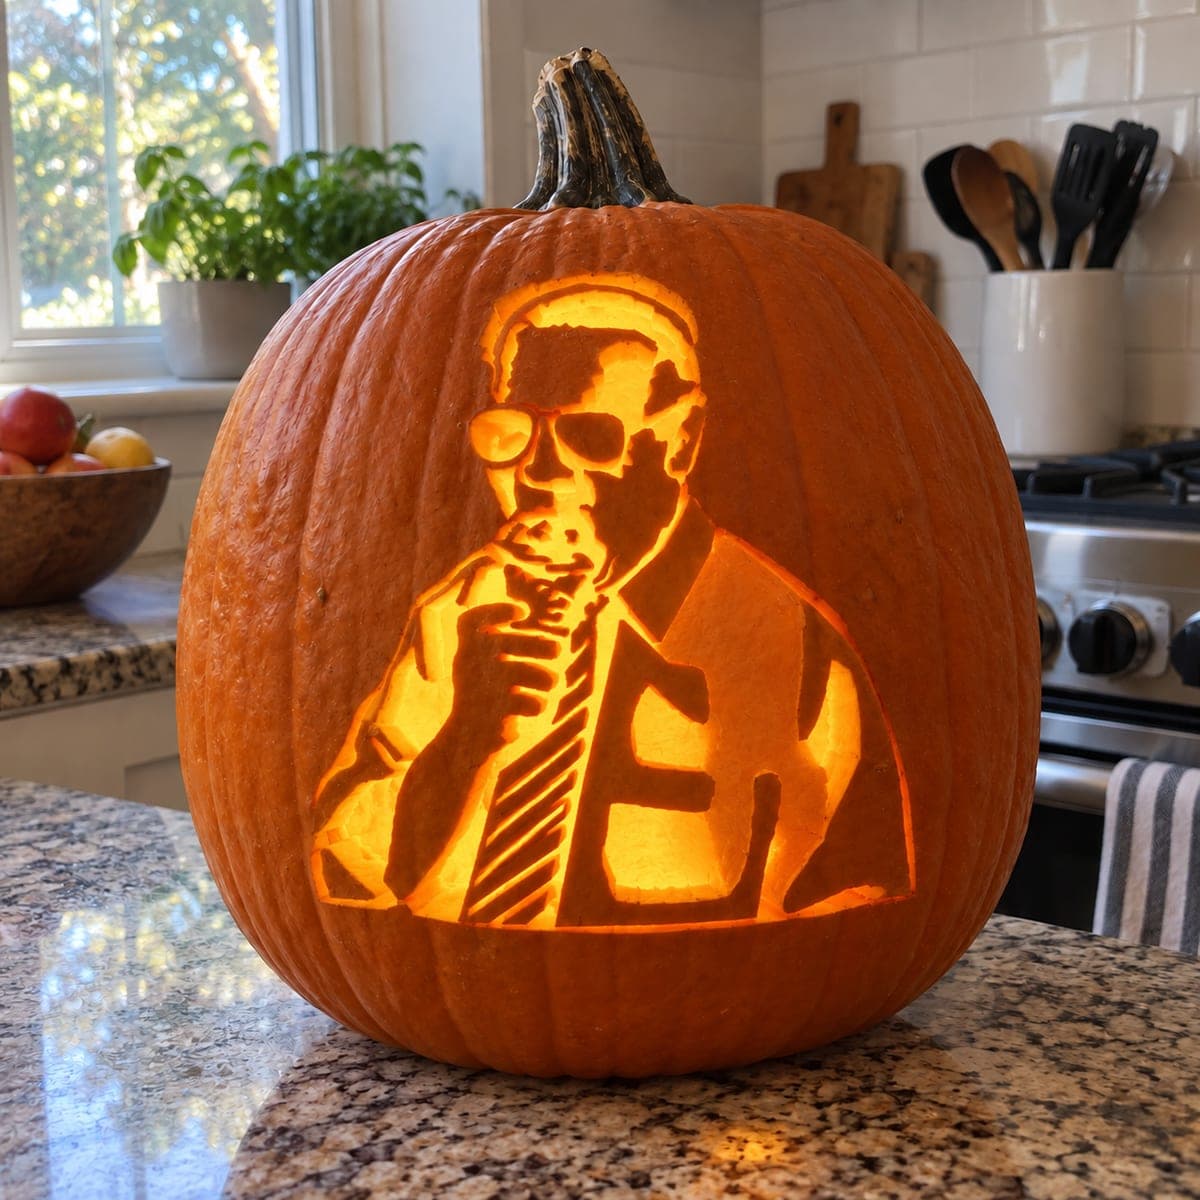
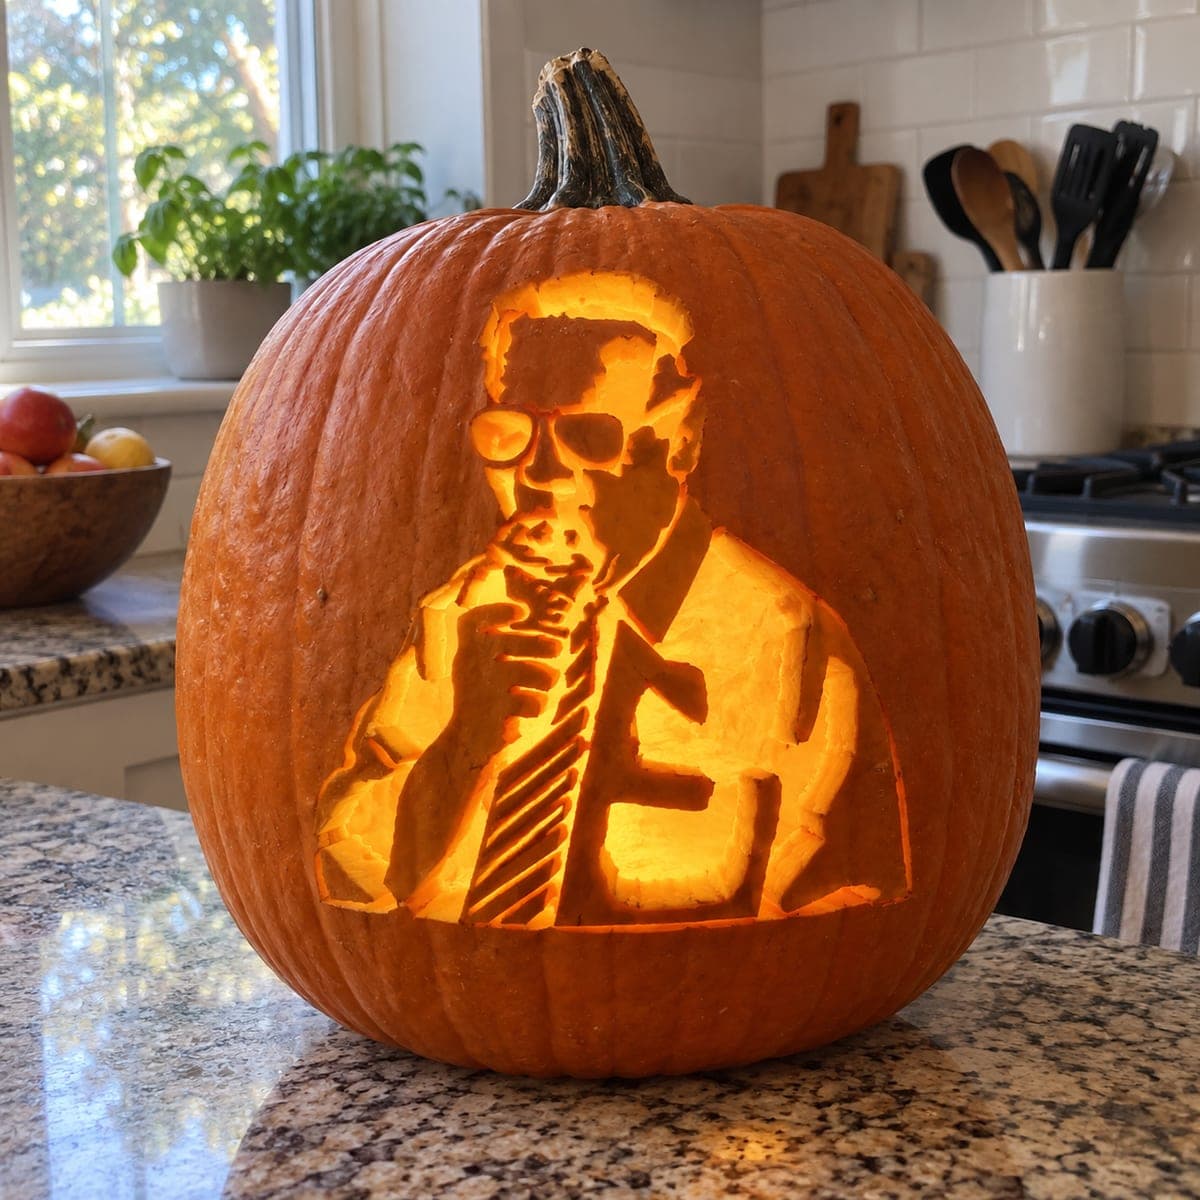
Sunglasses Speaker Holding a Microphone Pumpkin
1/2
AI
0

Sunglasses Speaker Holding a Microphone Pumpkin

This shaded portrait pumpkin carving idea depicts a suited man in sunglasses eating an ice cream cone, with the striped tie, jacket lapels, and cone rendered at different skin depths to create tonal contrast. The shading technique peels away the outer skin and scrapes the flesh at varying depths so brighter areas glow more intensely and darker preserved-skin sections recede. Carve the sunglass lenses at the shallowest depth first so you can judge the overall tonal range before committing to the deeper scraping on the ice cream and tie stripes.

This is an AI-generated concept image: a realistic, carvable design idea rather than a photo of a finished carve. AI concepts are always labeled and sit out the leaderboard and the contest.

No ratings yet · Sign in to rate
Comments (0)

  • No comments yet — be the first.

Save without an account. Sign in to like or comment.

Our tips for carving a similar design

The core trick here is depth-based shading, where you never cut all the way through except in the very brightest spots. By peeling skin and scraping the flesh at different depths, you build a range of tones from dark preserved skin to bright glowing cutouts. Plan your value map first so the sunglasses, tie stripes, and cone read clearly once the light is inside.

Written by PumpkinCarvingIdeas.com, inspired by the image above. These are our suggestions, not instructions from the uploader. This approach to the AI concept has not been tested on a real pumpkin.

From pumpkin to porch

  1. Gather your image and map the tones

    Since this is a concept image with no real pumpkin behind it, start by choosing a suited figure portrait stencil that has clear light and dark zones. Study where the design is fully bright, mid glow, and dark, then mark those three values on your pattern with a pencil. This tonal map is your guide for how deep to scrape each area. Spending time here saves you from over-cutting later.

  2. Prep and transfer the pattern

    Pick a tall, smooth pumpkin with an even wall so the flesh scrapes cleanly. Cut a lid from the bottom or back rather than the top so the stem stays intact, and hollow the inside until the front wall is about one inch thick. Tape your pattern flat against the face and poke closely spaced dots along every outline with a transfer tool. Peel the paper and connect the dots lightly if the lines are hard to read.

  3. Carve the sunglass lenses first

    Start with the sunglass lenses at the shallowest peel so you can judge your overall tonal range early. Use a shading tool or a small loop to remove just the outer skin, exposing dim orange flesh. Check how bright that reads against the untouched skin before you commit to anything deeper. This test area tells you how the rest of the values will behave.

  4. Peel the mid-tone areas

    Move on to the jacket lapels, shirt, and the shaded sides of the face, peeling skin and scraping the flesh to a medium depth. Keep the pumpkin wall thicker in these spots so they glow softly rather than blaze. Work slowly and step back often to compare each patch against the lenses you already finished. Leave narrow ridges of thicker flesh where you want subtle shadow lines.

  5. Scrape the brightest zones and cut the stripes

    For the ice cream cone and the lit tie stripes, scrape deeper until the wall is thin and the light really pushes through. If any spots need full cutouts for the sharpest brightness, do those last and keep them small. Leave thin bridges of flesh between the tie stripes so the stripe pattern stays supported and does not collapse. Cutting the largest openings last protects the structure while you finish the fine work.

  6. Light it and photograph

    Drop in a battery LED puck, warm white or amber, to bring out the orange glow safely. Never use an open flame near thin shaded walls, since they scorch and dry out fast. Dim the room and check that your three tone levels read clearly from a few feet away, then touch up any patch that looks too dark. Snap your photo the same night before the scraped flesh starts to shrink.

Gather your supplies

Check things off as you get ready.

Work on a stable surface, keep your free hand out of the cutting path, and have an adult handle sharp tools.

Three levels of light

  • Leave intact

    The untouched skin of the background and the dark sunglass frames, hair, and deep shadow edges that recede.

  • Peel & shade

    The jacket lapels, shirt, and shaded face planes, skin-peeled to a soft mid orange glow.

  • Cut through

    The ice cream cone and the lit tie stripes, scraped thin or cut through for the brightest light.

Learn the carving basics

Before you start cutting

How do I keep the tie stripes from falling apart?

Leave a thin bridge of flesh between each stripe rather than cutting them as open slots. Scrape the lit stripes thin so they glow, but never sever the whole strip. These small connectors hold the pattern together and still read as stripes once the light is on.

Why carve the sunglasses first?

The lenses are your shallowest peel, so finishing them early gives you a reference for how bright a light peel actually glows. You can compare every later area against them before scraping deeper. This keeps you from over-thinning the ice cream and tie by accident.

How thick should the pumpkin wall be for shading?

Hollow the front wall to about one inch as a baseline for the darkest peeled areas. Scrape down toward a quarter inch in the brightest spots like the cone. Working within that range gives you enough material to build several tones without cutting all the way through.

Your take belongs here, too.

Changed a detail? Made it simpler? Share a photo of your version and tell the community what worked.

Share your pumpkin

More pumpkins like this

You've reached the end · 8 pumpkins
The Patch Report

Fresh pumpkins, in your inbox.

The best new carvings, ideas worth stealing, and how-tos for carving season. Short, seasonal, and gone by November.

A short email during carving season. Unsubscribe anytime. See our privacy policy.