Halloween Pumpkin Carving Contest · Starts October 1st · $500 in prizes
← Back to ideas
@ai_concepts
Sep 14, 2026
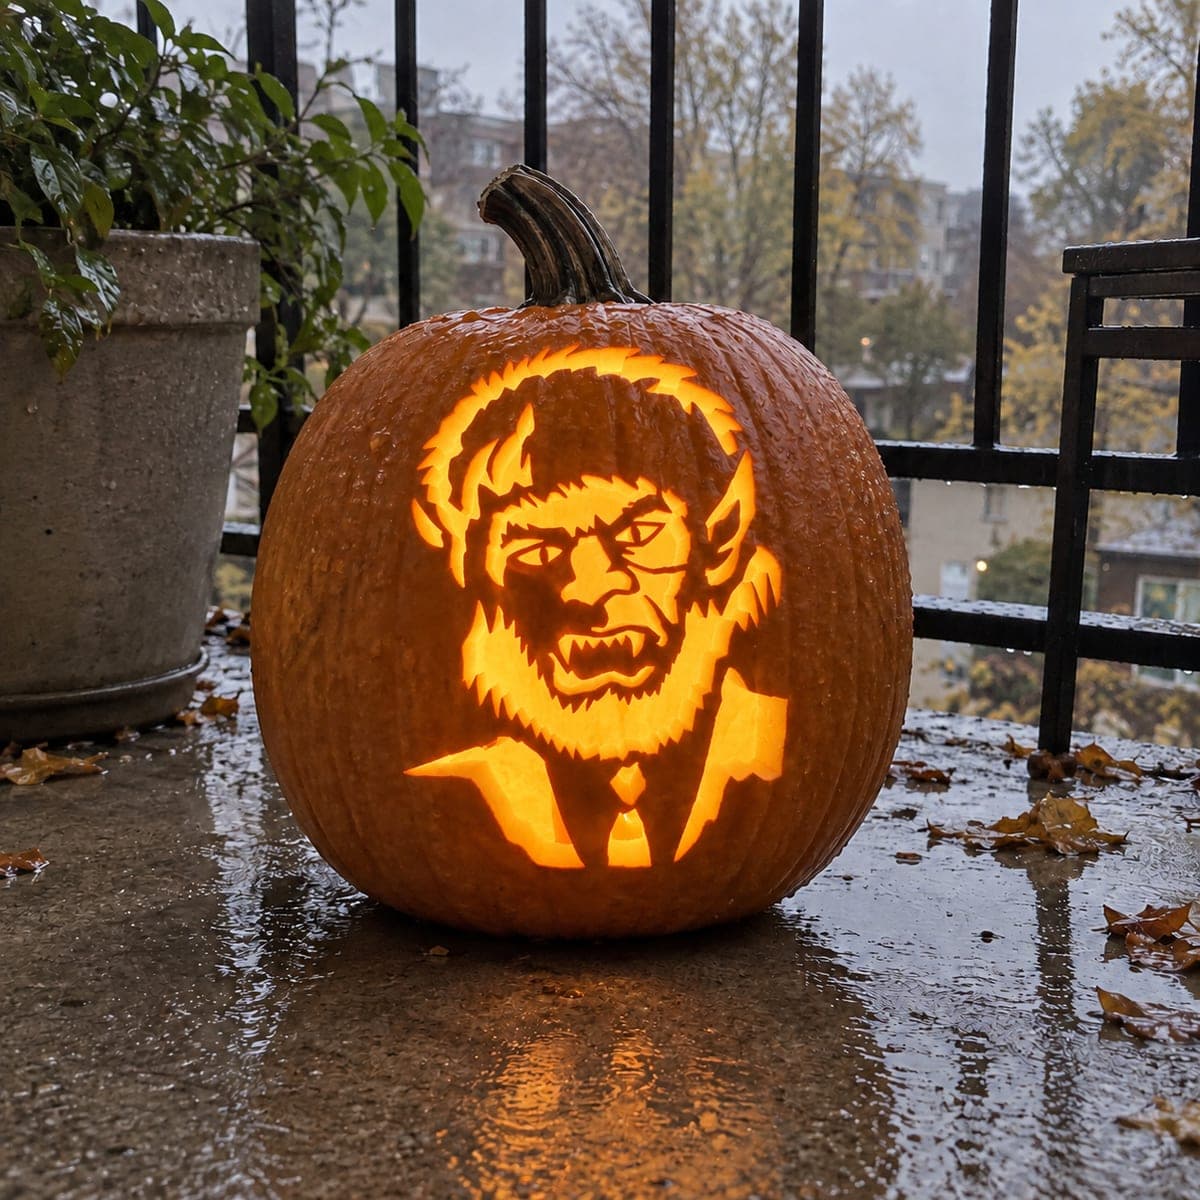
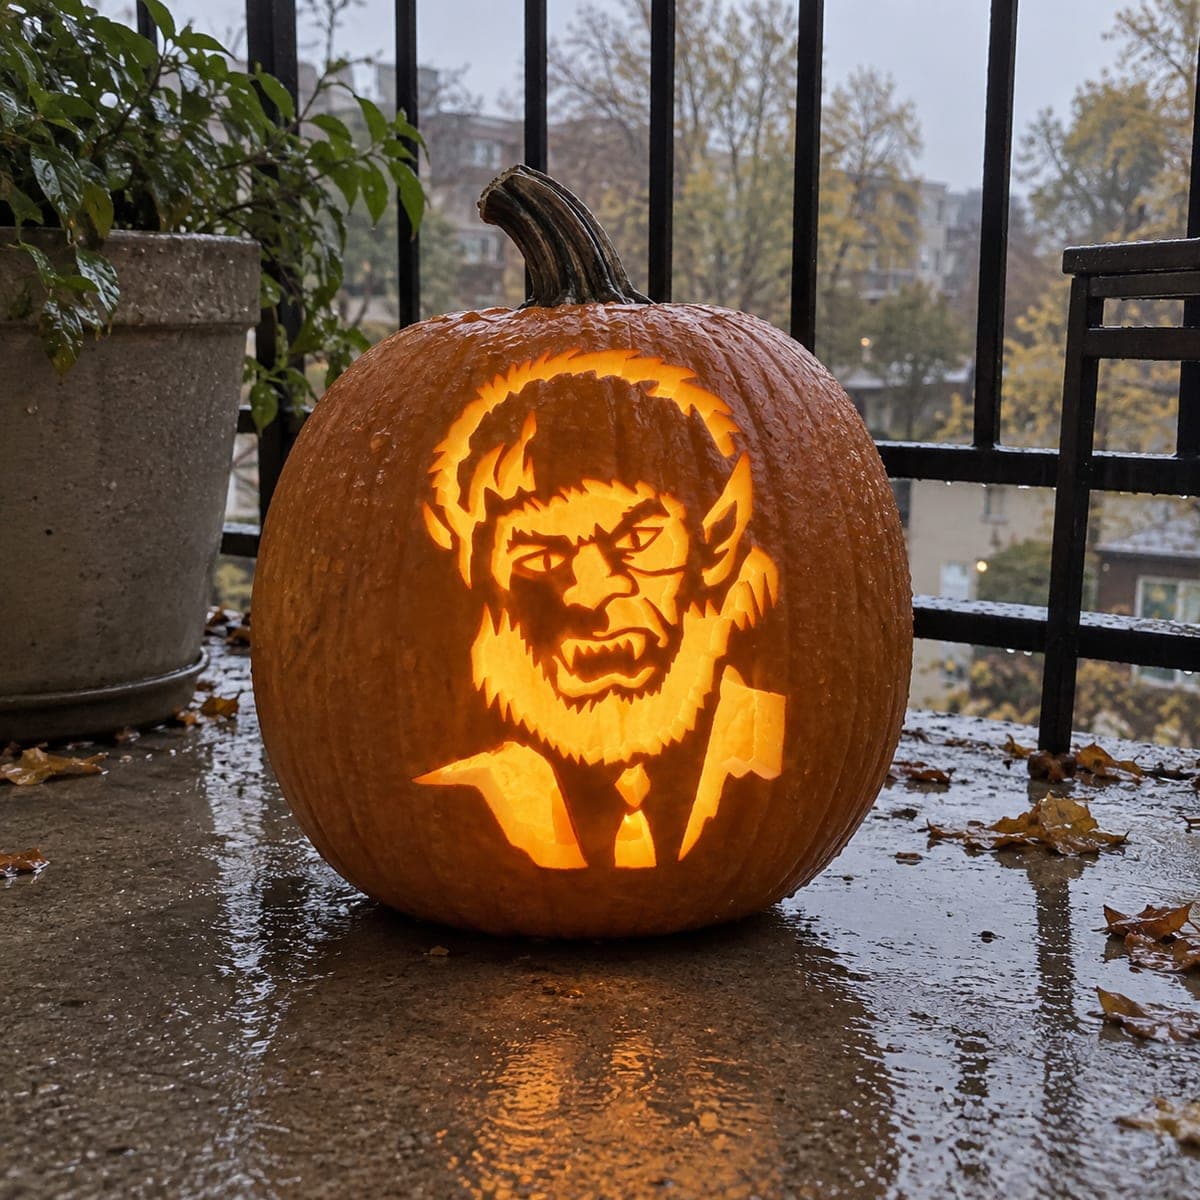
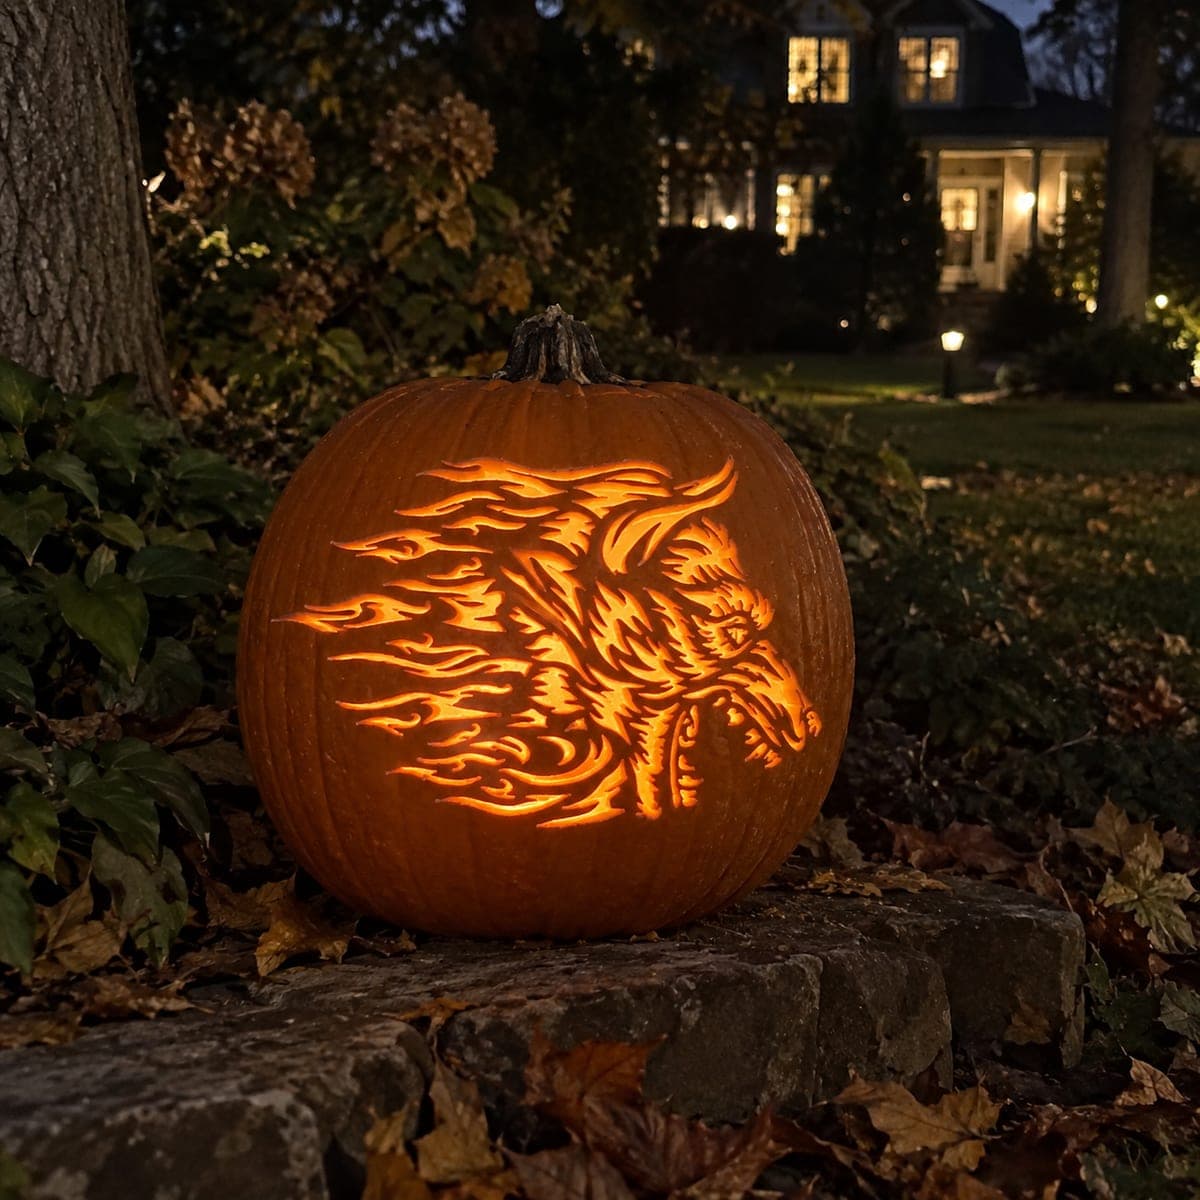
Fanged Werewolf in a Suit Pumpkin
1/2
AI
0

Fanged Werewolf in a Suit Pumpkin

A shaggy werewolf face with heavy brow, pointed ears, and bared fangs emerges above a glowing suit collar and tie in this Halloween jack-o-lantern carving. The shading technique involves peeling the skin to varying depths, with the brightest areas around the collar and lower cheeks scraped deepest and the dark fur left as raised rind. Work the face's fine details like the nose ridge and ear outlines with a narrow loop tool before scraping the broader lit areas so those edges stay crisp.

This is an AI-generated concept image: a realistic, carvable design idea rather than a photo of a finished carve. AI concepts are always labeled and sit out the leaderboard and the contest.

No ratings yet · Sign in to rate
Comments (0)

  • No comments yet — be the first.

Save without an account. Sign in to like or comment.

Our tips for carving a similar design

The core trick here is depth-based shading, where the same pumpkin reads as fur, skin, and shirt just by how deep you scrape. Leave the shaggy fur as raised rind for shadow, peel the cheeks and collar thin for a warm glow, and reserve true cutouts for the brightest fangs and tie. Map your light zones before you touch a tool so every edge lands where you want it.

Written by PumpkinCarvingIdeas.com, inspired by the image above. These are our suggestions, not instructions from the uploader. This approach to the AI concept has not been tested on a real pumpkin.

From pumpkin to porch

  1. Prep the pumpkin and pick your window

    Choose a tall, smooth-faced pumpkin so the werewolf portrait has room to breathe. Cut a lid or a back door and scoop the inside until the front wall is about one inch thick, which is thin enough to glow evenly. Scrape the interior flat behind the face so light spreads without dark spots. An adult should handle all the cutting tools from here on.

  2. Transfer the stencil

    Tape your printed werewolf pattern smoothly over the front, clipping the paper edges so it hugs the curve. Poke the outlines with a transfer tool or pushpin, following the brow, ears, fangs, collar, and tie. Pull the paper and connect the dots with a washable marker. Step back and confirm the face is centered and level before any blade goes in.

  3. Outline the fine details first

    With a narrow loop tool, define the crisp lines like the nose ridge, ear outlines, eye shapes, and the edges of each fang. Working these tight details before the broad areas keeps their borders sharp. Go shallow here, just scoring and lightly peeling to establish the boundaries. Take your time, since these small marks carry the whole expression.

  4. Build the shading in layers

    Now peel the skin to different depths to create the grayscale look. Leave the shaggy fur and dark brow as untouched or barely scratched rind so they stay in shadow. Scrape the cheeks and muzzle to a medium depth for a soft mid glow. Save the deepest scraping for the lower cheeks and the suit collar, where you want the strongest brightness without cutting all the way through.

  5. Cut the brightest openings last

    Once the shading reads well, make your true cutouts for the hottest spots, likely the bared fangs and a sliver of the tie or collar highlight. Cutting these last keeps the surrounding thin skin from tearing while you work. Keep any fang points connected to solid rind above and below so nothing snaps off. Clean each edge with a gentle bevel so light rakes through smoothly.

  6. Light it and photograph

    Drop in an LED tea light or a small battery puck, never a flame, since the thin scraped areas can scorch. View it in a dark room and touch up any zone that looks too dark by scraping a hair deeper. Wipe the face dry and rub a little petroleum jelly on cut edges to slow browning. Set it out at dusk and grab your photo while the glow is strongest.

Gather your supplies

Check things off as you get ready.

Work on a stable surface, keep your free hand out of the cutting path, and have an adult handle sharp tools.

Three levels of light

  • Leave intact

    The shaggy fur mane, heavy brow, and pointed ear tips stay as untouched rind for deep shadow.

  • Peel & shade

    The cheeks, muzzle, and suit shoulders get scraped to a medium depth for a soft mid glow.

  • Cut through

    The bared fangs and a thin highlight along the collar and tie are cut through for the brightest light.

Learn the carving basics

Before you start cutting

This is an AI concept image, so can a real pumpkin actually look like this?

You can get very close on a real pumpkin, but treat the picture as a target rather than a finished result. The shading depends on even wall thickness and patient scraping, so results vary with your pumpkin. Keep fangs and thin lines attached to solid rind so they hold up in the real world.

How do I keep the fangs from breaking?

Do not cut the fangs as free-floating shapes. Leave a bridge of rind connecting each fang tip to the lip or gum area above and below it. If a fang feels fragile, scrape it thin for glow instead of cutting all the way through.

My shading looks flat when lit. What went wrong?

Flat results usually mean the depths are too similar. Push more contrast by leaving the fur nearly full-thickness while scraping the collar much deeper. Check your work in a dark room as you go and adjust one zone at a time.

Your take belongs here, too.

Changed a detail? Made it simpler? Share a photo of your version and tell the community what worked.

Share your pumpkin

More pumpkins like this

You've reached the end · 8 pumpkins
The Patch Report

Fresh pumpkins, in your inbox.

The best new carvings, ideas worth stealing, and how-tos for carving season. Short, seasonal, and gone by November.

A short email during carving season. Unsubscribe anytime. See our privacy policy.