Halloween Pumpkin Carving Contest · Starts October 1st · $500 in prizes
← Back to ideas
@ai_concepts
Jul 26, 2026
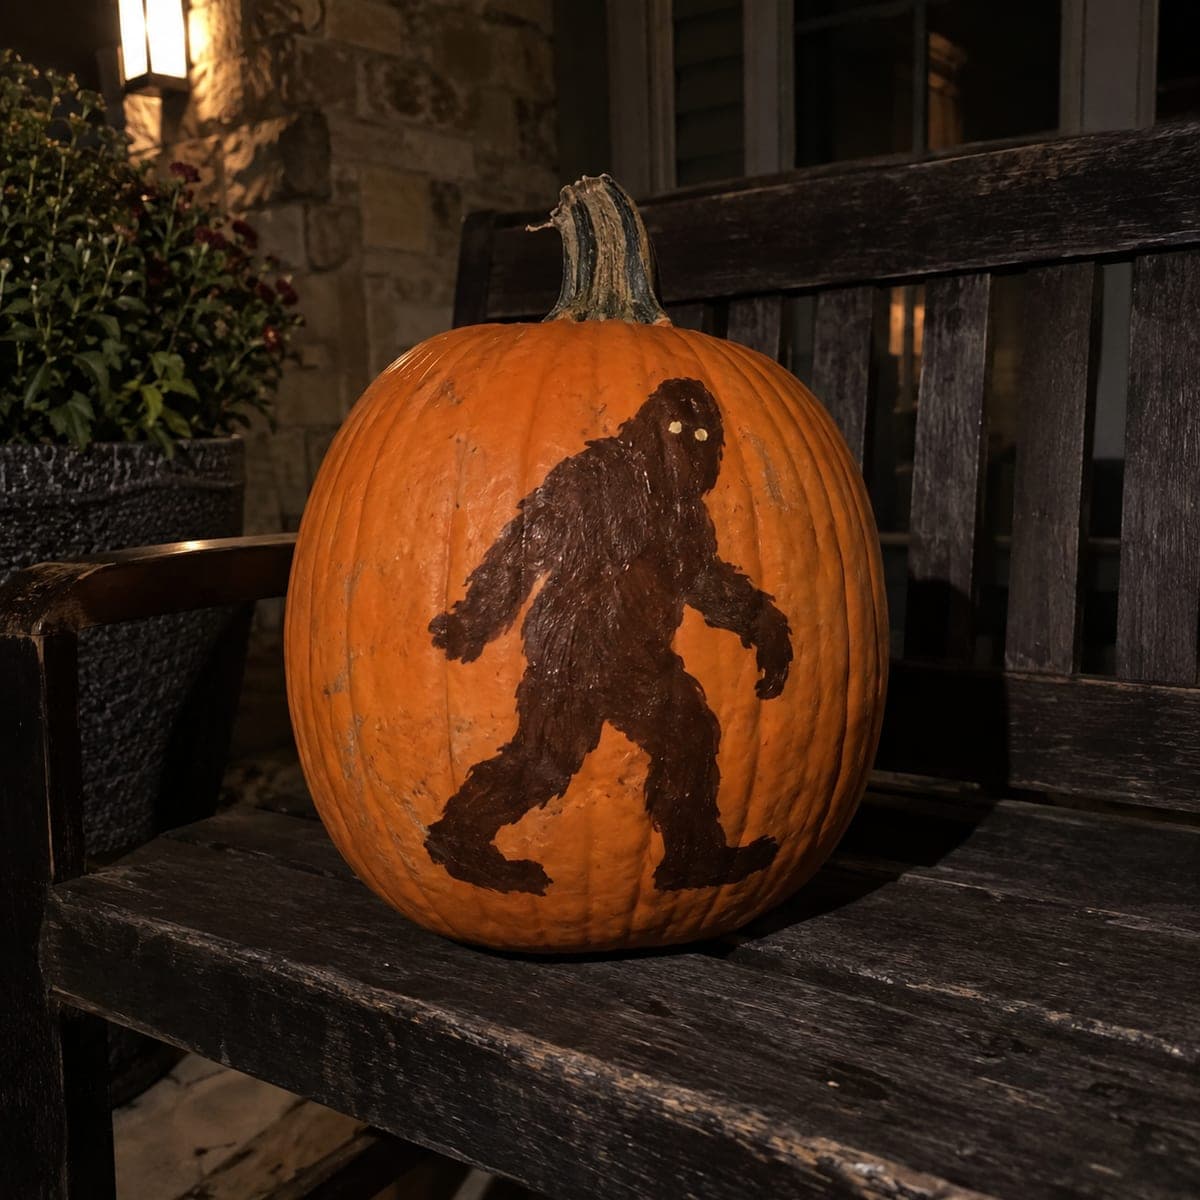
Bigfoot Walking Etched Pumpkin Carving IdeaAI
0

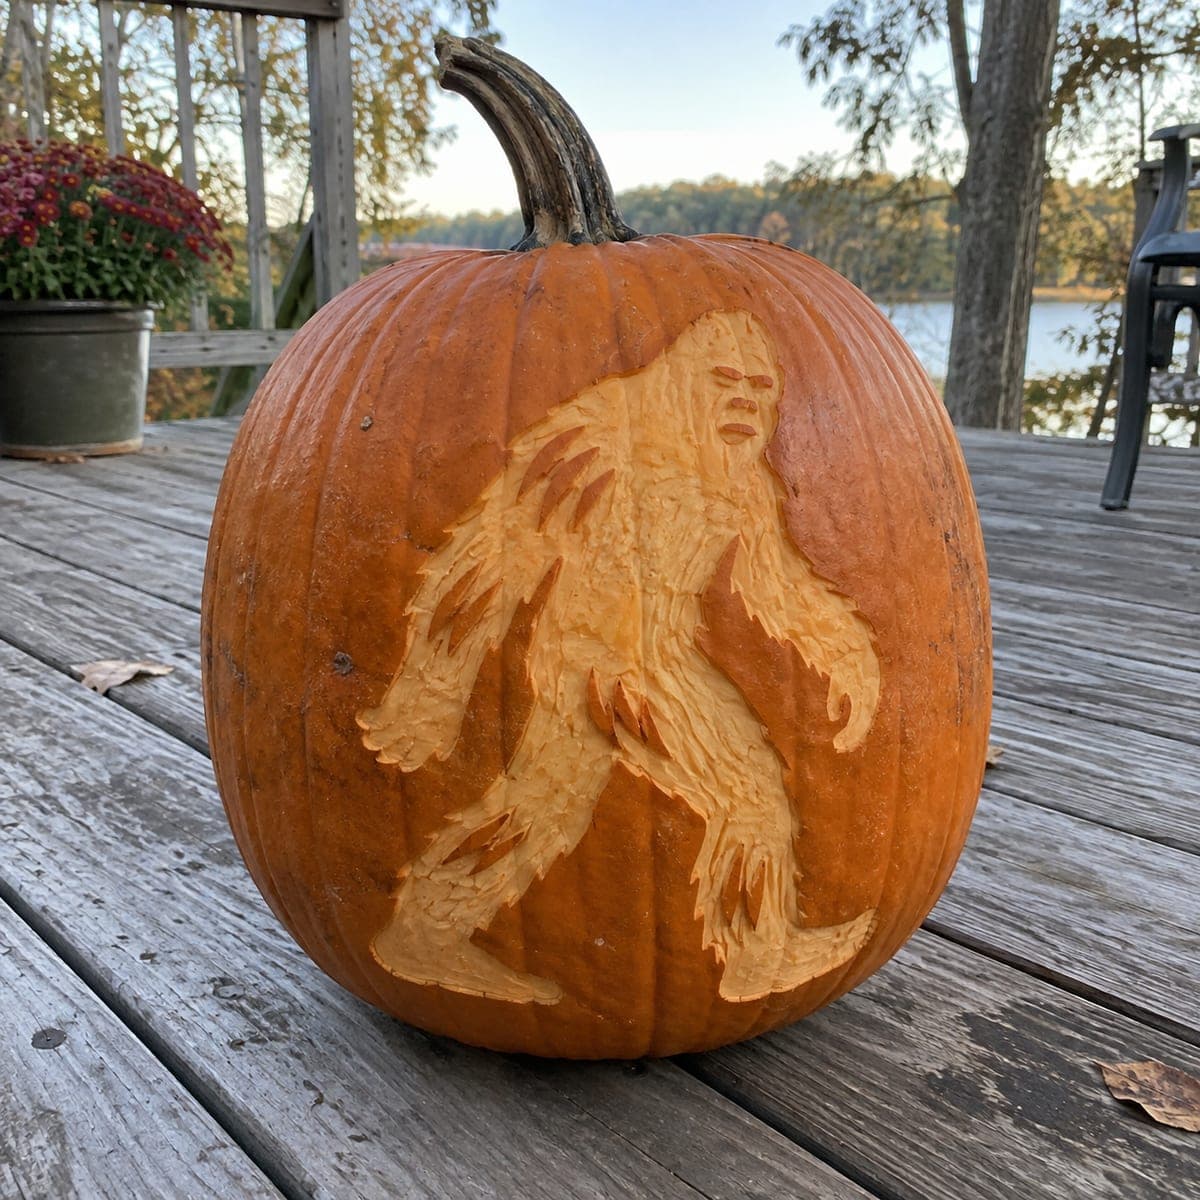
Bigfoot Walking Etched Pumpkin Carving Idea

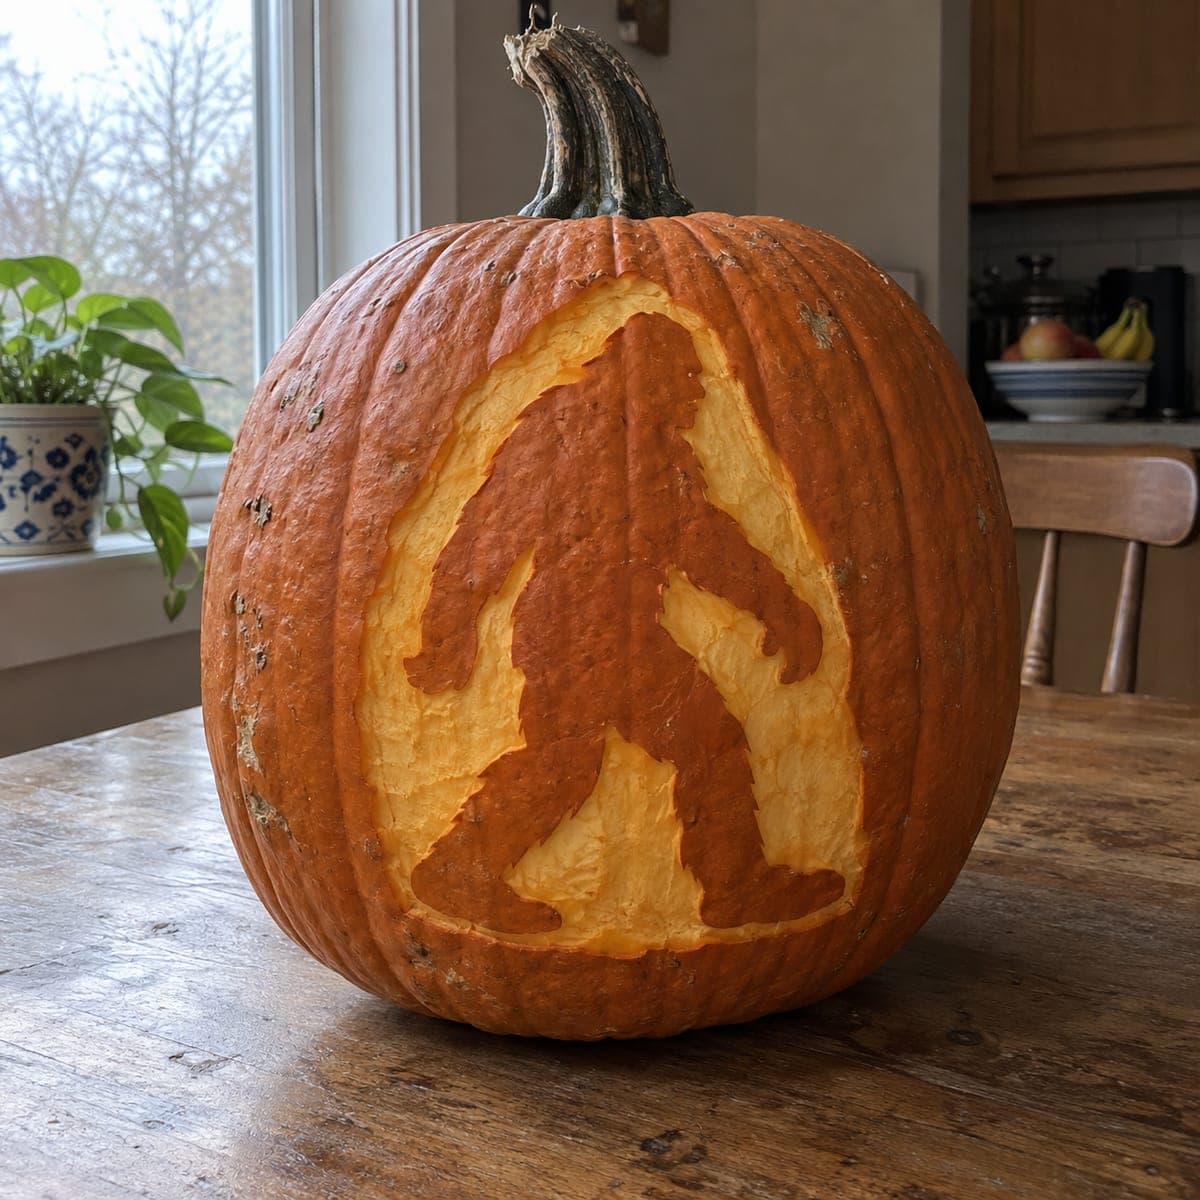
Sasquatch takes his famous mid-stride walk across this pumpkin, rendered in shaggy etched fur that mimics the classic trail-camera pose. Peel the skin inside the outline, then drag a V-gouge in short overlapping strokes to build the hairy texture, leaving darker skin in the shadows of the arms and legs. It reads great unlit in daylight, so it suits a deck rail or tailgate where a candle is not practical.

This is an AI-generated concept image: a realistic, carvable design idea rather than a photo of a finished carve. AI concepts are always labeled and sit out the leaderboard and the contest.

No ratings yet · Sign in to rate
Comments (0)

  • No comments yet — be the first.

Save without an account. Sign in to like or comment.

Our tips for carving a similar design

The whole design lives in the surface, so the trick is contrast between peeled glowing skin and short gouged fur strokes rather than any big openings. You outline the walking Bigfoot, skin the inside to a pale layer, then drag a V-gouge in overlapping flicks to fake shaggy hair. Leaving patches of dark skin in the arm and leg shadows gives the figure depth even with no light behind it.

Written by PumpkinCarvingIdeas.com, inspired by the image above. These are our suggestions, not instructions from the uploader. This approach to the AI concept has not been tested on a real pumpkin.

From pumpkin to porch

  1. Pick and prep a smooth-faced pumpkin

    Since this is an AI concept, you are recreating the look on a real pumpkin, so choose one with a broad, flat front and few ribs. Wipe it clean and dry it. Because this is an etched design, you do not need to gut it fully, but scraping the inside wall a bit on the carving side makes the skin easier to peel. Keep the stem intact for that outdoorsy trail-cam feel.

  2. Transfer the walking outline

    Tape your Bigfoot stencil flat against the front, snipping the edges so it hugs the curve. Poke the outline and the main muscle and shadow lines with a pin or dotting tool. Peel the paper and connect the dots lightly with a washable marker. Step back and check that the mid-stride pose sits centered and upright.

  3. Skin the body to a mid glow

    Use a lino or ribbon tool to shave off just the outer skin inside the whole outline, exposing the pale layer underneath. Keep the depth even and shallow so the shape reads as one solid figure. This peeled zone is your base tone. Do not cut all the way through anywhere, the effect depends on the pumpkin flesh catching light.

  4. Gouge the fur texture

    Switch to a small V-gouge and pull short, overlapping strokes following the direction hair would fall, down the arms, chest, and legs. Vary the pressure so some strokes bite deeper and brighter than others. Cluster strokes tighter along the outer edges to build that ragged, shaggy silhouette. Work in small sections and brush away shavings often to judge the contrast.

  5. Leave shadow skin for depth

    Resist etching every inch. Leave narrow bands of untouched dark skin where the near arm crosses the body and inside the leg gap, so those areas read as shadow. Deepen the face features, the brow and mouth, with slightly heavier gouging. This restraint is what makes the figure look three dimensional in plain daylight.

  6. Seal, stage, and photograph

    Rub the etched areas with a little petroleum jelly to slow browning and keep the pale tone crisp. Set the pumpkin on a deck rail or table where the profile catches side light. It shines unlit in daytime, but if you want a night glow you can hollow it later and add a battery LED, never a candle. Snap your photo early before the etched skin darkens.

Gather your supplies

Check things off as you get ready.

Work on a stable surface, keep your free hand out of the cutting path, and have an adult handle sharp tools.

Three levels of light

  • Leave intact

    Untouched dark skin along the crossing arm, the leg gap, and shadow edges of the body

  • Peel & shade

    The whole Bigfoot shape skinned to a pale mid-orange glow as the base tone

  • Cut through

    Deeper V-gouge fur strokes and facial features that read brightest against the peeled base

Learn the carving basics

Before you start cutting

Do I need to cut all the way through the pumpkin?

No, this is an etched design, so almost everything stays on the surface. You peel the skin and gouge texture without breaking through the wall. If you want night lighting, hollow the pumpkin and add a battery LED, but the daytime look needs no openings at all.

How do I keep the fur strokes from looking messy?

Work in the direction the hair would naturally fall and keep strokes short and overlapping rather than long and straight. Do one small section at a time and brush away shavings to check your contrast. Consistent stroke direction is what turns random gouges into believable shaggy fur.

Will the etched design last if I display it outside?

Etched pumpkins brown faster than cut ones because the exposed flesh dries out. Rub the peeled areas with petroleum jelly and keep it out of direct afternoon sun to slow it down. Plan to display and photograph it within a day or two for the crispest contrast.

Your take belongs here, too.

Changed a detail? Made it simpler? Share a photo of your version and tell the community what worked.

Share your pumpkin

More pumpkins like this

You've reached the end · 8 pumpkins
The Patch Report

Fresh pumpkins, in your inbox.

The best new carvings, ideas worth stealing, and how-tos for carving season. Short, seasonal, and gone by November.

A short email during carving season. Unsubscribe anytime. See our privacy policy.