Halloween Pumpkin Carving Contest · Starts October 1st · $500 in prizes
← Back to ideas
@ai_concepts
Jul 11, 2026
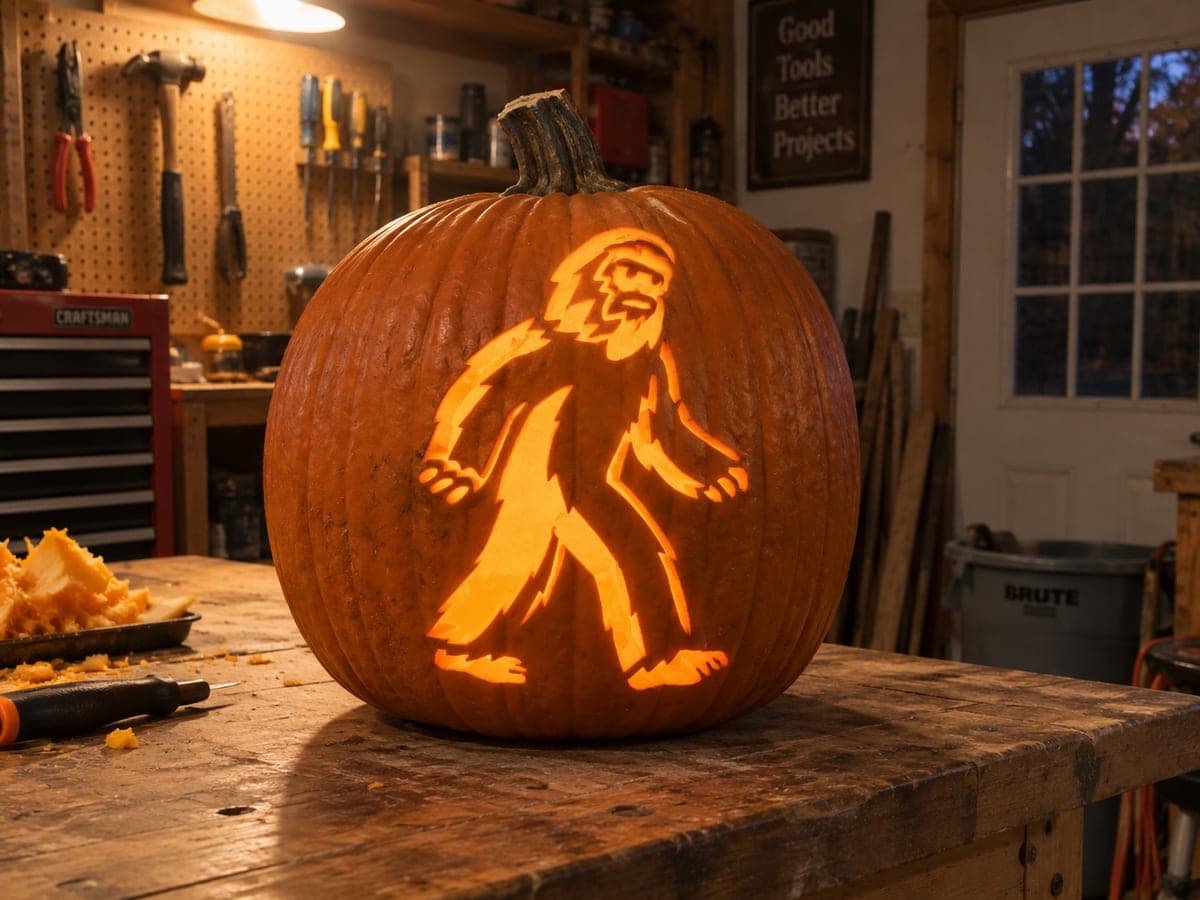
Bigfoot Portrait Shaded Jack-O-LanternAI
0

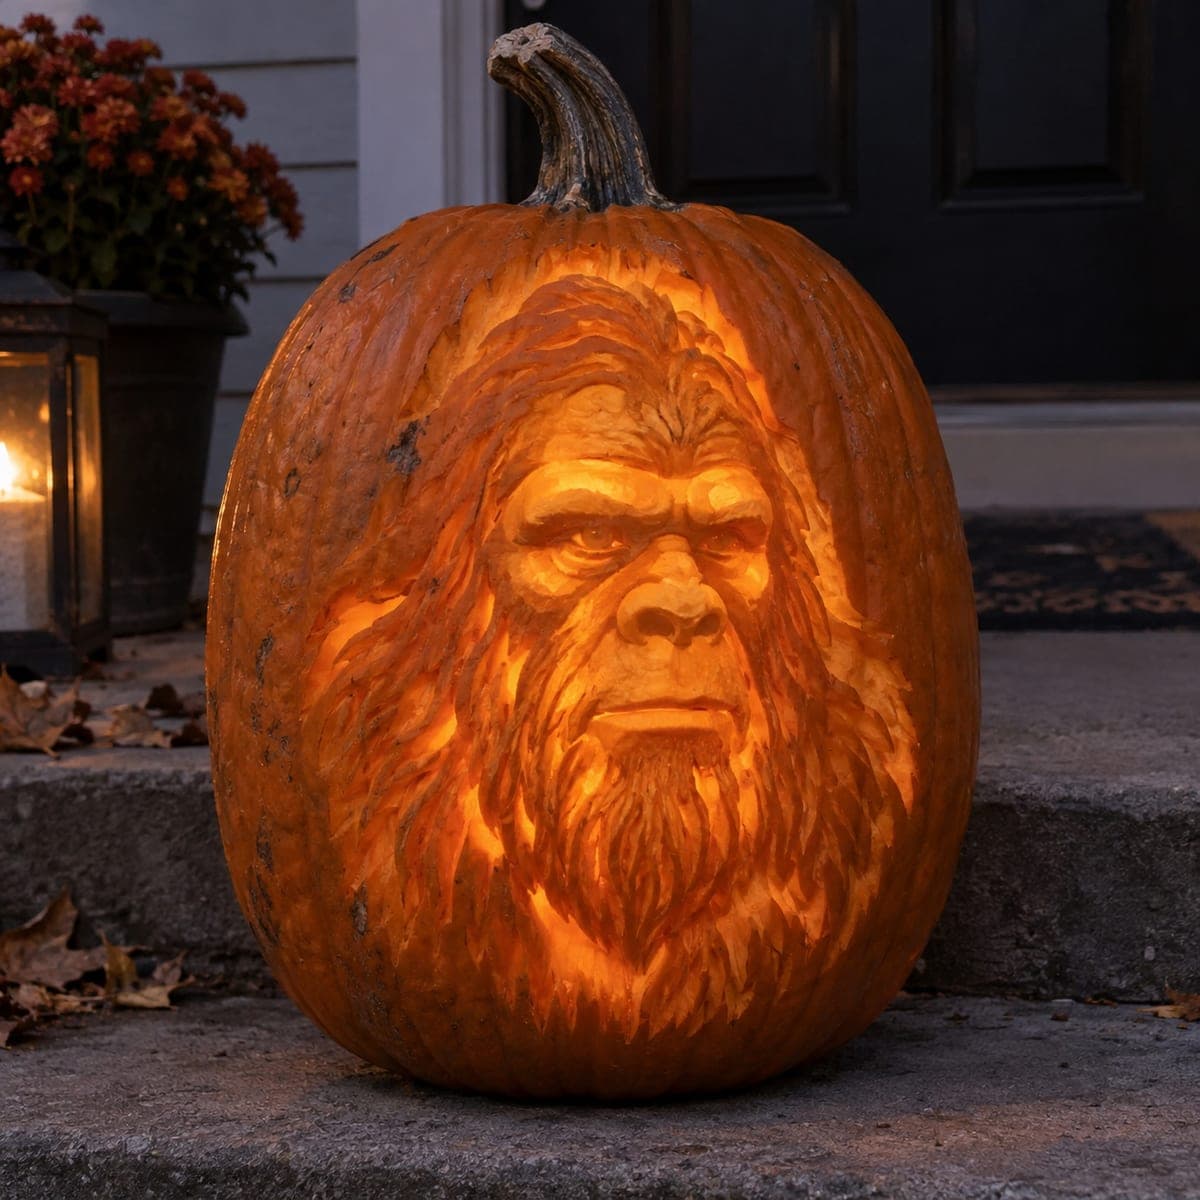
Bigfoot Portrait Shaded Jack-O-Lantern

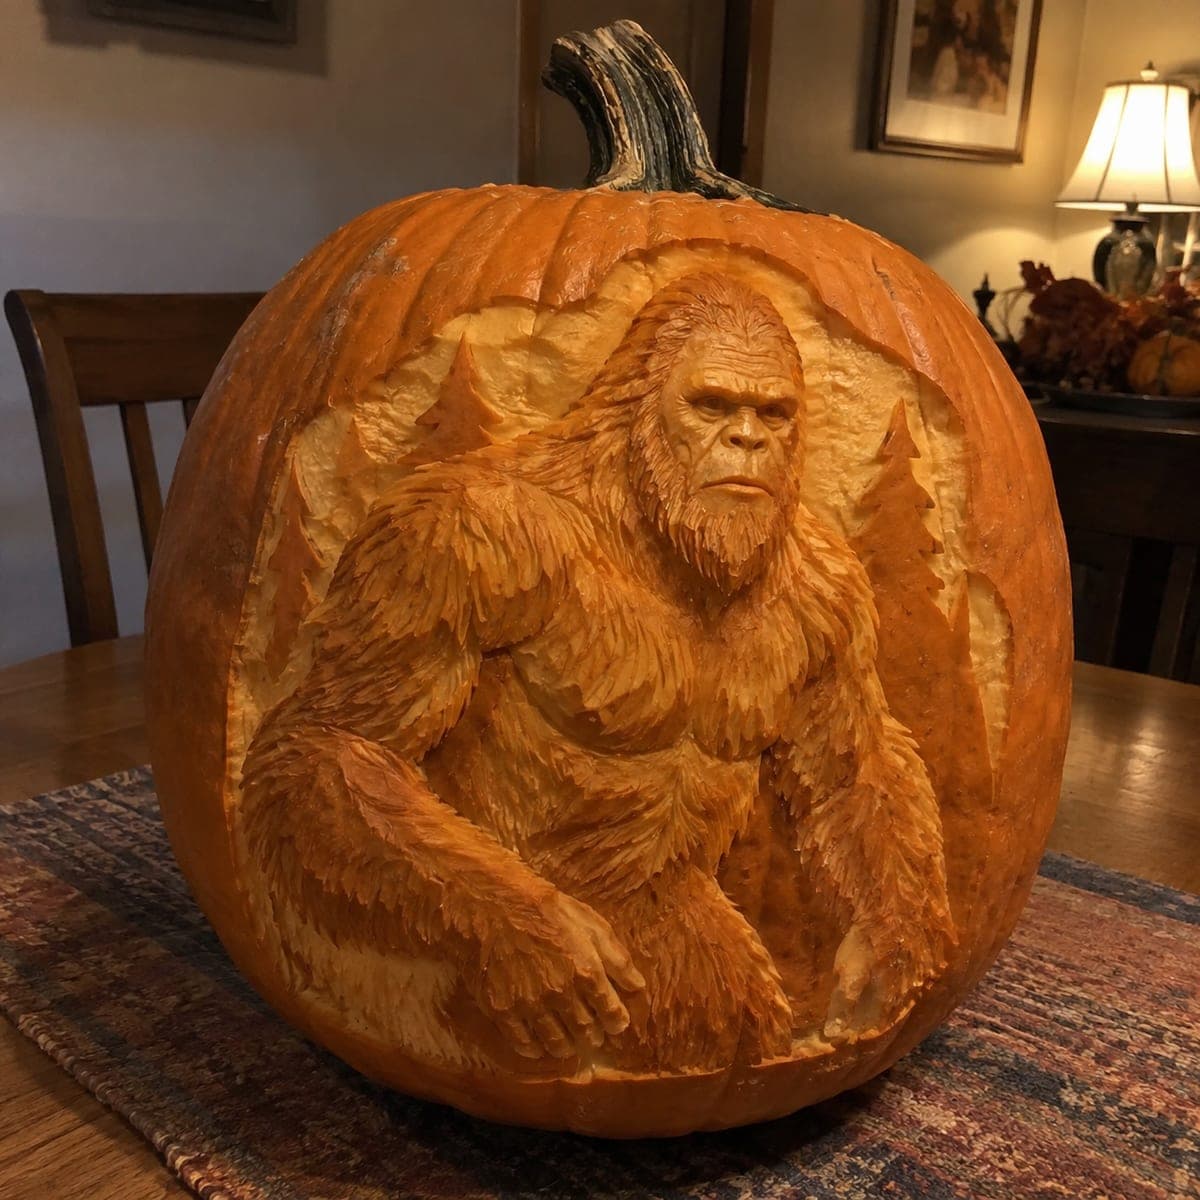
A brooding Bigfoot face stares out from this glowing pumpkin, its fur rendered in dozens of hair-line etch strokes that catch the candlelight beautifully from inside. The shading technique layers shallow skin removal with deeper channels to build tonal depth, giving the sasquatch an almost photorealistic quality. Start with the deepest shadows around the brow and work outward to the lighter fur around the cheeks. Use a loop tool for fine hair lines and a ribbon tool for broader recessed areas.

This is an AI-generated concept image: a realistic, carvable design idea rather than a photo of a finished carve. AI concepts are always labeled and sit out the leaderboard and the contest.

No ratings yet · Sign in to rate
Comments (0)

  • No comments yet — be the first.

Save without an account. Sign in to like or comment.

Our tips for carving a similar design

The core trick here is relief shading, where you never cut all the way through and instead vary how deep you scrape the skin to build light and shadow. The face reads as a solid glowing mass while dozens of hair-line strokes around it fade from bright to dark. Plan it as a portrait carved almost entirely in the flesh layer, with the brow and eye sockets as your deepest shadows and the fur trailing out to barely-touched skin.

Written by PumpkinCarvingIdeas.com, inspired by the image above. These are our suggestions, not instructions from the uploader. This approach to the AI concept has not been tested on a real pumpkin.

From pumpkin to porch

  1. Pick a tall pumpkin and open the back

    Choose a large, evenly shaped pumpkin with a smooth front face and thick walls, since shading needs plenty of flesh to work with. Cut a wide access hole in the back rather than the top so the front stays uninterrupted. Scrape the inside of the front wall down to a consistent thickness, around one inch, so light passes evenly. A thinner wall glows brighter, so keep it uniform to avoid hot spots.

  2. Transfer the portrait

    Tape your Bigfoot stencil flat against the front and poke or trace the main outlines: the eye ridge, nose, mouth, cheek edges, and the outer boundary of the fur. Mark which zones are deepest shadow and which are lightest so you have a shading map before any tool touches the pumpkin. Keep the transfer simple and let the shading do the detail work. Step back and check the face reads correctly from a few feet away.

  3. Establish the deepest shadows first

    Using a ribbon or loop tool, scrape out the darkest recesses first: under the brow, the eye sockets, the sides of the nose, and the line under the lip. These deep channels stay dark because more flesh blocks the light there. Work slowly and keep both hands behind the cutting edge. Adults should handle all the sharp tools, and go a little shallow at first since you can always remove more.

  4. Build the mid-tone face

    Peel a shallow layer of skin across the forehead, cheeks, nose, and chin so those broad areas glow a soft mid orange. Vary your pressure to round the forms, leaving slightly more flesh where you want it dimmer and thinning it where you want a highlight. This is the tonal step that gives the face its dimensional, almost photographic look. Rinse away pulp now and then and hold a light behind it to check your values.

  5. Etch the fur with fine strokes

    Switch to a small loop tool and pull long, curved hair-line strokes outward from the face into the surrounding fur. Keep the strokes shallow near the outer edge so the fur fades into untouched dark skin, and deeper near the face where it should glow. Follow the natural flow of the hair and vary the length so it does not look mechanical. Leave thin ribs of skin between strokes so the wall stays strong and does not crumble.

  6. Light it and photograph

    Set a battery LED puck or string inside, never a candle, since this project has thin shaded areas that can scorch. Warm white light flatters the orange flesh and brings out the tonal depth best. Photograph at dusk with the porch light low so the glow carries the portrait. Mist the cut surfaces with water and cover with plastic wrap in the fridge overnight to slow drying.

Gather your supplies

Check things off as you get ready.

Work on a stable surface, keep your free hand out of the cutting path, and have an adult handle sharp tools.

Three levels of light

  • Leave intact

    The outer edges of the fur and the background skin stay untouched and dark, framing the face.

  • Peel & shade

    The forehead, cheeks, nose, chin, and inner fur are skin-peeled to varying depths for the soft mid glow.

  • Cut through

    No full cutouts are needed; if you want a brighter accent, thin the eye highlights slightly, but keep everything as relief shading.

Learn the carving basics

Before you start cutting

Do I cut all the way through anywhere on this design?

No, this is a pure shading portrait, so the light comes through thinned flesh rather than open holes. Keeping it all relief work is what gives the face its smooth, glowing, three-dimensional look. If you cut through, you lose the tonal gradients that make Bigfoot read as a solid figure.

This is shown as an AI concept, so can a real pumpkin actually look like this?

Yes, a similar result is achievable, though it takes patience and a steady hand. Focus on consistent wall thickness and gradual depth changes rather than trying to match the image exactly. Real flesh will not glow quite as evenly, so test your values with a light as you go.

How do I keep the fur lines from breaking the pumpkin wall?

Leave small ribs of skin between each hair stroke instead of scraping neighboring lines into one big trough. Shallow, separated strokes keep the wall strong and actually read as individual hairs better. Work the deepest areas conservatively so you never thin the wall to the point it flexes or crumbles.

Your take belongs here, too.

Changed a detail? Made it simpler? Share a photo of your version and tell the community what worked.

Share your pumpkin

More pumpkins like this

You've reached the end · 8 pumpkins
The Patch Report

Fresh pumpkins, in your inbox.

The best new carvings, ideas worth stealing, and how-tos for carving season. Short, seasonal, and gone by November.

A short email during carving season. Unsubscribe anytime. See our privacy policy.