Halloween Pumpkin Carving Contest · Starts October 1st · $500 in prizes
← Back to ideas
@ai_concepts
Aug 23, 2026
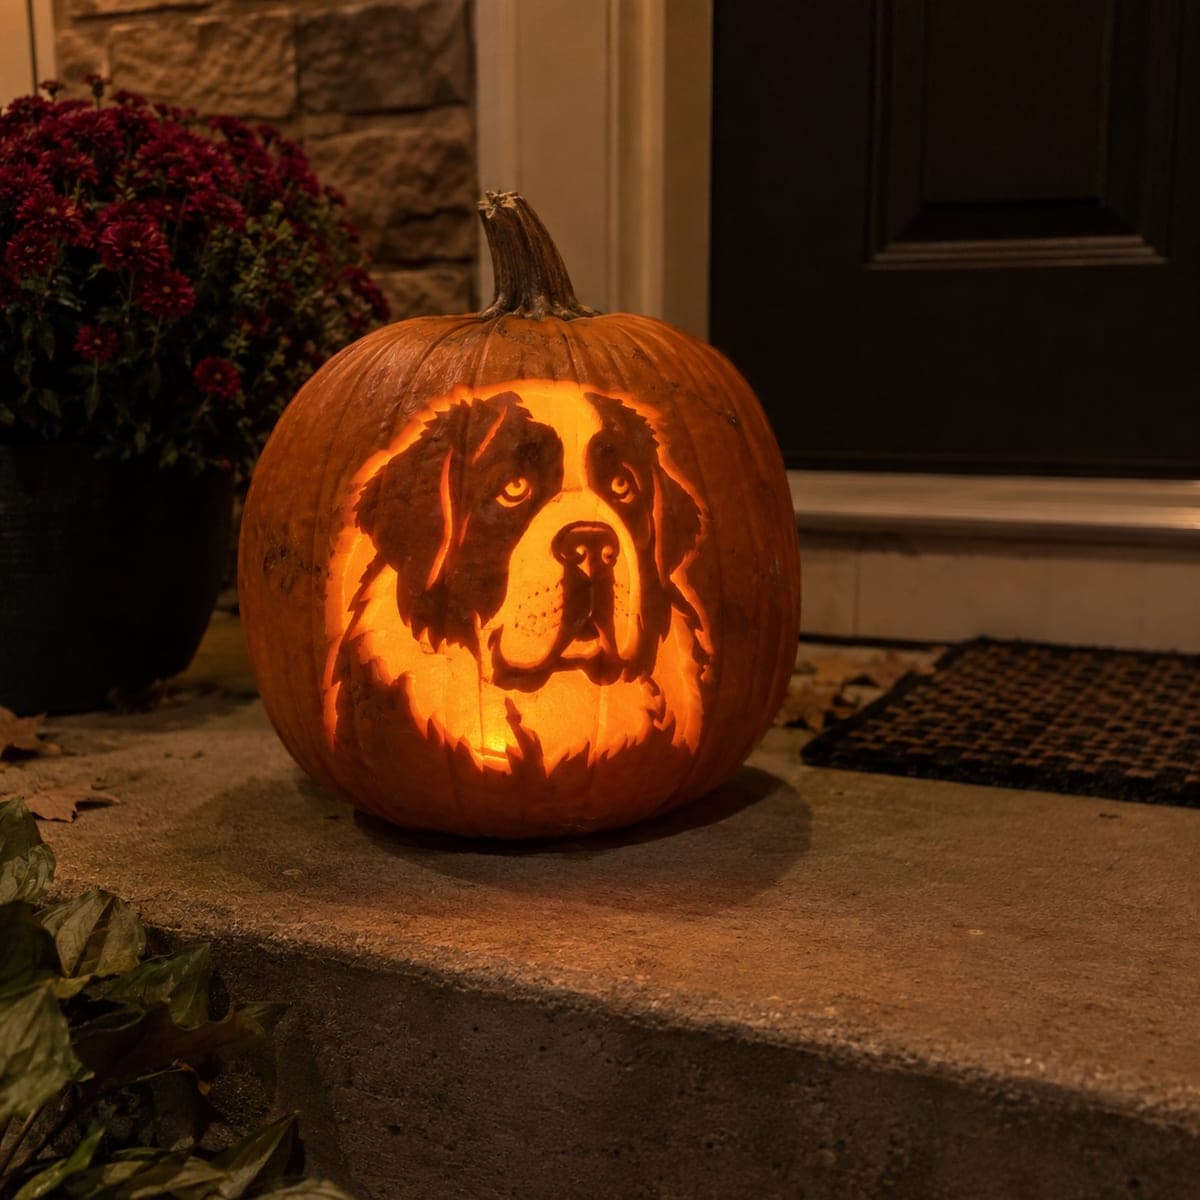
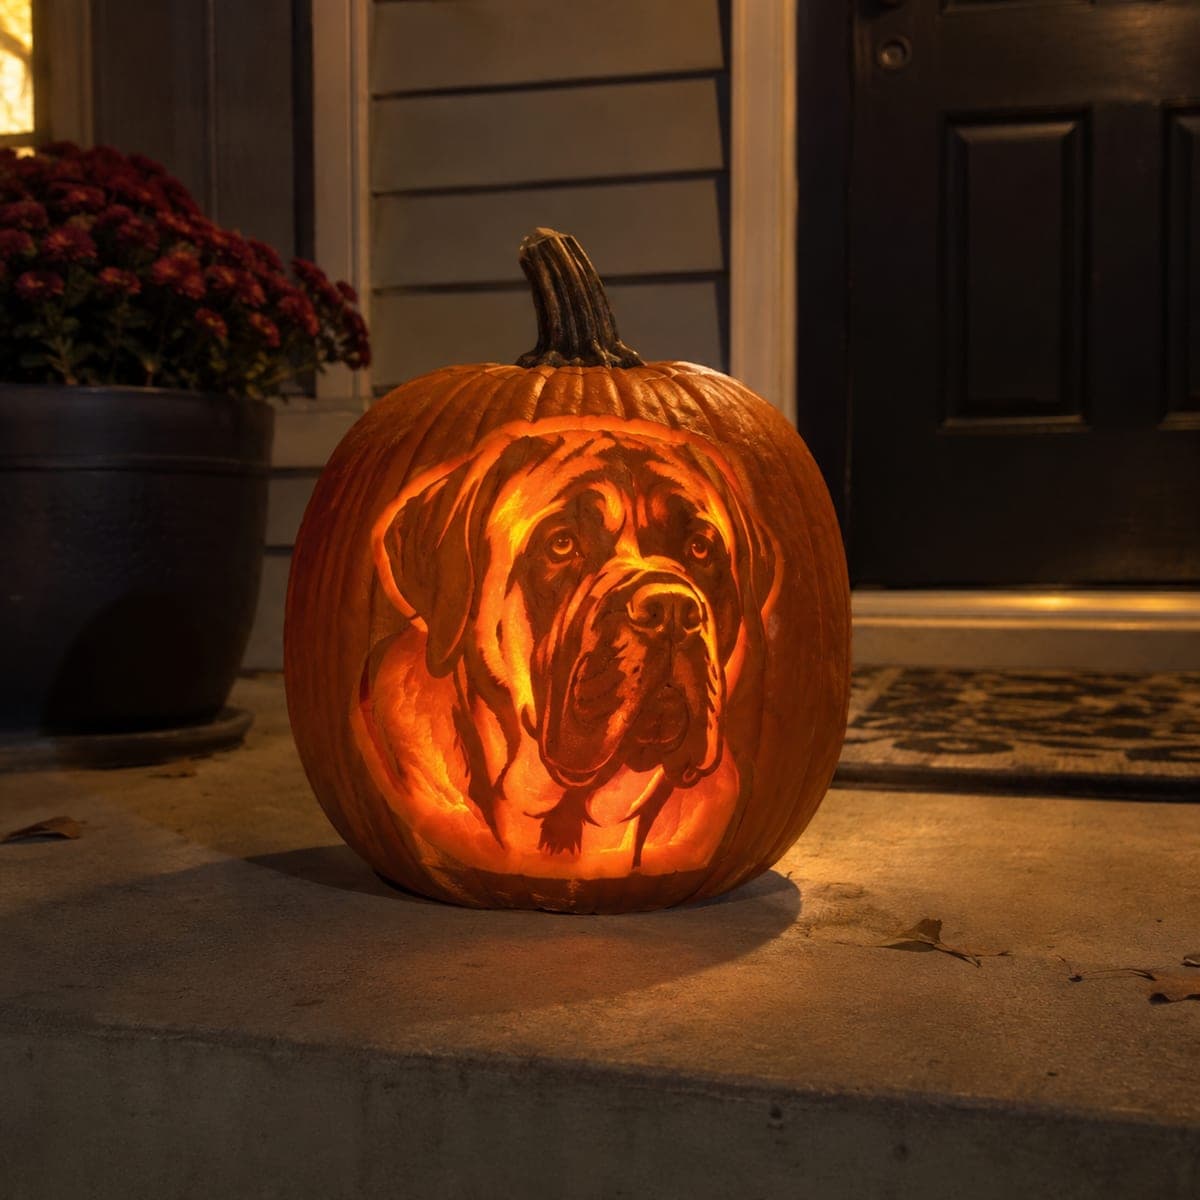
Saint Bernard Dog Portrait Carved Pumpkin Front PorchAI
0

Saint Bernard Dog Portrait Carved Pumpkin Front Porch

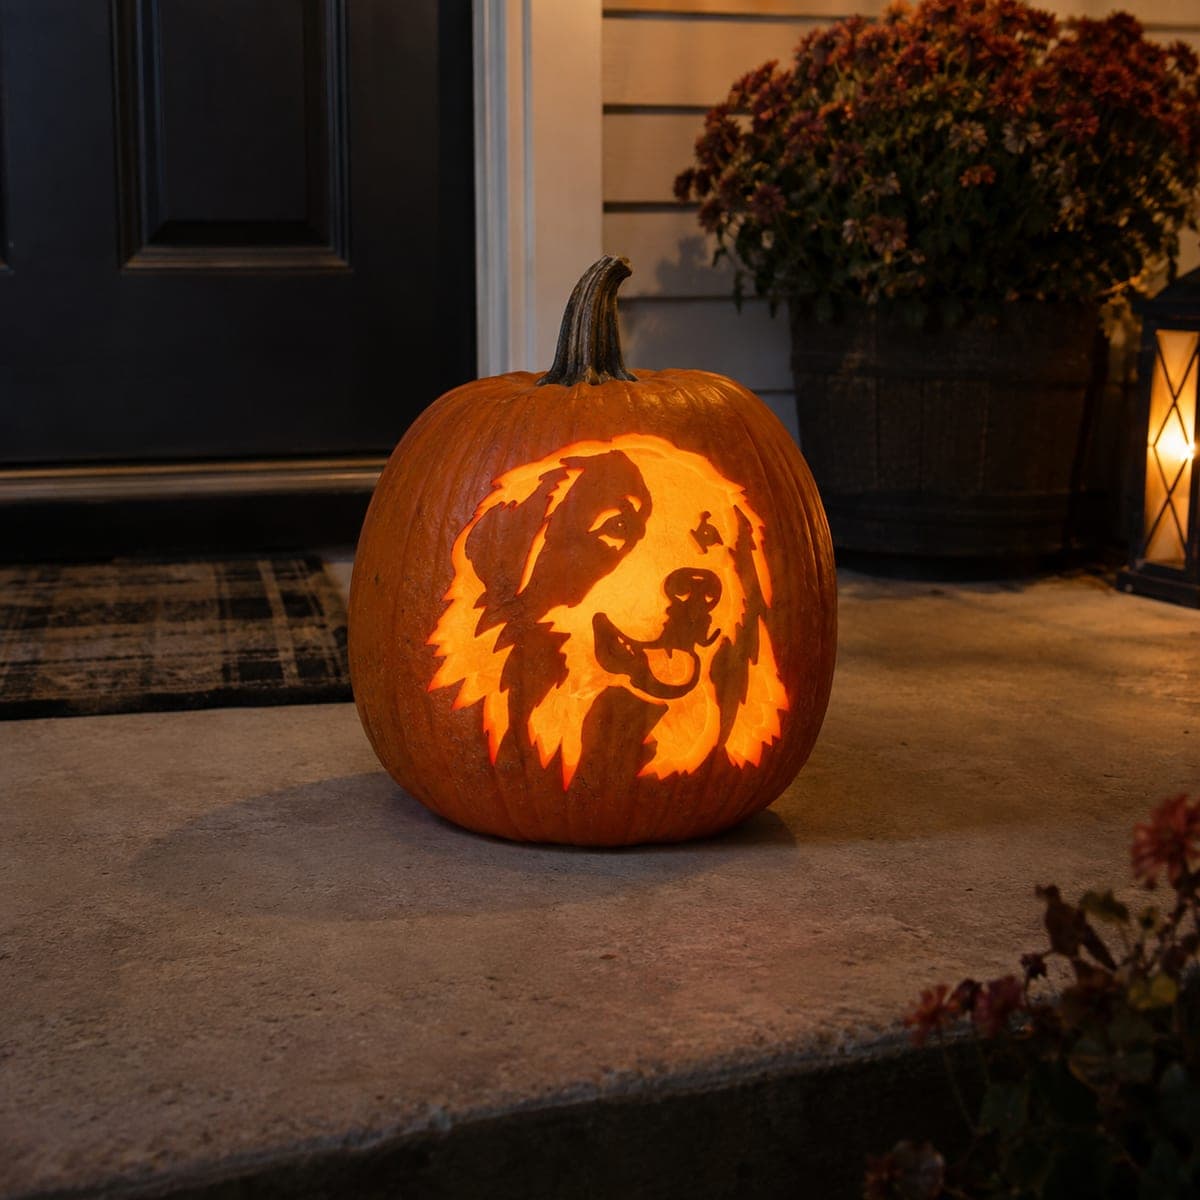
A Saint Bernard's broad, expressive face fills the pumpkin with layered shading that captures the breed's soulful eyes and signature tri-color markings in warm amber tones. The contrast between the dark carved areas and the thinner glowing patches makes the portrait feel three-dimensional when backlit. Use a wide flat gouge for the large dark areas around the ears, and switch to a fine V-tool for the fur texture and the white blaze on the muzzle. Dog breed pumpkin carving ideas like this one make a meaningful tribute for Saint Bernard owners to display on the porch.

This is an AI-generated concept image: a realistic, carvable design idea rather than a photo of a finished carve. AI concepts are always labeled and sit out the leaderboard and the contest.
No ratings yet · Sign in to rate

Comments (0)

  • No comments yet — be the first.

Save without an account. Sign in to like or comment.

Our tips for carving a similar design

The core trick here is shading, not cutting. Almost the whole dog is built from peeled skin at different depths, so you leave the darkest markings as untouched skin and thin out the glowing patches of fur and the white blaze. Only a few small openings, like the eyes, get cut all the way through for a bright spark of life.

Written by PumpkinCarvingIdeas.com, inspired by the image above. These are our suggestions, not instructions from the uploader. This approach to the AI concept has not been tested on a real pumpkin.

From pumpkin to porch

  1. Prep the pumpkin and pick a bright face

    Choose a large pumpkin with a wide, fairly flat front to hold the broad Saint Bernard face. Cut a lid from the bottom or back instead of the top so the stem stays intact and the pumpkin sits flat. Scrape the inside wall behind the design down to about one inch thick so light passes through the peeled areas. A thinner wall makes shading glow far more evenly.

  2. Transfer the portrait

    Tape your printed stencil smoothly over the front, easing out wrinkles with small cuts at the edges. Use a poking tool or pin to dot along every line, marking the dark markings, the fur edges, the eyes, and the white blaze. Go slow around the eyes and nose since those small shapes carry the whole expression. Peel the paper and connect the dots lightly with a marker if it helps you read the map.

  3. Shade the large dark areas first

    Decide which areas stay as untouched skin, mainly the dark ears and the patches around the eyes. Everything else gets some level of peeling. Use a wide flat gouge to skin the medium fur tones, removing just the orange skin so the flesh glows dim amber. Keep your non-cutting hand behind the blade and take shallow passes so you can deepen a spot later.

  4. Build fur texture with a V-tool

    Switch to a fine V-tool to carve directional fur strokes, following the way the coat falls on a real Saint Bernard. Go deeper on the white blaze down the muzzle and the light chest fur so those areas glow brightest without fully cutting through. Vary your pressure to fade from dark to light and create that three-dimensional layered look. Step back often and check the balance from a few feet away.

  5. Cut the eyes and finishing details last

    Save the true cutouts for the end, when the pumpkin is most fragile. Cut small openings only where you want the sharpest light, such as a glint in each eye and the nostrils, keeping thin bridges of skin between close shapes so nothing sags. Cut big openings last and support the wall with your fingers as you go. Clean up rough edges with a paring knife for a crisp portrait.

  6. Light it and photograph on the porch

    Set a battery LED light inside, ideally two small ones for even coverage across the wide face. Warm white or amber LEDs match the soulful tone better than a cold blue light. Place the pumpkin on the porch at dusk and check that the glowing fur reads clearly from the sidewalk. Snap your photo in low light so the shading contrast shows its full depth.

Gather your supplies

Check things off as you get ready.

Work on a stable surface, keep your free hand out of the cutting path, and have an adult handle sharp tools.

Three levels of light

  • Leave intact

    The dark ears and the shadowed patches around the eyes stay as untouched skin for the tri-color markings.

  • Peel & shade

    The bulk of the face, the fur, and the white muzzle blaze are skin-peeled at varying depths for a soft amber glow.

  • Cut through

    Only the eye glints and nostrils are cut through for the brightest sparks of light.

Learn the carving basics

Before you start cutting

How do I keep the dog looking soulful and not flat?

The expression lives in the eyes and the shading gradient around them. Leave the eye patches as darker untouched or lightly peeled skin, then cut just a tiny bright opening for the glint. Keep the transitions between light and dark gradual rather than sharp so the face reads as rounded fur.

The design is mostly shading. Do I even need to cut all the way through?

Barely. This portrait is built almost entirely from peeled skin at different depths, which is what gives it the warm layered look. Only a few small cutouts, like the eyes and nostrils, go fully through the wall. That means thinning the inner wall matters more than making big cuts.

This is shown as a concept image. Can a real pumpkin glow this evenly?

Yes, with care. The even amber glow in the concept comes from a consistently thin inner wall and two LED lights spreading the glow across the wide face. Scrape the flesh behind the design down evenly and test the light before you finish. Real pumpkins can absolutely match this with patient shading.

Your take belongs here, too.

Changed a detail? Made it simpler? Share a photo of your version and tell the community what worked.

Share your pumpkin

More pumpkins like this

You've reached the end · 8 pumpkins
The Patch Report

Fresh pumpkins, in your inbox.

The best new carvings, ideas worth stealing, and how-tos for carving season. Short, seasonal, and gone by November.

A short email during carving season. Unsubscribe anytime. See our privacy policy.