Halloween Pumpkin Carving Contest Β· Starts October 1st Β· $500 in prizes
← Back to ideas
@ai_concepts
Aug 5, 2026
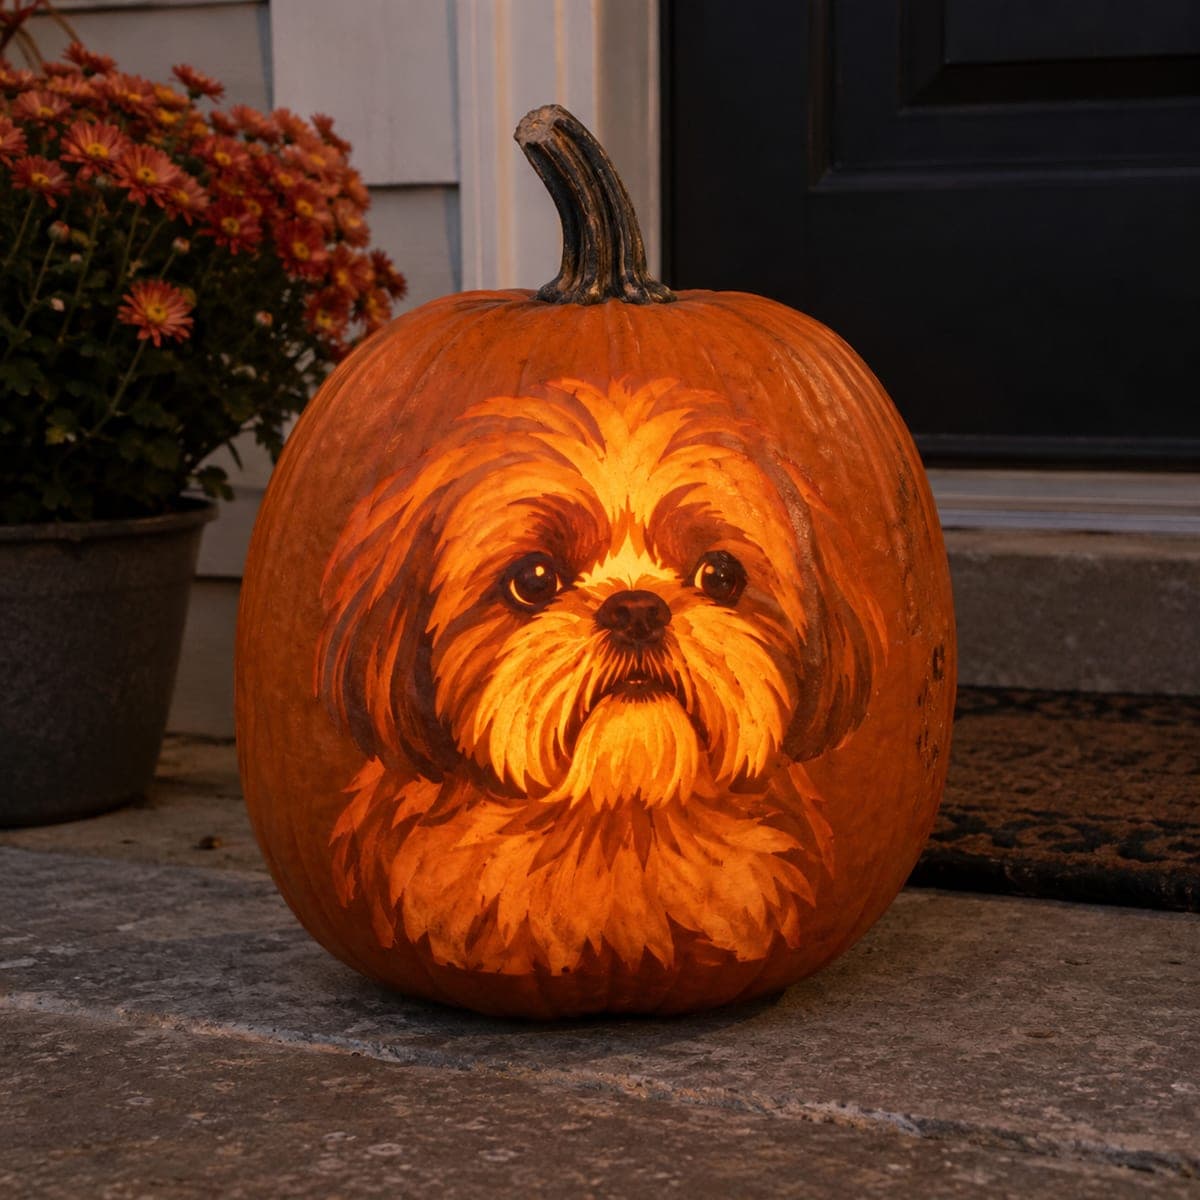
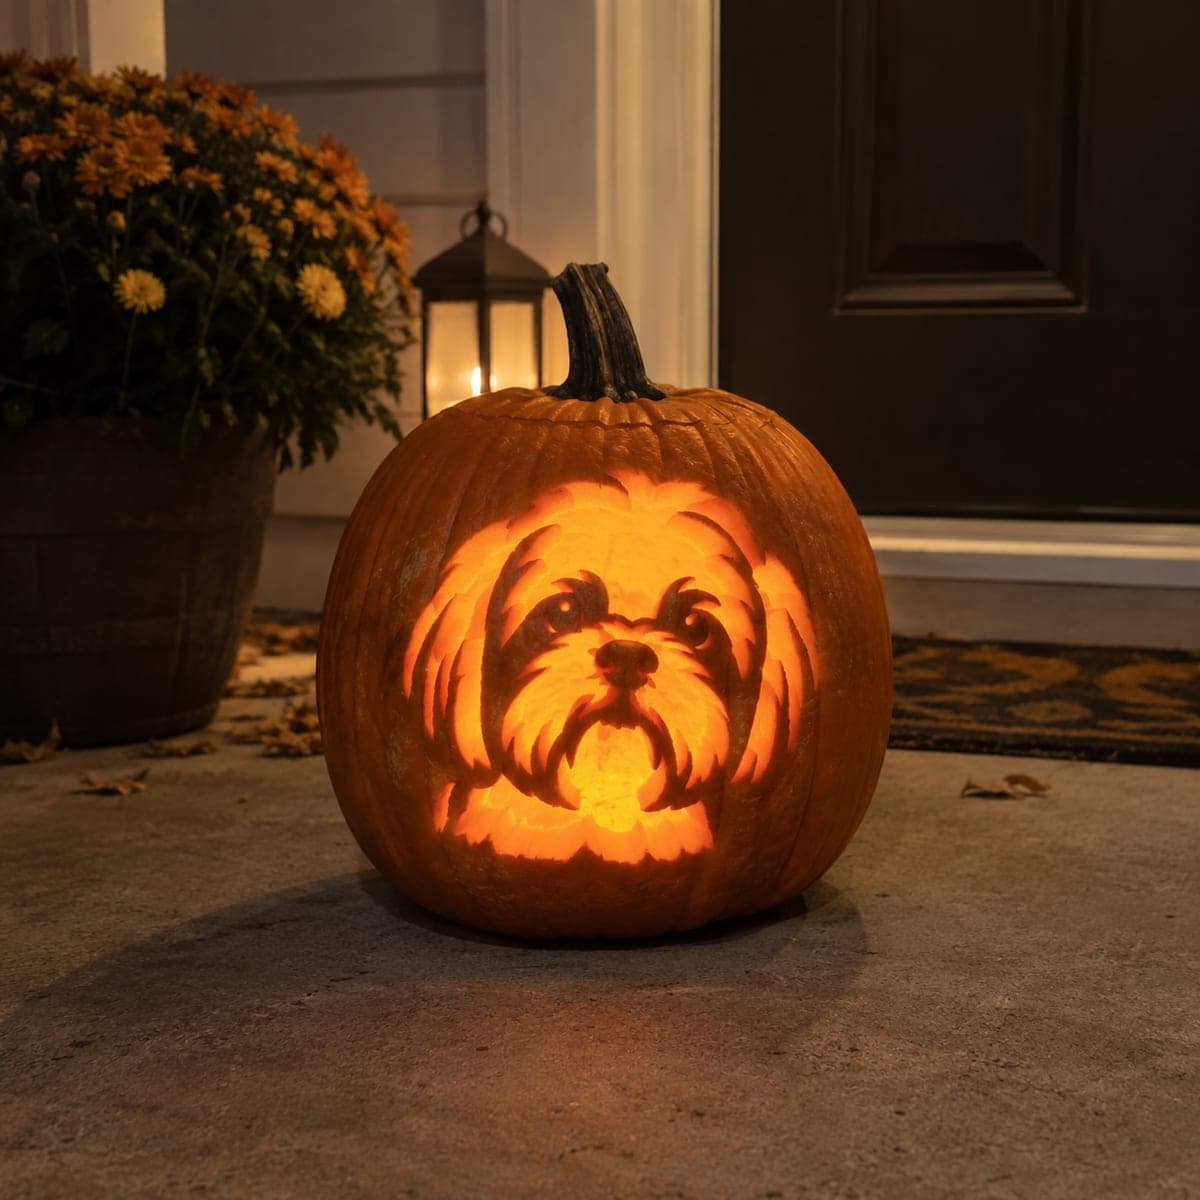
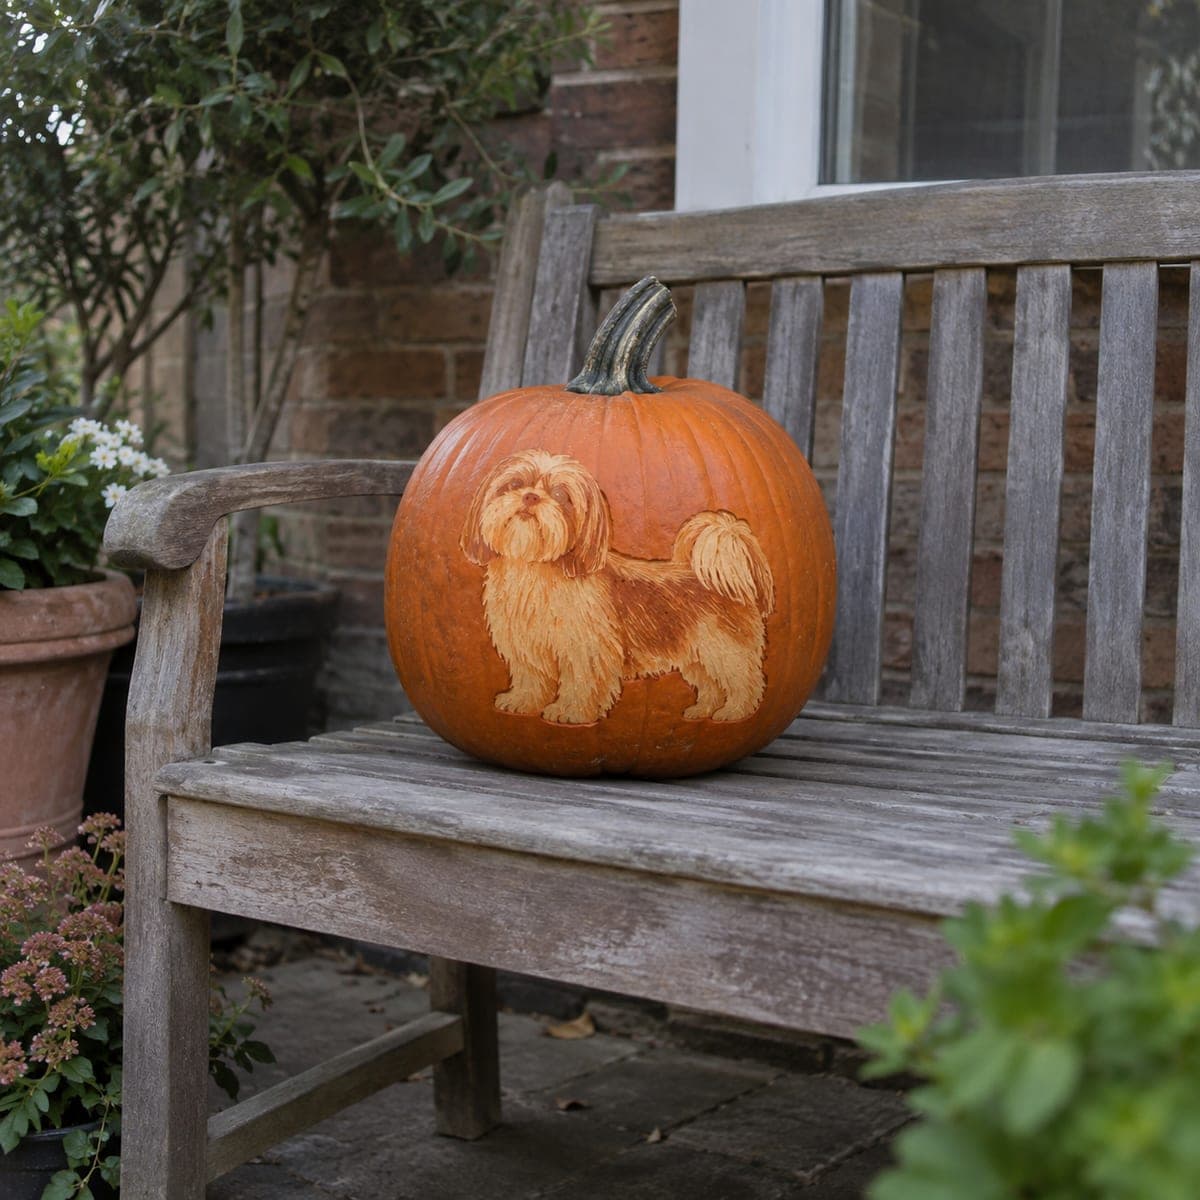
Glowing Shih Tzu Portrait Pumpkin CarvingAI
0

Glowing Shih Tzu Portrait Pumpkin Carving

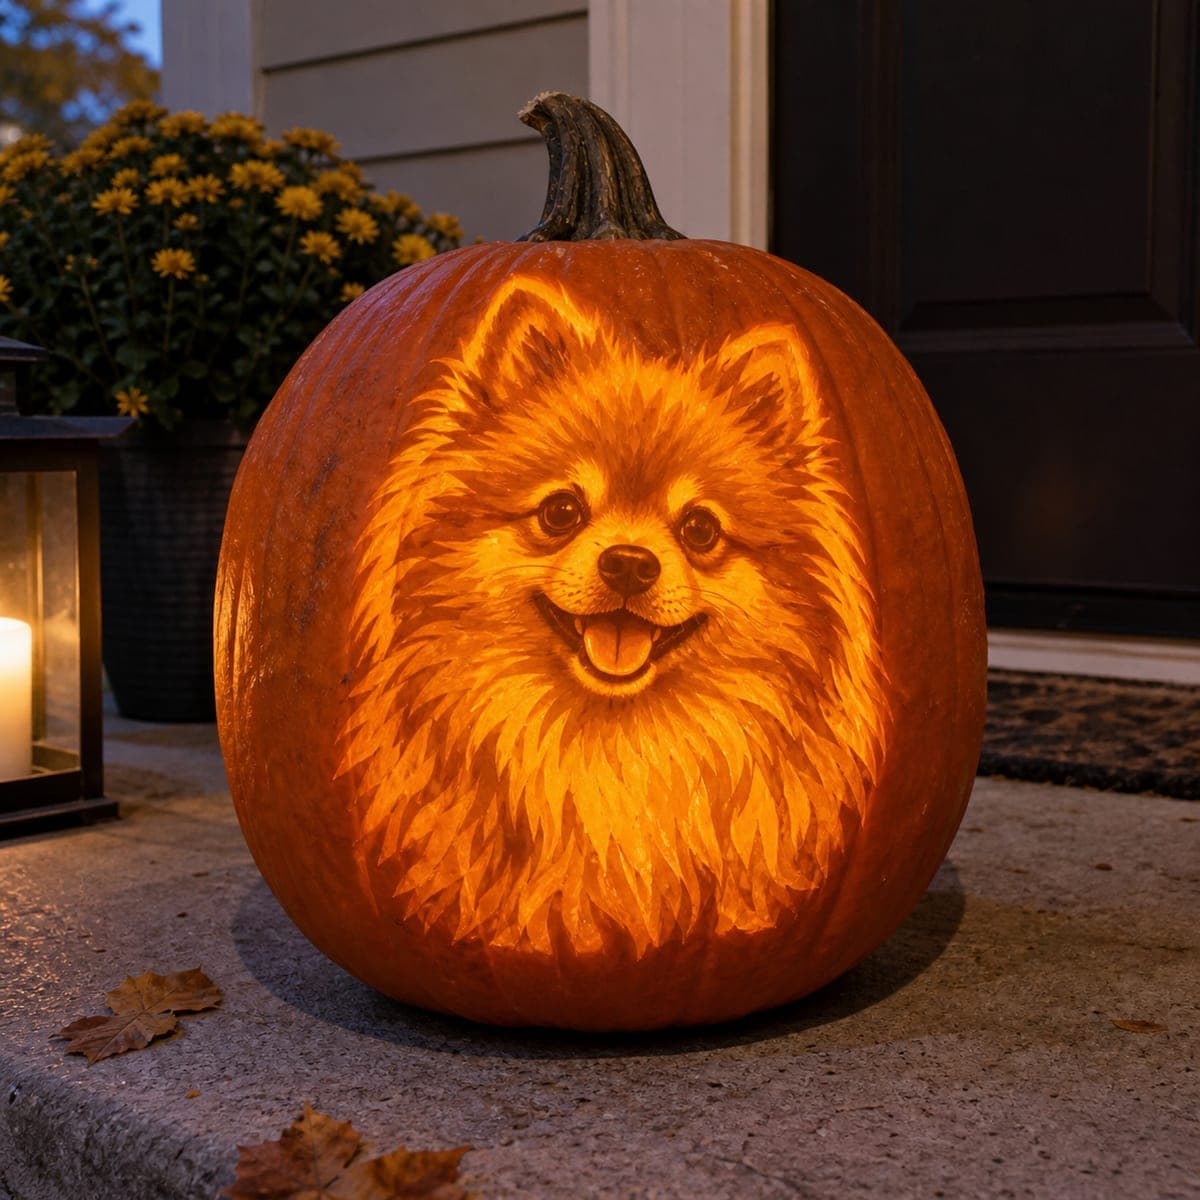
A shaggy Shih Tzu face beams from this pumpkin, every strand of fur etched at graduated depths so the portrait glows in soft golds and ambers after dark. Fur is the whole game here: pull long, overlapping strokes with a small gouge, always following the direction the coat grows. Shave the muzzle and forehead thinnest for the brightest glow, keep the eyes and nose nearly full depth for contrast, and light it with a warm LED.

This is an AI-generated concept image: a realistic, carvable design idea rather than a photo of a finished carve. AI concepts are always labeled and sit out the leaderboard and the contest.

No ratings yet Β· Sign in to rate

Comments (0)

  • No comments yet β€” be the first.

Save without an account. Sign in to like or comment.

Our tips for carving a similar design

The whole trick here is depth shading, not cutting holes: the fur is etched at graduated depths so thin areas glow bright and deep areas stay dark. Think of it as painting with light, peeling the skin thinnest where the muzzle and forehead catch the glow, and leaving the eyes and nose near full thickness for contrast. Plan every gouge stroke to follow the direction the coat grows before you touch the pumpkin.

Written by PumpkinCarvingIdeas.com, inspired by the image above. These are our suggestions, not instructions from the uploader. This approach to the AI concept has not been tested on a real pumpkin.

From pumpkin to porch

  1. Pick a smooth pumpkin and prep it

    Choose a tall pumpkin with a wide, even face and few ribs so the fur reads clearly. Cut a lid from the bottom rather than the top so the stem stays intact and the pumpkin sits flat on your step. Scoop the inside thoroughly and thin the carving wall to about one inch so light passes through the peeled areas. A cleaner, thinner wall makes shading far more predictable.

  2. Transfer the Shih Tzu pattern

    Tape a dog portrait stencil to the face and mark the main shapes: the domed forehead, the two eyes, the button nose, the muzzle, and the outer edge of the shaggy coat. Use a poker or transfer tool to dot the key lines onto the skin. Keep the eyes and nose clearly outlined since those stay dark for contrast. Step back and check the face is centered and level before you start removing anything.

  3. Skin-peel the brightest fur zones

    Switch to a small gouge and peel the top orange skin off the forehead and muzzle where the coat should glow most. Pull long, overlapping strokes that follow the direction the fur grows, fanning outward from the center of the face. Vary your pressure so some strands sit slightly deeper than others, which builds a soft, layered look. Work in patient passes rather than trying to reach full brightness in one stroke.

  4. Build the mid-tone coat with shallow etching

    Move outward to the cheeks, ears, and chest ruff and etch these more lightly so they glow dimmer than the muzzle. Keep every stroke flowing in the coat's natural direction to sell the shaggy texture. Leave narrow ridges of deeper skin between strands so individual locks stay distinct. This graduated depth is what makes the portrait look three dimensional once lit.

  5. Protect the eyes and nose for contrast

    Leave the eyes and nose nearly full thickness so they stay dark and anchor the face. You can lightly scratch a tiny catchlight into each eye for life, but do not peel them thin. A dark nose and dark eyes against the glowing muzzle is exactly what makes the dog recognizable. Resist the urge to cut any openings here.

  6. Light it and photograph after dark

    Drop in a warm white LED puck or a couple of battery tea lights and set the pumpkin back over them. Warm light flatters the golds and ambers in the fur far better than cool white. Check the glow in a dark room and touch up any strands that read too flat by peeling them a hair thinner. Shoot your photo at dusk on the porch for the softest, coziest result.

Gather your supplies

Check things off as you get ready.

Work on a stable surface, keep your free hand out of the cutting path, and have an adult handle sharp tools.

Three levels of light

  • Leave intact

    The eyes and nose stay untouched at near full depth so they read dark and anchor the face.

  • Peel & shade

    The forehead, muzzle, and inner ruff are peeled to varying mid depths for the soft golden fur glow.

  • Cut through

    Nothing is cut fully through on this design; the whole portrait relies on shading rather than open holes.

Learn the carving basics

Before you start cutting

Do I cut any holes through the pumpkin for this dog?

No, and that is the point. This portrait is built entirely from skin-peeling and etching at different depths, so light glows through thin areas while thicker areas stay dark. Keeping the wall intact protects the delicate fur detail and prevents blown-out bright spots.

How do I keep the fur from looking like random scratches?

Always pull your gouge in the direction the coat actually grows, fanning out from the center of the face and down the chest. Overlap your strokes in layers and vary the depth so some strands catch more light than others. Working slowly in the same flowing direction is what turns scratches into believable fur.

This is shown as a concept image, so can it really be carved?

Yes, a design like this is achievable because it uses depth shading rather than fragile cutouts. Since no real pumpkin exists here, treat it as inspiration and keep your wall around an inch thick for even glow. Just start light and remove more skin gradually, since you can always peel deeper but never add pumpkin back.

Your take belongs here, too.

Changed a detail? Made it simpler? Share a photo of your version and tell the community what worked.

Share your pumpkin

More pumpkins like this

You've reached the end Β· 8 pumpkins
The Patch Report

Fresh pumpkins, in your inbox.

The best new carvings, ideas worth stealing, and how-tos for carving season. Short, seasonal, and gone by November.

A short email during carving season. Unsubscribe anytime. See our privacy policy.