Halloween Pumpkin Carving Contest · Starts October 1st · $500 in prizes
← Back to ideas
@ai_concepts
Sep 13, 2026
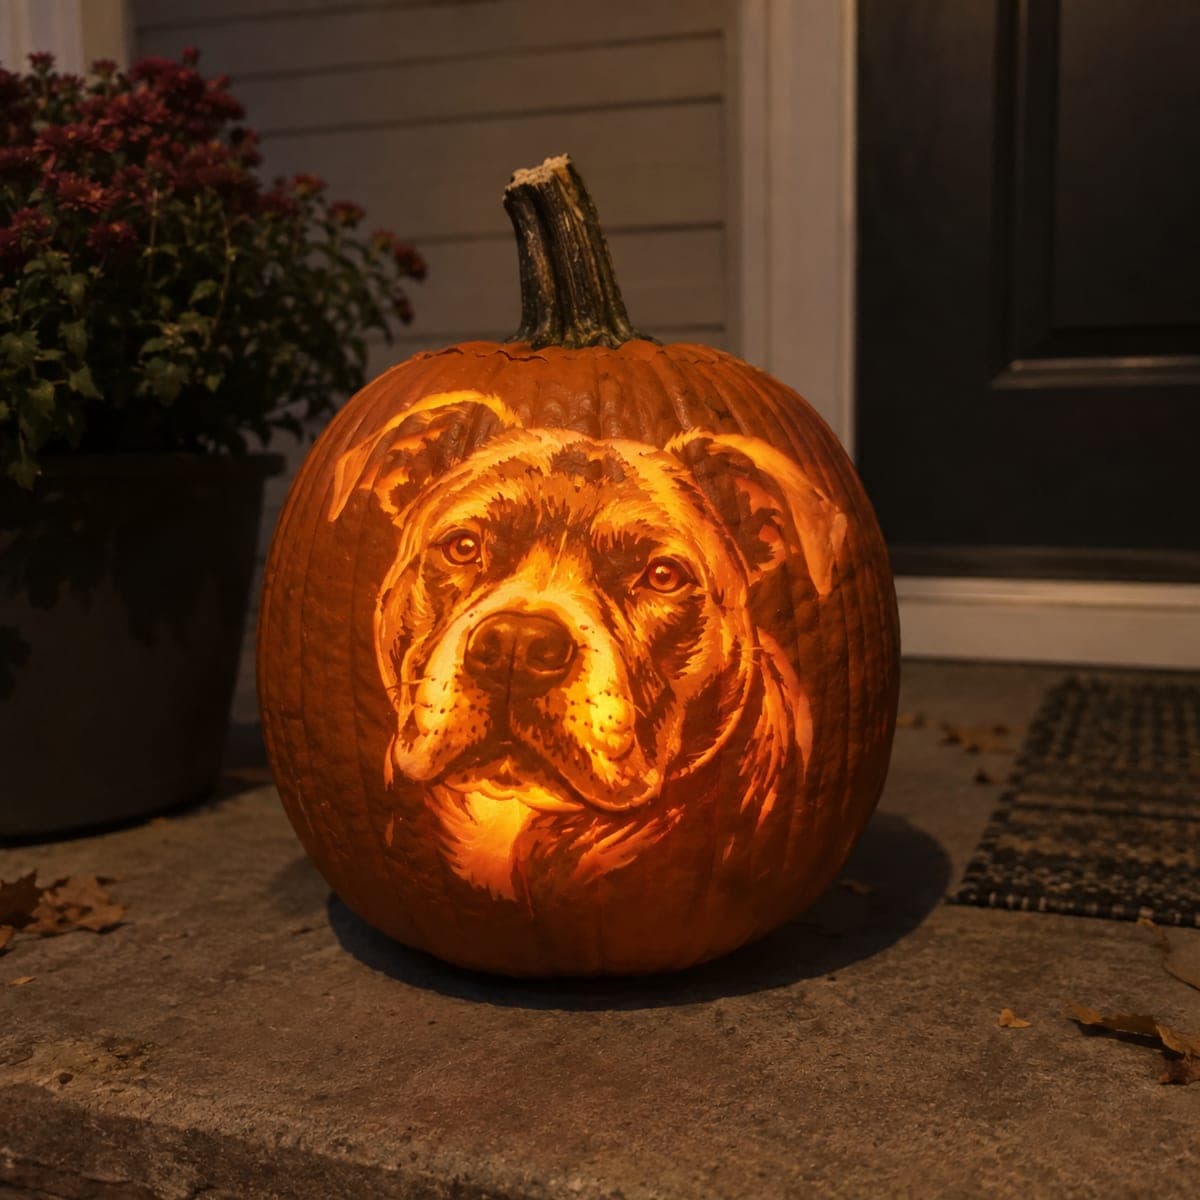
Pit Bull Portrait Shaded Halloween PumpkinAI
0

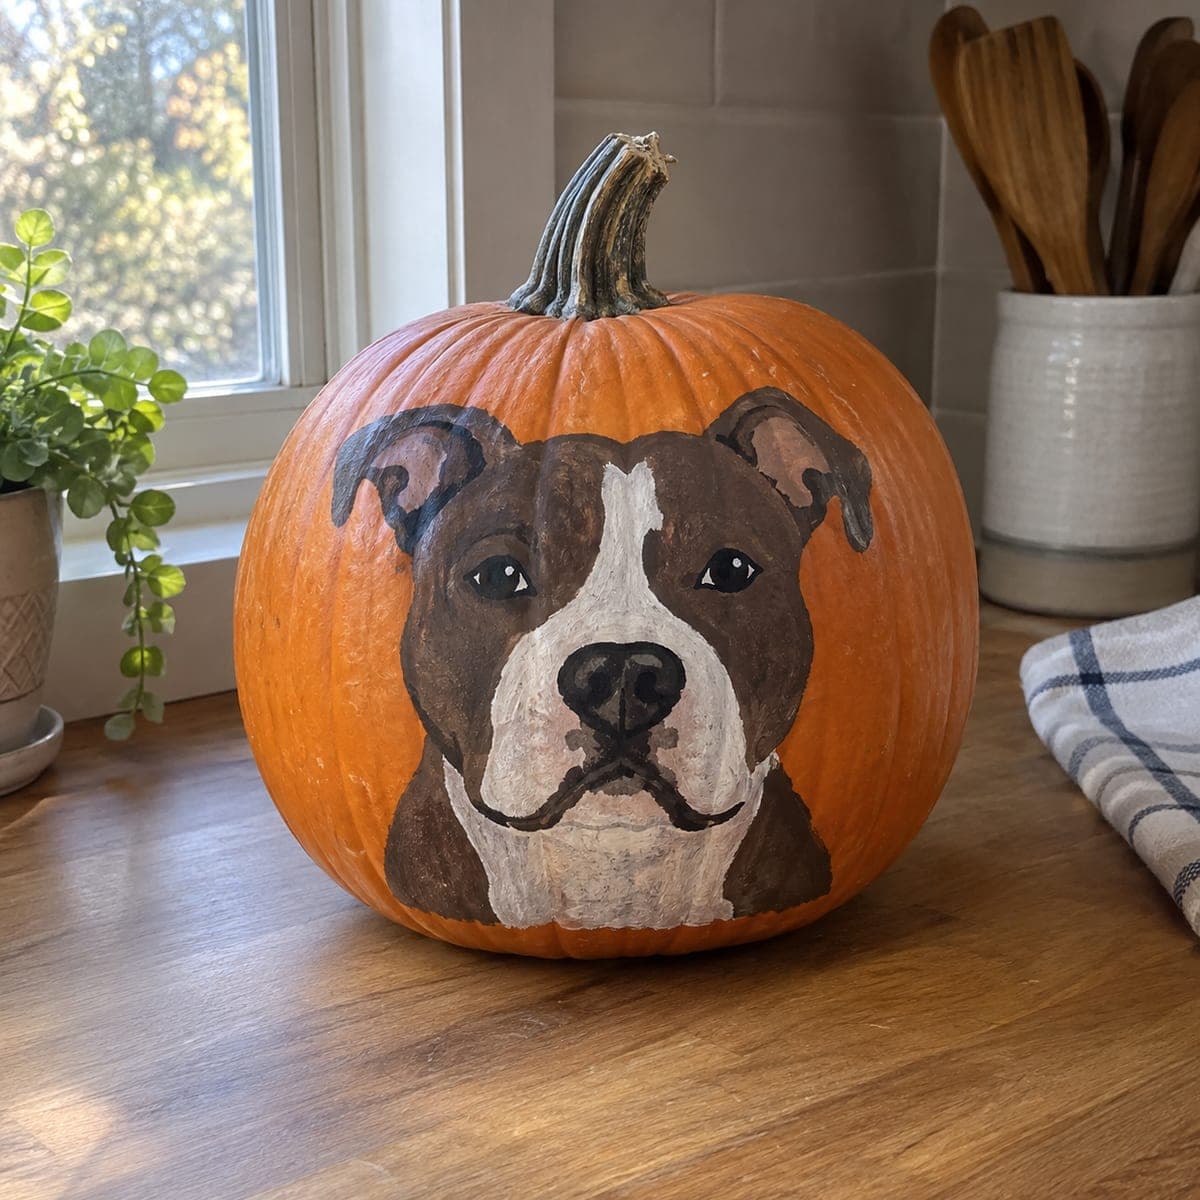
Pit Bull Portrait Shaded Halloween Pumpkin

A sweet-faced pit bull terrier is etched across this glowing pumpkin, the soft folds of skin around the jowls and the gentle eyes captured through graduated shading with loop and ribbon tools. The backlight from inside the pumpkin makes the etched lighter areas of the coat glow warmly against the deeper carved shadows. Use a fine gouge to define the eyebrow markings and whisker follicles, which bring the portrait to life. A heartfelt pumpkin carving idea for pit bull owners wanting to honor their dog.

This is an AI-generated concept image: a realistic, carvable design idea rather than a photo of a finished carve. AI concepts are always labeled and sit out the leaderboard and the contest.

No ratings yet · Sign in to rate
Comments (0)

  • No comments yet — be the first.

Save without an account. Sign in to like or comment.

Our tips for carving a similar design

This portrait glows because of graduated shading, not cutouts. The trick is peeling the coat to different depths so the muzzle, jowls, and bright chest catch the most light while the outline and shadows stay dark. Build the face in layers and keep checking it lit from inside.

Written by PumpkinCarvingIdeas.com, inspired by the image above. These are our suggestions, not instructions from the uploader. This approach to the AI concept has not been tested on a real pumpkin.

From pumpkin to porch

  1. Choose a large pumpkin and transfer the portrait

    Pick a big pumpkin with a smooth, thick front wall. Transfer a pit bull portrait by taping on a printed reference and poking the main outlines and shading zones with a pin tool. Mark where the brightest highlights and darkest shadows fall.

  2. Skin the portrait area to a base tone

    Peel the outer skin from the whole face with a ribbon tool to set your mid glow. Leave the background rind and the darkest markings unpeeled. This gives you a canvas where every deeper cut reads brighter.

  3. Shade the muzzle, jowls, and chest

    Carve the brightest areas, the top of the muzzle, the jowls, and the glowing chest, deeper so they let through the most light. Take thin passes and blend the transitions so there are no hard steps. Set an LED inside often to judge the gradient.

  4. Define the eyes and fine fur

    Use a fine detail knife for the eyes, eyebrow markings, and whisker follicles, working from the center outward. Leave a backing of flesh under every fine line so the details do not drop out. The gentle eyes are what make the portrait feel alive, so go slowly there.

  5. Refine the contrast and hydrate

    Step back, view it lit, and deepen any area that looks flat while keeping edges supported. Because so much skin is off, mist it and wrap it in plastic in the fridge between sessions. Carve it close to display day and photograph it lit.

Gather your supplies

Check things off as you get ready.

Work on a stable surface, keep your free hand out of the cutting path, and have an adult handle sharp tools.

Three levels of light

  • Leave intact

    The background rind and the darkest coat markings stay unpeeled and dark.

  • Peel & shade

    The whole face is peeled to a mid tone, then highlights are carved deeper.

  • Cut through

    Only the brightest highlights approach a full glow; nothing is a clean cutout.

Learn the carving basics

Before you start cutting

Why not cut the shapes all the way through?

A portrait needs soft gradients, not hard edges. Varying how deep you peel controls brightness, so the face glows smoothly instead of reading as a flat silhouette.

How do I get the eyes to look gentle?

Work the eyes with a fine knife from the center out and leave thin flesh over the pupils so they glow softly rather than punching through. Small, patient passes beat one deep cut.

It keeps drying before I finish. Help?

Shaded pumpkins lose moisture fast. Mist the carved surface, wrap it in plastic, and keep it cool between sessions, and plan to finish and display within a day or two.

Your take belongs here, too.

Changed a detail? Made it simpler? Share a photo of your version and tell the community what worked.

Share your pumpkin

More pumpkins like this

You've reached the end · 8 pumpkins
The Patch Report

Fresh pumpkins, in your inbox.

The best new carvings, ideas worth stealing, and how-tos for carving season. Short, seasonal, and gone by November.

A short email during carving season. Unsubscribe anytime. See our privacy policy.