Halloween Pumpkin Carving Contest · Starts October 1st · $500 in prizes
← Back to ideas
@ai_concepts
Aug 29, 2026
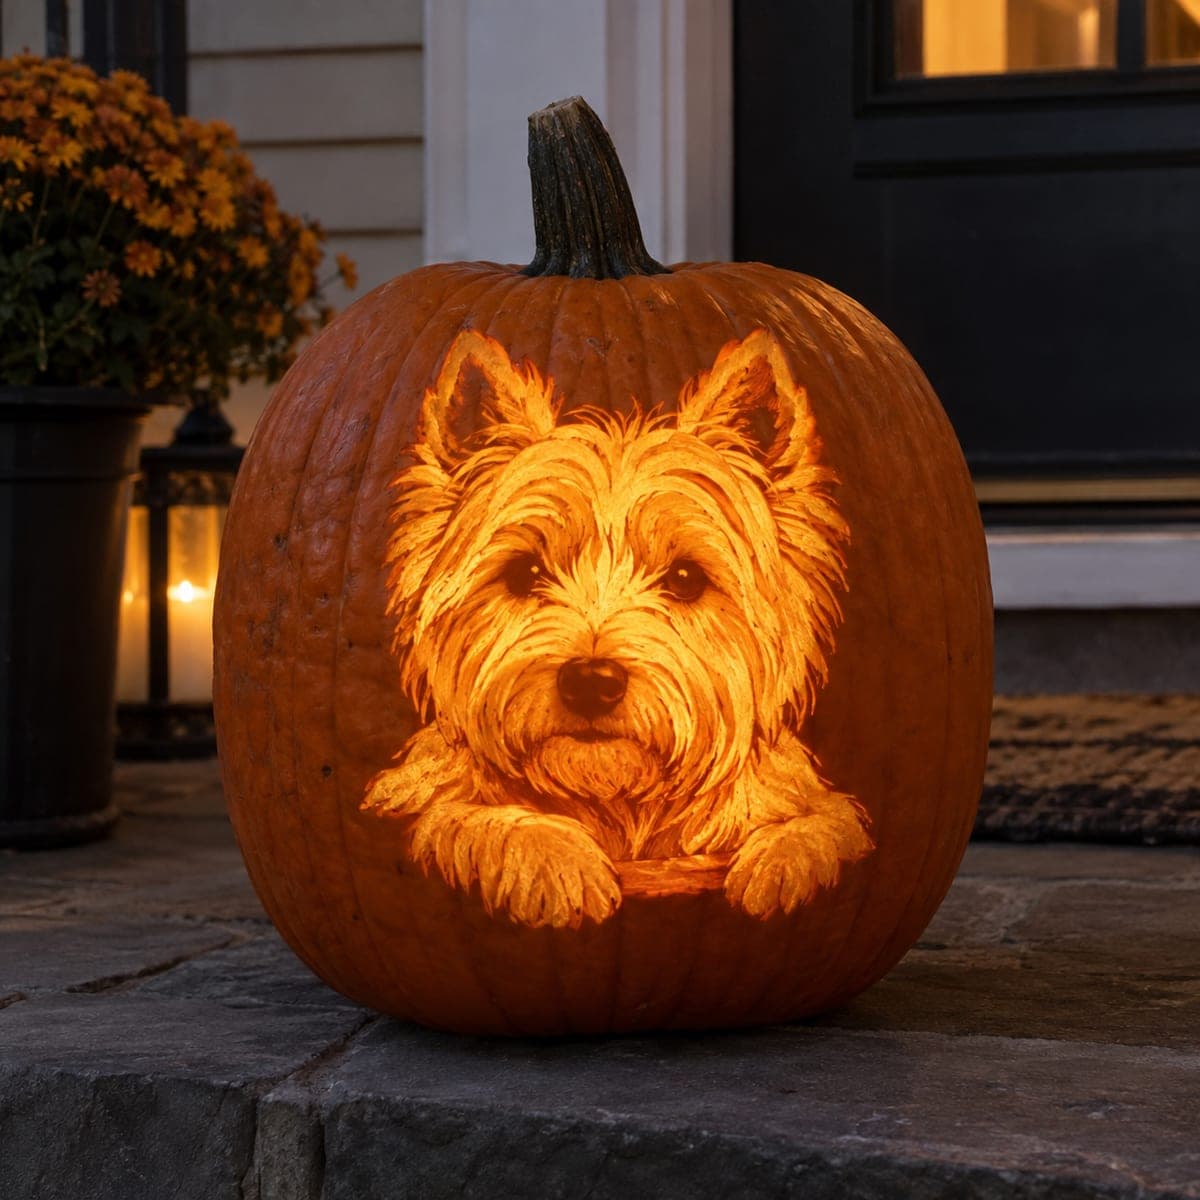
Westie Dog Portrait Shaded Pumpkin on Front PorchAI
0

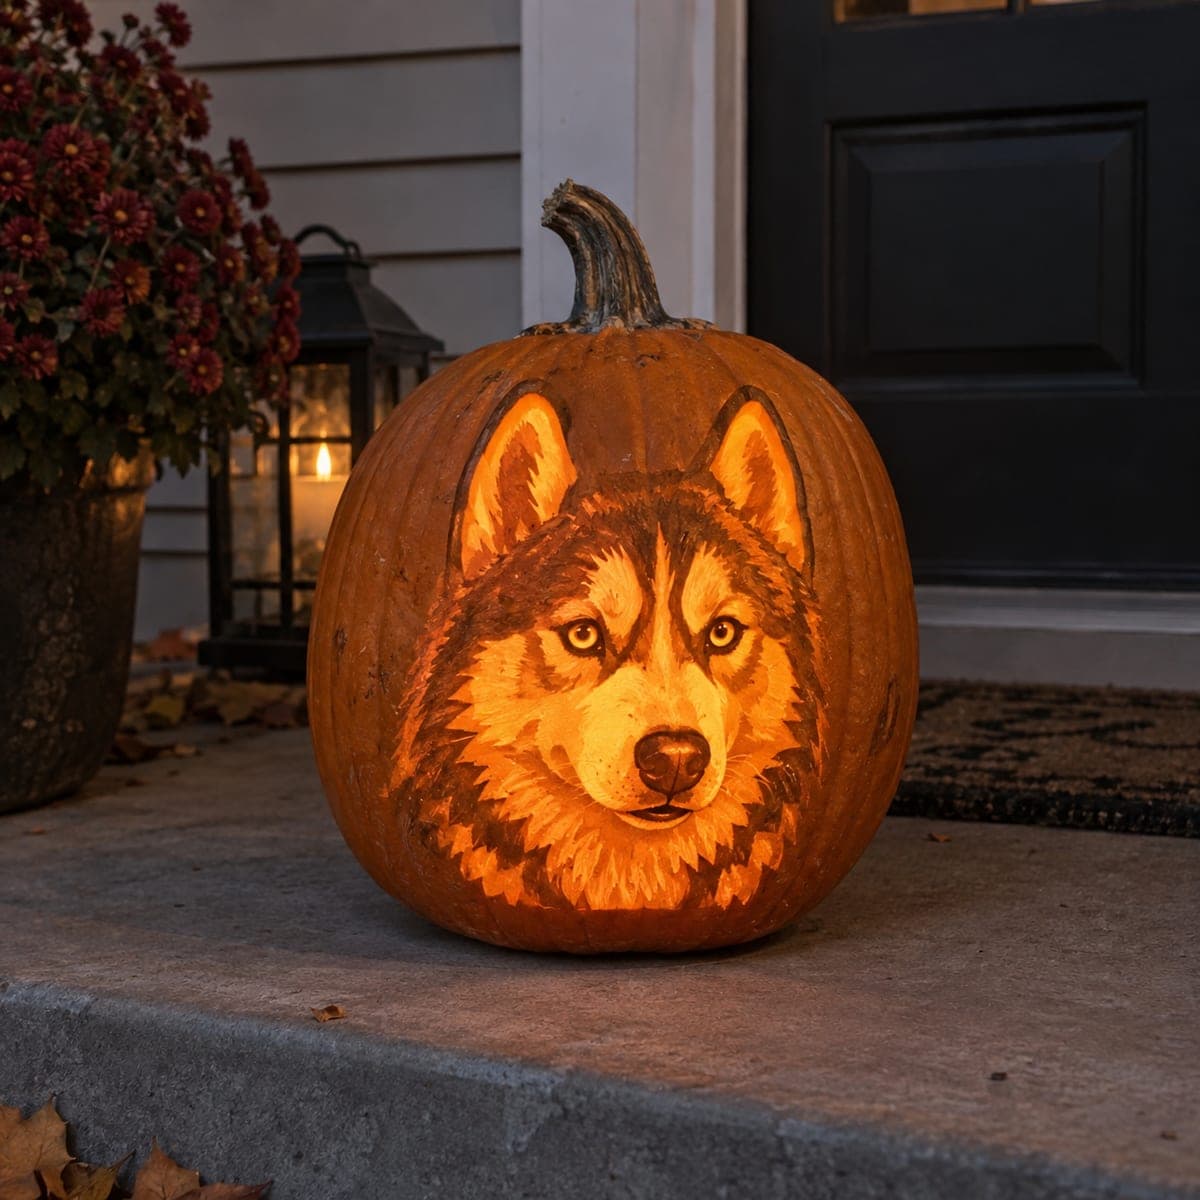
Westie Dog Portrait Shaded Pumpkin on Front Porch

A West Highland White Terrier peers over an invisible ledge in this beautifully lit shaded pumpkin carving, the dog's fluffy white coat translated into warm amber tones through careful etching. The paws-up framing gives the portrait a playful energy while the fine fur texture required short, directional strokes with a small V-gouge. Illuminate this pumpkin with a warm LED bulb rather than a candle to keep the surface temperature low and prevent premature softening of the thin etched areas. It is an ideal pet portrait pumpkin for Westie owners who want a personalized seasonal display.

This is an AI-generated concept image: a realistic, carvable design idea rather than a photo of a finished carve. AI concepts are always labeled and sit out the leaderboard and the contest.
No ratings yet · Sign in to rate

Comments (0)

  • No comments yet — be the first.

Save without an account. Sign in to like or comment.

Our tips for carving a similar design

The whole trick here is that the fluffy Westie is made of skin-shading, not cutouts, so the light glows through thinned pumpkin flesh instead of open holes. You control how bright each patch of fur reads by how deep you scrape, keeping the darkest skin for the eyes, nose, and shadow gaps between locks. Plan the fur as thousands of short directional strokes that all flow the way the coat grows.

Written by PumpkinCarvingIdeas.com, inspired by the image above. These are our suggestions, not instructions from the uploader. This approach to the AI concept has not been tested on a real pumpkin.

From pumpkin to porch

  1. Pick a smooth pumpkin and open the back

    Choose a tall pumpkin with a wide, flat, blemish-free face for the portrait. Cut a hatch from the back or bottom rather than the top so the stem stays intact and the front stays uninterrupted. Scoop the inside until the front wall is about one inch thick, scraping evenly so the light glows uniformly. A thinner wall shades faster, so keep it consistent across the whole face.

  2. Transfer the Westie pattern

    Tape your stencil flat over the face and poke or trace the main outlines: the head shape, ears, eyes, nose, and the two paws resting on the invisible ledge. Mark the boundaries between bright fur zones and darker shadow gaps so you know your light map before any blade touches the skin. Keep the eyes, nose, and the deepest shadow lines as untouched areas. Step back and check the whole layout reads as a dog before you commit.

  3. Peel the base coat

    Using a ribbon or gouge tool, remove just the outer skin across all the fur areas to create a soft dim glow. Work in short strokes that follow the direction the coat grows, sweeping outward from the face and down the chest. This first pass sets your mid tone and gives you a surface to carve brighter detail into. Leave the eyes, nose leather, and the shadow lines between fur clumps as full dark skin.

  4. Build fur with a small V-gouge

    Switch to a small V-gouge and carve short, directional strokes to thin the flesh where the coat catches light, like the top of the head, the cheek ruffs, and the fronts of the paws. The deeper and closer together your strokes, the brighter that patch will glow. Vary stroke length so the fur looks natural rather than combed flat. Keep bridges of thicker flesh between the brightest locks so the wall stays strong.

  5. Cut the few true openings

    Save any full cutouts for last so the face does not weaken while you work. On this design you only need small clean openings for the brightest highlights, such as tiny catchlights or the lightest edge of the muzzle. Cut these with a fine saw or detail blade, holding the tool steady and letting the piece drop inward. Everything else stays as shaded flesh, which is what keeps the portrait soft and lifelike.

  6. Light it and photograph

    Drop in a warm white LED puck or bulb, never a candle, so the low heat protects the thin etched fur from softening. Set the pumpkin on a step or porch and dim the surrounding lights to see the glow. If a fur zone looks too dark, scrape it a little thinner from the front; if too bright, you cannot undo it, so go slow. Coat the cut edges with a thin film of petroleum jelly to slow drying and keep the detail sharp for photos.

Gather your supplies

Check things off as you get ready.

Work on a stable surface, keep your free hand out of the cutting path, and have an adult handle sharp tools.

Three levels of light

  • Leave intact

    Eyes, black nose leather, and the shadow gaps between fur clumps stay as untouched dark skin.

  • Peel & shade

    The overall coat, ears, cheeks, and chest get skin-peeled for a soft amber mid glow.

  • Cut through

    Only the tiniest brightest highlights, like eye catchlights or the lit muzzle edge, are cut fully through.

Learn the carving basics

Before you start cutting

Do I really carve almost no holes for this?

Correct, this portrait is a shading piece, so the vast majority is thinned flesh rather than open cuts. The dog appears because different fur zones glow at different brightness depending on how deep you scrape. Reserve full cutouts for just a few tiny highlights.

How do I make the white fur look white on an orange pumpkin?

You cannot make it literally white, so you translate the coat into warm amber tones by brightness instead. The lightest parts of the fur become the most thinly scraped areas that glow strongest, while shadows between locks stay dark. Your eye reads that contrast as a fluffy white coat.

Why an LED instead of a candle for this design?

The etched fur areas are thin and delicate, and candle heat softens thin flesh quickly, causing the fine detail to sag within hours. A warm white LED keeps the surface cool so the texture holds. It also gives a steady even glow that shows the shading better than a flickering flame.

Your take belongs here, too.

Changed a detail? Made it simpler? Share a photo of your version and tell the community what worked.

Share your pumpkin

More pumpkins like this

You've reached the end · 8 pumpkins
The Patch Report

Fresh pumpkins, in your inbox.

The best new carvings, ideas worth stealing, and how-tos for carving season. Short, seasonal, and gone by November.

A short email during carving season. Unsubscribe anytime. See our privacy policy.