Halloween Pumpkin Carving Contest Β· Starts October 1st Β· $500 in prizes
← Back to ideas
@ai_concepts
Sep 11, 2026
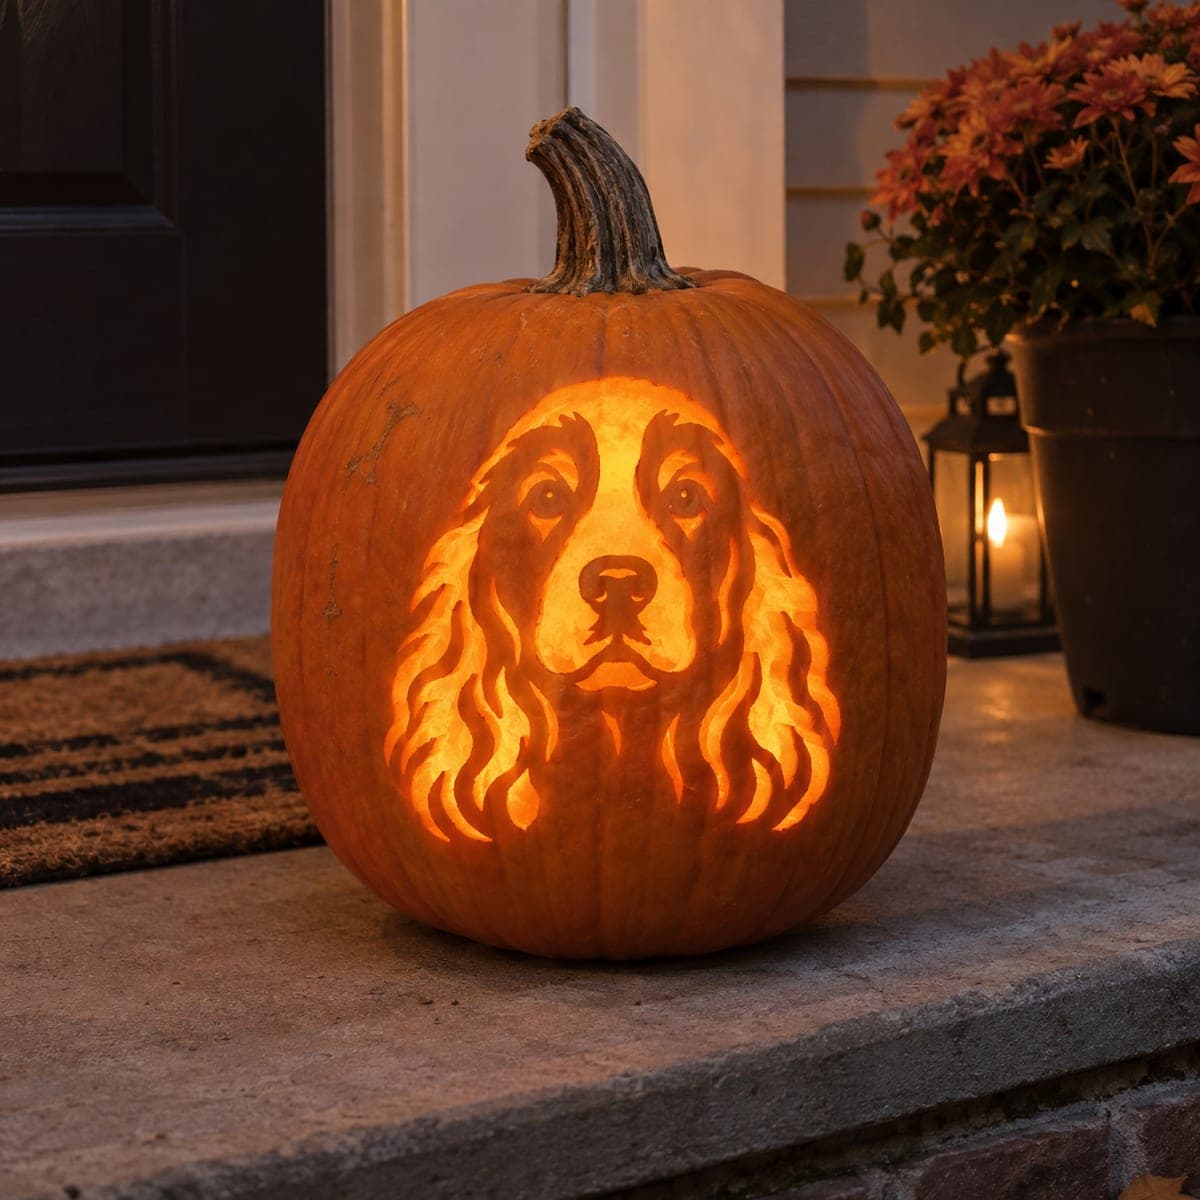
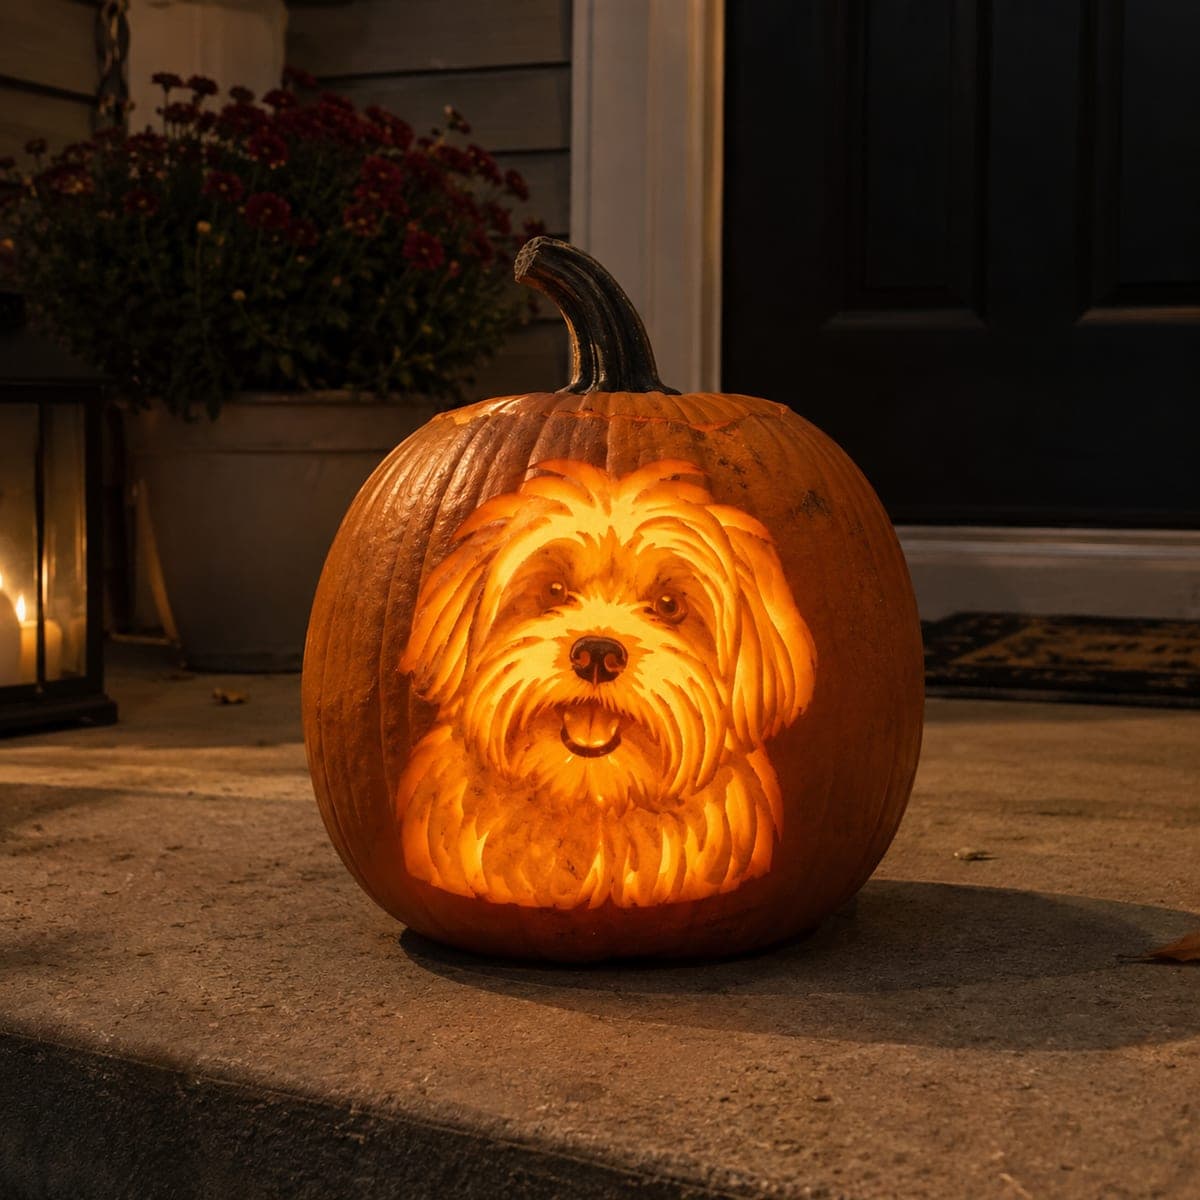
Cocker Spaniel Jack-O-Lantern With Flowing EarsAI
0

Cocker Spaniel Jack-O-Lantern With Flowing Ears

A cocker spaniel portrait glows from this pumpkin, its long wavy ears carved as ribbons of light that spill down both sides of the face. The design mixes pierced sections that shine brightly with shaved areas that glow softly, giving the coat real depth after dark. Transfer the pattern with pinpricks, cut the fully open shapes first, then peel the mid-tone fur. Perfect for spaniel owners who want a pet-themed porch pumpkin.

This is an AI-generated concept image: a realistic, carvable design idea rather than a photo of a finished carve. AI concepts are always labeled and sit out the leaderboard and the contest.

No ratings yet Β· Sign in to rate

Comments (0)

  • No comments yet β€” be the first.

Save without an account. Sign in to like or comment.

Our tips for carving a similar design

The core trick here is contrast between fully cut light and shaved half-tones, which lets the wavy ears read as ribbons of light while the muzzle and eyes stay softer. Plan the bright cutouts as the highlights on the forehead, muzzle, and the flowing strands of each ear, then use peeled skin for the shaded fur in between. Leaving thin walls of untouched skin between the ear strands is what keeps the design strong and gives the coat its layered look.

Written by PumpkinCarvingIdeas.com, inspired by the image above. These are our suggestions, not instructions from the uploader. This approach to the AI concept has not been tested on a real pumpkin.

From pumpkin to porch

  1. Pick and prep the pumpkin

    Choose a tall, rounded pumpkin with a smooth, wide front panel so the whole face fits without wrapping around a curve. Cut a lid from the bottom or the back rather than the top so the stem stays intact for looks. Scrape the inside wall behind the design down to about one inch thick using a sturdy scoop. A thinner, even wall makes both cutting and shaving far easier.

  2. Transfer the pattern with pinpricks

    Print the spaniel stencil sized to your pumpkin and tape it flat, snipping the edges so it hugs the curve. Poke closely spaced pinpricks along every outline, marking the eyes, nose, muzzle highlights, and each strand of the ears. Pay extra attention to dotting both edges of the thin fur ribbons so you know exactly where the walls between them sit. Peel the paper off and connect the dots lightly with a marker if the pattern is hard to read.

  3. Carve the bright cutouts first

    With a fine poker saw, cut all the way through only the brightest shapes: the glow across the forehead, the highlights along the muzzle and nose, and the widest gaps between the ear strands. Support each piece with your free hand and let the blade do the work with gentle strokes. Cutting these open areas while the pumpkin wall is still mostly solid keeps everything stable. Adults should handle all the sharp tools.

  4. Shape the flowing ears

    Treat each ear as a set of narrow light ribbons separated by thin walls of skin. Cut through the ribbon shapes you want brightest, but leave the walls between strands uncut so the ears do not collapse into one big hole. Keep at least a quarter inch of pumpkin between neighboring cutouts to hold the structure. This alternating cut-and-keep pattern is what makes the ears spill down the sides like real wavy fur.

  5. Peel the mid-tone fur

    Switch to a shaving tool or a lino-style gouge and remove just the outer orange skin over the shaded areas of the coat, the softer parts of the ears, and the shadows around the eyes and cheeks. Go slow and check the glow depth against a light as you work, since thinner skin glows brighter. Leave the darkest fur shadows as untouched skin for contrast. These shaved zones give the portrait its gentle, three-dimensional depth after dark.

  6. Light it and photograph

    Set a battery LED puck or string inside, never a candle, since the tight ear cutouts and shaved walls can scorch with an open flame. Test in a dark room and touch up any strand that reads too thin or too solid. Place it on the front step at dusk near a lantern or mums for a cozy backdrop. Shoot from straight on so the symmetry of the face and ears comes through.

Gather your supplies

Check things off as you get ready.

Work on a stable surface, keep your free hand out of the cutting path, and have an adult handle sharp tools.

Three levels of light

  • Leave intact

    The darkest fur shadows and the thin walls between ear strands stay untouched for contrast.

  • Peel & shade

    The soft coat, cheeks, and the shadowed parts of the ears are shaved to glow a dim orange.

  • Cut through

    The forehead highlight, muzzle and nose highlights, eyes, and the widest gaps between the flowing ear ribbons are cut fully open.

Learn the carving basics

Before you start cutting

How do I keep the long ears from breaking apart?

Think of each ear as ribbons of light with thin walls of skin between them, and never cut two neighboring ribbons into one big opening. Keep about a quarter inch of pumpkin between cutouts so the strands stay anchored top and bottom. If a section feels floppy, leave more skin or switch that area to a shaved glow instead of a full cut.

This is a concept image, so what size pumpkin actually works?

No real pumpkin exists in the picture, so treat it as a target look rather than a finished carving. A tall, evenly rounded pumpkin at least ten inches wide across the front gives you room for the face plus both trailing ears without wrapping onto a curve. A flatter front panel makes the pinprick transfer and the fine ear cuts much more forgiving.

How do I get the muzzle and eyes to look soft instead of harsh?

Use shaving rather than full cutouts for those areas so they glow dim instead of blasting bright. Peel a little skin at a time and hold the pumpkin to a light to judge the depth as you go. Leaving the eye outlines and nose shadow as untouched skin gives the face definition without hard holes.

Your take belongs here, too.

Changed a detail? Made it simpler? Share a photo of your version and tell the community what worked.

Share your pumpkin

More pumpkins like this

You've reached the end Β· 8 pumpkins
The Patch Report

Fresh pumpkins, in your inbox.

The best new carvings, ideas worth stealing, and how-tos for carving season. Short, seasonal, and gone by November.

A short email during carving season. Unsubscribe anytime. See our privacy policy.