Halloween Pumpkin Carving Contest · Starts October 1st · $500 in prizes
← Back to ideas
@ai_concepts
Sep 25, 2026
Black Pumpkin Carved with Diagonal Diamond BandAI
0

Report this carving

Tell us what is wrong. Reports are private.

Black Pumpkin Carved with Diagonal Diamond Band

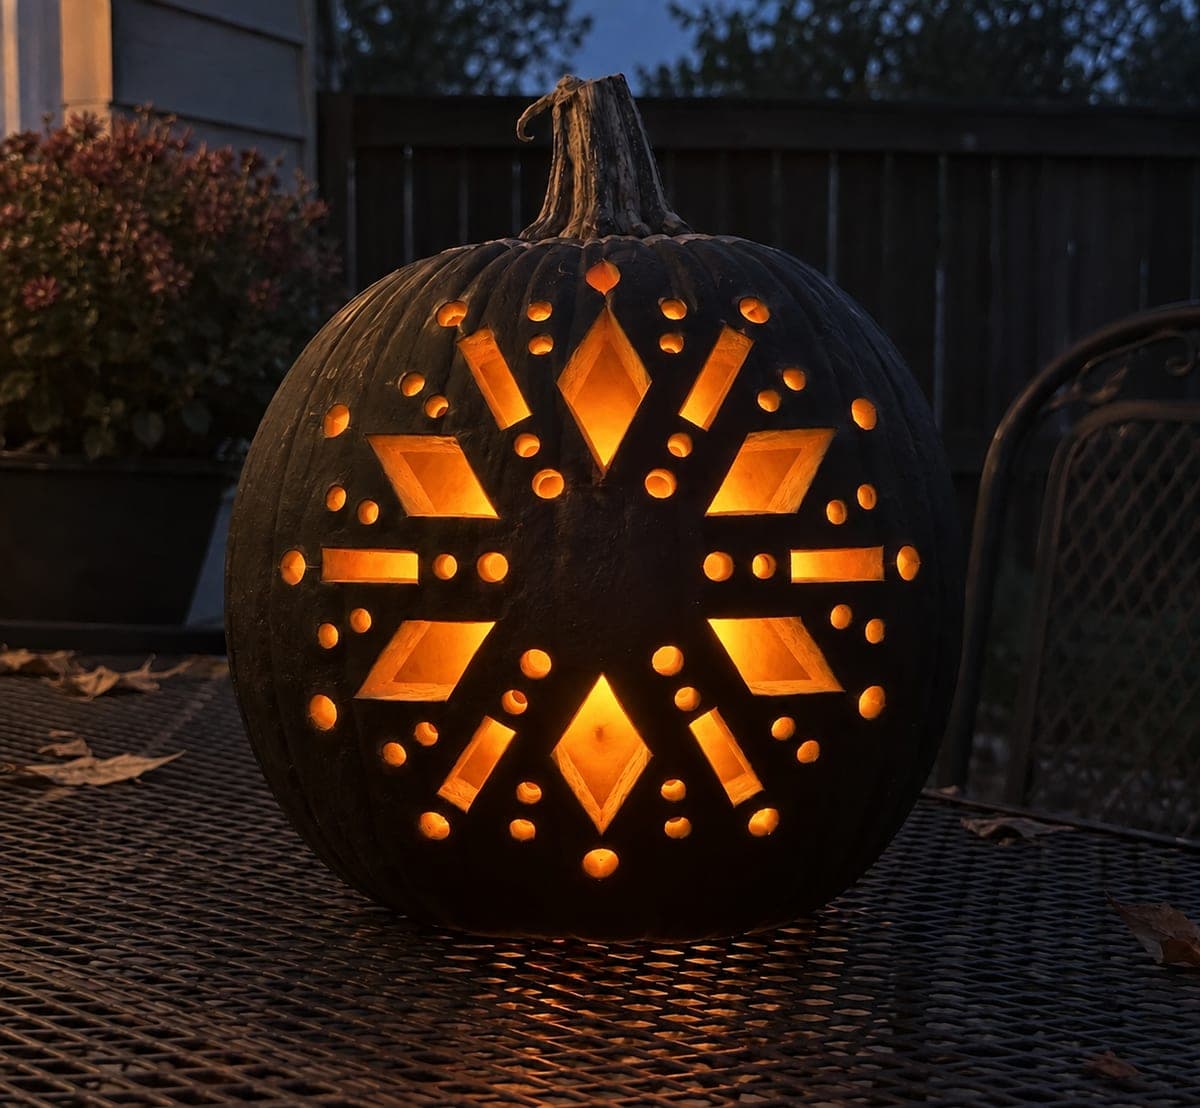
Five large separate diamond holes and ten small round holes arranged in a sweeping diagonal band are carved through the matte-black painted exterior of an orange pumpkin in this medium black pumpkin carving idea, exposing raw orange cut rims against the dark painted surface. Sketch the diagonal band first with chalk so the pattern placement is even before cutting. An amber internal glow highlights every orange-edged hole along the band.

No ratings yet · Sign in to rate
Comments (0)

  • No comments yet — be the first.

Save without an account. Sign in to like or comment.

Our tips for carving a similar design

The diagonal band is the organizing principle: all five diamonds and ten round holes follow a single sweeping axis across the painted black surface. Sketch the axis line first, then place holes along it before cutting anything. The orange-edged cut rims against the black rind are the visual payoff, so keeping the paint intact between all holes is essential.

From pumpkin to porch

  1. Paint and cure the exterior

    Apply two thin coats of matte black paint to the full exterior and let it cure overnight. Any peeling along cut edges means the paint was not fully cured, so err on the side of more drying time. The cured black surface is what makes the orange cut rims dramatic.

  2. Draw the diagonal axis

    Using a chalk marker, draw a straight diagonal line from one upper quadrant to the opposite lower quadrant across the front face. This line is the spine of your pattern and everything aligns to it. Step back and confirm it sweeps boldly across the pumpkin before proceeding.

  3. Map hole positions along the band

    Mark five large diamond positions and ten small circle positions alternating along the diagonal axis. Space them so the distances between adjacent holes are roughly equal. Every hole must have at least half an inch of black-painted rind on all sides. Wipe away any crowded positions with a damp cloth and resketch.

  4. Cut the diamond holes

    Cut each diamond individually using a detail blade for the corners and a fine saw for the sides. Score all four corners lightly before cutting through, which stops the paint from chipping at the tip points. Push each waste piece inward and immediately notice the vivid orange rim.

  5. Drill the round holes

    Use a step drill bit or borer for the ten small circles. Pre-mark each center with a pin. Drill slowly at each position so the bit does not skate across the cured paint surface. Space the circles evenly between and around the diamonds.

  6. Light and admire the band

    Place an amber LED inside and view the pumpkin in the dark. The diagonal band of glowing holes reads as a sweeping stroke of light. Rotate the pumpkin slightly if the band looks better at a particular angle to your viewer's perspective.

Written with AI to match this design

Gather your supplies

Check things off as you get ready.

Work on a stable surface, keep your free hand out of the cutting path, and have an adult handle sharp tools.

Three levels of light

  • Leave intact

    All black-painted rind outside the diagonal band, plus the rind between each hole in the band, stays solid and dark.

  • Peel & shade

    None; the black paint and solid rind between cuts create the contrast.

  • Cut through

    All five diamond holes and all ten round holes are cut completely through, exposing orange cut rims against the black exterior.

Learn the carving basics

Before you start cutting

How do I stop the diamond corners from chipping the black paint when I cut?

Score each corner lightly with the blade tip before making the full cut. This creates a tiny incision that the saw can follow precisely without dragging paint away from the cut line. Scoring all four corners first, then connecting them with the saw, produces clean, chip-free diamond tips.

Can the band curve instead of being a straight diagonal?

A gentle S-curve version of the band can look dynamic and more organic. The technique is the same: draw the curved axis first, then position holes along it. Curved placement is slightly harder to space evenly by eye, so mark more reference points along the curve before committing to hole positions.

Should the diamonds and circles alternate strictly, or can I cluster them?

Strict alternation gives the band a rhythm that is easy to read from a distance. Clustering several circles together and then several diamonds together can work for a deliberate rhythmic variation, but avoid placing two large diamonds directly adjacent since they will merge visually when lit.

Your take belongs here, too.

Changed a detail? Made it simpler? Share a photo of your version and tell the community what worked.

Share your pumpkin

More pumpkins like this

You've reached the end · 8 pumpkins
The Patch Report

Fresh pumpkins, in your inbox.

The best new carvings, ideas worth stealing, and how-tos for carving season. Short, seasonal, and gone by November.

A short email during carving season. Unsubscribe anytime. See our privacy policy.