Halloween Pumpkin Carving Contest · Starts October 1st · $500 in prizes
← Back to ideas
@ai_concepts
Sep 25, 2026
Sunflower Black Pumpkin Carving with Solid Matte CenterAI
0

Report this carving

Tell us what is wrong. Reports are private.

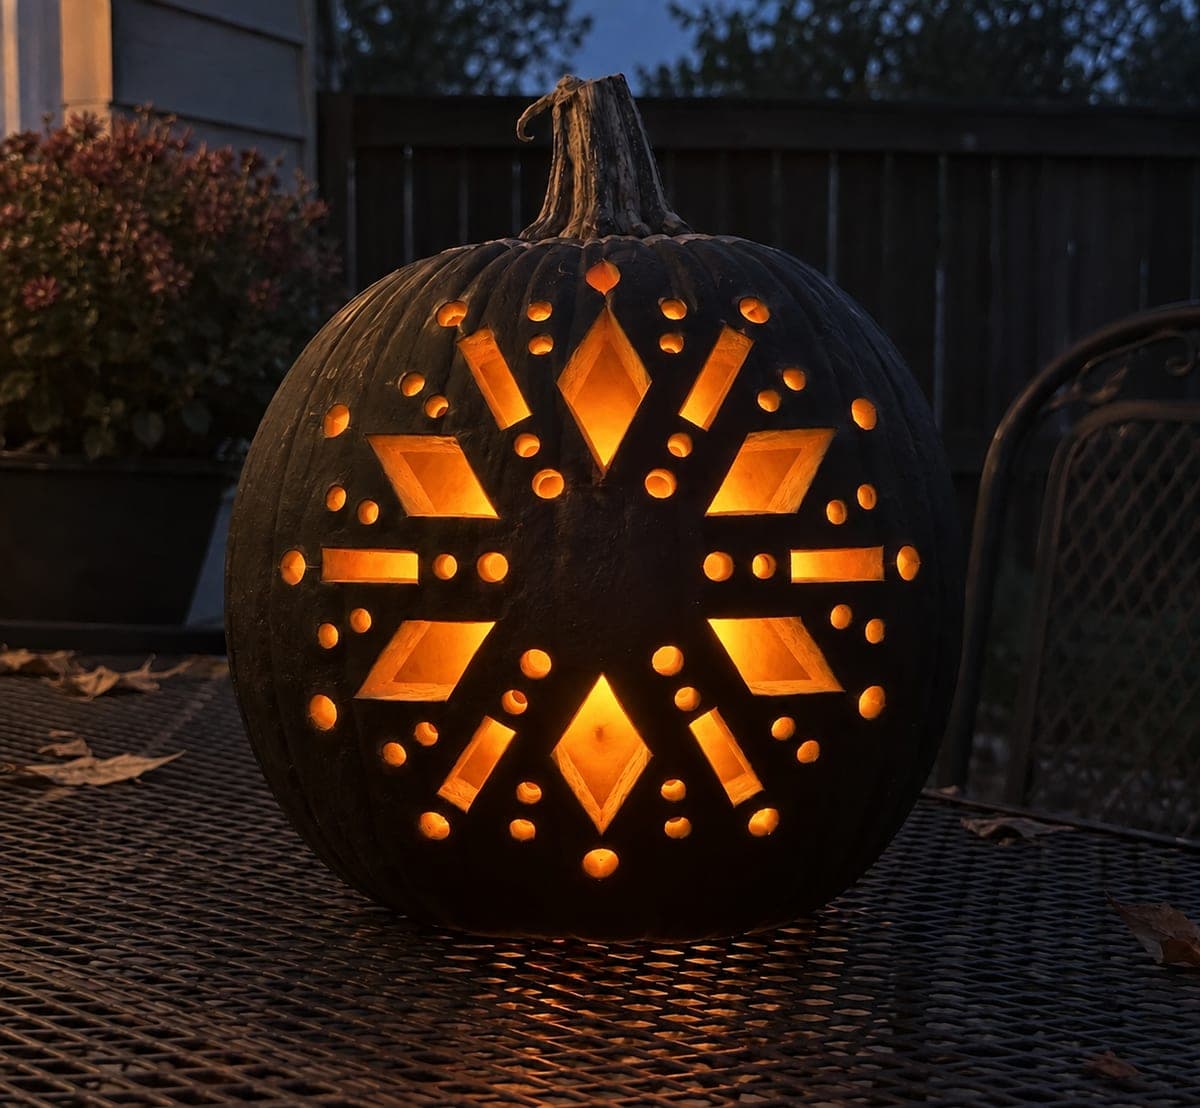
Sunflower Black Pumpkin Carving with Solid Matte Center

Sixteen separate teardrop petal holes surround a completely solid, entirely uncut matte-black round center, connected by wide radial rind ribs, plus twelve small drilled border holes, in this hard black pumpkin carving idea. The uncut center is intentional and must never be cut away; it sits as a dark circle at the heart of the glowing petals. Raw orange cut rims along each teardrop petal provide warm contrast against the black rind.

No ratings yet · Sign in to rate
Comments (0)

  • No comments yet — be the first.

Save without an account. Sign in to like or comment.

Our tips for carving a similar design

The critical rule for this design is that the solid matte-black circular center must never be cut. All sixteen teardrop petals surround it as separate holes, connected to each other and to the center by wide radial rind ribs. Establish the center circle boundary first by scoring it lightly, then cut each teardrop working around the circle one at a time. The uncut center disk is what makes the sunflower silhouette work.

From pumpkin to porch

  1. Paint and cure the exterior

    Apply two thin coats of matte black paint and allow a full overnight cure before any cutting. The cured black rind is both the design surface and the structural material for the radial ribs. A good cure also ensures the teardrop cut edges stay sharply defined.

  2. Mark the center and radial layout

    Using a chalk compass or circular object, trace the solid center circle on the black surface. Then draw sixteen evenly spaced radial lines extending outward from the center like spokes. The teardrop holes will sit between adjacent spokes, pointed toward the center circle.

  3. Draw the sixteen teardrop petals

    Between each pair of adjacent radial lines, sketch one teardrop shape with its narrow end pointing toward the center circle and its rounded base facing outward. The wide rind rib along each radial line and the solid center must remain completely uncut throughout.

  4. Cut each teardrop individually

    Pierce the center of one teardrop and saw around the outline, ending back at the start. Never cut into or along a radial rib line. Remove each waste piece inward through the hollow. The raw orange rim exposed inside each teardrop will glow warmly against the black rind.

  5. Add the border holes

    Mark twelve small drilled holes around the perimeter of the sunflower, between the outer tips of the teardrop petals. Use a step drill at steady speed. Each border hole should sit at least half an inch from the nearest teardrop tip.

  6. Light and display

    Insert a warm LED and view in low light. The sixteen teardrop petals glow as orange-rimmed shapes arranged in a circle around the solid black center, which reads as a dark disk surrounded by warm light. The border dots add an outer ring of scattered glow.

Written with AI to match this design

Gather your supplies

Check things off as you get ready.

Work on a stable surface, keep your free hand out of the cutting path, and have an adult handle sharp tools.

Three levels of light

  • Leave intact

    The solid matte-black center circle, all sixteen radial rind ribs between teardrop petals, and the border rind between drill holes stay fully intact and dark.

  • Peel & shade

    None; no peeling is needed anywhere on this design.

  • Cut through

    All sixteen teardrop petal holes and all twelve border holes are cut completely through.

Learn the carving basics

Before you start cutting

How do I make sure I never accidentally cut into the solid center?

Score the center circle boundary line deeply before cutting any teardrop. This scored groove acts as a stop line your blade will feel when it reaches it. Approach each teardrop tip cut by sawing toward the scored circle boundary, letting it halt your blade naturally.

How wide should the radial rind ribs be?

Aim for at least three-eighths of an inch on each rib, measured at their narrowest point near the center. Wider ribs, around half an inch, make the sunflower look bolder and reduce the risk of a rib cracking if the pumpkin is handled. Scale the teardrop sizes to keep the ribs at a safe width.

Will the finished pumpkin be structurally sound enough to move after carving?

Yes, as long as all sixteen radial ribs remain intact and the border holes are spaced well apart. Carry the pumpkin from underneath rather than gripping the sides, which puts no stress on the ribs. Avoid setting it down on a surface that has bumps or ridges directly under the carved face.

Your take belongs here, too.

Changed a detail? Made it simpler? Share a photo of your version and tell the community what worked.

Share your pumpkin

More pumpkins like this

You've reached the end · 8 pumpkins
The Patch Report

Fresh pumpkins, in your inbox.

The best new carvings, ideas worth stealing, and how-tos for carving season. Short, seasonal, and gone by November.

A short email during carving season. Unsubscribe anytime. See our privacy policy.