Halloween Pumpkin Carving Contest · Starts October 1st · $500 in prizes
← Back to ideas
@ai_concepts
Jul 28, 2026
Board Game Night Dice Pumpkin CarvingAI
0

Board Game Night Dice Pumpkin Carving

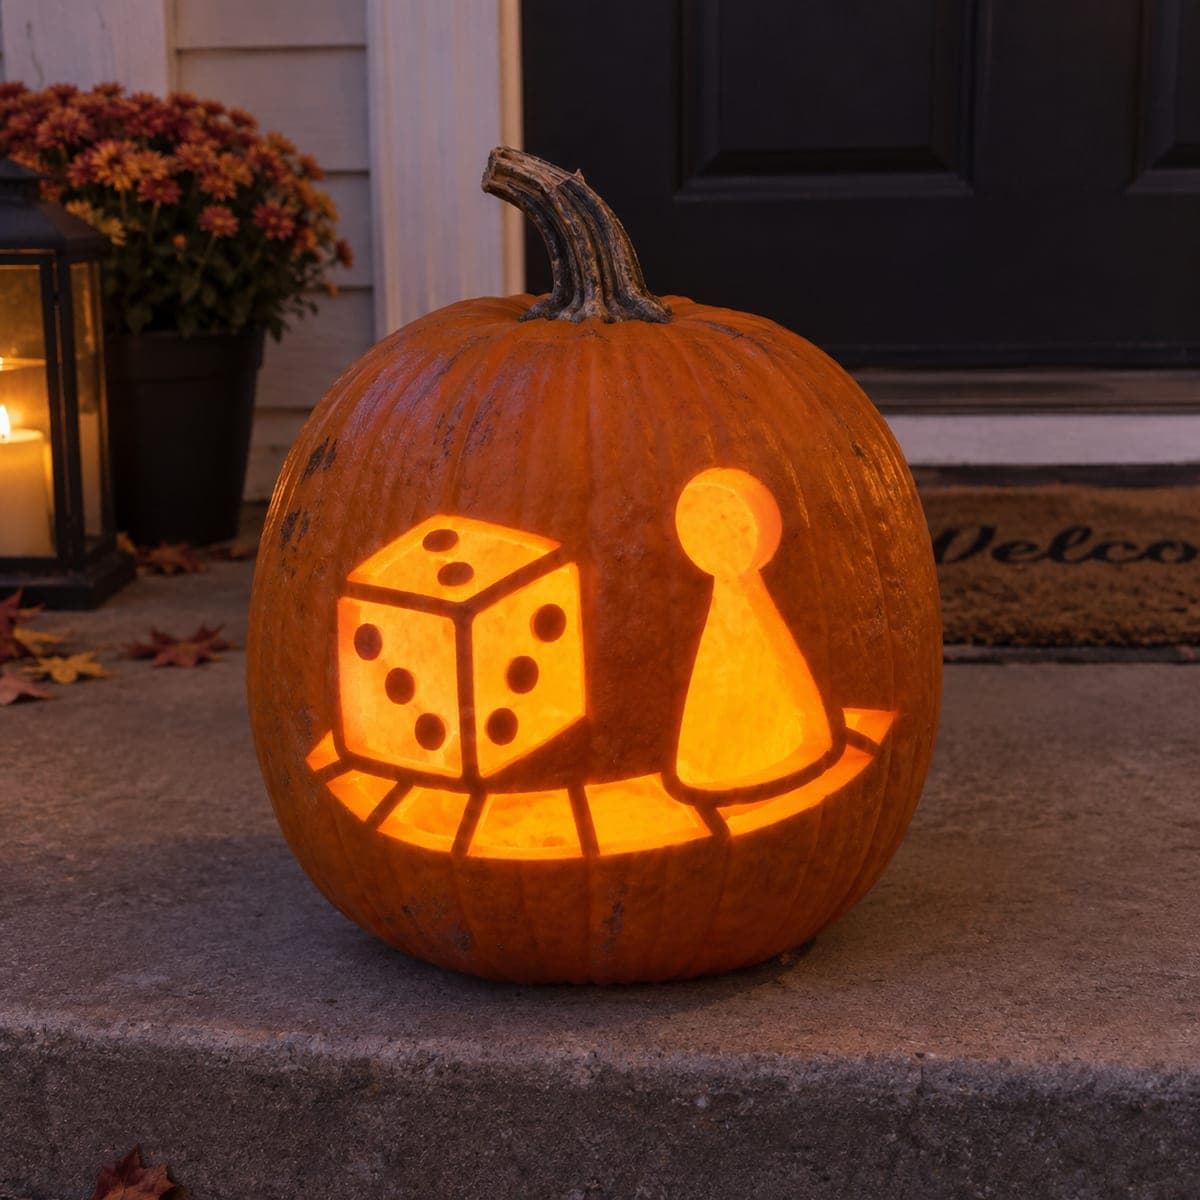
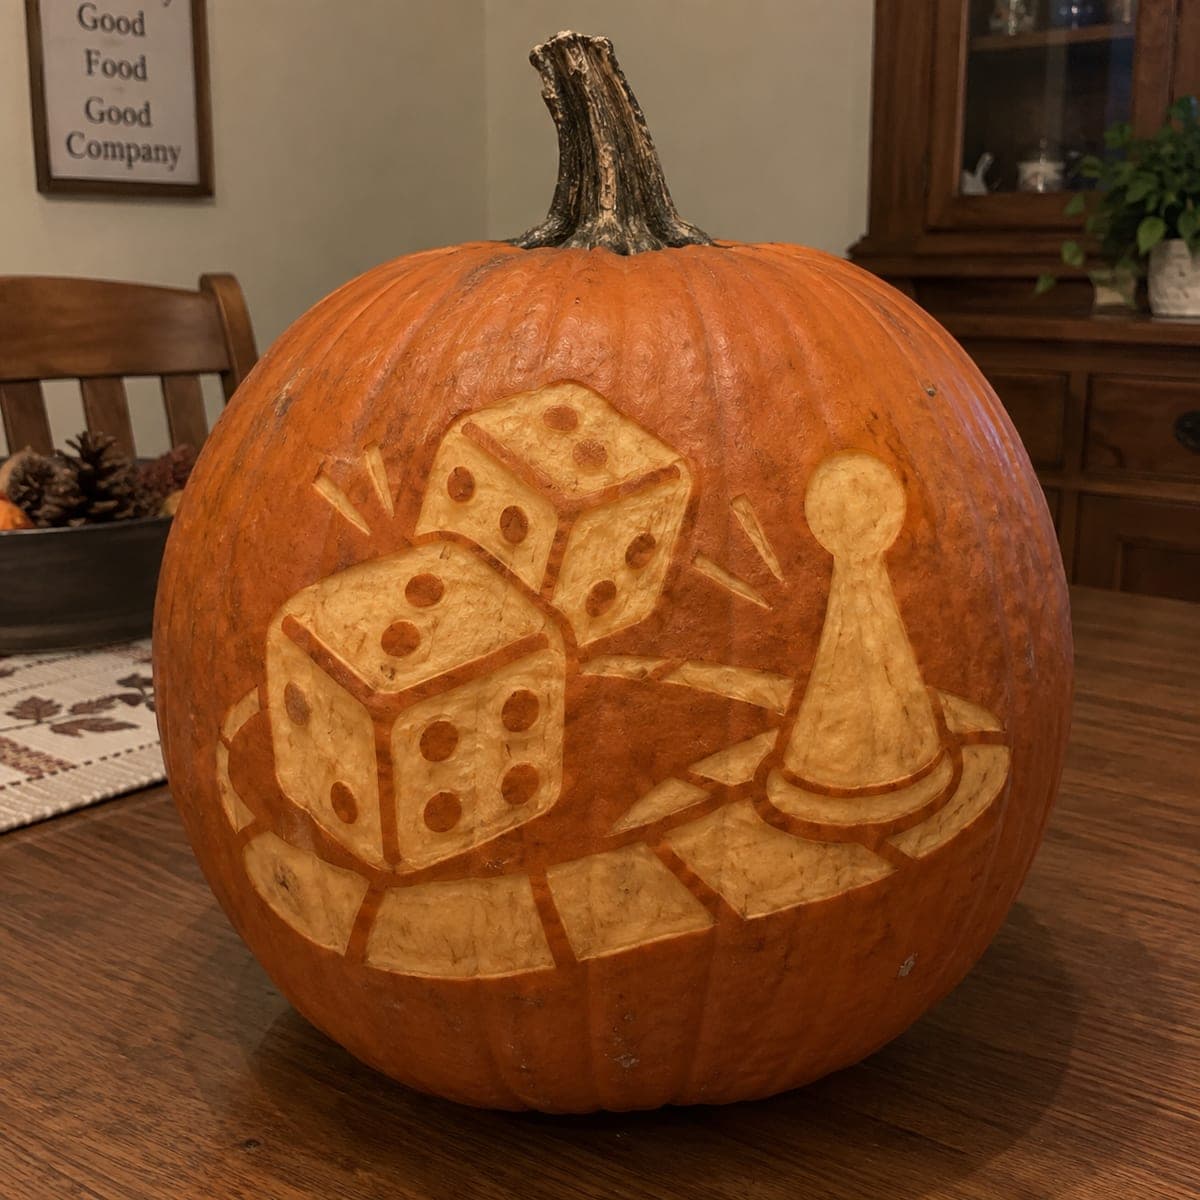
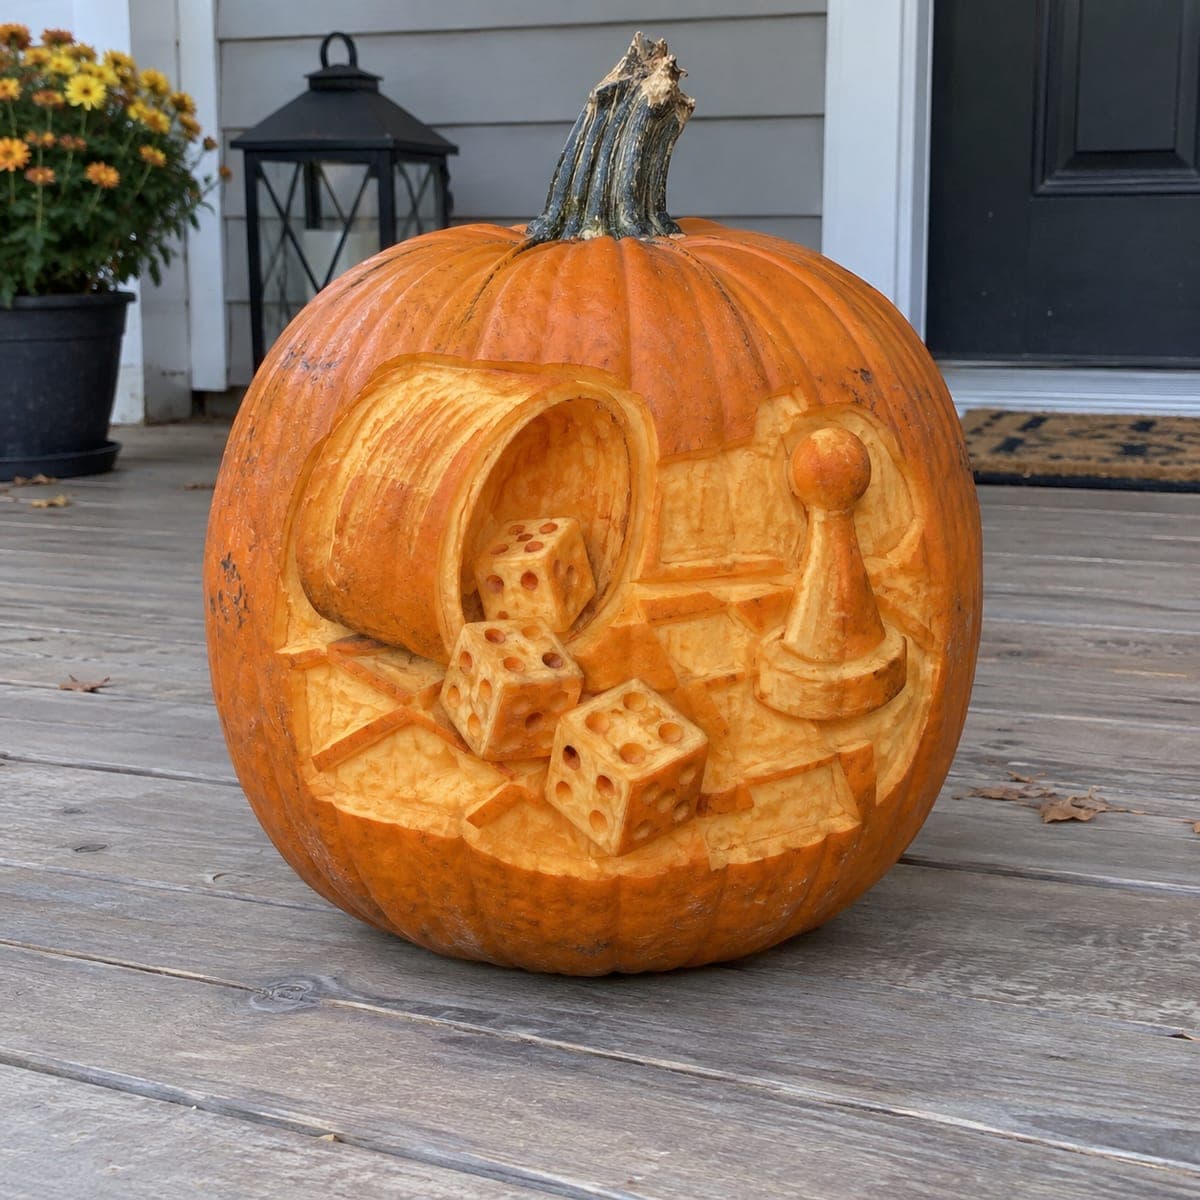
Tumbling dice and a game pawn on a winding board path are peeled into this pumpkin, a clever carving idea for a family that loves game night. The whole scene is surface-etched rather than cut through, so the pips, the pawn's curves, and the path tiles all read as pale shapes on orange. Lay out the two dice as simple cubes in marker, keeping their pip counts believable, then peel the large faces before detailing. Small motion dashes make the dice feel mid-roll.

This is an AI-generated concept image: a realistic, carvable design idea rather than a photo of a finished carve. AI concepts are always labeled and sit out the leaderboard and the contest.

No ratings yet · Sign in to rate
Comments (0)

  • No comments yet — be the first.

Save without an account. Sign in to like or comment.

Our tips for carving a similar design

The whole trick here is that nothing gets cut all the way through. Every shape, the two tumbling dice, the winding tile path, and the standing pawn, is skin-peeled so it glows pale against dark orange skin. Because you control depth rather than making openings, you can shade curves and vary brightness across the scene.

Written by PumpkinCarvingIdeas.com, inspired by the image above. These are our suggestions, not instructions from the uploader. This approach to the AI concept has not been tested on a real pumpkin.

From pumpkin to porch

  1. Pick a smooth face and transfer the layout

    Choose the flattest, cleanest side of a firm pumpkin so the flat die faces have room to read. Sketch the two dice as simple cubes in washable marker, then add the curved path of tiles sweeping below them and the rounded pawn on the right. Keep the pip counts believable, like a four and a three on the visible faces, and pencil in a few short motion dashes near the dice. Step back and check the whole scene balances before you touch a tool.

  2. Score all the outlines first

    With a fine detail blade, trace just the outer edges of every shape to a shallow depth. This locks in your drawing so a slip while peeling stops at a clean line instead of tearing across the design. Cut the die cube edges, the pip circles, each path tile seam, and the pawn silhouette. Take your time on the pawn's curves since smooth outlines here make it read instantly.

  3. Peel the big die faces

    Use a loop or ribbon tool to scrape away only the outer skin on the large faces of both dice, leaving a smooth even layer of flesh that will glow dim orange. Work in one direction and keep the depth consistent so the faces look flat and clean. Leave the pip circles unpeeled for now so they stay as dark dots against the pale face. This is the core shading move, so go slow and check brightness by holding the pumpkin toward a lamp.

  4. Peel the pawn and the path tiles

    Skin-peel the pawn body to the same mid depth, then go slightly deeper on its rounded belly to suggest a highlight, easing back toward the edges for a soft curved look. Peel each path tile, leaving the thin seams between them unpeeled so the tiles stay separated. Keep a narrow band of untouched skin around the base of the pawn so it looks like it is standing on the board. Small depth changes are what sell the shapes as three dimensional.

  5. Add motion dashes and refine contrast

    Peel the short dash marks around the dice so they read as bright little bursts of movement. Now compare all your peeled areas and deepen anything that should pop, such as the front die, while leaving background elements a touch shallower. Clean up any ragged edges with the detail blade. The pips and tile seams should still be the darkest parts of the design for contrast.

  6. Light it and photograph

    Drop in a battery LED puck, warm white looks best against the orange, and set it low so the light rakes across the peeled surfaces. Because this is a surface carving with no openings, the glow comes through the thinned flesh, so give it a minute in a dark room to see the full effect. Rub a little petroleum jelly on cut edges to slow drying and keep the shapes crisp for a few days. Snap your photo slightly off to the side so the shading and depth show.

Gather your supplies

Check things off as you get ready.

Work on a stable surface, keep your free hand out of the cutting path, and have an adult handle sharp tools.

Three levels of light

  • Leave intact

    The background skin, the dice pips, and the thin seams between path tiles stay untouched and dark.

  • Peel & shade

    The large die faces, the pawn body, the path tiles, and the motion dashes are skin-peeled for a soft mid glow.

  • Cut through

    Nothing is cut through on this design, so there are no full-brightness openings.

Learn the carving basics

Before you start cutting

Do I need to cut all the way through anywhere?

No, and that is what makes this design approachable. Every element is surface-peeled, so you are only removing the outer skin and a thin layer of flesh. That keeps the pumpkin strong and lets the glow come through evenly.

How do I keep the dice pips looking clean?

Score each pip circle before you peel the surrounding face, then simply leave the pips unpeeled. Because the skin around them is thinned and glowing, the untouched dots will stay dark and crisp. Just make sure your peel depth around each pip is even so the dots do not smear.

This is a concept image, so how deep should I actually peel?

Aim for peeling just through the outer skin, roughly an eighth of an inch, and test one small patch against a light first. Go a little deeper on the pawn's belly for a highlight, but stop before the flesh gets thin enough to feel translucent everywhere. Consistent shallow depth reads better than uneven gouging.

Your take belongs here, too.

Changed a detail? Made it simpler? Share a photo of your version and tell the community what worked.

Share your pumpkin

More pumpkins like this

You've reached the end · 8 pumpkins
The Patch Report

Fresh pumpkins, in your inbox.

The best new carvings, ideas worth stealing, and how-tos for carving season. Short, seasonal, and gone by November.

A short email during carving season. Unsubscribe anytime. See our privacy policy.