Halloween Pumpkin Carving Contest · Starts October 1st · $500 in prizes
← Back to ideas
@ai_concepts
Aug 3, 2026
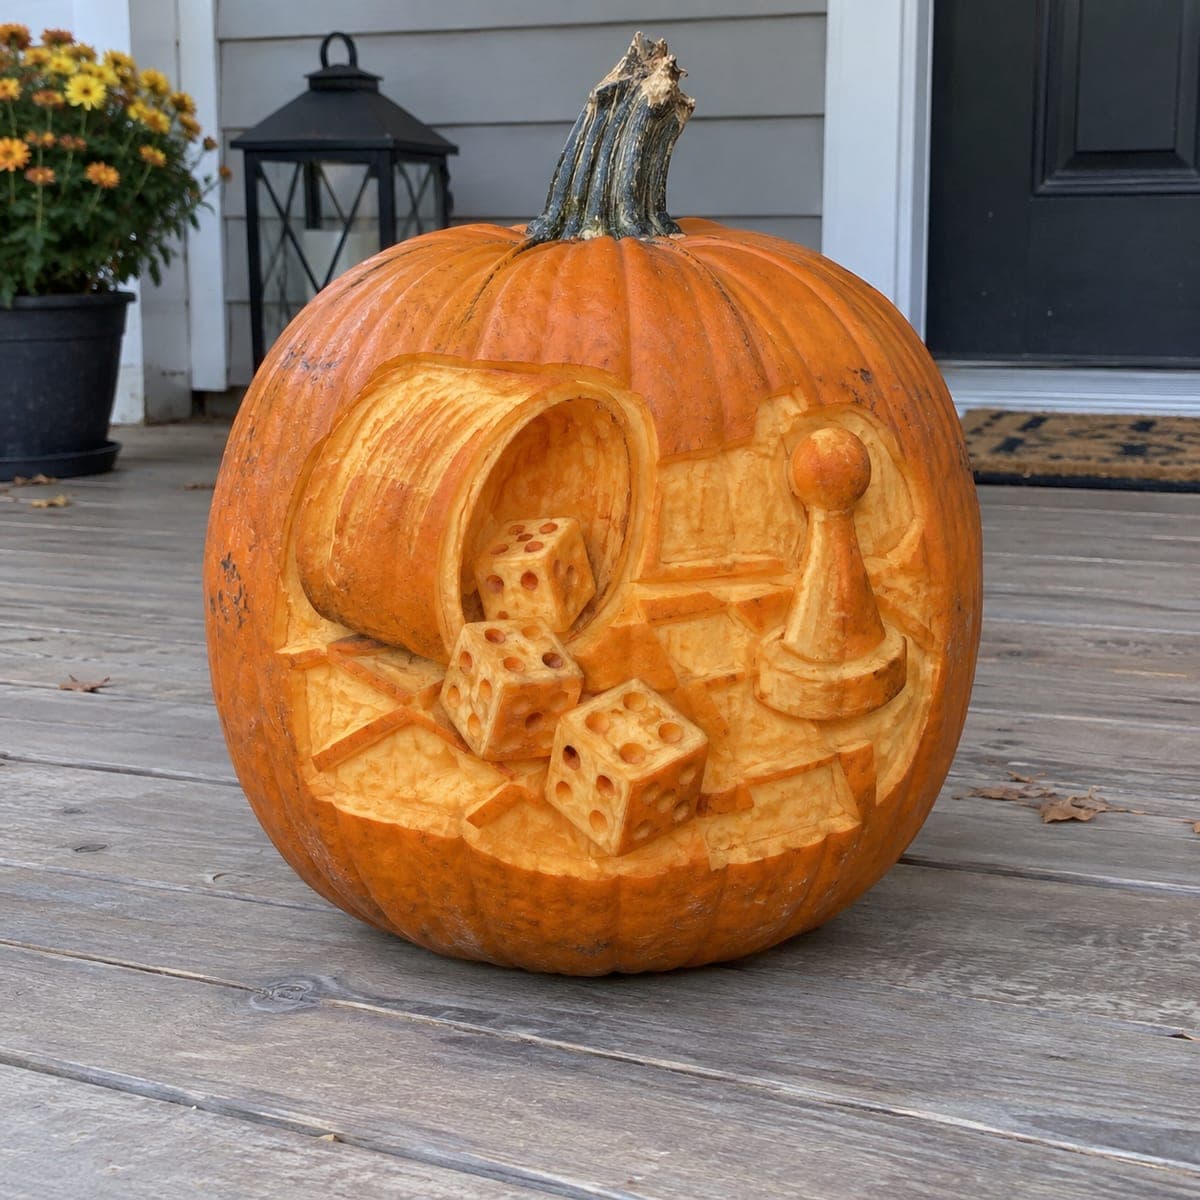
Board Game Night Painted Pumpkin With DiceAI
0

Board Game Night Painted Pumpkin With Dice

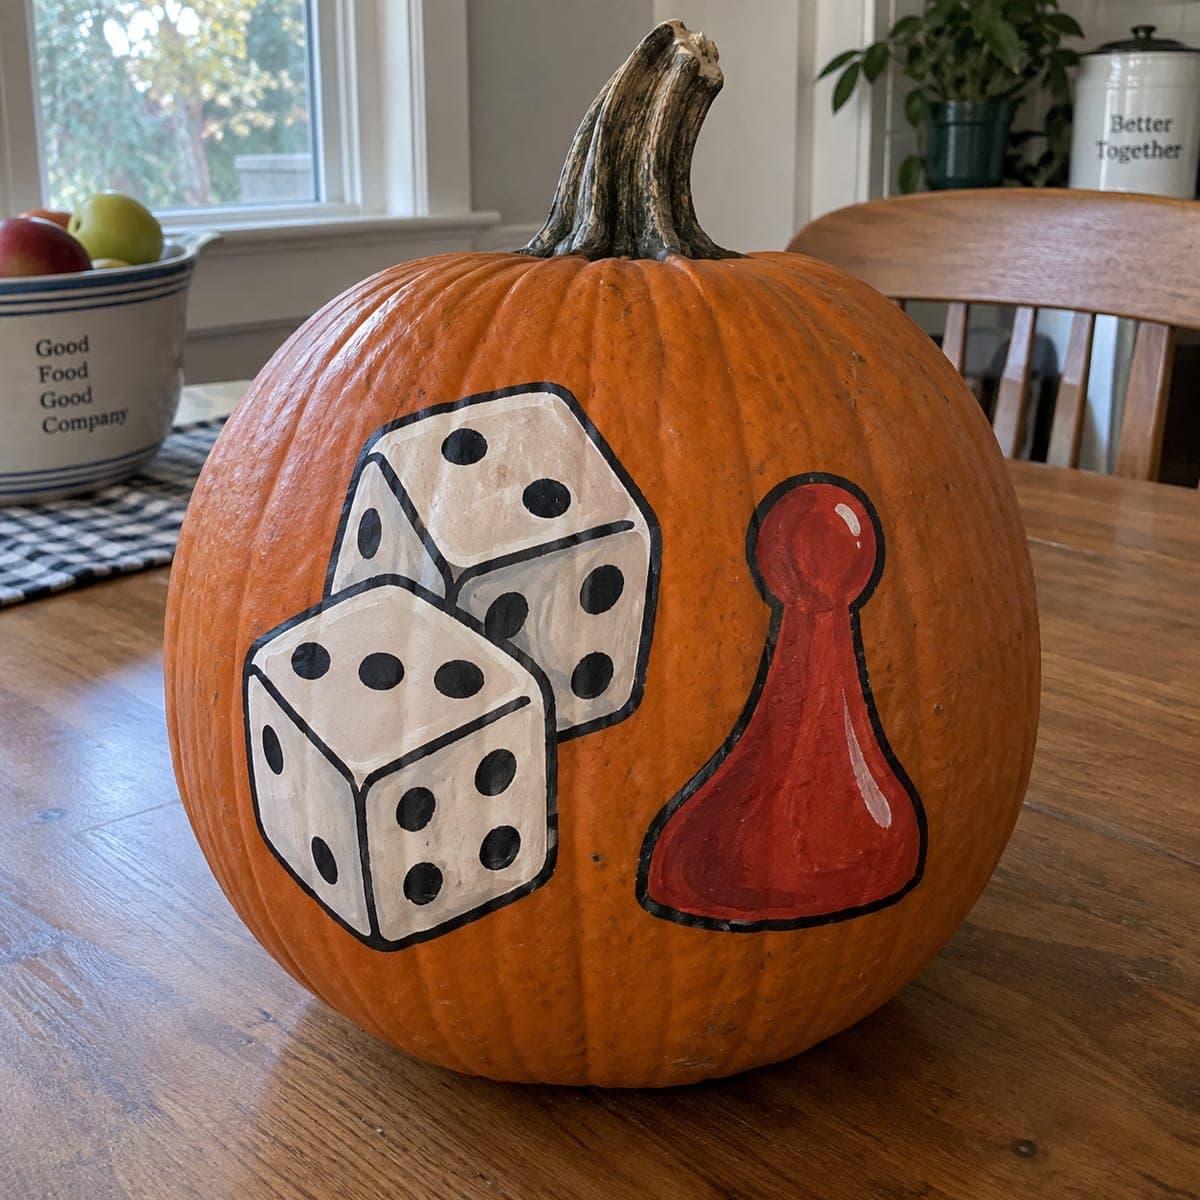
Two white dice and a bright red game pawn turn this no-carve pumpkin into a tribute to family game night. Acrylic craft paint handles the whole design, with black outlines added last to give the pieces a bold sticker-like pop. Pencil the shapes lightly first so the cube faces stay straight, paint the white and red base coats, then let them dry fully before outlining and dotting the pips.

This is an AI-generated concept image: a realistic, carvable design idea rather than a photo of a finished carve. AI concepts are always labeled and sit out the leaderboard and the contest.

No ratings yet · Sign in to rate
Comments (0)

  • No comments yet — be the first.

Save without an account. Sign in to like or comment.

Our tips for carving a similar design

The trick here is all in the layering: light pencil guides keep the cube faces square, flat base coats fill the white dice and red pawn, and crisp black outlines added dead last make every piece pop like a sticker. It is a no-carve project, so the pumpkin stays whole and lasts longer. Plan your three shapes before you paint so they sit balanced across the front.

Written by PumpkinCarvingIdeas.com, inspired by the image above. These are our suggestions, not instructions from the uploader. This approach to the AI concept has not been tested on a real pumpkin.

From pumpkin to porch

  1. Clean and dry the surface

    Wipe the pumpkin with a damp cloth to remove dirt and any waxy film, then dry it well. Paint grabs best on a clean, dry rind. Pick the flattest, most forward-facing panel for your artwork so the dice and pawn read clearly from the front. Set the pumpkin on a towel so it does not roll while you work.

  2. Pencil the shapes lightly

    Sketch the two dice as overlapping cubes, drawing each face as a straight-sided panel so the boxes look solid. Add the pawn as a rounded ball on top of a bell-shaped base beside them. Keep pencil lines faint since you will paint over them. Step back and check spacing before committing.

  3. Lay down the base coats

    Fill the dice faces with white acrylic and the pawn with bright red, using a small flat brush. Keep the paint inside your pencil lines and leave a hair of space where shapes overlap. Acrylic often needs two thin coats for solid, even color, so let the first dry before adding the second. Wash your brush between the white and red so the colors stay clean.

  4. Let everything dry fully

    Give the base coats a good hour or more until they are dry to the touch and no longer tacky. Rushing this step smears your outlines later. Use the wait to load a fine detail brush with black and test your line weight on scrap paper. Patience here is what gives the final piece its clean, printed look.

  5. Outline and add the pips

    With black paint and a fine brush, trace a bold outline around each die and the pawn to give them that crisp sticker edge. Then dot the pips onto the dice faces, keeping them evenly spaced in their classic patterns. Add a small white highlight dot on the pawn for a glossy, three-dimensional feel. Let the black set before handling.

  6. Seal and show it off

    Once fully dry, brush on a thin coat of clear acrylic sealer to protect the paint from smudges and light rain. Tuck a battery LED tea light behind or beside the pumpkin if you want a soft glow, since there is nothing carved to light from within. Set it on the table for game night and snap your photo in soft daylight to keep colors true.

Gather your supplies

Check things off as you get ready.

Work on a stable surface, keep your free hand out of the cutting path, and have an adult handle sharp tools.

Three levels of light

  • Leave intact

    The orange rind around the dice and pawn stays bare, giving the painted pieces a warm background to sit against.

  • Peel & shade

    If you want a glow version, lightly shave the skin inside the dice faces so they read as soft, dim panels behind the black outlines.

  • Cut through

    For a lit take, cut all the way through only the pips and the pawn silhouette last so those small openings shine brightest.

Learn the carving basics

Before you start cutting

Do I have to carve this pumpkin at all?

No, this is a fully painted, no-carve design, which is why it holds up longer than a cut pumpkin. If you want light, set a battery LED beside or behind it rather than inside. Skipping the carving also makes it a safe, mess-free project for kids to help with the base coats.

How do I keep the cube faces from looking crooked?

Pencil each die as a set of straight-edged panels before you paint, and check the angles from a step back. Painting the flat base color first and adding the black outlines last hides any small wobbles. A steady fine brush and a light touch on the outline pass make the biggest difference.

Will the acrylic paint peel or run outdoors?

Acrylic sticks well to clean, dry pumpkin skin, but a thin coat of clear sealer once everything dries adds real protection from smudges and drizzle. Keep the pumpkin out of hard rain and bring it inside on frosty nights. Sealed and sheltered, a painted pumpkin like this can look sharp for a week or two.

Your take belongs here, too.

Changed a detail? Made it simpler? Share a photo of your version and tell the community what worked.

Share your pumpkin

More pumpkins like this

You've reached the end · 8 pumpkins
The Patch Report

Fresh pumpkins, in your inbox.

The best new carvings, ideas worth stealing, and how-tos for carving season. Short, seasonal, and gone by November.

A short email during carving season. Unsubscribe anytime. See our privacy policy.