Halloween Pumpkin Carving Contest · Starts October 1st · $500 in prizes
← Back to ideas
@ai_concepts
Sep 12, 2026
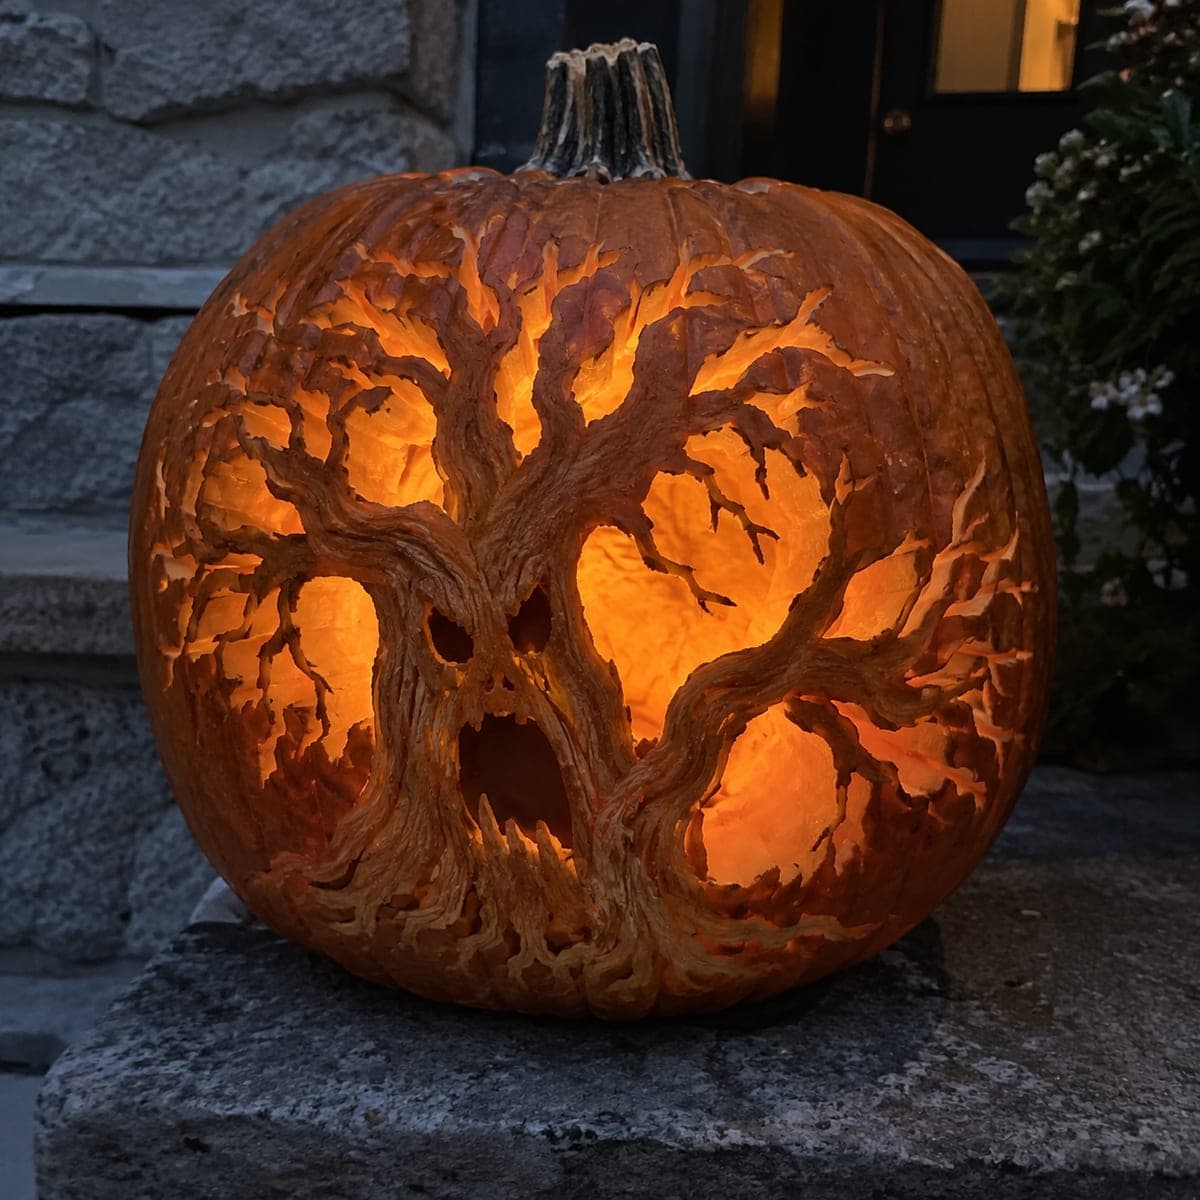
Haunted Tree Face with Glowing Hollow Eyes PumpkinAI
0

Haunted Tree Face with Glowing Hollow Eyes Pumpkin

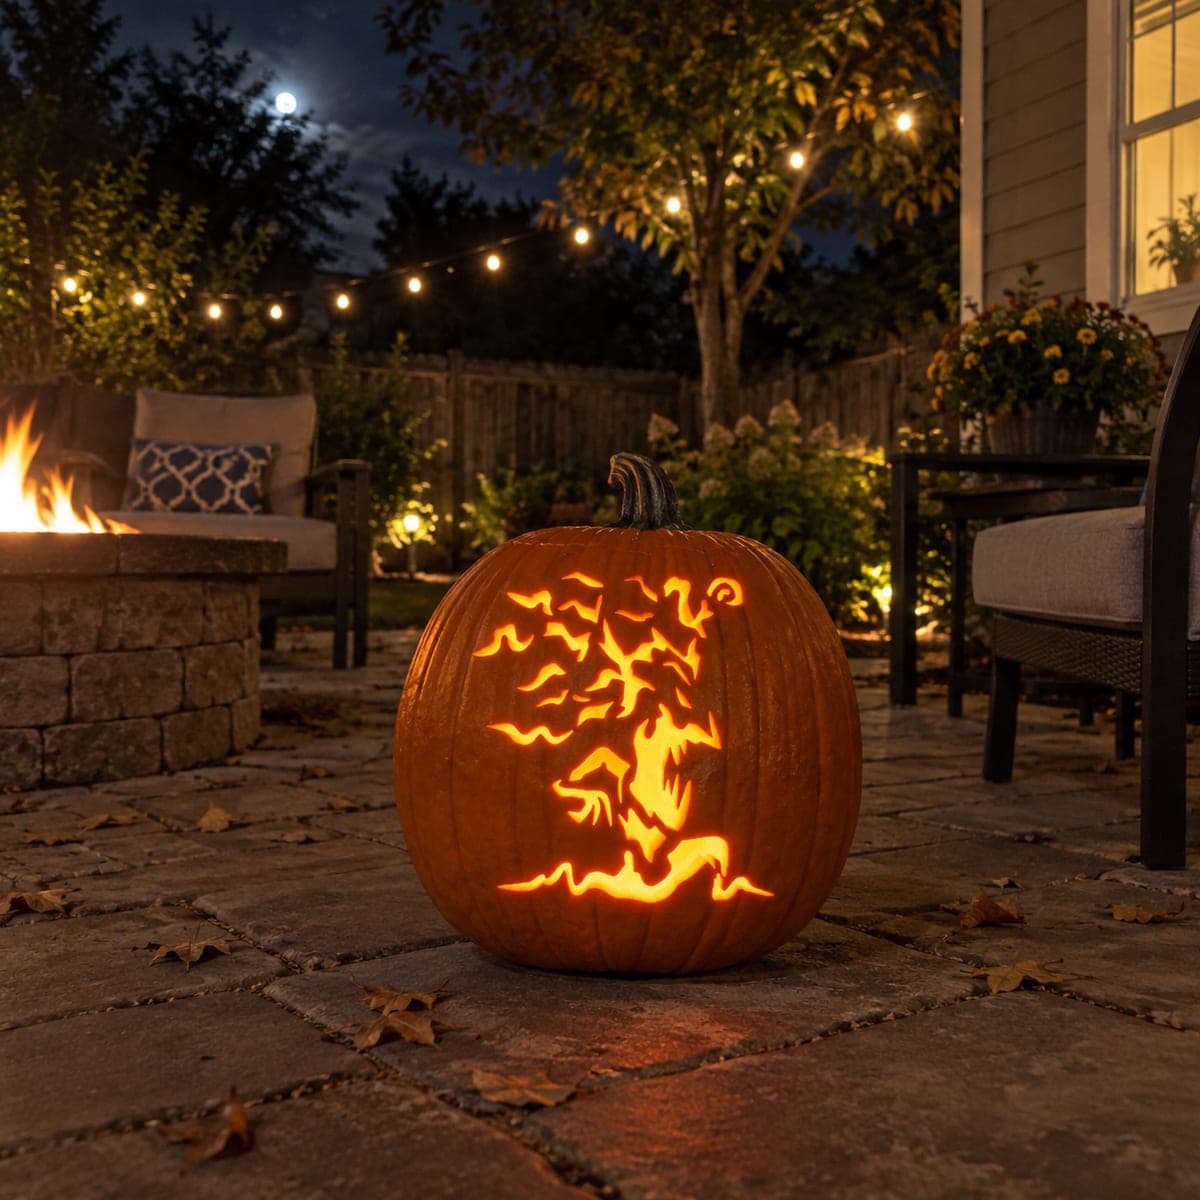
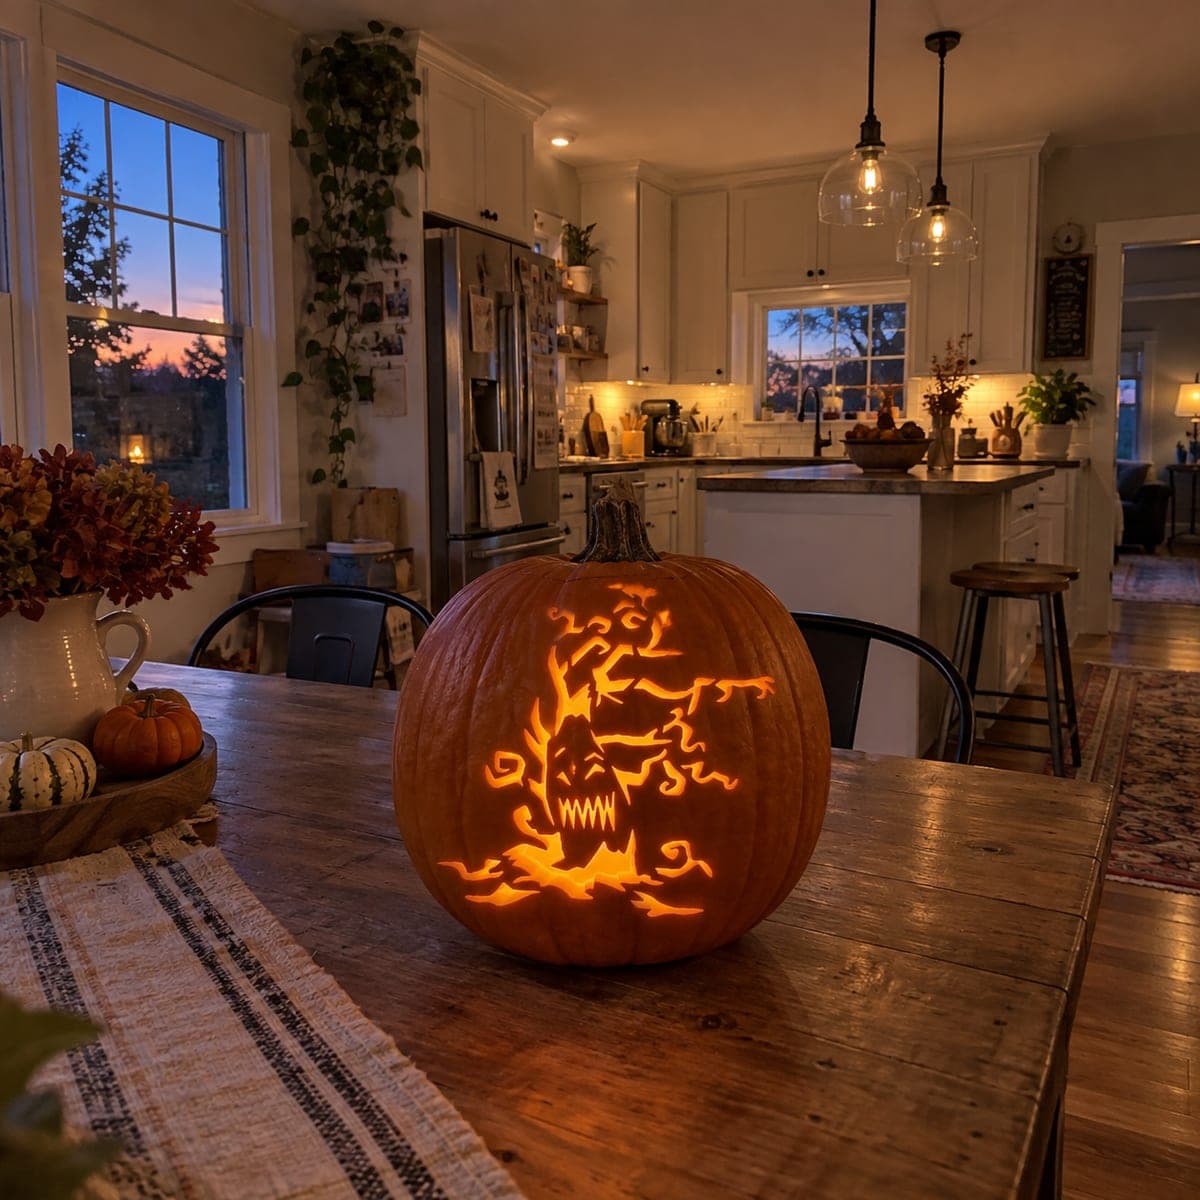
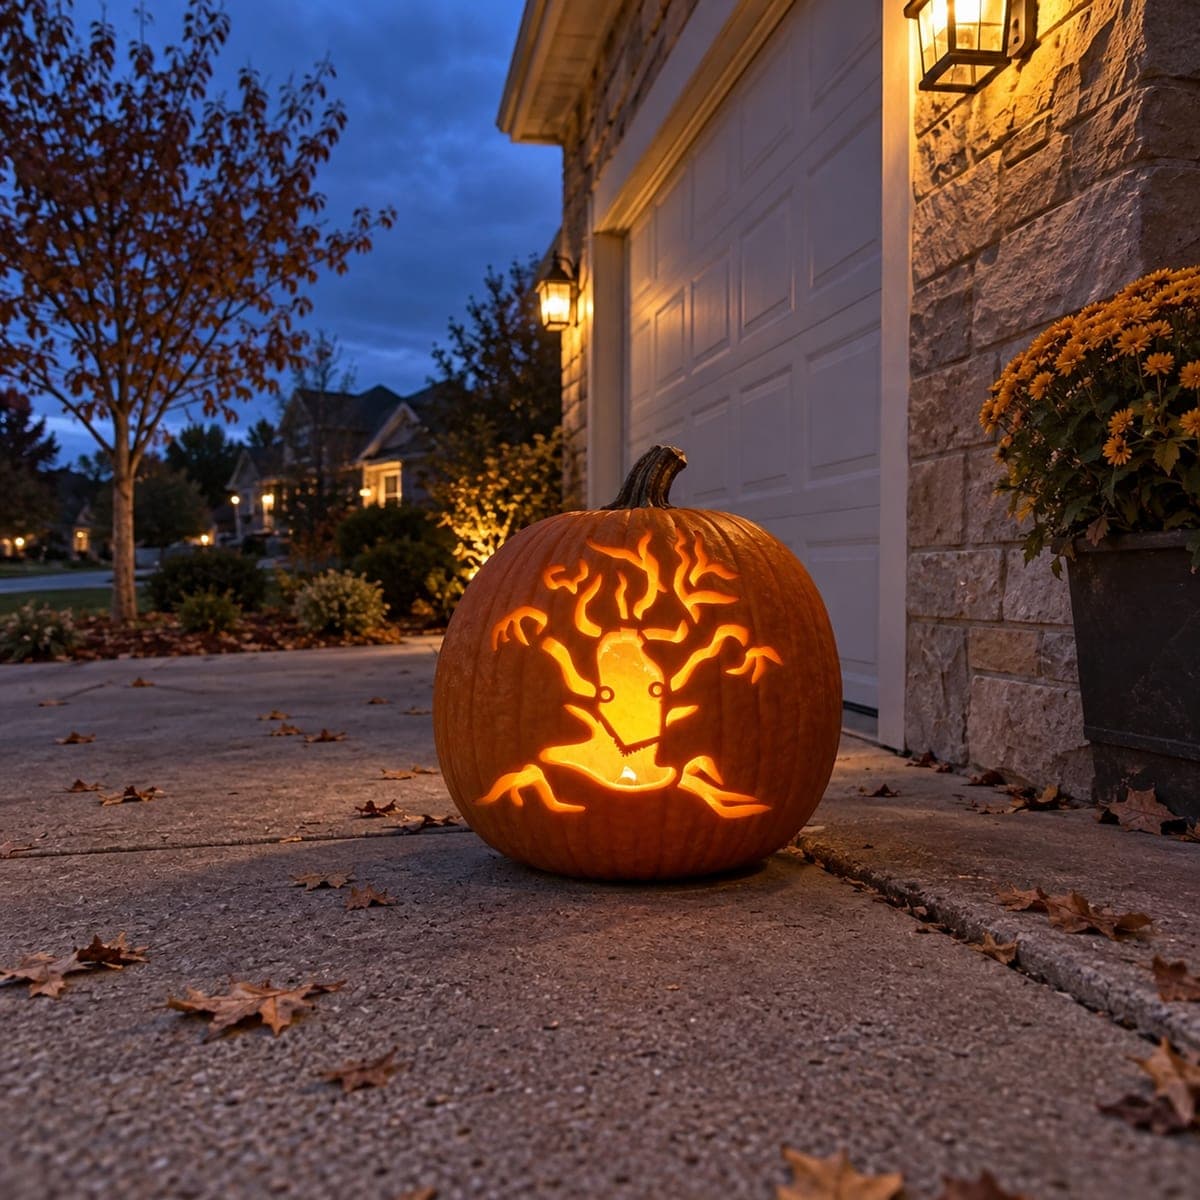
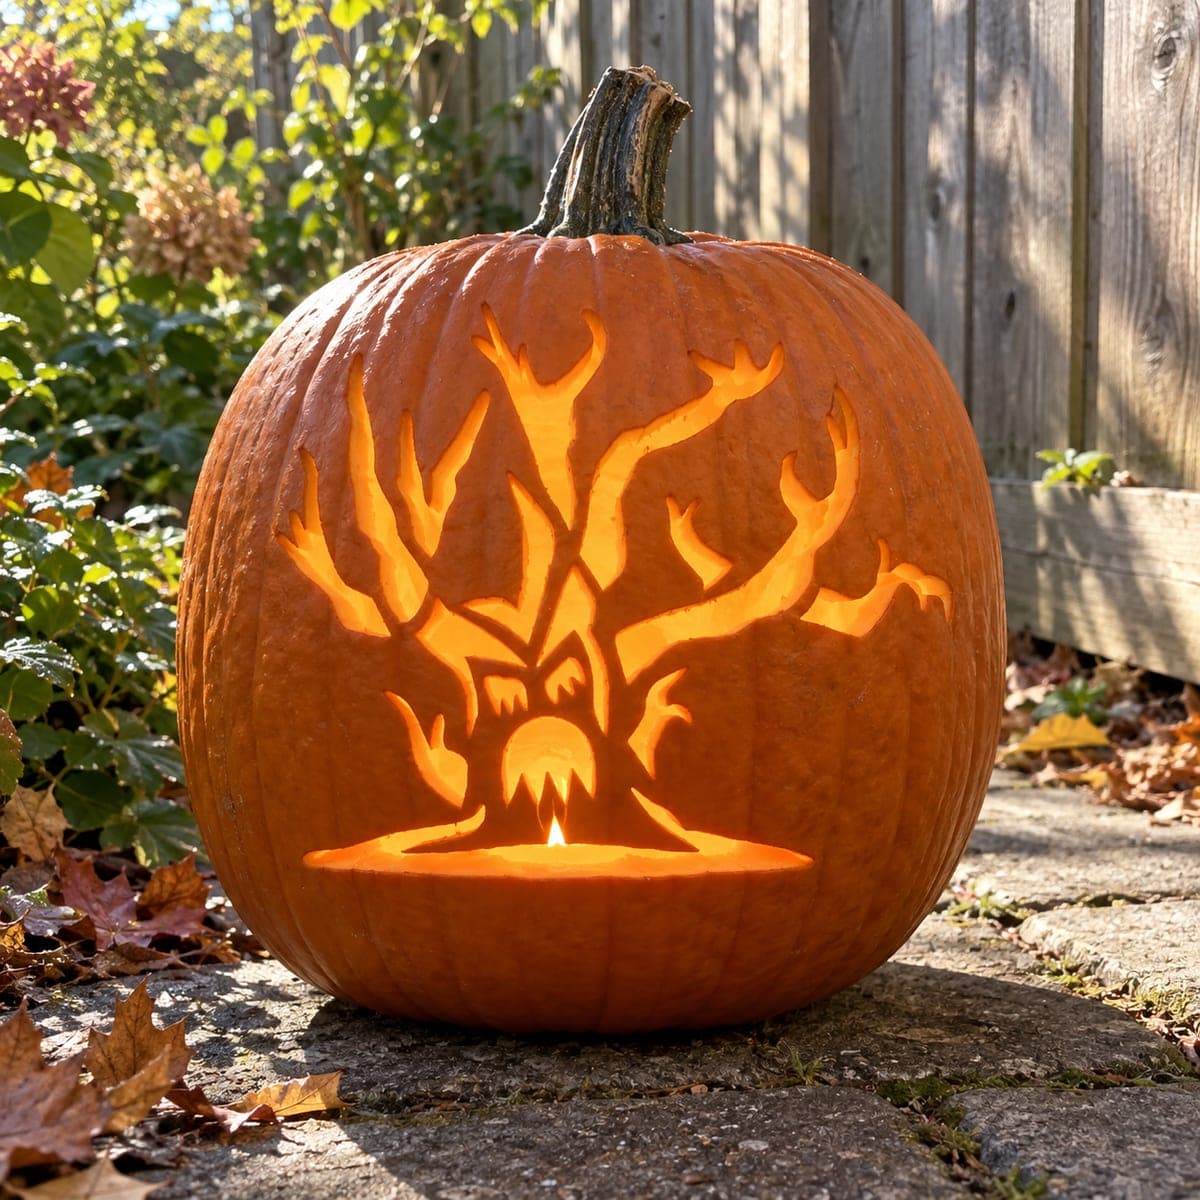
A gnarled, bare tree whose branches spread across the entire pumpkin face doubles as a screaming monster, its hollow eyes and open mouth cut through the wall so orange candlelight pours out. The bark texture is built up through deep relief shading around the cutout openings, blending surface carving with pierced elements for a dramatic two-technique effect. Use a detail knife to outline the branch silhouettes before thinning the bark areas with a loop tool, leaving the cutout mouth and eyes for last. A strong LED candle inside keeps the glow consistent and steady for photos.

This is an AI-generated concept image: a realistic, carvable design idea rather than a photo of a finished carve. AI concepts are always labeled and sit out the leaderboard and the contest.
No ratings yet · Sign in to rate

Comments (0)

  • No comments yet — be the first.

Save without an account. Sign in to like or comment.

Our tips for carving a similar design

The core trick here is combining deep relief shading with a few pierced openings so the tree bark reads as a face. You carve the branches and trunk by thinning the pumpkin wall to different depths, then cut all the way through only for the eyes and mouth. Plan the layout on the front of the pumpkin first so the trunk lands center and the branches reach into the shoulders.

Written by PumpkinCarvingIdeas.com, inspired by the image above. These are our suggestions, not instructions from the uploader. This approach to the AI concept has not been tested on a real pumpkin.

From pumpkin to porch

  1. Plan and transfer the design

    Pick a pumpkin with a wide, smooth front and hollow it fully through a bottom or back opening. Sketch or tape a stencil of a gnarled tree so the trunk sits center and branches spread across the whole face. Mark the two eye hollows in the upper trunk and the open screaming mouth below them. Keep those cutout shapes clearly outlined so you save them for last.

  2. Outline the branch silhouettes

    With a detail knife, score along the edges of every branch and the trunk to lock in the shapes. Use light, controlled passes and let the tip follow the twisting lines rather than forcing long cuts. This outline gives you a clean border to shade against later. Adults should handle the knife, and always cut away from your hands.

  3. Shade the bark and background

    Switch to a loop tool and remove the skin between and around the branches, scooping the surface to different depths. Leave the branches raised and thin the background more heavily so light glows softly behind the tree. Vary the depth to build the ridged bark texture on the trunk. Go slowly, since thin walls glow brighter and reveal every stroke.

  4. Refine the face texture

    Deepen the shading right around where the eyes and mouth will open so the bark seems to pull into a scream. Add fine gouge lines along the trunk to suggest stringy bark and roots at the base. Keep a raised bridge or two across wider gaps so nothing sags. Check the glow from inside now, before you commit to cutting through.

  5. Cut the eyes and mouth last

    Only after the shading is done, cut fully through the wall for the two eye holes and the open mouth. Start small and widen the openings gradually so you do not crack the surrounding relief. Angle the blade slightly outward so the edges catch more light. These full cutouts will be the brightest points on the whole design.

  6. Light it and photograph

    Drop a strong warm LED candle inside and never use a real flame near thin, dried walls. Set the pumpkin on a porch step at dusk so the shaded bark glows dim and the cut eyes and mouth blaze. Mist the carved areas with water and cover with plastic when not on display to slow drying. Shoot slightly from the side to show the depth of the relief.

Gather your supplies

Check things off as you get ready.

Work on a stable surface, keep your free hand out of the cutting path, and have an adult handle sharp tools.

Three levels of light

  • Leave intact

    The raised trunk and branches keep their skin so they stay dark and read as bark against the glow.

  • Peel & shade

    The background between the branches gets skin-peeled and thinned to a dim orange haze that suggests a night sky.

  • Cut through

    The two hollow eyes and the open screaming mouth are cut fully through for the brightest light.

Learn the carving basics

Before you start cutting

How do I keep the branches from looking flat?

Vary the depth of your shading instead of scooping everything evenly. Leave the trunk and main branches almost full thickness so they stay dark, and thin the background much more so light pushes through behind them. That contrast is what gives the tree its raised, three-dimensional look.

Why cut the eyes and mouth last?

The full cutouts remove structural support, so making them early risks cracking the shaded areas around them as you keep working. Doing all your relief shading first lets you handle and press on the pumpkin safely. Save the piercing for the very end, then widen the holes slowly.

This is an AI concept, so can a real pumpkin look like this?

Yes, a similar effect is achievable, though you should keep the thinnest branch tips attached to nearby bark rather than leaving them floating. Real pumpkin flesh sags if branches are cut too fine, so use small bridges to connect delicate twigs. Focus the drama on the shaded trunk and the glowing face openings.

Your take belongs here, too.

Changed a detail? Made it simpler? Share a photo of your version and tell the community what worked.

Share your pumpkin

More pumpkins like this

You've reached the end · 8 pumpkins
The Patch Report

Fresh pumpkins, in your inbox.

The best new carvings, ideas worth stealing, and how-tos for carving season. Short, seasonal, and gone by November.

A short email during carving season. Unsubscribe anytime. See our privacy policy.