Halloween Pumpkin Carving Contest · Starts October 1st · $500 in prizes
← Back to ideas
@ai_concepts
Sep 25, 2026
Cauldron With Hatband Support and Flame Holes PumpkinAI
0

Report this carving

Tell us what is wrong. Reports are private.

Cauldron With Hatband Support and Flame Holes Pumpkin

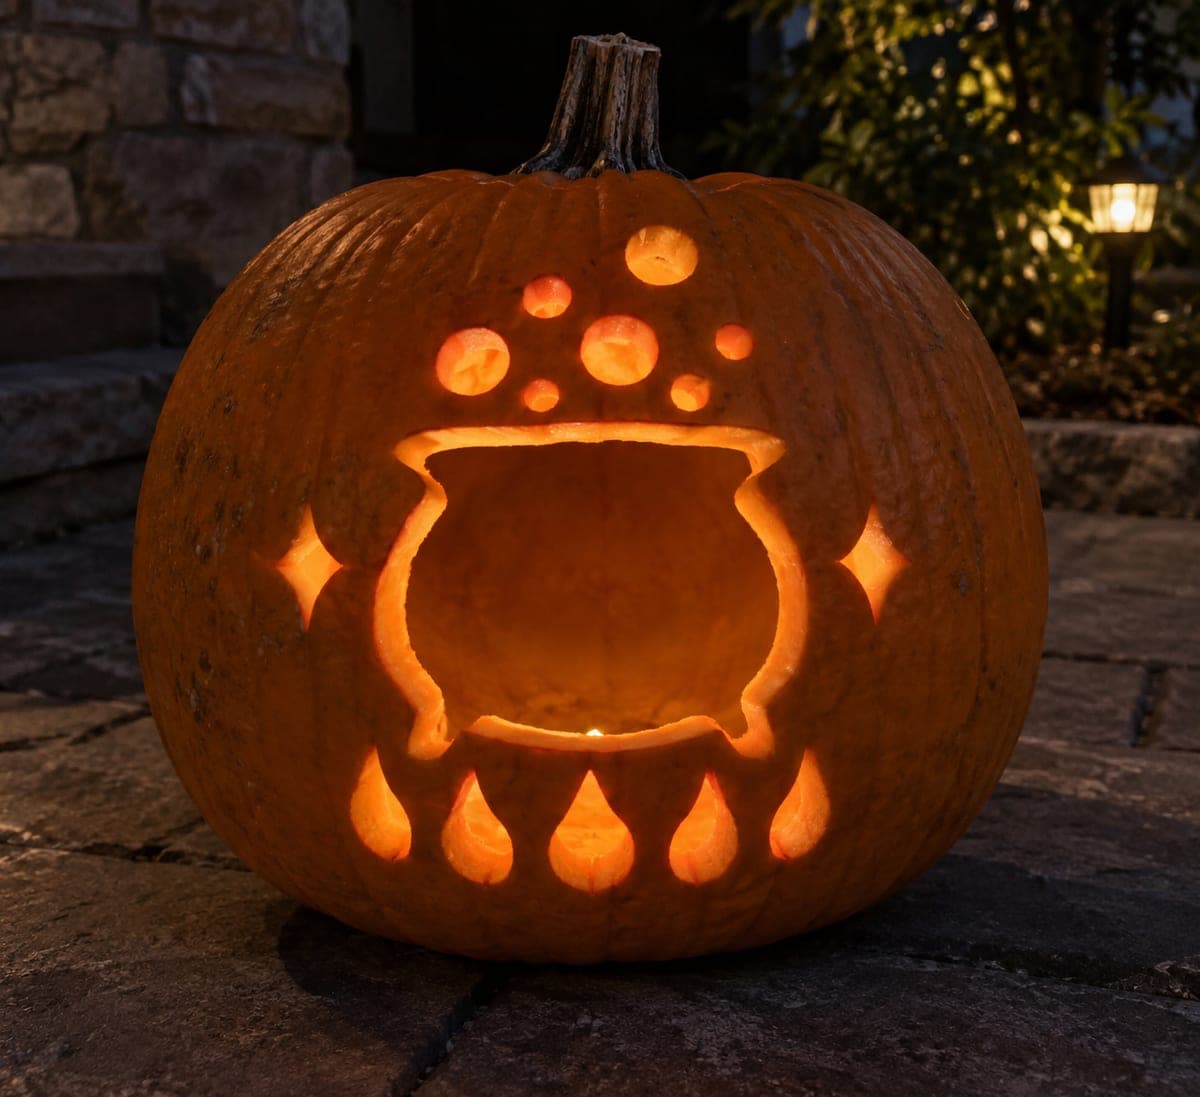
A large cauldron cutout divided by one thick horizontal solid band connected at both sides is joined by five round bubble holes and four short teardrop flame holes on a pumpkin displayed on a garden bench at blue hour. The horizontal band is what turns this from an easy design into a medium one: cut the top cauldron section and the bottom section as two independent shapes, never saw through the band itself. The flame holes below the cauldron reinforce the bubbling-brew narrative.

No ratings yet · Sign in to rate
Comments (0)

  • No comments yet — be the first.

Save without an account. Sign in to like or comment.

Our tips for carving a similar design

A thick horizontal band connected to the shell at both sides divides the cauldron aperture into top and bottom sections, adding structural complexity that earns this design its medium difficulty. The band acts as the design's spine: the two cauldron sections are cut as completely independent shapes, and the band is never cut into. Flame holes below the cauldron and bubble holes above reinforce the bubbling-brew narrative.

From pumpkin to porch

  1. Hollow and transfer

    Hollow through the back lid, leaving walls about an inch thick. Transfer the template, marking the upper cauldron section, lower cauldron section, hatband position, bubble holes, and flame holes all separately.

  2. Cut the upper cauldron section

    Carve the opening above the band first: the rim of the cauldron and the upper body down to where the band begins. Confirm both ends of the band feel solidly attached to the outer shell before moving on.

  3. Cut the lower cauldron section

    Open the lower cauldron body below the band as a second independent shape, ending at the feet. Never let the blade approach the band. With both sections open, the band should span the cauldron horizontally, glowing orange between two bright openings.

  4. Add the round bubble holes

    Drill or saw the five round bubble holes above the cauldron rim, spacing them to suggest rising steam or bubbles. Keep each hole at least half an inch from the rim.

  5. Cut the teardrop flame holes

    The four short teardrop flame holes below the cauldron require a narrow blade tip for the pointed end. Cut the wider base of the teardrop first, then work toward the point in careful short strokes.

  6. Light and display

    Set an LED inside and display on a garden bench at blue hour. The band glows orange between the two cauldron openings, and the flames below flicker-simulate with an LED that has a candle-flicker mode.

Written with AI to match this design

Gather your supplies

Check things off as you get ready.

Work on a stable surface, keep your free hand out of the cutting path, and have an adult handle sharp tools.

Three levels of light

  • Leave intact

    The solid horizontal band and all outer shell rind

  • Peel & shade

    None

  • Cut through

    Upper and lower cauldron sections, five round bubble holes, and four teardrop flame holes

Learn the carving basics

Before you start cutting

How do I confirm the band is still solid after cutting both cauldron sections?

Gently press the center of the band with one fingertip. There should be no flex or creak. If there is any movement, the band is too narrow at one of its shell attachment points; reinforce from inside with a toothpick and craft glue.

My teardrop flames look blunt at the tip. How do I get a sharp point?

Cut the teardrop body first, then make two final short angled cuts meeting at a point for the tip. A very short, narrow-tipped blade works best. If the point still looks blunt, a thin carving knife can trim it cleanly.

Does it matter which way the flames point?

Conventionally, flames point upward toward the cauldron to suggest fire heating the pot. Pointing them outward in a radial pattern is also an option and looks more abstract.

Your take belongs here, too.

Changed a detail? Made it simpler? Share a photo of your version and tell the community what worked.

Share your pumpkin

More pumpkins like this

You've reached the end · 8 pumpkins
The Patch Report

Fresh pumpkins, in your inbox.

The best new carvings, ideas worth stealing, and how-tos for carving season. Short, seasonal, and gone by November.

A short email during carving season. Unsubscribe anytime. See our privacy policy.