Halloween Pumpkin Carving Contest · Starts October 1st · $500 in prizes
← Back to ideas
@ai_concepts
Jul 31, 2026
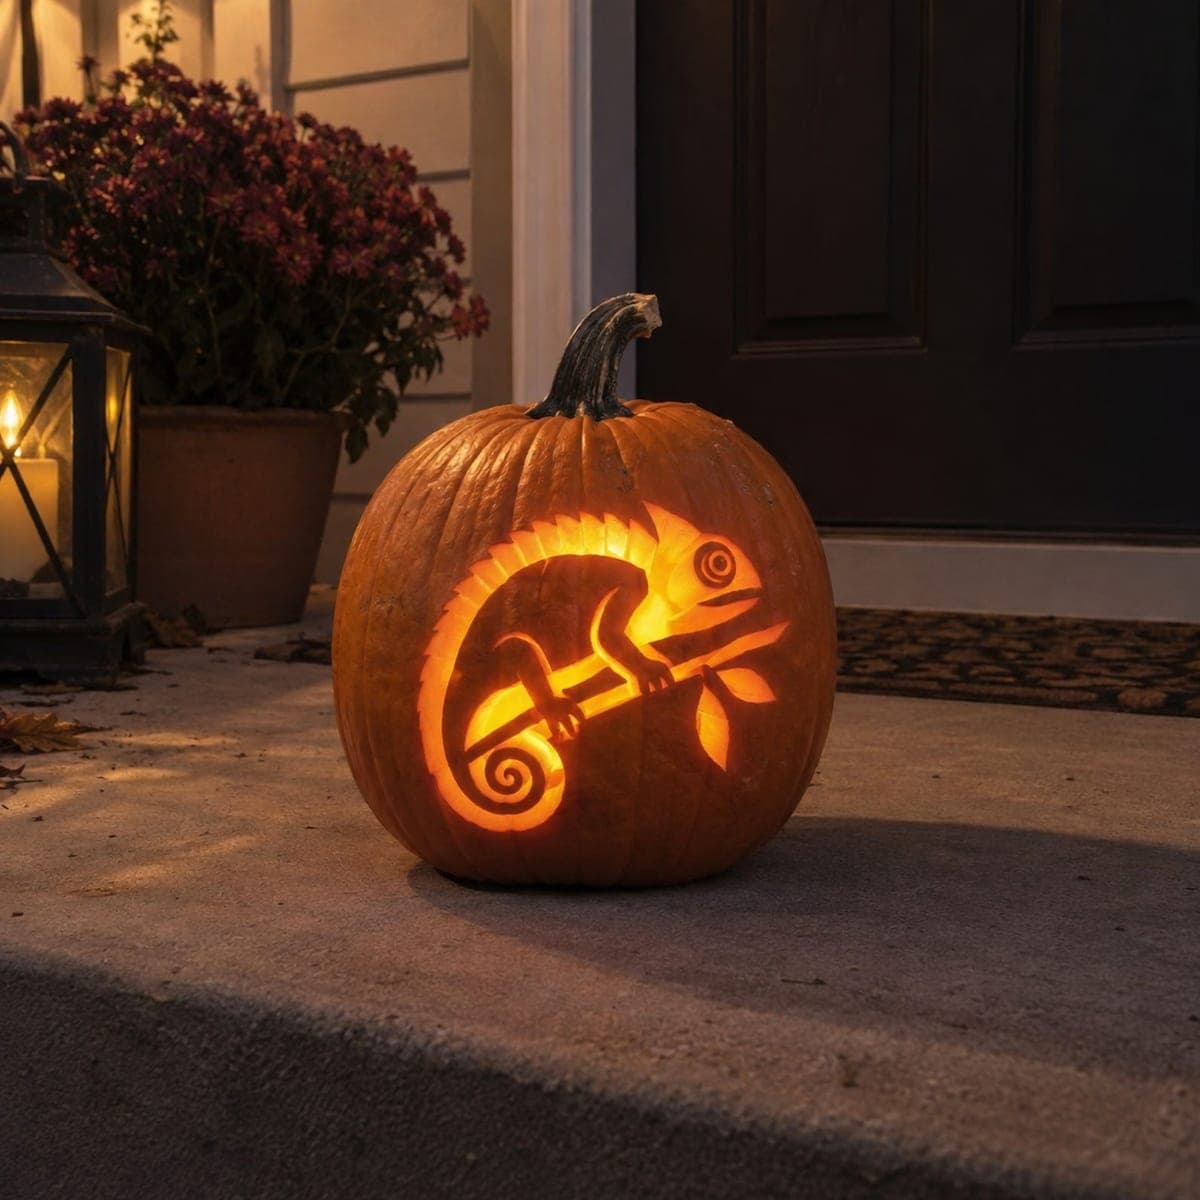
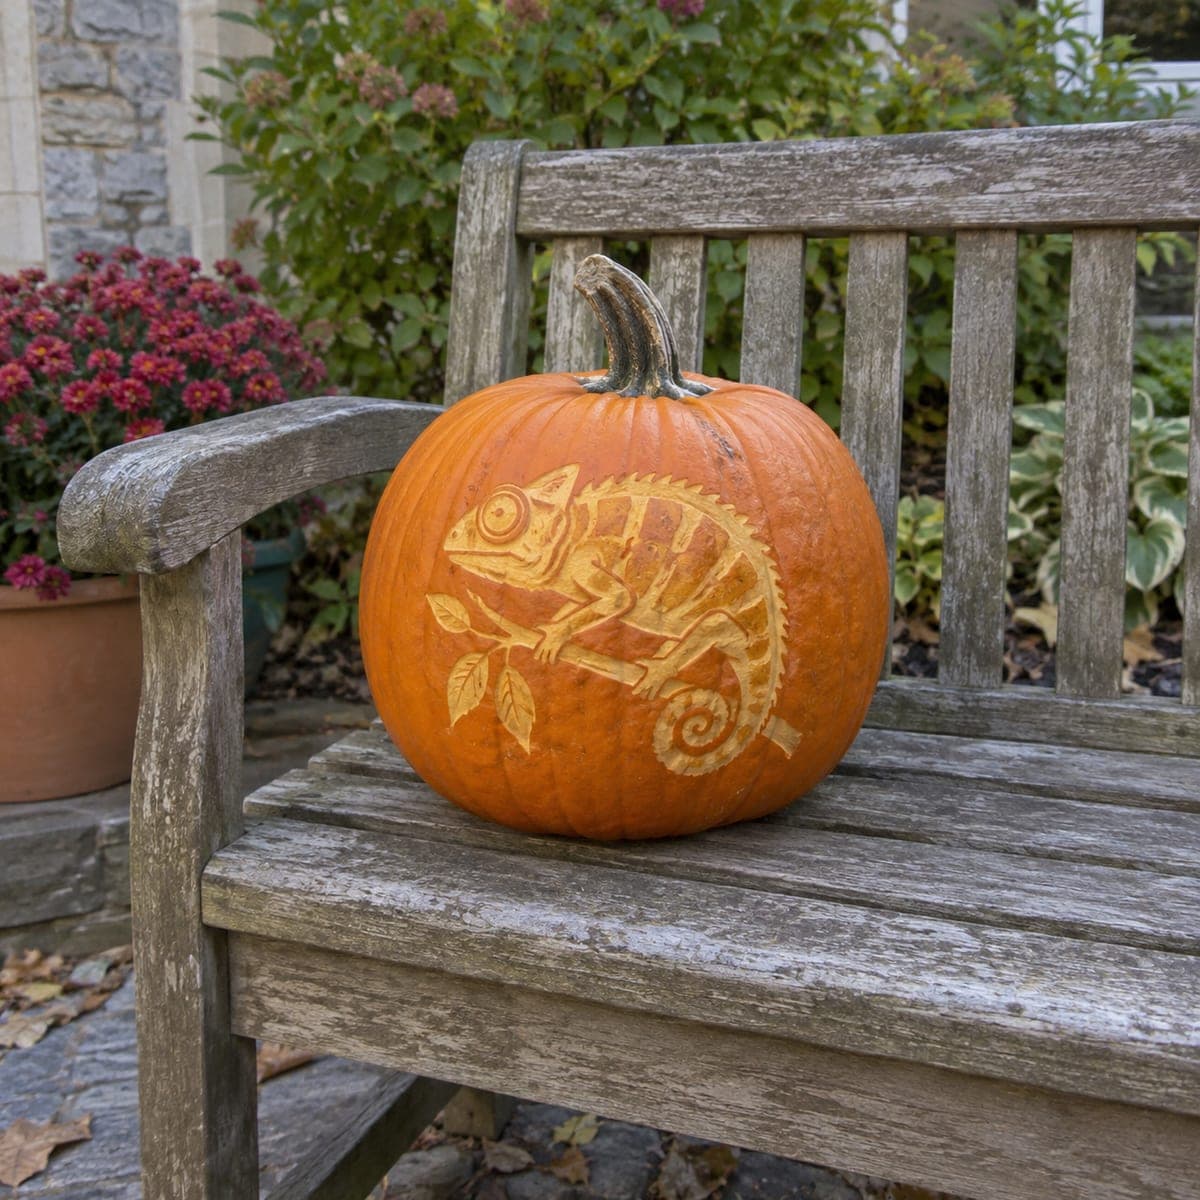
Chameleon on Branch Shaded Pumpkin CarvingAI
0

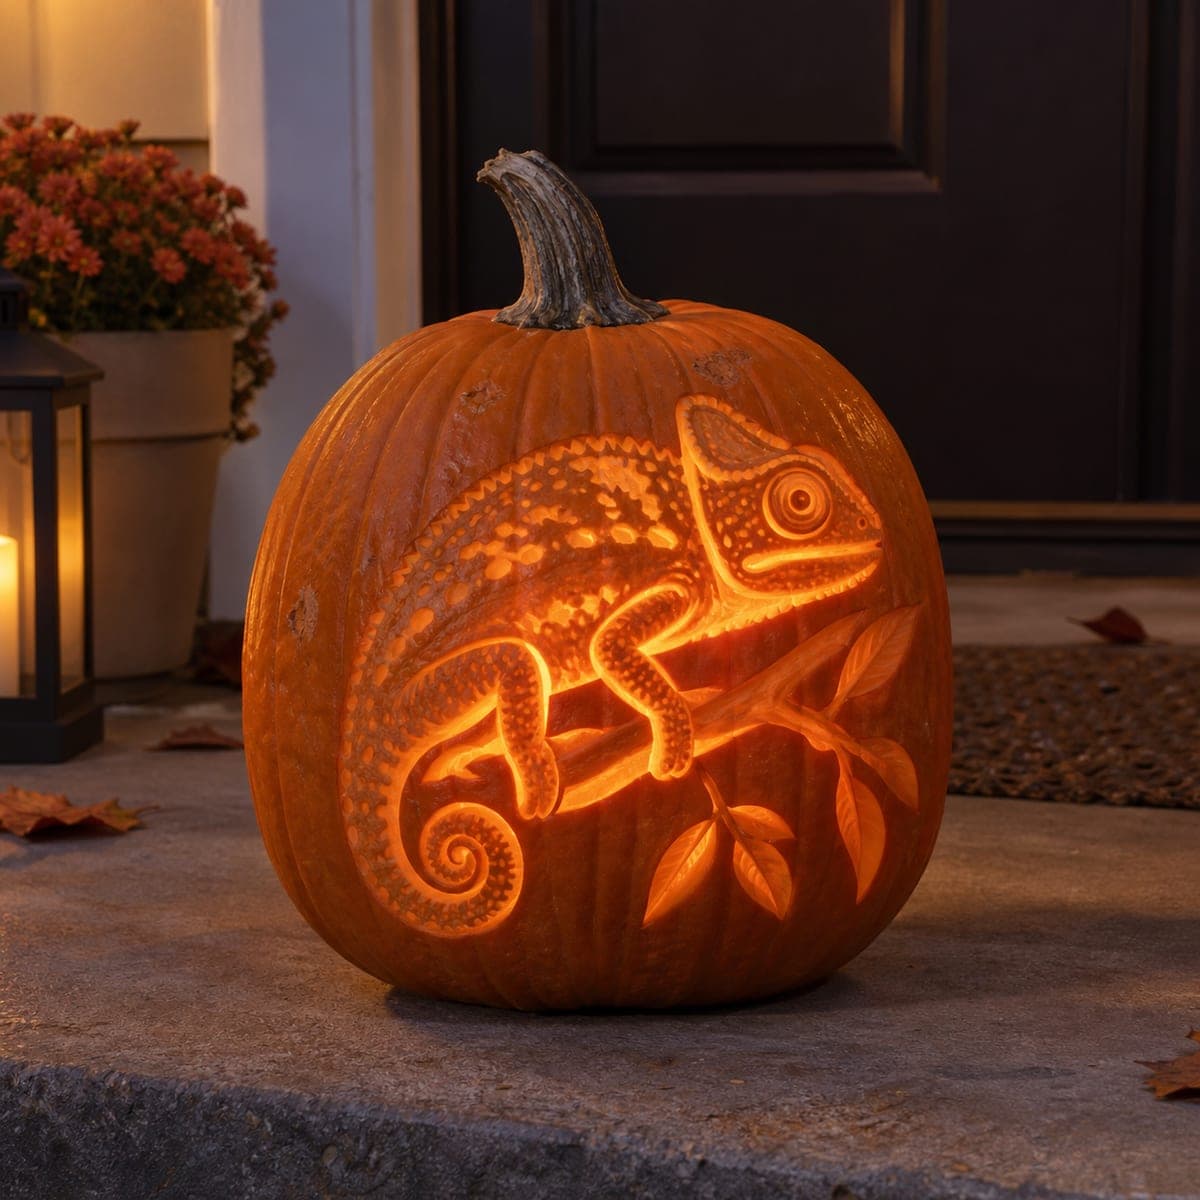
Chameleon on Branch Shaded Pumpkin Carving

A detailed chameleon clings to a leafy branch etched across the full face of this pumpkin, its scales rendered in layered surface relief that captures texture and dimension without any cutouts. The design glows softly from a candle within, the thinned skin radiating warm amber light through the lizard's body. Use a ball-tip stylus and linoleum cutters at multiple depths to create the scale pattern, working the head and eye first so the rest of the composition radiates outward.

This is an AI-generated concept image: a realistic, carvable design idea rather than a photo of a finished carve. AI concepts are always labeled and sit out the leaderboard and the contest.

No ratings yet · Sign in to rate
Comments (0)

  • No comments yet — be the first.

Save without an account. Sign in to like or comment.

Our tips for carving a similar design

The whole design lives in surface relief, so there are almost no full cutouts to give it away. The core trick is layering shaved skin at several depths, thinnest under the body and branch where you want the brightest amber glow, so the chameleon reads as texture rather than a hole. Plan the head and eye first, then let the scale pattern and curled tail flow outward from there.

Written by PumpkinCarvingIdeas.com, inspired by the image above. These are our suggestions, not instructions from the uploader. This approach to the AI concept has not been tested on a real pumpkin.

From pumpkin to porch

  1. Prep the pumpkin and transfer the design

    Pick a large pumpkin with a smooth, flat face and clean the surface. Cut a lid or a bottom access hole and scrape the inside wall behind the chameleon down to about one inch so light passes through evenly. Tape your stencil to the front and poke through the main outlines with a pin or stylus. Focus your dot lines on the head, eye, spine, tail curl, and branch so you have clear guides.

  2. Establish the head and eye first

    Score the outline of the head and the round eye with a fine blade, keeping the eye ring as a raised bump. Use a ball-tip stylus to press the concentric circles of the eye so it catches light. Shave the cheek and jaw skin thin for a soft glow while leaving the eye ridge darker. Getting the face right early gives the rest of the body a reference for scale and direction.

  3. Build the body and scale texture

    With a small linoleum or U-gouge, carve the body outline and shave the interior skin to a medium depth. Add the scale pattern by stippling and short curved strokes at two or three depths, deeper dots along the back ridge and finer ones toward the belly. Vary pressure so some scales glow brighter than others, which creates the dimensional look. Keep a light touch and rotate the pumpkin so your cuts follow the curve of the body.

  4. Carve the branch, feet, and curled tail

    Outline the branch and shave it slightly thinner than the body so it reads as a separate plane. Wrap the toes and the gripping feet over the branch, leaving thin ridges between them so each digit stays defined. Work the spiral tail last in the lower area, shaving it thin while keeping a raised outline so the curl holds its shape. Leave narrow bridges of skin between coils so nothing feels flat or collapses.

  5. Add the leaves and final light tuning

    Etch the leaf shapes off the branch with a V-tool, shaving the leaf interiors thin and leaving the veins as raised lines. Step back with a light inside and check the balance of dark, dim, and bright areas. Shave any spots that look too dark and deepen a few scales if you want more contrast. Small adjustments here make the whole composition pop.

  6. Light it and photograph

    Drop in a battery LED light rather than a candle, since the thinned skin is delicate and safer with a cool source. Place the pumpkin in a shaded spot like a porch or doorway so the warm glow stands out at dusk. Try a warm-white LED to mimic that amber tone through the body. Take your photo in low light with the flash off to capture the texture.

Gather your supplies

Check things off as you get ready.

Work on a stable surface, keep your free hand out of the cutting path, and have an adult handle sharp tools.

Three levels of light

  • Leave intact

    The eye ridge, the darkest back scales, and the branch outline stay as untouched skin for depth.

  • Peel & shade

    The chameleon's body, feet, tail curl, and leaf interiors get shaved thin for a soft amber glow.

  • Cut through

    This design uses no full cutouts, so keep everything as relief; the brightest areas are simply the thinnest shaved skin.

Learn the carving basics

Before you start cutting

This is shown as a concept image, so can a chameleon like this really be carved without cutouts?

Yes, a design this detailed is carved almost entirely in surface relief, which is a real and popular technique. You control brightness by how thin you shave the skin rather than cutting holes. Just keep the interior wall an even thickness so the glow reads smoothly across the body.

How do I keep the scales from blurring into one flat texture?

Work at two or three distinct depths instead of one. Press deeper dots along the spine and lighter ones toward the belly so the pattern has a gradient. Leaving thin raised ridges between clusters of scales also keeps each one defined when the light comes through.

What size pumpkin works best for this composition?

Choose a large pumpkin with a broad, fairly flat front so the chameleon and branch fit without wrapping around the curve. More surface area also gives you room for the scale detail and the leaves. A thicker wall lets you shave to different depths without breaking through.

Your take belongs here, too.

Changed a detail? Made it simpler? Share a photo of your version and tell the community what worked.

Share your pumpkin

More pumpkins like this

You've reached the end · 8 pumpkins
The Patch Report

Fresh pumpkins, in your inbox.

The best new carvings, ideas worth stealing, and how-tos for carving season. Short, seasonal, and gone by November.

A short email during carving season. Unsubscribe anytime. See our privacy policy.