Halloween Pumpkin Carving Contest · Starts October 1st · $500 in prizes
← Back to ideas
@ai_concepts
Jul 20, 2026
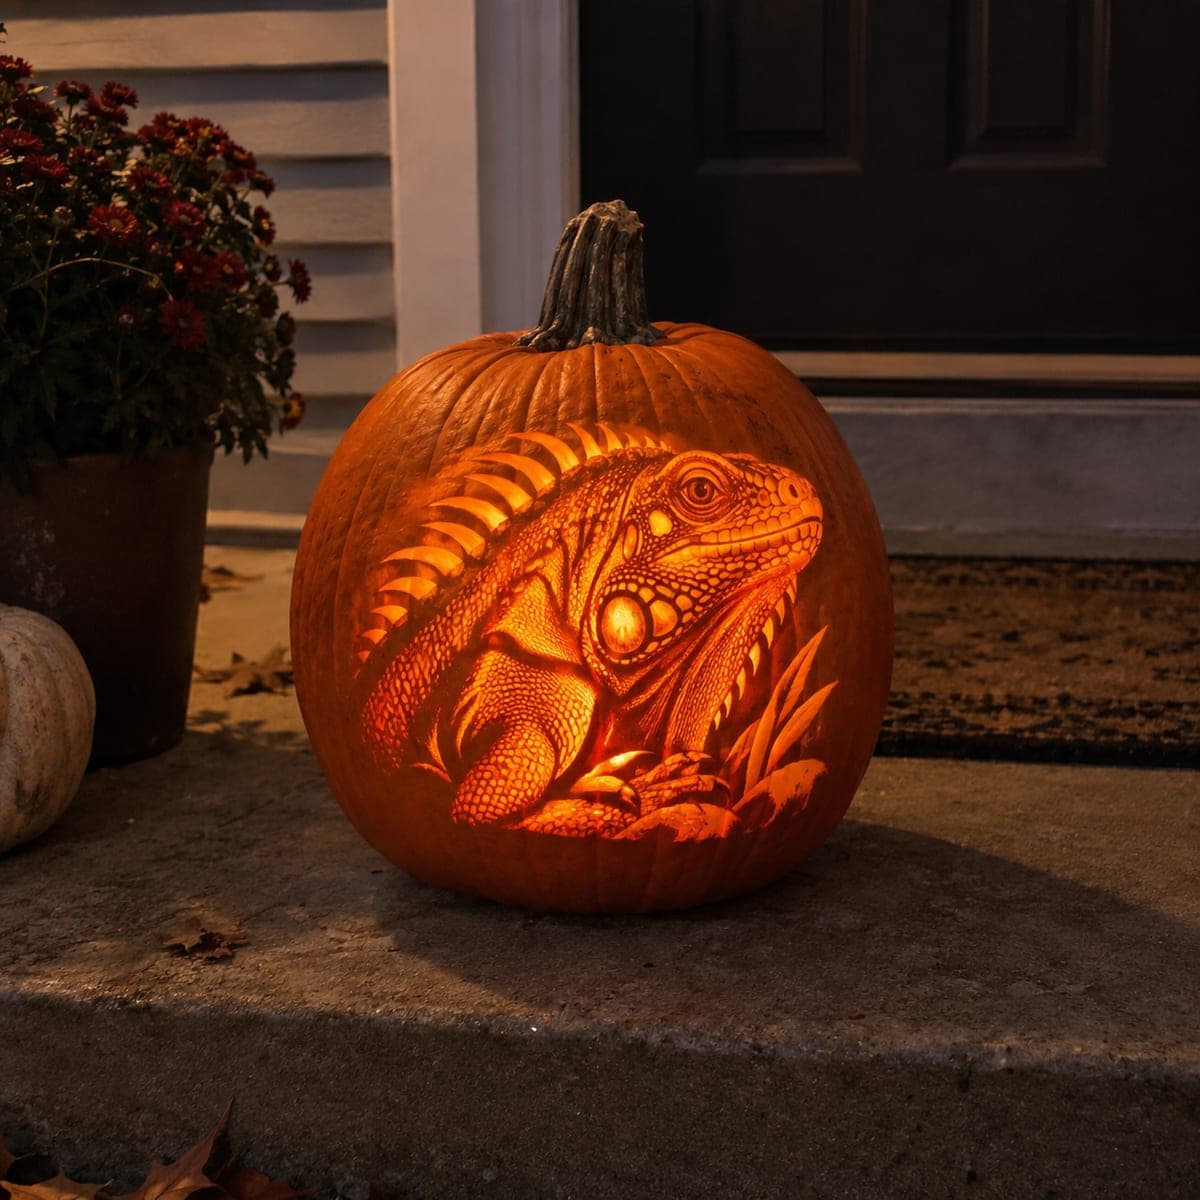
Coiled Snake Shading Pumpkin Carving IdeaAI
0

Coiled Snake Shading Pumpkin Carving Idea

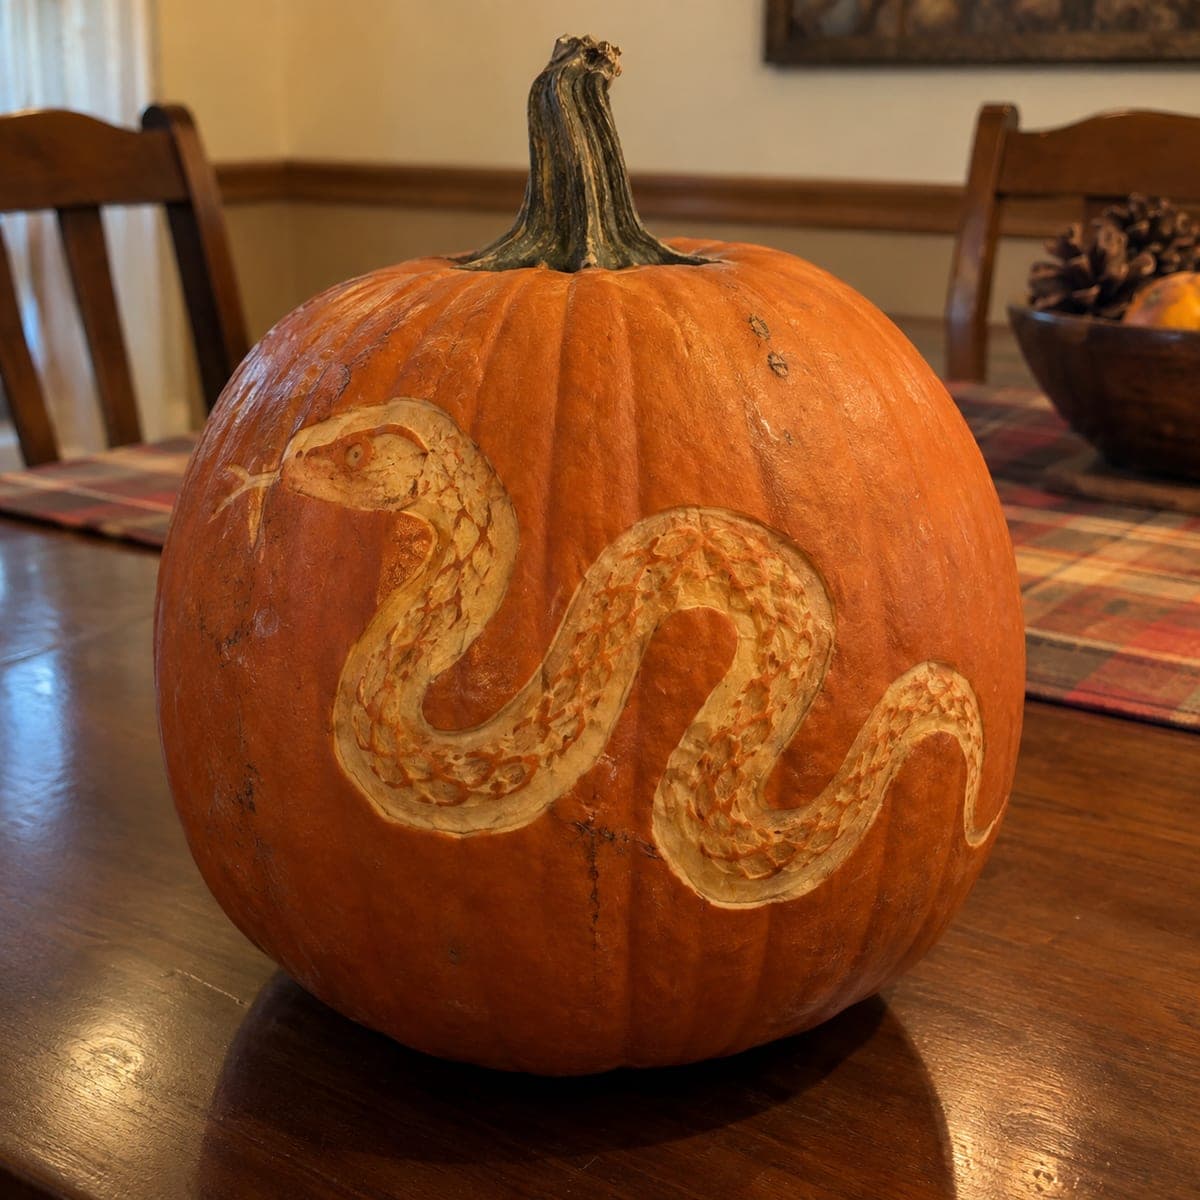
A coiling snake with detailed scale texture winds its way across the surface of this no-carve pumpkin, the skin peeled and etched to bring out every scale pattern in creamy relief against the orange rind. Because nothing is pierced through, the design holds well and the pumpkin stays fresh longer than a cutout version. Use a linoleum cutter or a small V-gouge to outline the scales before shaving the skin between them. This pumpkin carving idea works equally well as a Halloween or autumn display.

This is an AI-generated concept image: a realistic, carvable design idea rather than a photo of a finished carve. AI concepts are always labeled and sit out the leaderboard and the contest.

No ratings yet · Sign in to rate
Comments (0)

  • No comments yet — be the first.

Save without an account. Sign in to like or comment.

Our tips for carving a similar design

The core trick here is a no-cut relief carving, where the whole snake is created by peeling and etching the skin rather than piercing through the shell. You outline the coiled body and forked tongue, then shave the surface skin so the pale flesh reads creamy against the darker rind, and finally carve tiny scale marks to add texture. Because nothing is cut all the way through, the design stays sturdy and the pumpkin holds up longer.

Written by PumpkinCarvingIdeas.com, inspired by the image above. These are our suggestions, not instructions from the uploader. This approach to the AI concept has not been tested on a real pumpkin.

From pumpkin to porch

  1. Pick and prep a smooth pumpkin

    Choose a large, round pumpkin with a broad, blemish-free side so the snake has room to wind across it. Wipe the skin clean and dry it well. Since this is a surface-only design, you do not need to open the lid or gut the pumpkin unless you want a faint inner glow later. Set it on a towel at a comfortable working height.

  2. Transfer the coiling layout

    Sketch or tape on a pattern of a snake curving in a loose S from the head near the top down to the tail. Mark the head, the eye, and the little forked tongue off to the side. Use a poker tool or a pin to dot the main outline through the pattern onto the skin. Step back and check that the coils flow evenly before you cut anything.

  3. Outline with a V-gouge

    Trace the full outline of the snake with a small V-gouge or linoleum cutter, keeping the groove shallow and steady. Let an adult handle the sharp tools and always cut away from your holding hand. This channel defines the edge of the body and keeps your shaved area from wandering. Take the curves slowly so the line stays smooth.

  4. Shave the skin for the creamy body

    Inside the outline, peel away just the orange skin to expose the pale flesh underneath, working in thin passes with a shaving tool or ribbon gouge. Keep the depth even so the whole snake glows the same soft cream color. Leave the background rind untouched so the body stands out. This peeled layer is the heart of the effect, so go slow and keep it clean.

  5. Etch the scale texture

    With the tip of the V-gouge, carve rows of small overlapping curved marks across the body to suggest scales, following the direction of the coils. Vary the depth slightly so some scales catch more shadow than others. Add a shaved highlight along the belly and a tiny etched eye and tongue. Do not carve all the way through anywhere, so the relief stays intact.

  6. Seal, light, and photograph

    Rub a thin coat of petroleum jelly over the peeled areas to slow drying and keep the cream color fresh. If you want a faint glow, cut a small access hole in the back and set a battery LED inside, never a candle. Photograph it in soft side lighting so the etched scales throw gentle shadows. Store it somewhere cool between displays to make it last.

Gather your supplies

Check things off as you get ready.

Work on a stable surface, keep your free hand out of the cutting path, and have an adult handle sharp tools.

Three levels of light

  • Leave intact

    The orange rind background around the snake stays untouched and dark, framing the body.

  • Peel & shade

    The peeled snake body glows a soft creamy orange as the main relief shape.

  • Cut through

    Optionally only a small hidden access hole in the back is cut through, since this is a no-cut surface design.

Learn the carving basics

Before you start cutting

How do I keep the shaved snake from turning brown before Halloween?

Peeled flesh dries and darkens faster than skin, so seal the shaved areas with a thin layer of petroleum jelly right after carving. Keep the pumpkin in a cool spot and out of direct sun between displays. Since this is a concept image, plan to carve a real one only a day or two before you want to show it off.

Do I need to hollow out the pumpkin for this design?

Not for the look itself, since the snake is all surface relief and nothing is cut through the shell. If you want a faint inner glow behind the etching, cut a small access hole in the back and add a battery LED. Otherwise you can leave the pumpkin whole, which helps it stay firm and fresh longer.

What is the easiest way to get consistent scale texture?

Practice a few rows of the small curved gouge marks on the pumpkin bottom or a scrap first to find a comfortable depth. Work in overlapping rows that follow the curve of the body, like roof shingles. Keeping the marks shallow and evenly spaced reads as scales better than deep random cuts.

Your take belongs here, too.

Changed a detail? Made it simpler? Share a photo of your version and tell the community what worked.

Share your pumpkin

More pumpkins like this

You've reached the end · 8 pumpkins
The Patch Report

Fresh pumpkins, in your inbox.

The best new carvings, ideas worth stealing, and how-tos for carving season. Short, seasonal, and gone by November.

A short email during carving season. Unsubscribe anytime. See our privacy policy.