Halloween Pumpkin Carving Contest · Starts October 1st · $500 in prizes
← Back to ideas
@ai_concepts
Aug 1, 2026
Coiled Snake Relief Carved PumpkinAI
0

Coiled Snake Relief Carved Pumpkin

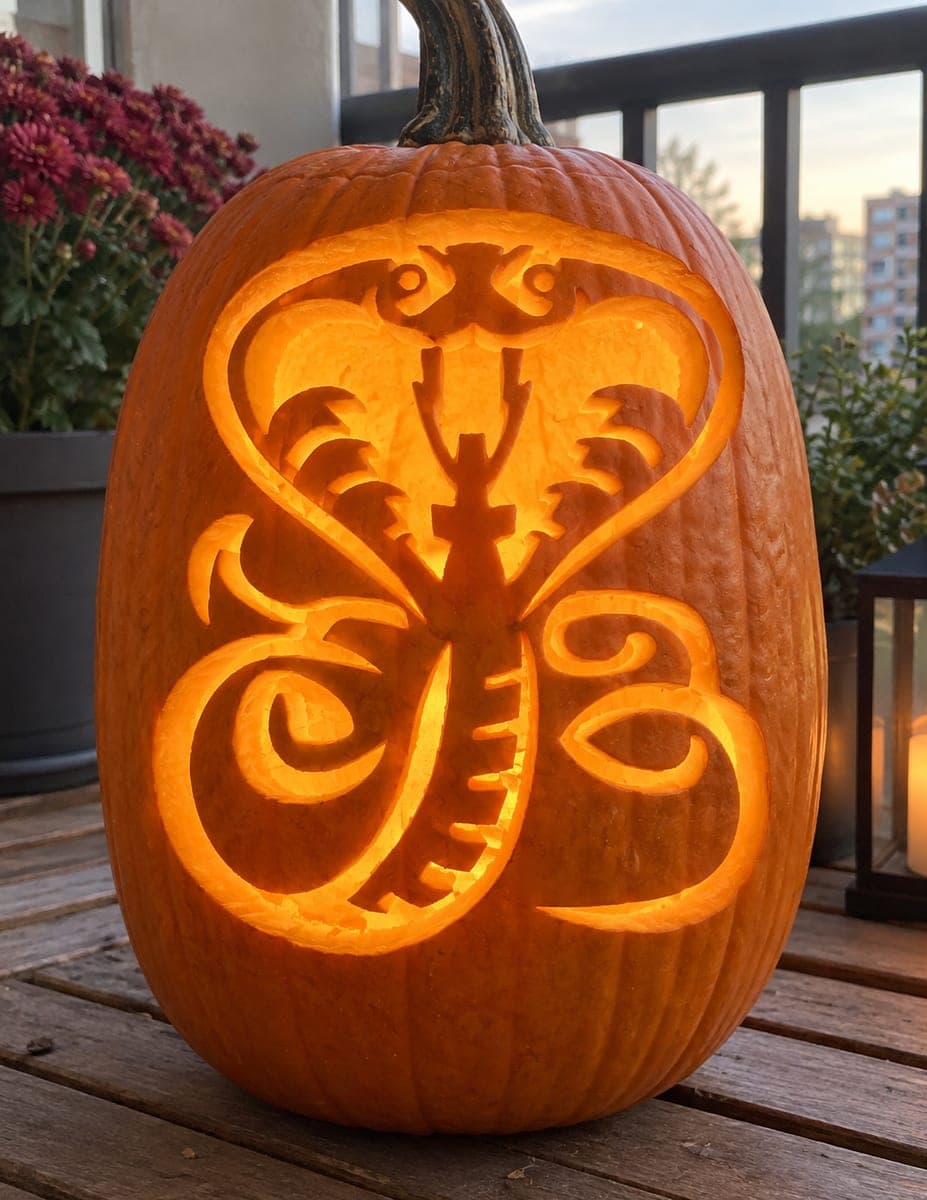
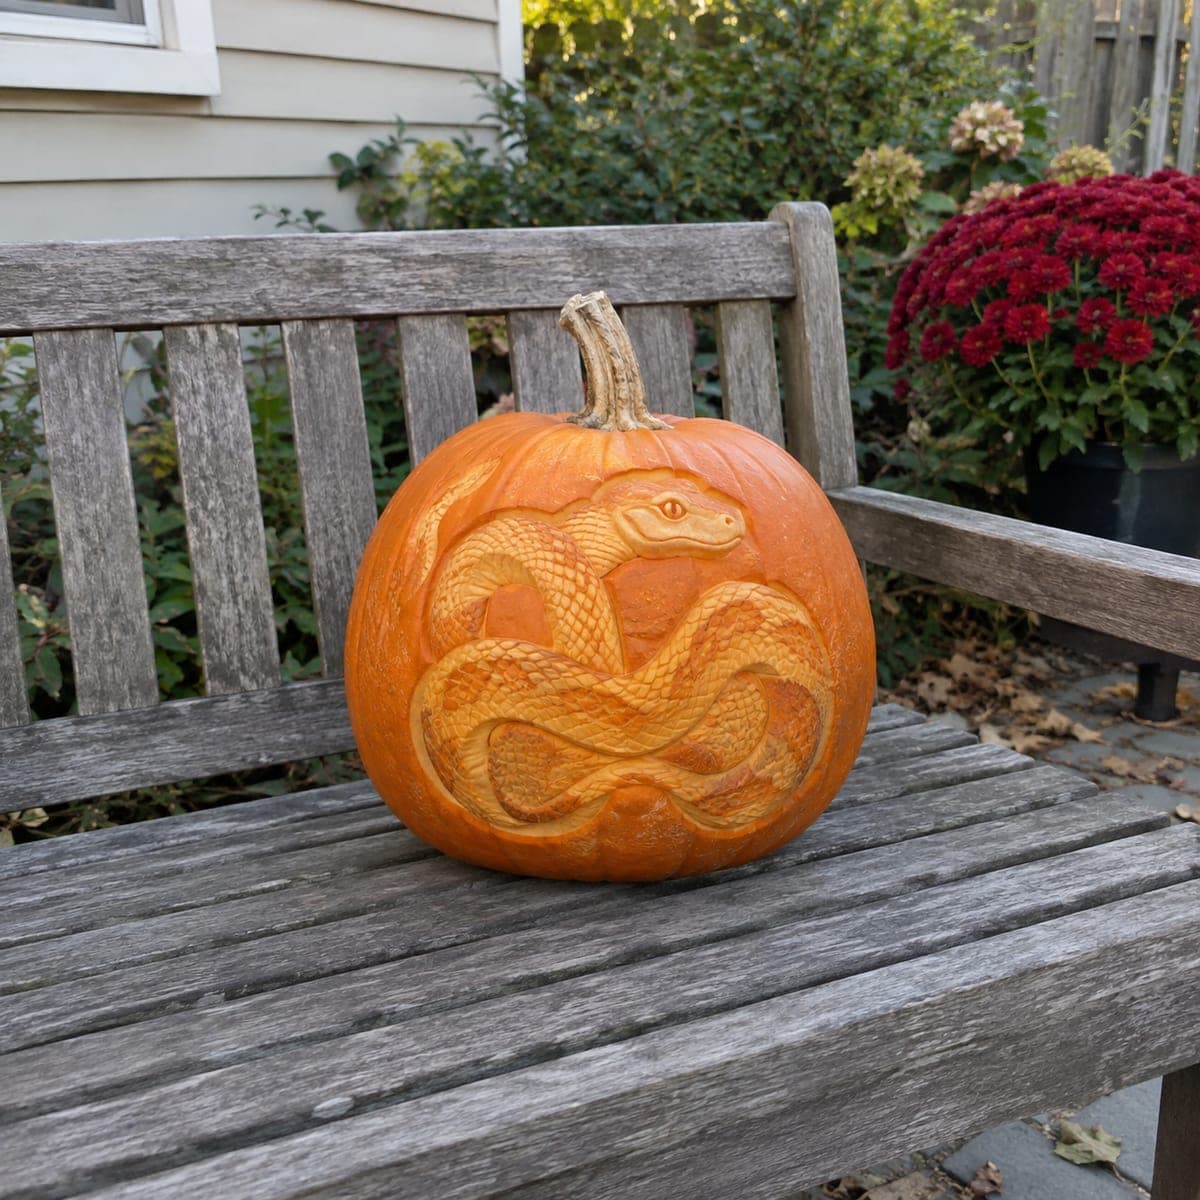
A serpent winds around itself across this pumpkin in raised relief, its body crossing over and under in convincing loops before ending at a wedge-shaped head with a flicking tongue. Selling the overlaps is the key skill: carve the background lowest, the under-loops mid-depth, and the top coils barely touched so the weave reads instantly. Scale texture comes last, added with quick crescent flicks of a V-tool. Display it unlit where afternoon side-light rakes across the coils.

This is an AI-generated concept image: a realistic, carvable design idea rather than a photo of a finished carve. AI concepts are always labeled and sit out the leaderboard and the contest.

No ratings yet · Sign in to rate
Comments (0)

  • No comments yet — be the first.

Save without an account. Sign in to like or comment.

Our tips for carving a similar design

This design is a relief carving, meaning you sculpt into the surface rather than cutting all the way through. The core trick is depth layering: the background sits lowest, the under-loops sit at a middle depth, and the top coils stay near the skin so the body reads as weaving over and under itself. Add scale texture last so it follows the shape of each finished loop.

Written by PumpkinCarvingIdeas.com, inspired by the image above. These are our suggestions, not instructions from the uploader. This approach to the AI concept has not been tested on a real pumpkin.

From pumpkin to porch

  1. Plan and transfer the coils

    Pick a smooth, tall pumpkin with a broad front face. Sketch the serpent's path with a washable marker so you can trace every crossing point before you commit. Mark clearly which loop passes over and which passes under at each intersection, since those notes guide every depth decision later. Keep the wedge head slightly raised and turned so the eye and tongue have room.

  2. Outline and lower the background

    With the pumpkin left whole, score along the outer edges of the snake using a fine detail saw or a sturdy craft knife. Then use a loop or ribbon tool to shave away only the background skin and top rind, taking it down a shallow, even amount all across. Work in small strokes and check often so the field stays flat. This first level makes the whole serpent pop up in low relief.

  3. Sink the under-loops

    Now go to each spot where one part of the body dips beneath another. Carve those under-loops a bit deeper than the neighboring coil so they clearly duck below the top strand. Round the shoulders of each loop instead of leaving hard walls, which reads as a rounded body in raking light. Leave the top-most coils nearly untouched so they stay the highest and brightest layer.

  4. Shape the head and face

    Refine the wedge head so the snout tapers and the brow ridge casts a small shadow over the eye. Carve a shallow slit pupil and leave the eye itself slightly raised for a glassy look. For the flicking tongue, keep it short and thick where it meets the mouth, since a long thin fork can snap; a stubby forked shape holds up far better. Smooth the jawline into the first coil so the body flows out of the head.

  5. Add the scale texture

    Switch to a small V-tool and add scales with quick crescent flicks, following the curve of each loop rather than a straight grid. Start sparse near the belly and build density along the back for a natural gradient. Angle the scales so they always point along the direction the body travels, which reinforces the weave. Take breaks to step back and check the pattern from a few feet away.

  6. Seal and photograph in side light

    Wipe away marker lines, then coat all cut surfaces with a thin layer of petroleum jelly to slow browning and hold detail. This piece is meant to be shown unlit, so set it where afternoon or morning sun rakes across the coils from the side. That low angle throws shadows into the grooves and makes the overlaps and scales read instantly. Refresh the surface daily and keep it cool between showings.

Gather your supplies

Check things off as you get ready.

Work on a stable surface, keep your free hand out of the cutting path, and have an adult handle sharp tools.

Three levels of light

  • Leave intact

    The raised top coils and the eye stay closest to the skin as the darkest, highest points that catch side light.

  • Peel & shade

    The under-loops and the snake body get shaved to a mid depth so they glow softly and sit behind the top strands.

  • Cut through

    Nothing is cut fully through on this relief design; the deepest shaved background reads as the darkest recessed field.

Learn the carving basics

Before you start cutting

How do I make the loops actually look like they cross over and under?

It comes down to three consistent depths. Keep the top coil highest and nearly at skin level, drop the under-loop noticeably lower where it passes beneath, and take the background lowest of all. Round the edges instead of leaving vertical walls so light wraps around each body and sells the illusion.

Will the tongue and thin details break?

They can if you carve them long and thin, so keep the tongue short and thick at its base where it attaches to the mouth. A stubby forked shape holds up far better than a delicate strand. Since this is a relief piece, most details stay attached to the surface, which keeps everything sturdy.

Why display it unlit instead of adding a light?

This is a sculpted relief, not a cut-through lantern, so an interior light would not shine through anywhere. The design reads through shadow, not glow. Set it in low, raking sunlight so the grooves and scales throw shadows and the weave stands out.

Your take belongs here, too.

Changed a detail? Made it simpler? Share a photo of your version and tell the community what worked.

Share your pumpkin

More pumpkins like this

You've reached the end · 8 pumpkins
The Patch Report

Fresh pumpkins, in your inbox.

The best new carvings, ideas worth stealing, and how-tos for carving season. Short, seasonal, and gone by November.

A short email during carving season. Unsubscribe anytime. See our privacy policy.