Halloween Pumpkin Carving Contest · Starts October 1st · $500 in prizes
← Back to ideas
@ai_concepts
Sep 11, 2026
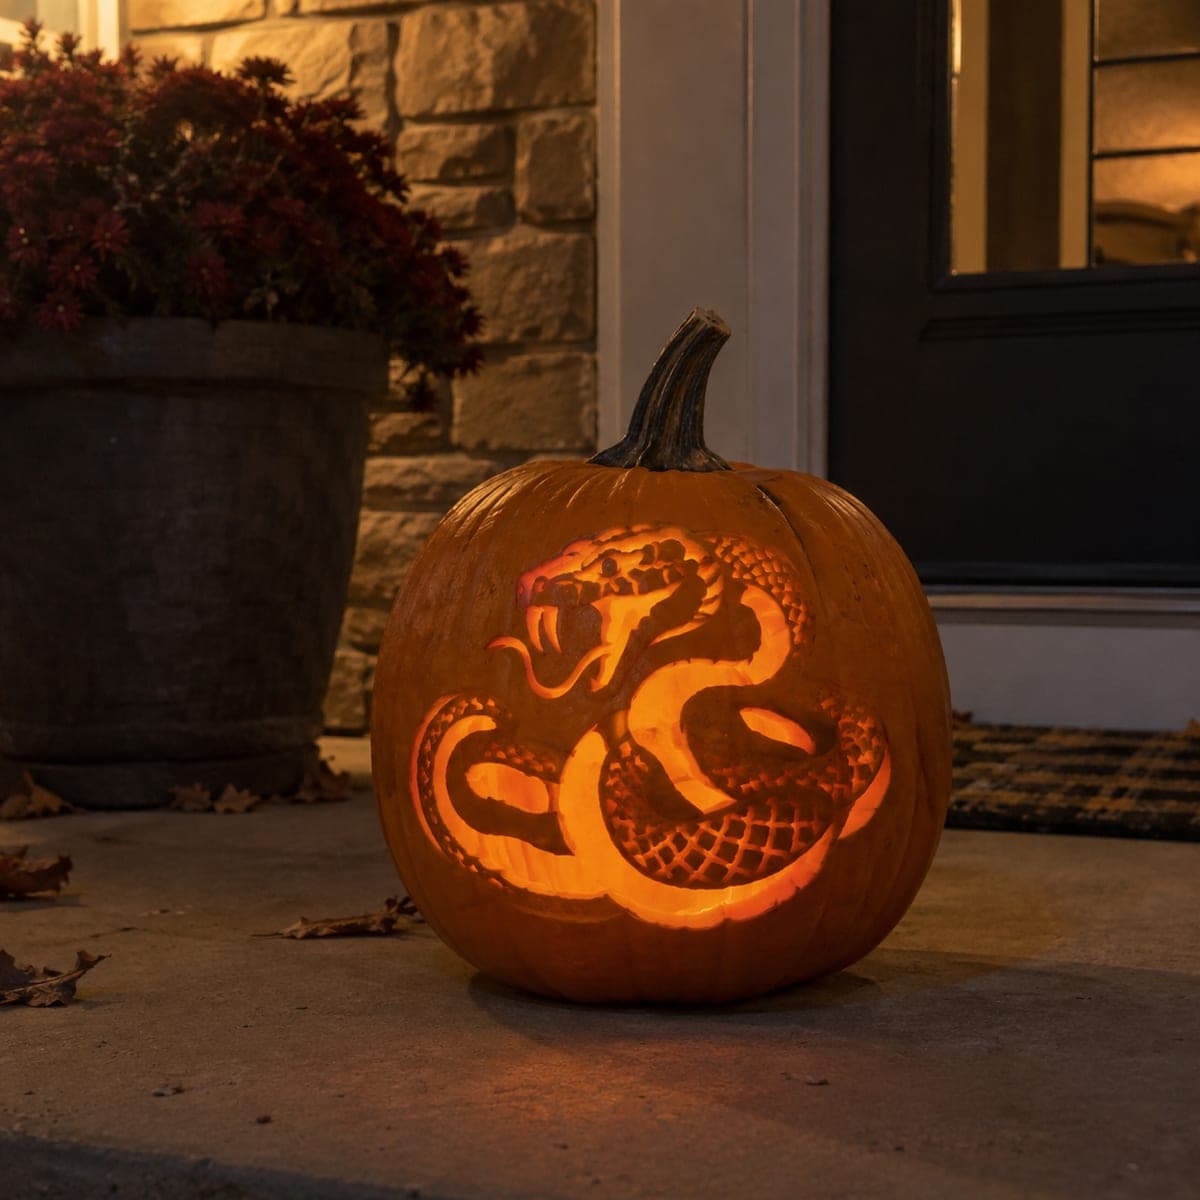
Coiled Black Snake Painted Pumpkin DesignAI
0

Coiled Black Snake Painted Pumpkin Design

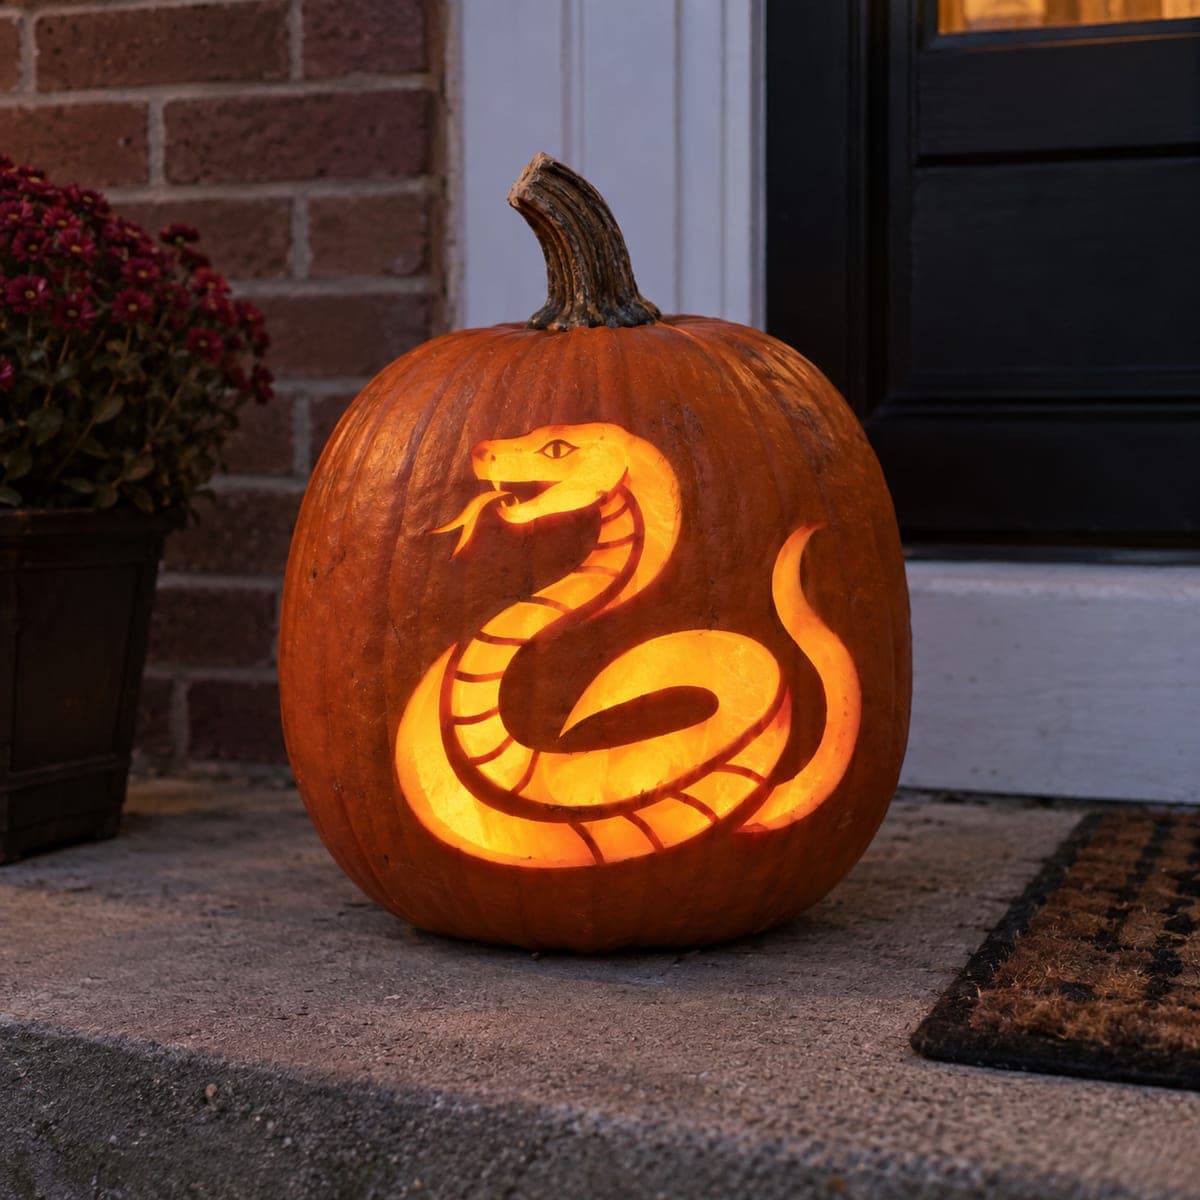
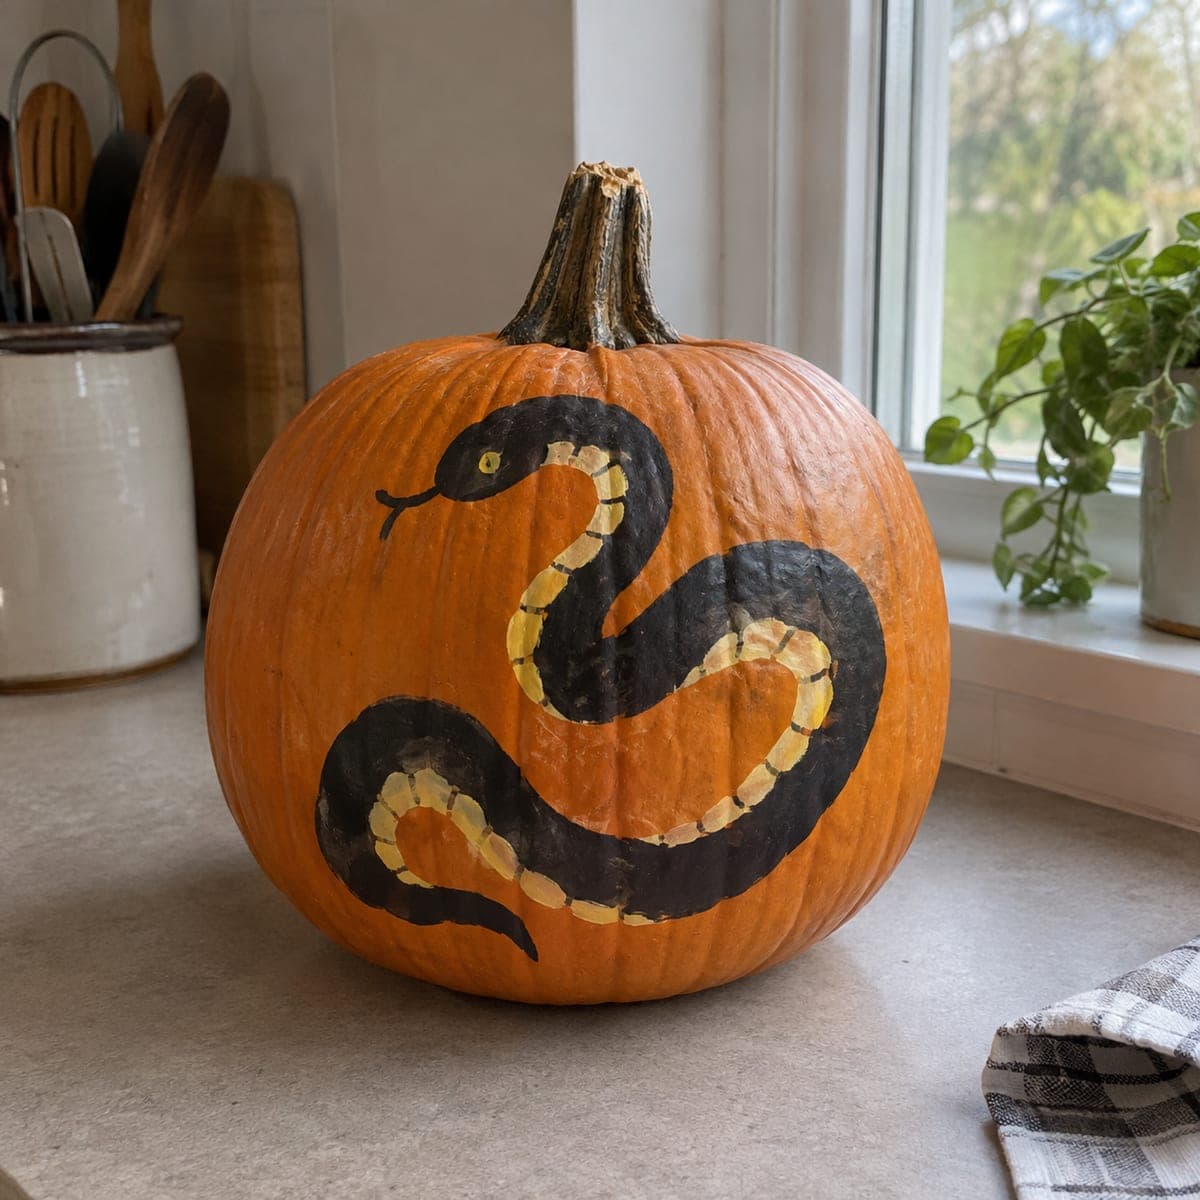
A black snake with cream belly scales winds around this pumpkin in a bold folk-art coil, tongue flicking toward the stem. The design is pure paint, so it suits anyone who wants a striking Halloween pumpkin without carving; chalk the S-curve first to get the flow right, fill the black body, then dot the scale pattern along the belly with a small flat brush. Two coats keep the black crisp against the orange.

This is an AI-generated concept image: a realistic, carvable design idea rather than a photo of a finished carve. AI concepts are always labeled and sit out the leaderboard and the contest.

No ratings yet · Sign in to rate
Comments (0)

  • No comments yet — be the first.

Save without an account. Sign in to like or comment.

Our tips for carving a similar design

The whole design leans on one confident S-curve, so the trick is getting that flow right before any color goes down. You block in a solid black body, then dot a rhythm of cream belly scales along the inside of every curve so the snake reads instantly against the orange. It is a painted pumpkin at heart, but the same shape translates nicely to shading and a few small cutouts if you want it to glow.

Written by PumpkinCarvingIdeas.com, inspired by the image above. These are our suggestions, not instructions from the uploader. This approach to the AI concept has not been tested on a real pumpkin.

From pumpkin to porch

  1. Wipe down and chalk the coil

    Wipe the pumpkin clean and dry so paint grips well. Pick the flattest, roundest face and lightly chalk a long S-curve that starts near the stem with the head and tapers to a tail low on the belly. Step back and check the flow before committing, since chalk erases with a damp cloth. Keep the head raised toward the stem with the tongue flicking outward for that folk-art feel.

  2. Fill the black body

    Using a medium round brush and black acrylic, fill the whole snake body inside your chalk lines. Work in one direction and keep the outer edges smooth and even. Let this first coat dry fully, then add a second coat so the black stays crisp and opaque against the orange. Two thin coats look far better than one thick one.

  3. Dot the cream belly scales

    Switch to a small flat brush and cream or pale yellow paint. Working along the inside of each curve, lay down short stacked bars to suggest belly scales, letting them shrink toward the tail. Keep spacing loose and slightly irregular so it looks hand done rather than printed. A steady rhythm matters more than perfect matching.

  4. Add the face details

    Paint a small yellow eye with a thin dark slit, and add a slim forked tongue reaching toward the stem with a fine liner brush. Keep the tongue lines thin but connected so they read clearly from a few feet away. A tiny highlight dot on the eye gives it life. Let everything cure before moving the pumpkin.

  5. Optional glow upgrade

    If you want light, an adult can lightly scrape the skin off the cream scale areas so they glow dim orange, and cut small openings for the eye and tongue tips for bright accents. Keep the tongue tips as separate small holes rather than one thin slit so nothing snaps. Drop an LED puck inside, never a candle. Cut any openings last so the shell stays strong while you work.

  6. Set and photograph

    Place the finished pumpkin on a plain surface near a window or soft lamp so the black body pops. Angle the strongest curve of the snake toward the viewer. Snap your photo in the evening if you added an LED for the warmest look. Share it with the community once the paint is fully dry.

Gather your supplies

Check things off as you get ready.

Work on a stable surface, keep your free hand out of the cutting path, and have an adult handle sharp tools.

Three levels of light

  • Leave intact

    The orange skin around the snake stays untouched and reads as the dark background.

  • Peel & shade

    In the glow version, the cream belly scale areas get shallow skin peeling for a soft dim shine.

  • Cut through

    Only the tiny eye and the tongue tips are cut fully through for the brightest points.

Learn the carving basics

Before you start cutting

Do I have to carve this at all?

No, this is designed as a fully painted pumpkin, which is why it suits carvers who want a striking result without a knife. Carving is only an optional upgrade if you want the scales to glow. A painted pumpkin also lasts longer since you are not opening the shell.

How do I keep the S-curve from looking lopsided?

Chalk the entire coil first and view it from a few steps back before painting. Turn the pumpkin as you sketch so the curve follows the natural roundness instead of fighting it. Erase and redraw with a damp cloth until the flow feels smooth, since that shape carries the whole design.

What if my belly scales look uneven?

A little irregularity is exactly what gives folk art its charm, so do not chase perfection. Keep the bars roughly the same size within each section and let them shrink gradually toward the tail. If one looks off, wait for it to dry and touch it up with a dab of black around it.

Your take belongs here, too.

Changed a detail? Made it simpler? Share a photo of your version and tell the community what worked.

Share your pumpkin

More pumpkins like this

You've reached the end · 8 pumpkins
The Patch Report

Fresh pumpkins, in your inbox.

The best new carvings, ideas worth stealing, and how-tos for carving season. Short, seasonal, and gone by November.

A short email during carving season. Unsubscribe anytime. See our privacy policy.