Halloween Pumpkin Carving Contest · Starts October 1st · $500 in prizes
← Back to ideas
@ai_concepts
Aug 1, 2026
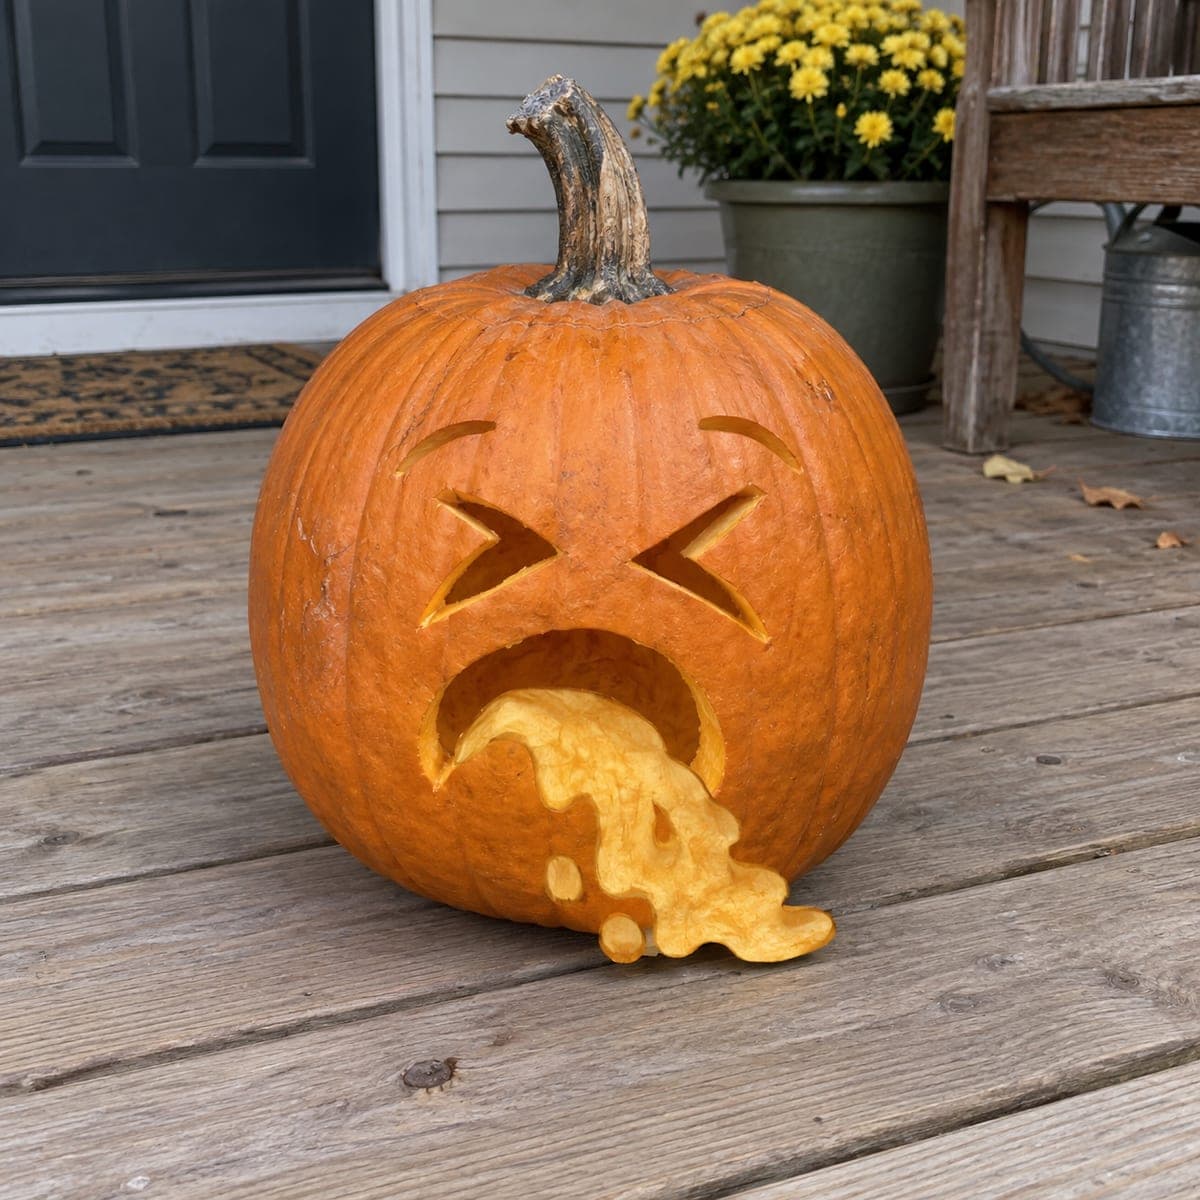
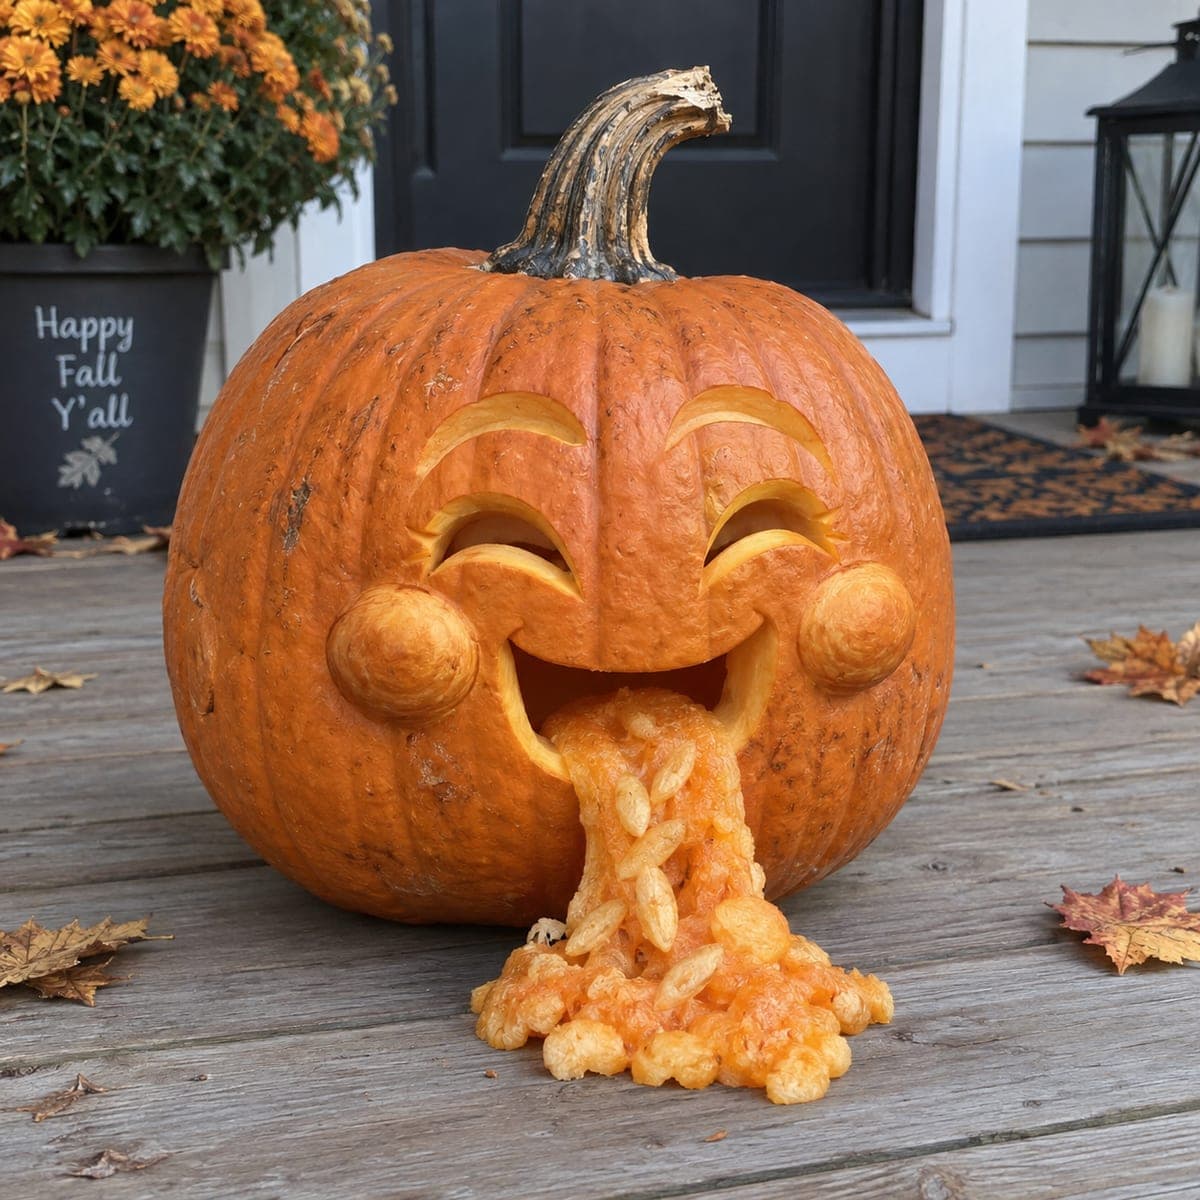
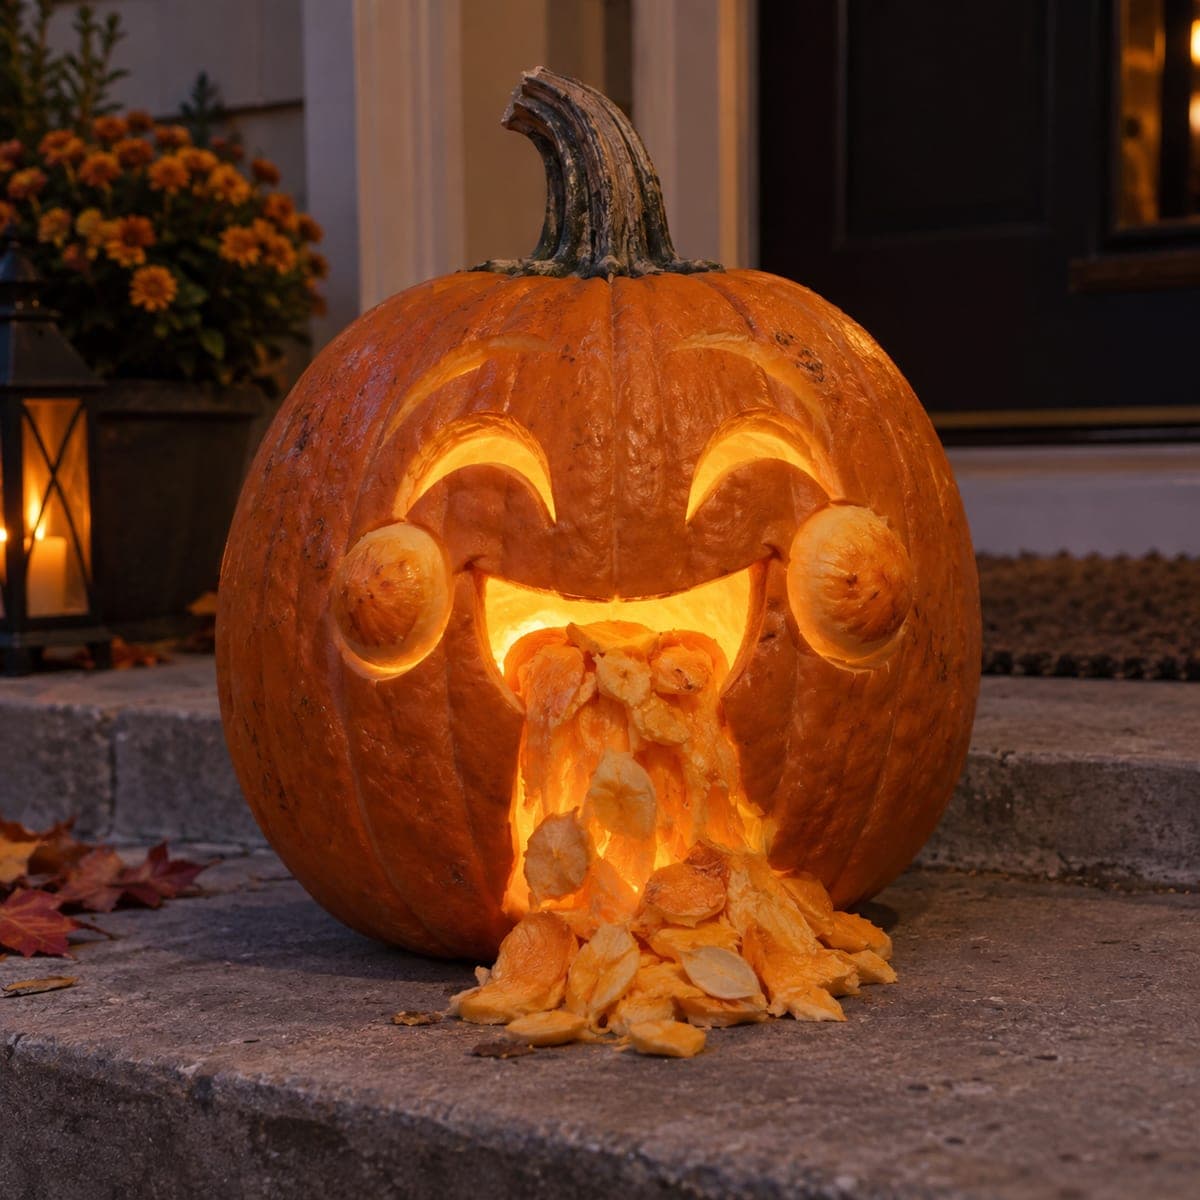
Classic Puking Jack-O-Lantern With Pumpkin GutsAI
0

Classic Puking Jack-O-Lantern With Pumpkin Guts

Squeezed-shut X eyes and a gaping mouth spilling real pumpkin guts down the porch make this the timeless funny jack-o-lantern gag. The carving itself is just three shapes, so most of the effort is arranging the seeds and stringy pulp into a convincing splatter. Cut the mouth with a slight downward lip so the innards drape naturally, and save the stringiest pulp from cleaning out the pumpkin for the pile.

This is an AI-generated concept image: a realistic, carvable design idea rather than a photo of a finished carve. AI concepts are always labeled and sit out the leaderboard and the contest.

No ratings yet · Sign in to rate
Comments (0)

  • No comments yet — be the first.

Save without an account. Sign in to like or comment.

Our tips for carving a similar design

The whole gag rests on three simple cutouts, two crossed X eyes and one wide gaping mouth, so the carving is fast. The real magic is scooping out the pumpkin, saving the stringiest seeds and pulp, and arranging that mess into a splatter pouring from the mouth onto the porch. Cut the mouth with a slightly downward lower lip so the guts look like they are draping out naturally.

Written by PumpkinCarvingIdeas.com, inspired by the image above. These are our suggestions, not instructions from the uploader. This approach to the AI concept has not been tested on a real pumpkin.

From pumpkin to porch

  1. Prep and save the guts

    Cut a lid or a bottom opening and scoop out the insides with a sturdy metal spoon. As you clean, set aside the longest, stringiest pulp and the seed clumps in a bowl. This is your splatter material, so do not toss it. Scrape the front inner wall thin, down to about one inch, so cutting is easier.

  2. Draw the three shapes

    Sketch two crossed X shapes for the squeezed-shut eyes in the upper face, keeping each stroke a slim tapered line. Below them, draw a large open mouth with a slightly droopy lower edge. Add two small curved brow lines above the eyes for the pained look. Keep everything centered and roomy so the mouth has space to spill.

  3. Cut the eyes and brows first

    With a small carving saw or a detail blade, carve the thin X strokes and the brow lines while the pumpkin wall is still fully supported. Cutting these small details first keeps the shell strong. Push the little scraps out gently from the inside. Take your time on the crossings so the lines stay crisp.

  4. Cut the gaping mouth last

    Save the biggest opening for last so the face does not weaken while you work. Carve the mouth outline, giving the bottom lip a gentle downward curve so guts can drape over it. Remove the piece in one clean pull if you can. Smooth the lower edge so pulp slides over it instead of snagging.

  5. Stage the splatter

    Set the pumpkin where it will sit, then pull your saved stringy pulp and seeds out through the mouth. Let it cascade down the front and pool on the ground for that spilled look. Drag a few strands wide so the splatter looks messy and natural. Add a couple of stray seed blobs off to the side for extra effect.

  6. Light it and photograph

    Place a battery LED tea light or a small puck light inside, never a candle near the loose pulp. Warm white gives the best queasy glow through the eyes and mouth. Shoot at dusk from a low angle so the splatter reads clearly against the porch boards. Refresh or swap the pulp before it dries out if it will sit for days.

Gather your supplies

Check things off as you get ready.

Work on a stable surface, keep your free hand out of the cutting path, and have an adult handle sharp tools.

Three levels of light

  • Leave intact

    The full orange skin across the face and body stays untouched and dark.

  • Peel & shade

    Optionally shave a thin halo around the mouth and eyes for a soft dim glow that frames the features.

  • Cut through

    The two X eyes, the brow lines, and the wide open mouth are cut all the way through for the brightest light.

Learn the carving basics

Before you start cutting

How do I keep the splatter from drying out and looking sad?

Fresh pulp shrivels within a day or two, so stage it right before guests or photos. If the pumpkin sits on display all week, plan to pull fresh strings from a spare pumpkin or a scoop you refrigerated. A quick misting with water can revive it for a short time.

Will the wide mouth make the pumpkin cave in?

A large low opening does weaken the front, which is why you carve it last after the eyes are done. Keep the walls around one inch thick and leave a solid band of skin below the mouth for support. If your pumpkin feels soft, choose a smaller mouth.

Can I make the drooping lower lip without it breaking?

Yes, just avoid cutting the lip too thin or too far out. A gentle downward curve on the bottom edge is enough to guide the guts over it. Leave the lip attached to the surrounding shell on both sides so it stays strong.

Your take belongs here, too.

Changed a detail? Made it simpler? Share a photo of your version and tell the community what worked.

Share your pumpkin

More pumpkins like this

You've reached the end · 8 pumpkins
The Patch Report

Fresh pumpkins, in your inbox.

The best new carvings, ideas worth stealing, and how-tos for carving season. Short, seasonal, and gone by November.

A short email during carving season. Unsubscribe anytime. See our privacy policy.