@cider_sam
Sep 7, 2026

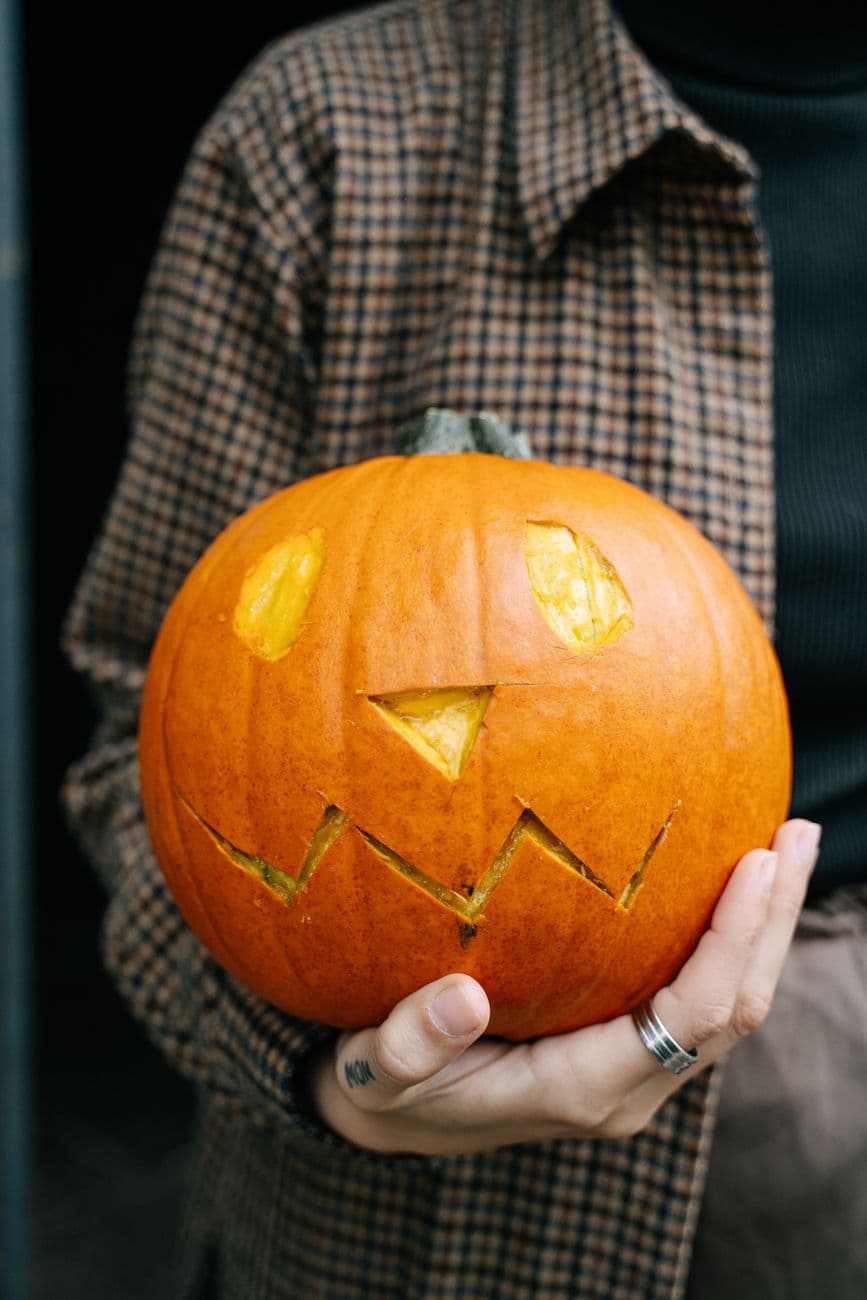
The core trick here is playing two simple grins off each other, one with a jagged toothy smile and one with sweet heart-shaped eyes. Both faces rely on clean cutout shapes with no fine detail, so the plan is to draw bold features, carve the smaller eyes and nose first, then open the wide mouths last. Keep the jaws thick between teeth so the grin holds its shape.
Written by PumpkinCarvingIdeas.com, inspired by @cider_sam's photo above. These are our suggestions, not instructions from the uploader, and this approach hasn't been tested on their exact carve.
Choose two round pumpkins with smooth, flat-ish front faces so your features read clearly. If you want to wear them like the photo, cut a large opening in the bottom rather than the top so you can slip it over your head. Scoop out all the seeds and pulp, and thin the front wall to about one inch so your knife glides through. A thinner wall makes the cutouts much easier to control.
Draw or trace a jagged toothy grin on one pumpkin and a softer face with two heart eyes on the other. Keep the shapes big and simple, and mark the teeth as connected triangles rather than separate floating pieces. Use a washable marker so you can wipe and redraw until the spacing looks balanced. Step back and check both faces from a few feet away before you cut.
Start with the eyes and the small triangle nose on the toothy pumpkin, and the two hearts on the other. Use a small serrated carving saw and let the tool do the work with gentle back-and-forth strokes. Cutting the small shapes first keeps the pumpkin sturdy while you work. Push each piece out from the inside with your thumb to avoid tearing the edges.
Save the wide mouths for last since they remove the most material and weaken the shell. On the toothy grin, carve around the outside of the smile and leave the teeth attached top and bottom so they stay strong. For the heart-eyed face, cut the friendly curved smile in one smooth pass. Work slowly around the corners so the jaw does not crack.
Smooth any rough edges with the tip of your saw or a small spoon so the light shines evenly. Drop a battery LED puck or a short string of LED lights inside each pumpkin, never a candle, especially if these will go near faces or costumes. Rub a little petroleum jelly on the cut edges to slow drying. Test the glow in a dark room and touch up any thin spots.
These faces look best shot together so the jagged grin and the heart eyes play off each other. Set them on a railing, a porch step, or hold them for a fun couple's costume shot like the one that inspired this guide. Shoot at dusk so the LED glow reads warm against the darker background. Keep the lights battery powered if anyone is wearing a pumpkin.
Check things off as you get ready.
Work on a stable surface, keep your free hand out of the cutting path, and have an adult handle sharp tools.
The whole outer skin of both pumpkins stays dark for that solid orange body.
Lightly shave a thin outline around each grin if you want a faint halo glowing around the mouths.
The eyes, nose, teeth gaps, heart eyes, and both wide smiles are cut clean through for the brightest light.
Leave each tooth connected to both the top and bottom of the mouth opening instead of carving them as separate points. Carve the mouth outline around the teeth, and keep the pumpkin wall about an inch thick for strength. Thicker jaws are far less likely to snap while you handle the pumpkin.
You can, but cut the opening in the bottom wide enough to clear your head and scoop the inside very clean. Only use battery LED lights, never a candle, and take the pumpkin off often since it gets warm and heavy. Have someone help you lift it on and off so you do not crack it.
The heart-eyed pumpkin is the easier of the two because it has only three simple shapes and one smooth smile. Carve that one first to get comfortable, then move to the toothy grin which needs a bit more care around the teeth. Both are still beginner friendly.
Changed a detail? Made it simpler? Share a photo of your version and tell the community what worked.
The best new carvings, ideas worth stealing, and how-tos for carving season. Short, seasonal, and gone by November.





Comments (0)