Halloween Pumpkin Carving Contest · Starts October 1st · $500 in prizes
← Back to ideas
@ai_concepts
Sep 14, 2026
Clawed Tree Monster Against a Moon PumpkinAI
0

Clawed Tree Monster Against a Moon Pumpkin

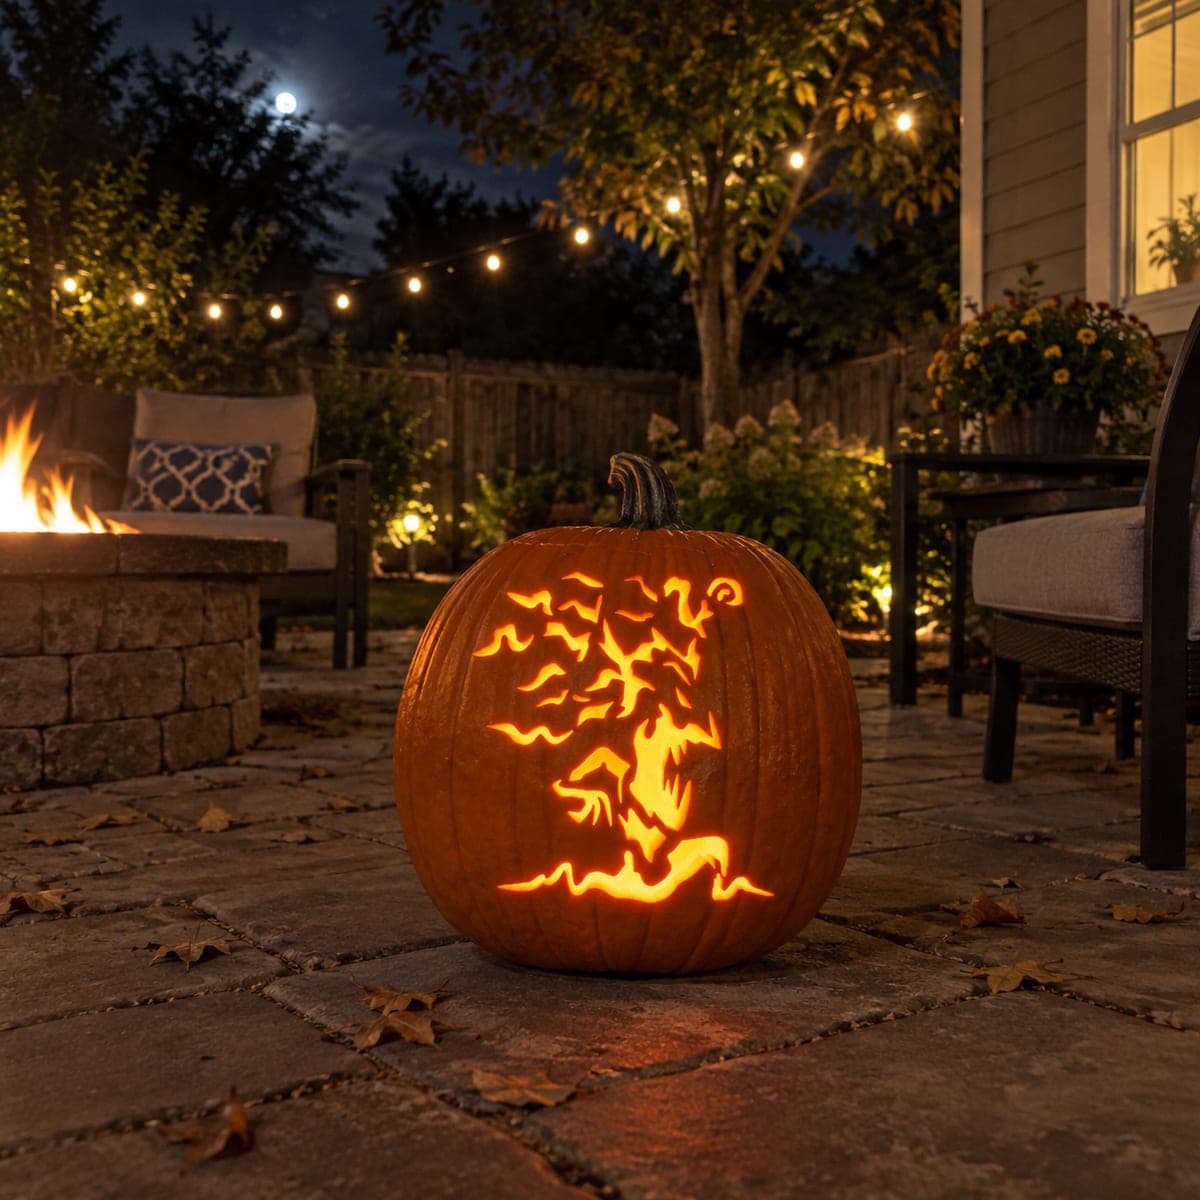
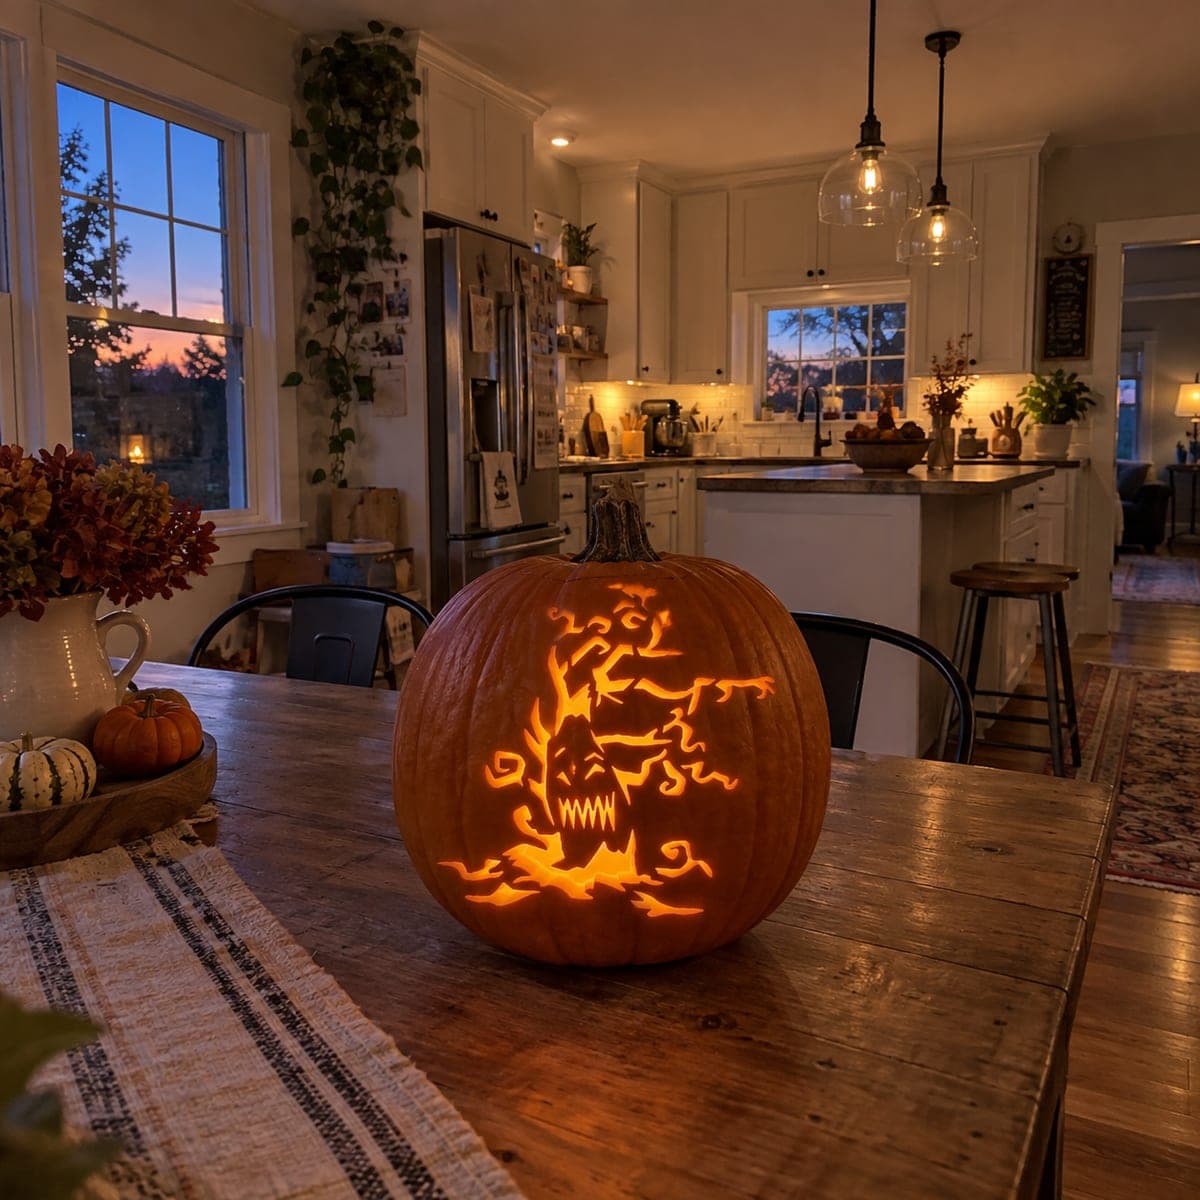
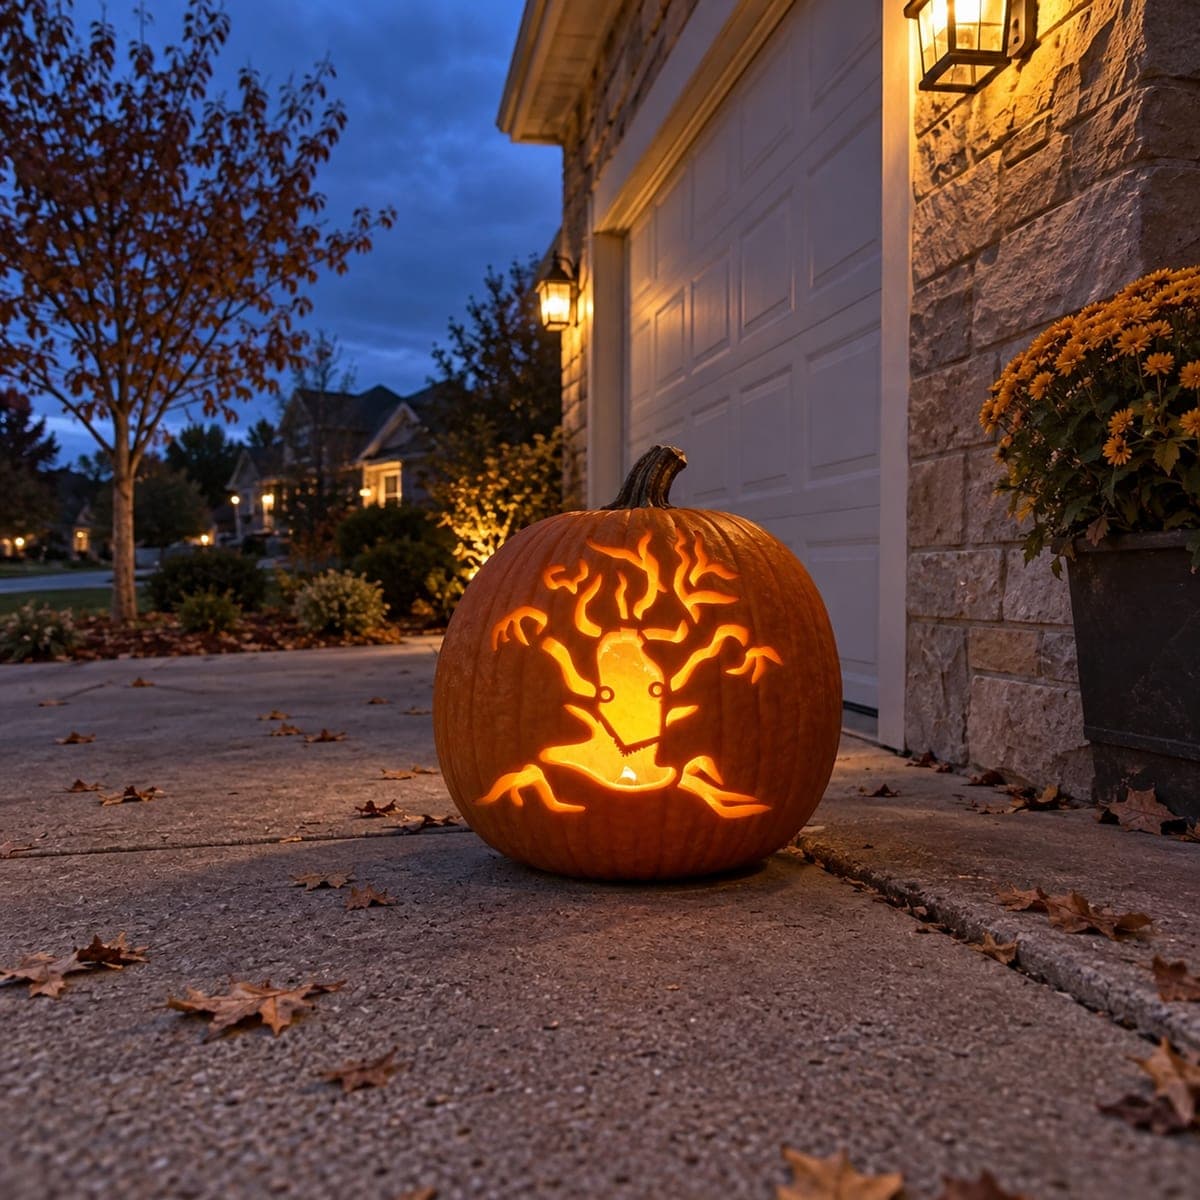
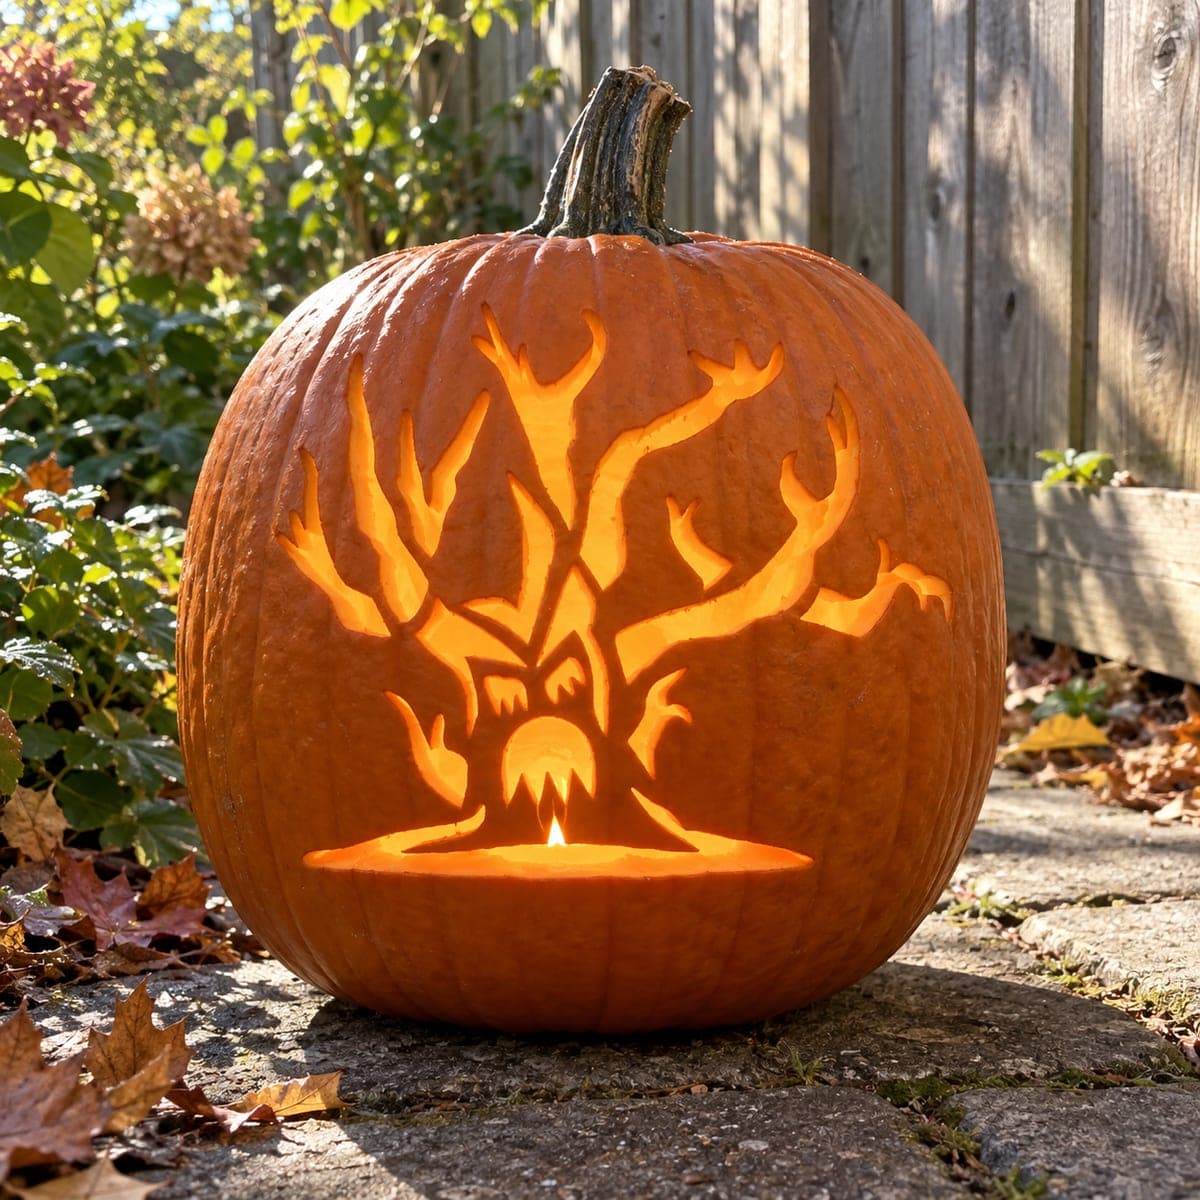
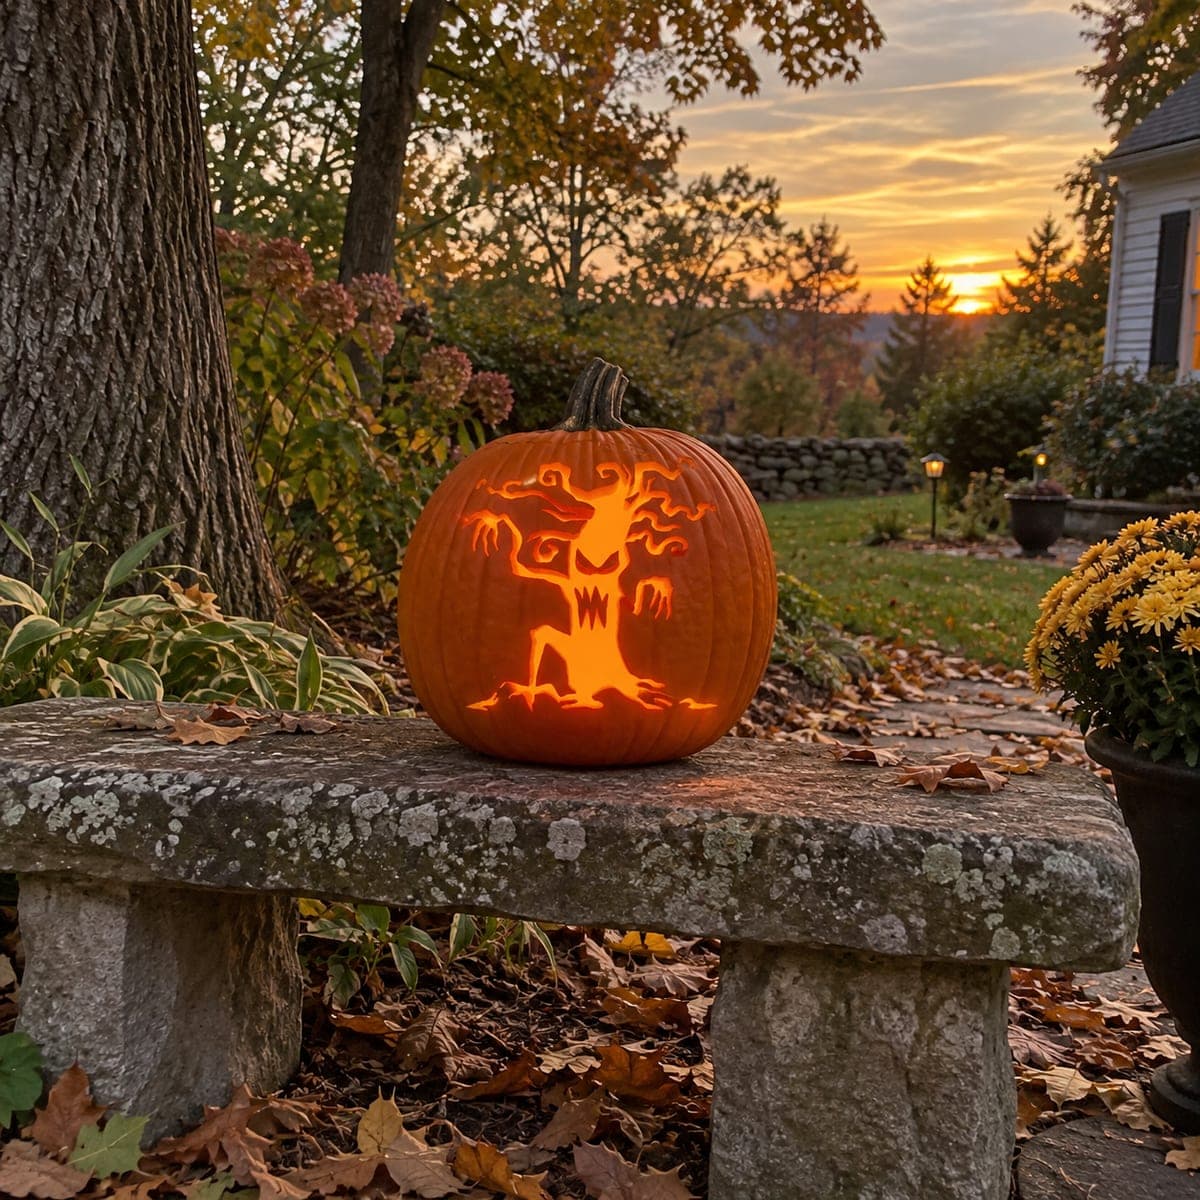
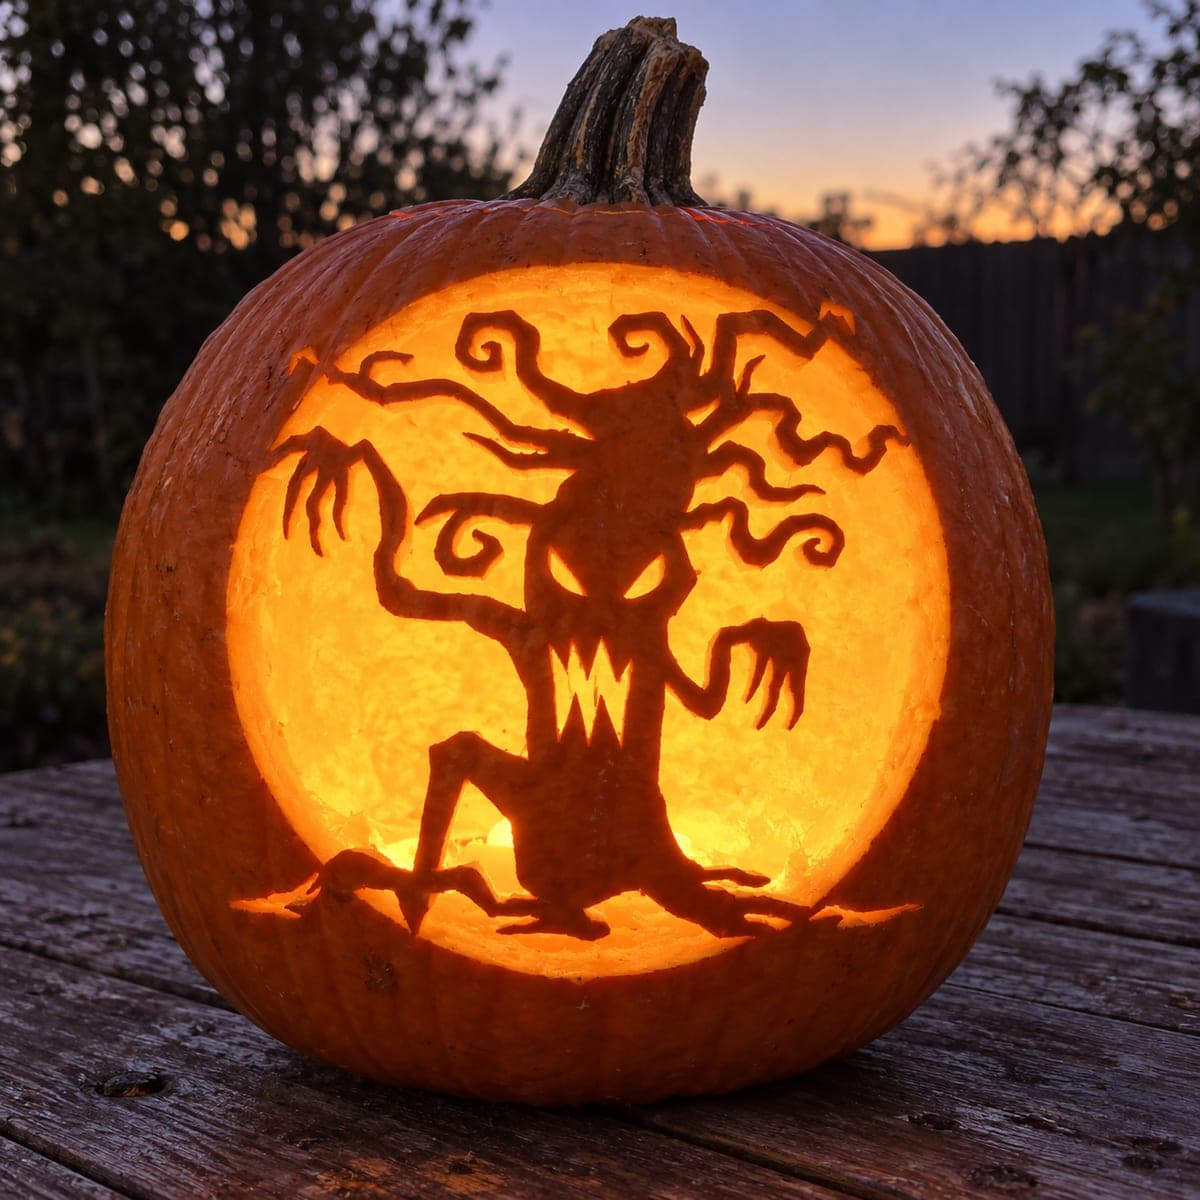
A menacing tree monster with sharp claw-tipped branches and a wide screaming face stands against a glowing oval moon, photographed at golden hour. The large oval of light is cut away while the tree-monster silhouette stays as intact skin in this silhouette pumpkin carving. Carve the curved moon background in sections, starting at the sides and working toward the top, so the oval stays round; the claw tips at the branch ends should be widened to at least an eighth of an inch before cutting to avoid snapping off.

This is an AI-generated concept image: a realistic, carvable design idea rather than a photo of a finished carve. AI concepts are always labeled and sit out the leaderboard and the contest.

No ratings yet · Sign in to rate
Comments (0)

  • No comments yet — be the first.

Save without an account. Sign in to like or comment.

Our tips for carving a similar design

The core trick here is reverse silhouette work: the twisted tree monster stays as solid pumpkin skin while a large oval moon is fully cut away around it to backlight the shape. Plan the big oval opening as your last cuts so the shell stays rigid while you carve the fine branch and claw details. Because this is a concept image, treat the branches and claws as details you would widen and bridge on a real pumpkin so nothing snaps.

Written by PumpkinCarvingIdeas.com, inspired by the image above. These are our suggestions, not instructions from the uploader. This approach to the AI concept has not been tested on a real pumpkin.

From pumpkin to porch

  1. Prep the pumpkin and transfer the design

    Pick a tall, wide pumpkin with a smooth flat face for the moon oval. Cut a lid from the bottom or back rather than the top so the stem stays intact, then scrape the inside wall behind the design down to about an inch thick. Tape your printed pattern to the front and poke the outlines with a pin or transfer tool. Mark clearly which areas are the tree monster (stays skin) and which is the moon (gets cut out).

  2. Widen the fragile claw and branch tips

    Before any cutting, look over every branch end and clawed finger. On a real pumpkin these thin points snap easily, so plan to keep each claw tip at least an eighth of an inch wide. Leave small skin bridges where a branch would otherwise become a floating sliver. It is better to have slightly chunky claws that survive than delicate ones that break off.

  3. Carve the face and skin details first

    Start with the monster's screaming mouth, the triangle teeth, and the angled eyes, since these are full cutouts inside the silhouette. Use a small serrated saw and make slow, straight passes, letting the blade do the work. Cut the narrow gaps between the branches next so the twisting shape reads clearly. Doing these tight cuts while the shell is still mostly solid keeps everything stable.

  4. Peel the shading areas

    For a softer glow on parts of the trunk or ground line, use a lino or gouge tool to skin off just the orange rind without going all the way through. This gives a dim orange tone that separates the monster from the bright moon. Keep these peeled zones shallow and even. Work outward from the center so you do not lean on finished details.

  5. Cut the moon oval in sections

    Save the big oval for last. Carve the moon background in sections, starting at the sides and working up toward the top, so the curve stays round and the shell does not sag. Remove the lower sections before the top ones to keep support as long as possible. Take your time following the oval line so the moon reads as a clean circle behind the tree.

  6. Light it and photograph

    Drop in one or two battery LED lights, never a candle, since the thin shell and skin bridges will scorch. Warm white or orange LEDs mimic the golden-hour glow in the concept. Set the pumpkin at eye level outdoors at dusk and check that the moon lights evenly behind the silhouette. Rotate the lights until the claws and screaming face stand out sharp and dark.

Gather your supplies

Check things off as you get ready.

Work on a stable surface, keep your free hand out of the cutting path, and have an adult handle sharp tools.

Three levels of light

  • Leave intact

    The tree monster body, twisting branches, and clawed fingers stay as untouched dark skin.

  • Peel & shade

    Parts of the trunk base and the ground line can be skin-peeled for a dim orange glow.

  • Cut through

    The large oval moon behind the monster, plus the eyes and screaming mouth, are cut fully through for the brightest light.

Learn the carving basics

Before you start cutting

How do I keep the moon oval from looking lopsided?

Draw the full oval before you cut and step back to check it from a few feet away. Carve it in sections starting at the sides and working up to the top so the shell holds its shape as you go. Removing weight evenly keeps the curve round instead of caving at one edge.

Won't the thin claw branches break off?

They can, which is why you widen every claw tip to at least an eighth of an inch before cutting. Keep small skin bridges connecting delicate branches to the main trunk so nothing floats free. Thicker points look almost identical when lit but survive handling much better.

Should I cut the face details or the moon first?

Cut the face, teeth, and branch gaps first while the shell is still solid and supportive. Save the big moon oval for last so the pumpkin does not flex and crack around your fine details. Working small to large is the safest order for a design like this.

Your take belongs here, too.

Changed a detail? Made it simpler? Share a photo of your version and tell the community what worked.

Share your pumpkin

More pumpkins like this

You've reached the end · 8 pumpkins
The Patch Report

Fresh pumpkins, in your inbox.

The best new carvings, ideas worth stealing, and how-tos for carving season. Short, seasonal, and gone by November.

A short email during carving season. Unsubscribe anytime. See our privacy policy.