Halloween Pumpkin Carving Contest · Starts October 1st · $500 in prizes
← Back to ideas
@ai_concepts
Sep 25, 2026
Crooked Tree Pumpkin with Round Accent CutoutsAI
0

Report this carving

Tell us what is wrong. Reports are private.

Crooked Tree Pumpkin with Round Accent Cutouts

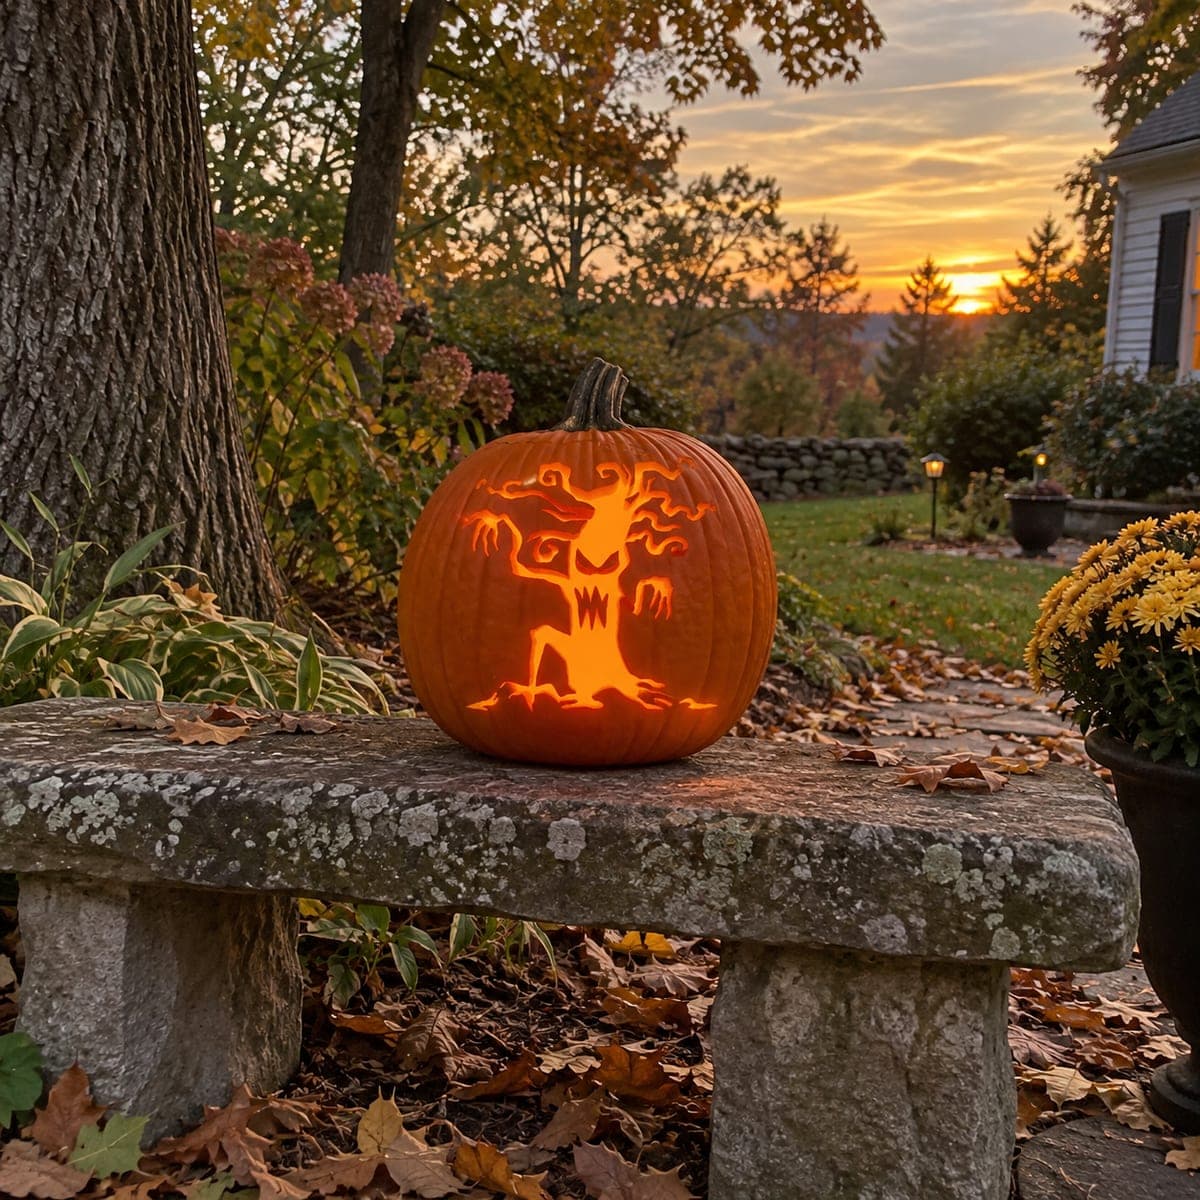
A leaning, crooked tree silhouette pairs with small round cutout accents on this spooky tree pumpkin carving, photographed on a bench at dusk. Cut the full tree shape as one empty opening, then add the circular accents as separate holes with plenty of rind between each one. No interior islands means there is nothing to fall out, which makes cleanup easy. Display on a railing where the warm glow can reach eye level.

No ratings yet · Sign in to rate
Comments (0)

  • No comments yet — be the first.

Save without an account. Sign in to like or comment.

Our tips for carving a similar design

The crooked, leaning trunk works as a single empty silhouette, cutting the entire tree shape as one open aperture. The round cutout accents are punched separately in the surrounding rind, adding a secondary glow pattern that frames the tree. Because neither the tree interior nor the accent holes retain any islands, the main challenge is keeping the single continuous tree cut clean and the accent holes spaced far enough apart to avoid weakening the shell.

From pumpkin to porch

  1. Prep and gut the pumpkin

    Cut a wide bottom cap and scoop to about an inch of wall thickness. A slightly asymmetric or irregular pumpkin actually suits the crooked-tree theme well. Dry the surface before transferring the design.

  2. Transfer the tree silhouette and accent positions

    Mark the full crooked tree outline in marker, exaggerating the lean slightly if it is not already dramatic. Mark the round accent positions separately in the surrounding rind, aiming for at least an inch of solid rind between each circle and at least three-quarters of an inch between any circle and the tree opening.

  3. Cut the full tree silhouette

    Pierce the tree interior and cut the full outline in one continuous path, working around the leaning trunk and irregular branches. Keep branch widths at least half an inch. For the crooked sections, rotate the pumpkin to keep the saw moving in a natural forward direction rather than bending it sideways.

  4. Remove the piece and clean edges

    Pop the tree piece through to the inside and remove it. Use a linoleum U-tip to smooth any rough spots along the curves. Check the overall silhouette from a display distance and trim if needed.

  5. Punch the round accent holes

    Use a drill bit, punch tool, or narrow saw to cut each circular accent hole. Work from the outside and remove each disc cleanly. Space the circles irregularly for a natural scattered look rather than a grid pattern.

  6. Light and display

    Place a battery-operated candle inside and display on a bench, railing, or step at eye level. The crooked silhouette glows against the dark and the scattered circles float around it as secondary light points. Display at dusk or in full dark for maximum effect.

Written with AI to match this design

Gather your supplies

Check things off as you get ready.

Work on a stable surface, keep your free hand out of the cutting path, and have an adult handle sharp tools.

Three levels of light

  • Leave intact

    All surrounding rind outside the tree silhouette and between accent circles

  • Peel & shade

    None, this design uses only through-cuts

  • Cut through

    Full interior of the crooked tree silhouette and each individual round accent hole

Learn the carving basics

Before you start cutting

How do I cut a clean circle without a drill?

Pierce the center of the circle with a poking tool first, then insert a narrow detail saw and cut around the circumference in short strokes. Alternatively, a round cookie cutter pressed firmly onto the rind surface and tapped with a rubber mallet can punch a clean circle if the rind is thick enough. Clean up the edges with a linoleum tool.

How many accent circles look right?

Between five and nine circles scattered in the surrounding rind looks intentional without crowding. Fewer than five can look sparse, while more than ten starts to weaken the shell significantly. Cluster two or three together in one area and leave another area clear for visual variety.

The leaning trunk looks too stiff and straight in my transfer. How do I add more movement?

Before marking the final outline, freehand a gentle S-curve for the trunk using marker, stepping back to check the lean from arm's length. A trunk that shifts direction twice, leaning one way at the base and the other near the crown, reads as more organically crooked than a single straight diagonal.

Your take belongs here, too.

Changed a detail? Made it simpler? Share a photo of your version and tell the community what worked.

Share your pumpkin

More pumpkins like this

You've reached the end · 8 pumpkins
The Patch Report

Fresh pumpkins, in your inbox.

The best new carvings, ideas worth stealing, and how-tos for carving season. Short, seasonal, and gone by November.

A short email during carving season. Unsubscribe anytime. See our privacy policy.