Halloween Pumpkin Carving Contest · Starts October 1st · $500 in prizes
← Back to ideas
@ai_concepts
Aug 14, 2026
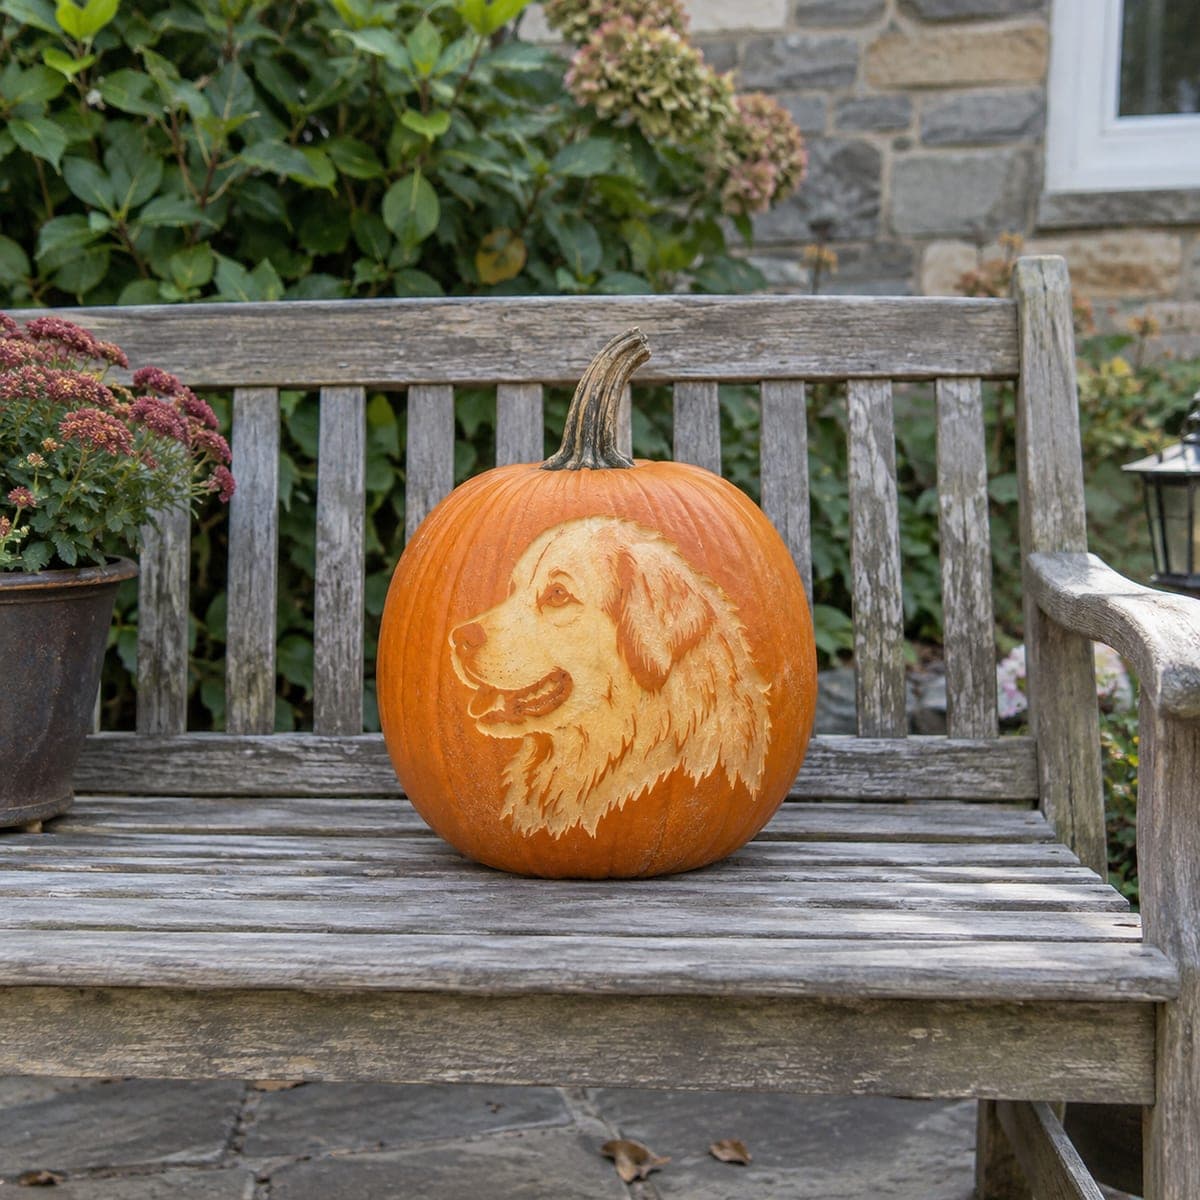
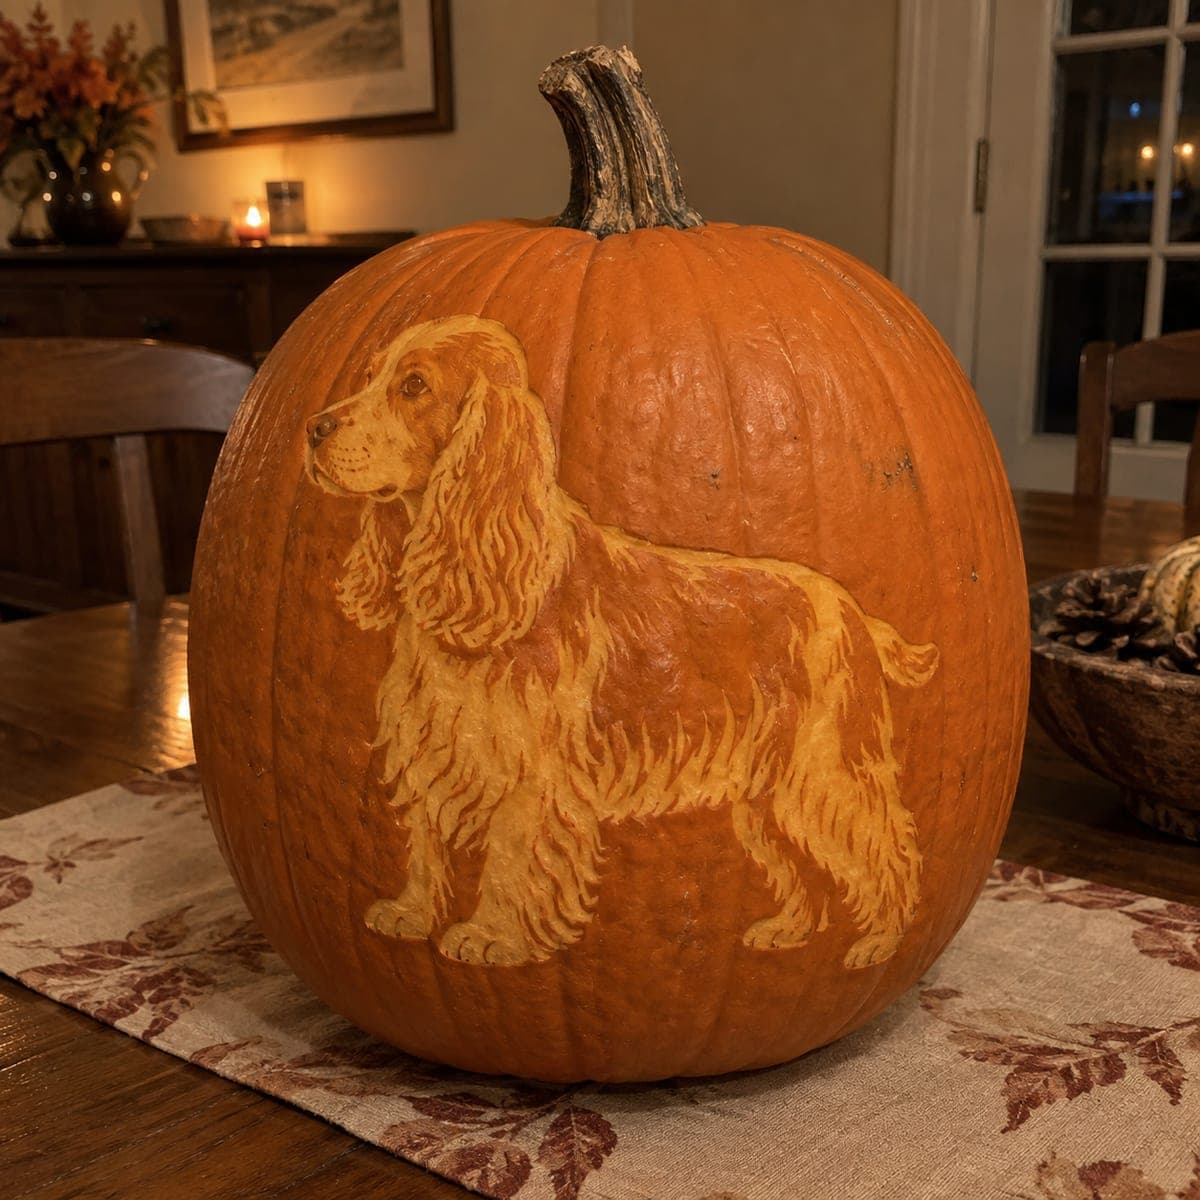
Collie Profile Etched Pumpkin PortraitAI
0

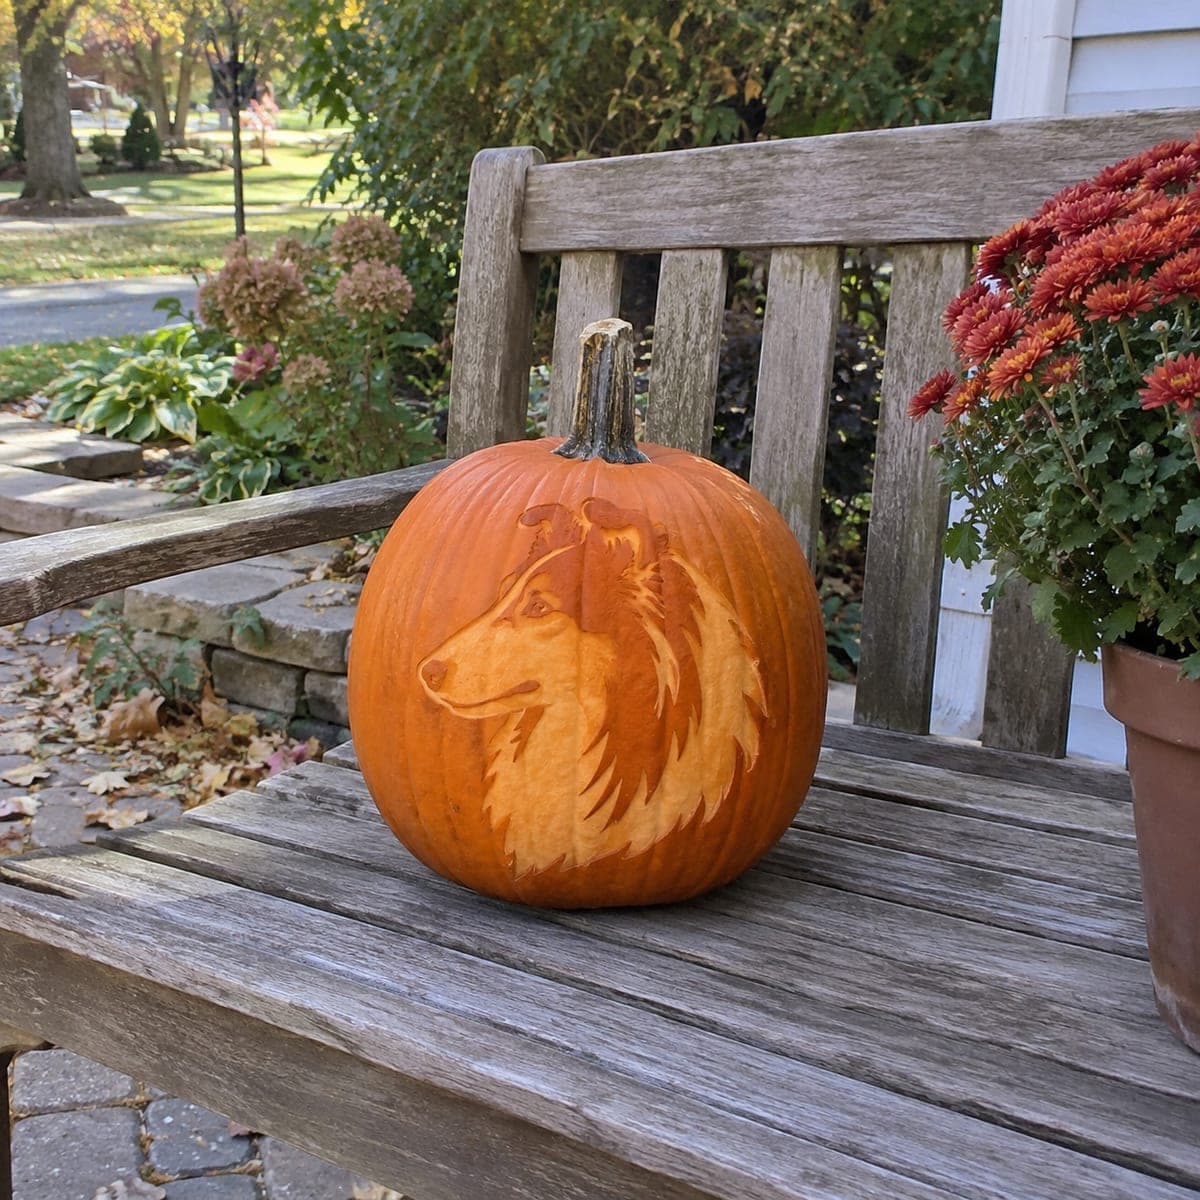
Collie Profile Etched Pumpkin Portrait

A noble collie gazes leftward in this etched profile portrait, its long muzzle, tipped ears, and flowing mane rendered in feathered peel strokes against untouched rind. The unlit surface-carving style suits daytime porches and lasts noticeably longer than pierced designs. Anchor the eye and nose placement first, then pull long strokes down through the ruff to suggest silky fur. Herding-breed owners will recognize their dog instantly from across the yard.

This is an AI-generated concept image: a realistic, carvable design idea rather than a photo of a finished carve. AI concepts are always labeled and sit out the leaderboard and the contest.

No ratings yet · Sign in to rate
Comments (0)

  • No comments yet — be the first.

Save without an account. Sign in to like or comment.

Our tips for carving a similar design

The core trick here is a fully etched, unlit portrait where nothing is cut all the way through. You leave the dark rind as the collie's shadowed markings and peel away the skin in feathered strokes to build the glowing muzzle and flowing mane. Anchor the eye and nose first, then work outward with long directional strokes so the fur reads from across the yard.

Written by PumpkinCarvingIdeas.com, inspired by the image above. These are our suggestions, not instructions from the uploader. This approach to the AI concept has not been tested on a real pumpkin.

From pumpkin to porch

  1. Prep and transfer the profile

    Pick a tall, smooth pumpkin with a broad flat face for the portrait area. Wipe it clean and dry, then tape your collie profile stencil over the flattest spot. Poke closely spaced transfer dots along the eye, muzzle, ear tips, and the outer edge of the ruff. Connect the dots lightly with a washable marker so you have a clear map before any cutting.

  2. Score the outline and set the eye

    With a fine detail knife or a lino-style U gouge, trace the whole silhouette just deep enough to break the skin. Establish the eye and nose first since those anchor the whole likeness. Keep these shapes small and controlled, only removing a shallow layer so light details stay crisp. Getting the eye right early makes the rest of the face fall into place.

  3. Peel the bright muzzle and face

    Switch to a shallow ribbon or peeling tool to remove only the outer skin on the muzzle, cheek, and the lit side of the face. Peeled skin glows dim orange, so use it for the lightest fur areas. Keep the depth even and stop at the flesh, do not cut through the wall. Leave patches of untouched rind for the dark ear tips and shadow along the top of the head.

  4. Feather the flowing ruff

    Work down through the mane with long, tapering strokes that all follow the direction the fur hangs. Vary your pressure so some strokes go a touch deeper and brighter while others stay shallow, which creates that silky layered look. Leave thin ridges of darker rind between strokes so the fur has separation. Take your time here, the ruff is what sells the breed.

  5. Refine contrast and clean edges

    Step back often and compare light zones to dark zones. Deepen the brightest highlights on the muzzle and near the eye a little more to add dimension. Tidy any ragged edges with the tip of your detail knife and brush away loose pulp. Because nothing is pierced, the whole surface should read as smooth shaded tones.

  6. Seal, display, and photograph

    Rub a thin coat of petroleum jelly or a light spray sealant over the peeled areas to slow drying and hold the contrast longer. This etched style shines in daytime, so set it on a porch or bench where sun rakes across the surface. For evening, tuck a small battery LED behind or beside it rather than inside, since there is no interior opening. Snap your photo in soft morning or late afternoon light for the best depth.

Gather your supplies

Check things off as you get ready.

Work on a stable surface, keep your free hand out of the cutting path, and have an adult handle sharp tools.

Three levels of light

  • Leave intact

    Untouched dark rind forms the tipped ear tips, the shadow across the top of the head, and the deepest folds in the mane.

  • Peel & shade

    Skin-peeled areas give the dim orange glow of the shaded cheek, the lit muzzle, and the layered strokes through the ruff.

  • Cut through

    No full cutouts on this design, keep the wall intact; reserve your very deepest peels only for the brightest highlight near the eye and nose.

Learn the carving basics

Before you start cutting

Should I hollow this pumpkin out if I am not cutting through?

You do not need a large interior opening for an etched portrait, but scraping the inside wall behind the face thinner can make peeled areas glow a bit more if you add a side light. If you plan to keep it purely a daytime piece, you can leave it mostly intact. Just remove enough pulp so the shell is not overly heavy.

How do I keep the feathered fur strokes from blurring together?

Always leave a narrow ridge of darker skin between adjacent strokes so each one stays distinct. Follow a single consistent direction, letting the strokes taper to a point at their ends. Working from the top of the mane downward helps the layers overlap naturally like real fur.

This is shown as a concept image, so how would a real version hold up?

An etched design like this exists only as a concept here, but the technique is very achievable on a real pumpkin. Because you never pierce the wall, it resists collapse and typically lasts longer than pierced designs. A light coat of sealant and a cool, shaded spot will stretch its life even further.

Your take belongs here, too.

Changed a detail? Made it simpler? Share a photo of your version and tell the community what worked.

Share your pumpkin

More pumpkins like this

You've reached the end · 8 pumpkins
The Patch Report

Fresh pumpkins, in your inbox.

The best new carvings, ideas worth stealing, and how-tos for carving season. Short, seasonal, and gone by November.

A short email during carving season. Unsubscribe anytime. See our privacy policy.