Halloween Pumpkin Carving Contest · Starts October 1st · $500 in prizes
← Back to ideas
@ai_concepts
Jul 22, 2026
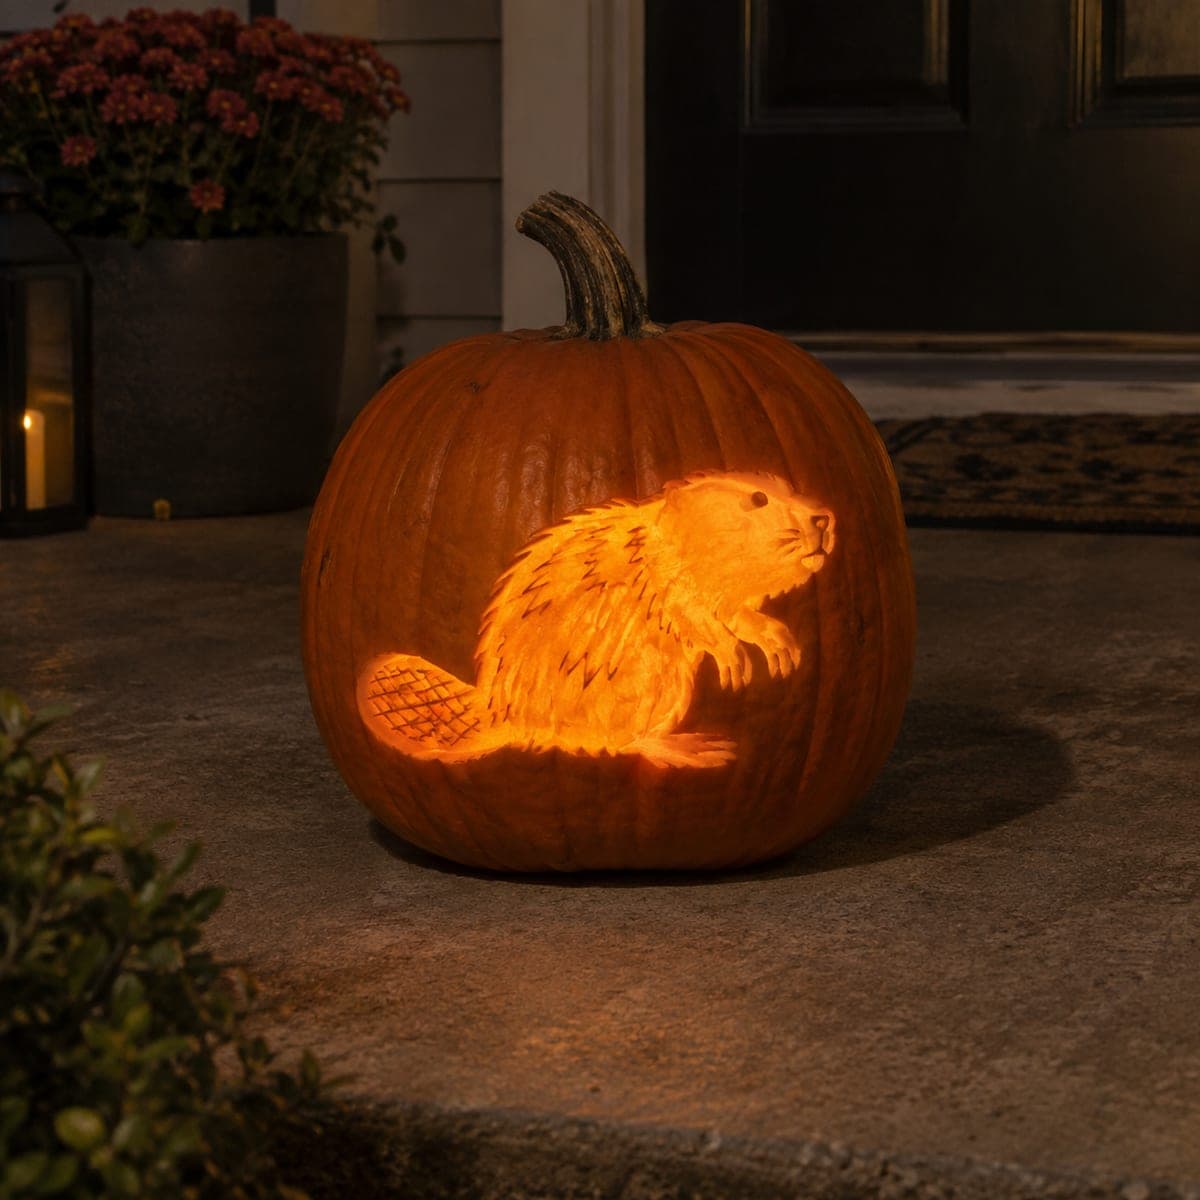
Curious Raccoon Etched Pumpkin PortraitAI
0

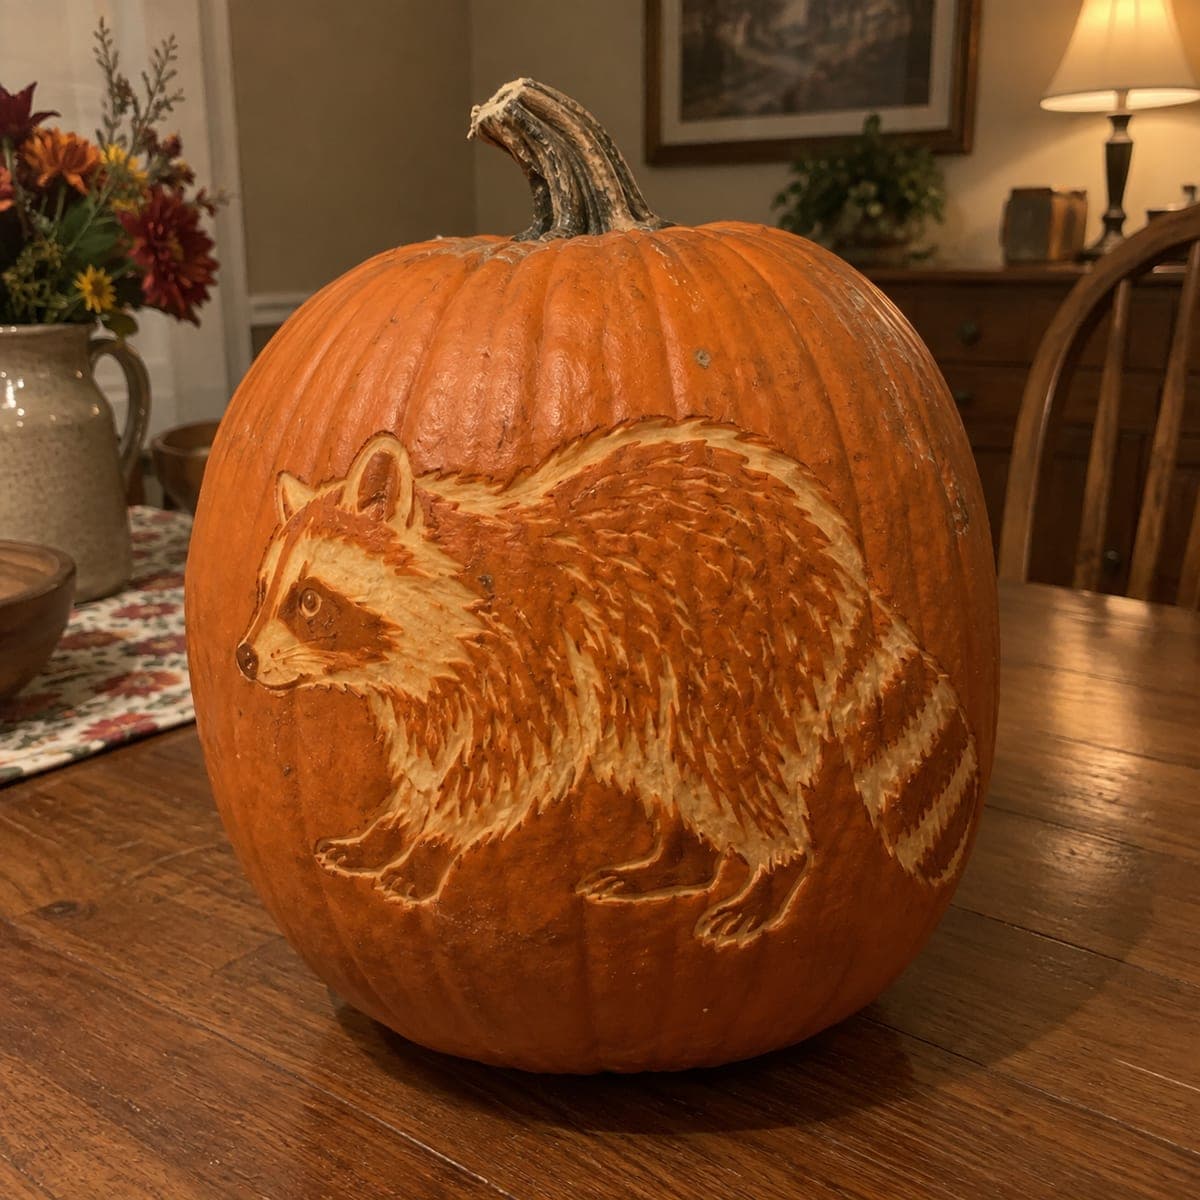
Curious Raccoon Etched Pumpkin Portrait

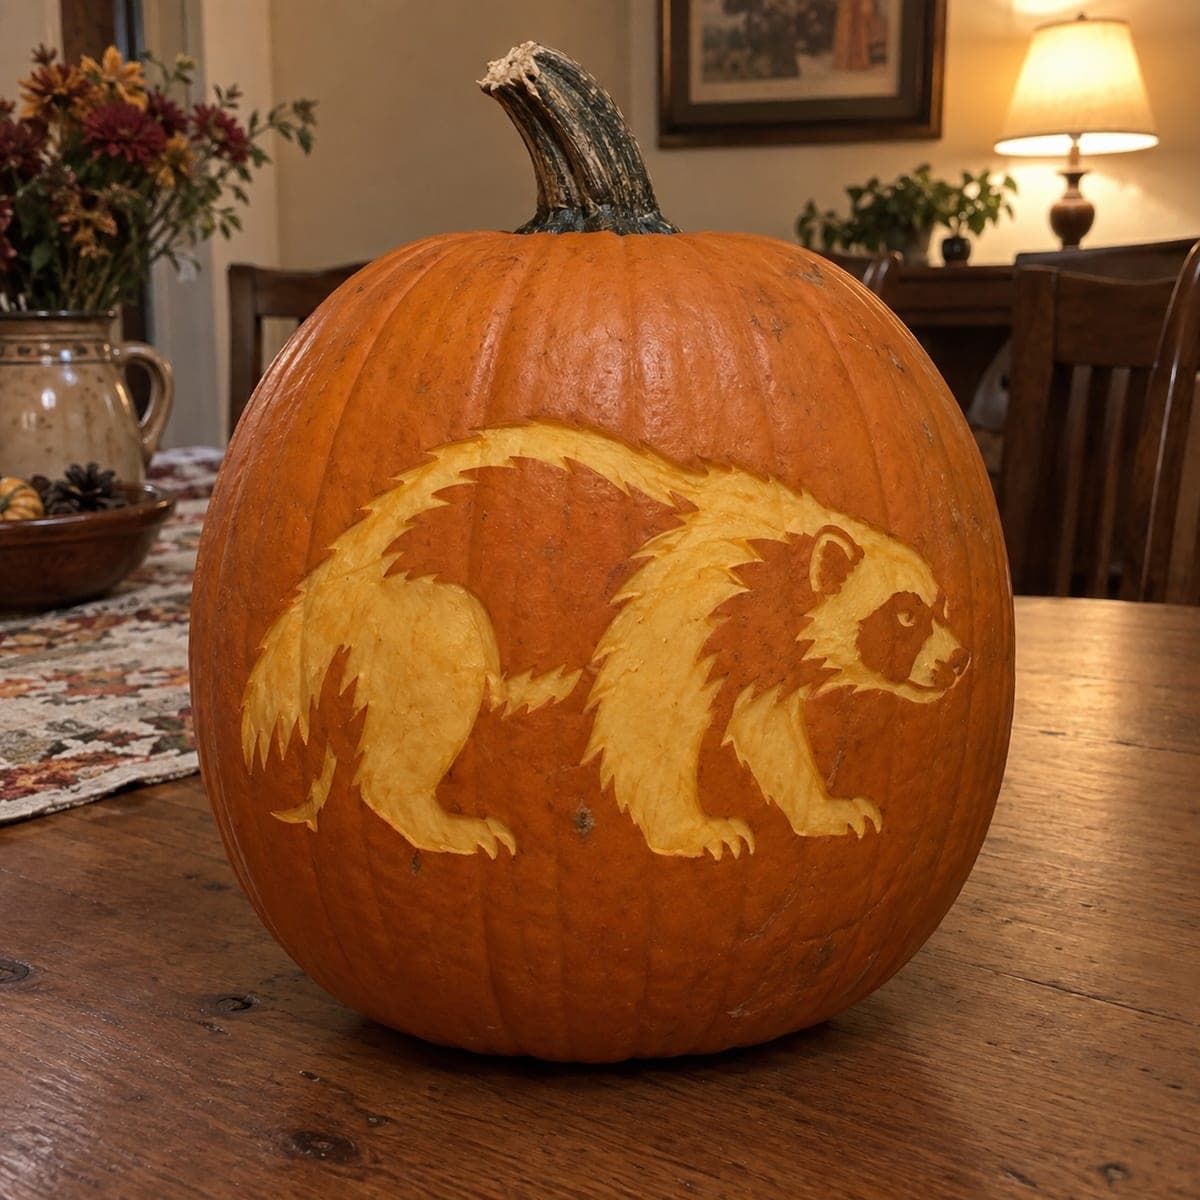
A full-bodied raccoon prowls across this pumpkin in fine surface etching, with its black mask, ringed tail, and hundreds of short fur strokes shaved into the skin. The design displays unlit, reading like a woodcut against the orange rind on a dining table or porch. Work the fur in the direction it grows, from the face outward, and save the bold tail rings for last since they anchor the composition. A woodland favorite for wildlife watchers.

This is an AI-generated concept image: a realistic, carvable design idea rather than a photo of a finished carve. AI concepts are always labeled and sit out the leaderboard and the contest.

No ratings yet · Sign in to rate
Comments (0)

  • No comments yet — be the first.

Save without an account. Sign in to like or comment.

Our tips for carving a similar design

The whole design lives in the skin, not in cut-through holes, so the trick is layering hundreds of short fur strokes at different depths to build light and shadow. You peel broad areas for the pale belly and face, leave the dark mask and body untouched, and shave the ringed tail last to anchor the pose. Because it stays unlit, work in good light and treat the rind like a woodcut block.

Written by PumpkinCarvingIdeas.com, inspired by the image above. These are our suggestions, not instructions from the uploader. This approach to the AI concept has not been tested on a real pumpkin.

From pumpkin to porch

  1. Pick a tall pumpkin and clean the face

    Choose a large pumpkin with one smooth, fairly flat side so the raccoon has room to stretch nose to tail. Wipe the surface clean and dry it. You do not need to gut this one heavily since there are no cutouts, but scooping a little from the top helps if you want to add an LED later. Set it on a towel so it cannot roll while you etch.

  2. Transfer the raccoon outline

    Tape your stencil over the flat side and poke through the main lines with a pin or transfer tool: the body outline, face, mask, legs, and tail rings. Keep the dots close together on curves like the ears and snout so you can read the shape after removing the paper. Step back and check the whole animal fits before you cut anything. Redraw any faint sections with a washable marker.

  3. Map your three tones first

    Before etching fur, decide what stays dark, what gets a shallow peel, and what gets shaved deepest. Leave the black mask, the dark tail bands, and the leg shadows as untouched skin. Lightly skin the belly, chest, and the pale stripes of the tail so they read as a soft glow. This planning keeps the raccoon from turning into one flat texture.

  4. Etch the fur from the face outward

    Using a small loop or detail tool, start at the nose and pull short strokes in the direction the fur grows, fanning back across the cheeks, over the shoulders, and down the flanks. Vary how deep you go so some hairs catch more light than others. Keep strokes short and overlapping rather than long gouges, which is what gives the coat its soft, layered look. Take breaks so your hand stays steady on the fine work.

  5. Carve the mask, eyes, and ringed tail

    Deepen the eyes and nose with a fine tip so they stand out, but leave a thin ridge of skin at the eye highlight so it does not look hollow. Keep the mask mostly dark with just a few etched hairs at its edges. Save the tail rings for last: shave the pale bands cleanly and leave the dark bands raised, keeping the border between them crisp. These bold rings balance the busy fur and finish the composition.

  6. Clean up and light it gently

    Brush away pumpkin dust with a dry paintbrush so it does not settle into your etched lines. Rub a thin coat of petroleum jelly over the shaved areas to slow drying and deepen the contrast. This design shines unlit on a table, but if you want a glow, tuck a small warm LED inside and aim it low so it grazes the fur texture. Photograph it the same night, since etched skin darkens over a day or two.

Gather your supplies

Check things off as you get ready.

Work on a stable surface, keep your free hand out of the cutting path, and have an adult handle sharp tools.

Three levels of light

  • Leave intact

    The black eye mask, the dark tail bands, and the deep leg shadows stay as untouched skin.

  • Peel & shade

    The belly, chest, cheeks, and the pale stripes of the tail get a shallow skin peel for a soft mid glow.

  • Cut through

    Nothing is cut fully through on this etched design; the deepest fur strokes and eye details read as the brightest accents.

Learn the carving basics

Before you start cutting

Do I cut all the way through anywhere on this raccoon?

No, this is a surface etching design, so you never pierce the wall. All the contrast comes from three depths of shaved skin. That also means it holds its shape well and looks great even without a light behind it.

How do I keep the fur from looking like random scratches?

Always pull your strokes in the direction the fur actually grows, starting at the face and fanning outward over the body. Overlap short strokes and vary the depth so some catch light and some stay soft. Working in one consistent direction per section is what turns scratches into a believable coat.

This is an AI concept, so will a real pumpkin look the same?

The pictured pumpkin is a digital concept, but the technique is completely doable on a real one. Etched fur and peeled tone areas are among the most reliable pumpkin methods since nothing thin has to stay attached. Expect your real version to darken and soften a bit as the skin dries, which many carvers actually like for a woodcut feel.

Your take belongs here, too.

Changed a detail? Made it simpler? Share a photo of your version and tell the community what worked.

Share your pumpkin

More pumpkins like this

You've reached the end · 8 pumpkins
The Patch Report

Fresh pumpkins, in your inbox.

The best new carvings, ideas worth stealing, and how-tos for carving season. Short, seasonal, and gone by November.

A short email during carving season. Unsubscribe anytime. See our privacy policy.