Halloween Pumpkin Carving Contest · Starts October 1st · $500 in prizes
← Back to ideas
@ai_concepts
Sep 25, 2026
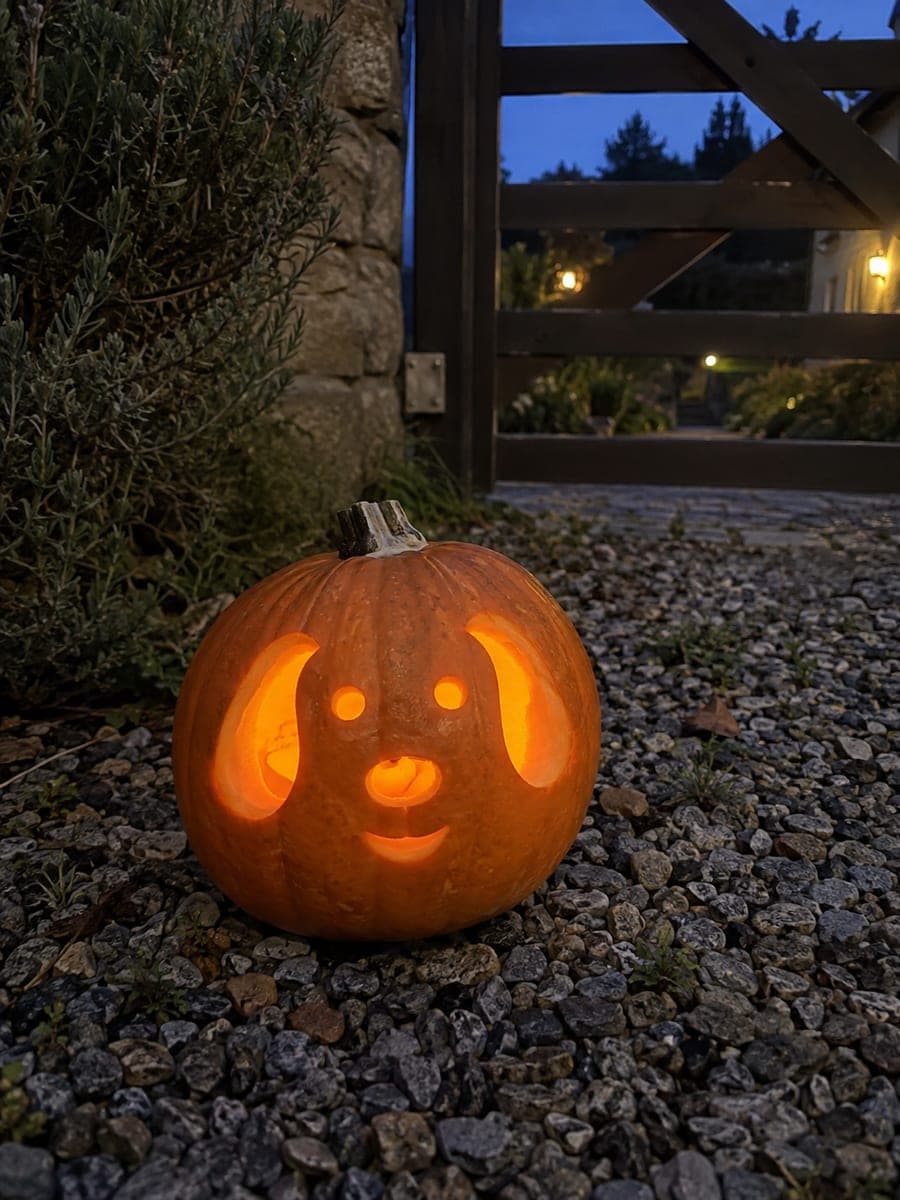
Cute Glowing Puppy Face Pumpkin with Round EyesAI
0

Report this carving

Tell us what is wrong. Reports are private.

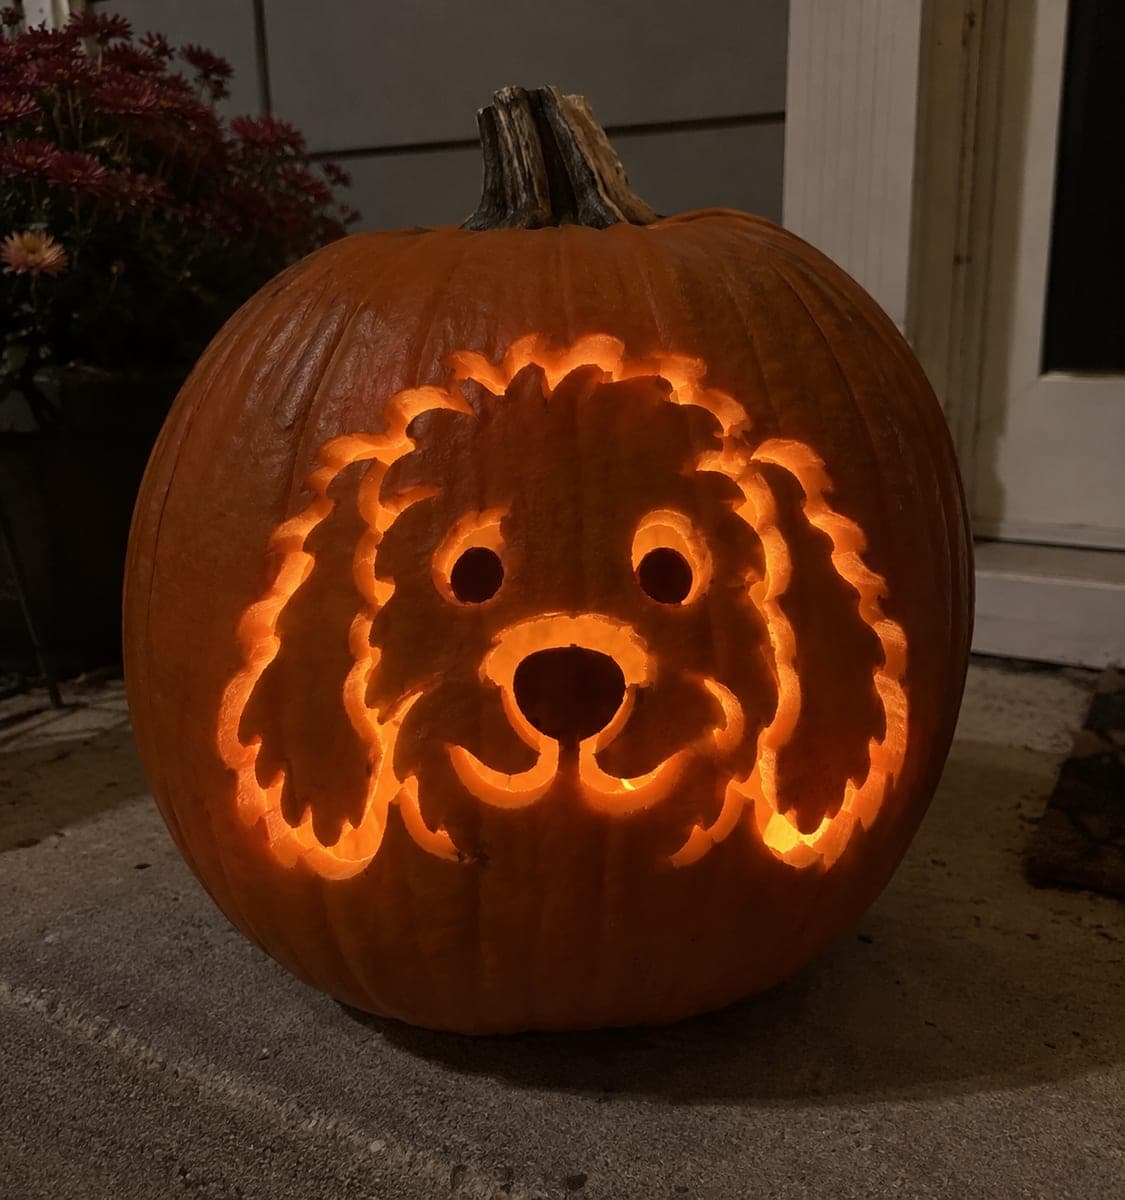
Cute Glowing Puppy Face Pumpkin with Round Eyes

Round glowing eye holes, a simple nose aperture and floppy ear openings cut as completely isolated shapes give this easy puppy pumpkin carving its sweet, wide-eyed expression. Every facial and ear aperture is independent with solid rind between each cut, so there are no tricky bridges for beginners to manage. Mark the eyes first with a coin as a guide for consistent sizing, then center the nose below them and add the floppy ears on either side. The round eyes glow warmly and evenly with a single LED candle set toward the back of the pumpkin.

No ratings yet · Sign in to rate
Comments (0)

  • No comments yet — be the first.

Save without an account. Sign in to like or comment.

Our tips for carving a similar design

Every aperture on this puppy face, the eyes, nose and floppy ears, is an independent isolated cut with solid rind on all sides. The absence of bridging requirements or retained islands means there are no complex structural decisions to make. Using a coin to mark consistent eye sizes anchors the face proportions before any other element is placed.

From pumpkin to porch

  1. Hollow the pumpkin

    Cut access from the back and scoop all seeds. Scrape the interior to about an inch thick across the face panel. Set the LED candle toward the back of the interior before you start carving so you can test the glow of each hole as it is cut.

  2. Mark all apertures with guides

    Press a coin into the rind to mark both eye positions, confirming they are level and equidistant from the center line. Place a smaller circle for the nose directly below and centered between the eyes. Sketch the floppy ear shapes on each side with a marker, keeping them clearly separated from the eyes.

  3. Cut the eyes first

    Use a detail saw to cut both eye holes using a rotating motion. The coin guides should give you clean, consistent circles. Pop the waste pieces inward. Check symmetry before moving on.

  4. Cut the nose

    Cut the nose aperture directly below the eyes. A simple round or oval shape works. Keep it smaller than each eye so the proportions stay cute rather than comical.

  5. Cut the floppy ears

    Cut each ear shape as a standalone opening well separated from the eye holes. The ear shapes can be simple rounded rectangles or curved drops. Use a detail saw for the straight sections and a narrow blade for the rounded lower ends.

  6. Light and display

    Settle the LED candle at the back of the interior and check that all holes glow evenly. The wide-eyed puppy expression reads best when displayed at or slightly below eye level. A warm white LED gives the orange rind a soft amber glow that suits the cute style.

Written with AI to match this design

Gather your supplies

Check things off as you get ready.

Work on a stable surface, keep your free hand out of the cutting path, and have an adult handle sharp tools.

Three levels of light

  • Leave intact

    All surrounding rind and the face areas between the holes

  • Peel & shade

    None, this design uses only independent through-cuts

  • Cut through

    Both round eye holes, the nose aperture and both floppy ear openings

Learn the carving basics

Before you start cutting

How do I make the two round eyes perfectly level?

Measure the distance from the center top of each eye mark to an imaginary horizontal line across the pumpkin face. If they match, the eyes are level. Alternatively, hold a ruler or strip of tape horizontally against the marks and adjust before cutting.

Should the ear openings be taller or wider?

Floppy ears that are taller than they are wide tend to read as spaniel-style ears. Ears that are wider than tall read as shorter, rounder ears. Either works. Pick the shape that fits the width of your pumpkin without crowding the eyes.

Can I add a smile opening for a fuller puppy expression?

Yes. A shallow curved slot below the nose adds a smile and keeps the design beginner-friendly as long as you preserve at least two centimeters between the smile and the nose above it. Keep the smile curve broad and short to prevent fragile thin sections at the corners.

Your take belongs here, too.

Changed a detail? Made it simpler? Share a photo of your version and tell the community what worked.

Share your pumpkin

More pumpkins like this

You've reached the end · 8 pumpkins
The Patch Report

Fresh pumpkins, in your inbox.

The best new carvings, ideas worth stealing, and how-tos for carving season. Short, seasonal, and gone by November.

A short email during carving season. Unsubscribe anytime. See our privacy policy.