Halloween Pumpkin Carving Contest · Starts October 1st · $500 in prizes
← Back to ideas
@ai_concepts
Sep 25, 2026
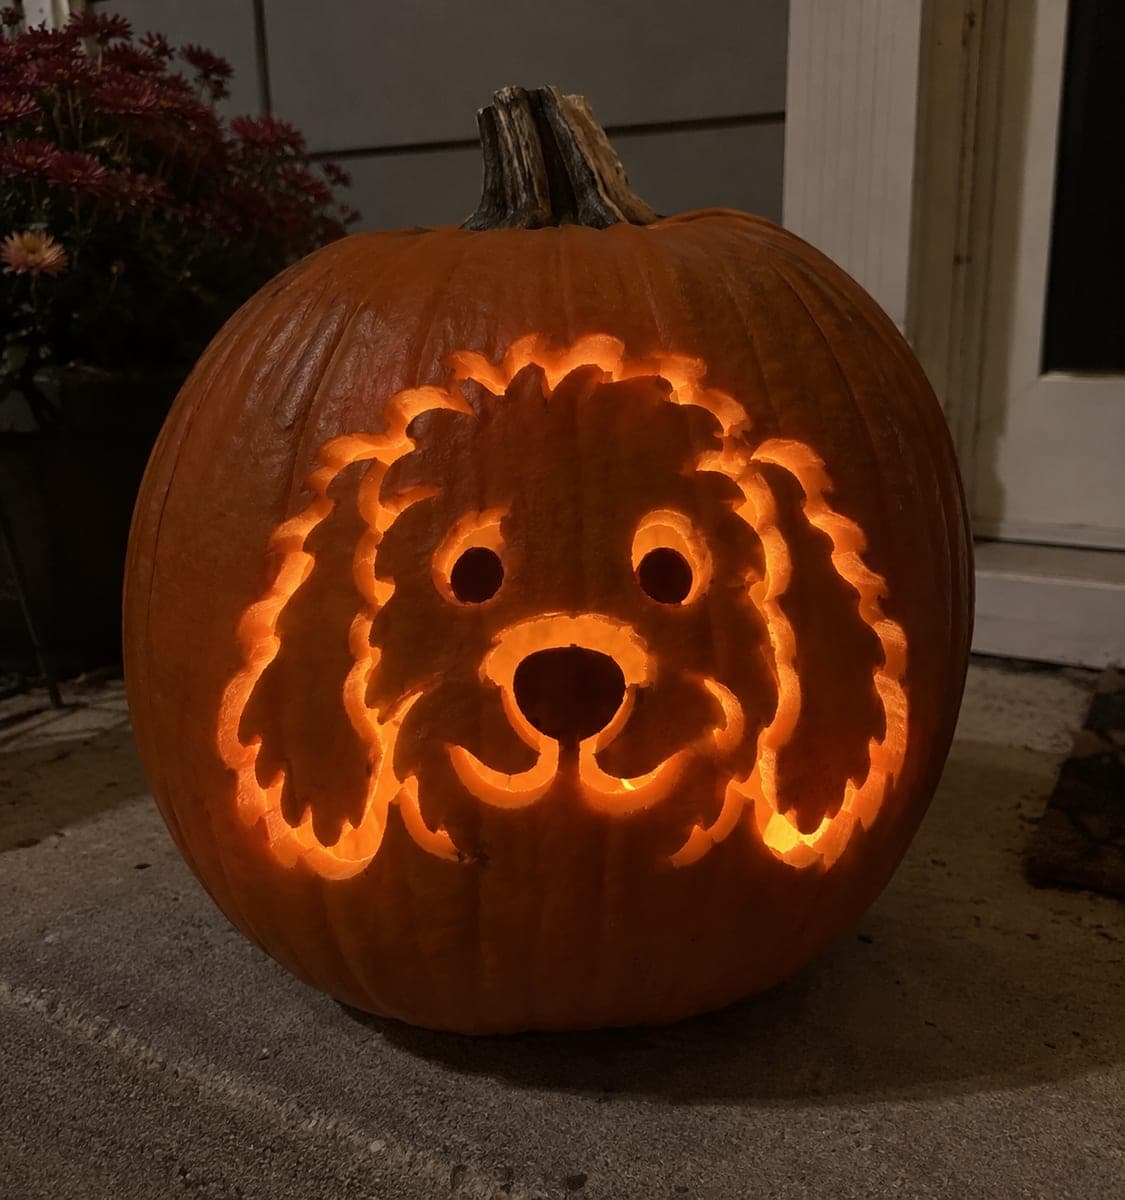
Shaggy Labradoodle Pumpkin Carving with Round EyesAI
0

Report this carving

Tell us what is wrong. Reports are private.

Shaggy Labradoodle Pumpkin Carving with Round Eyes

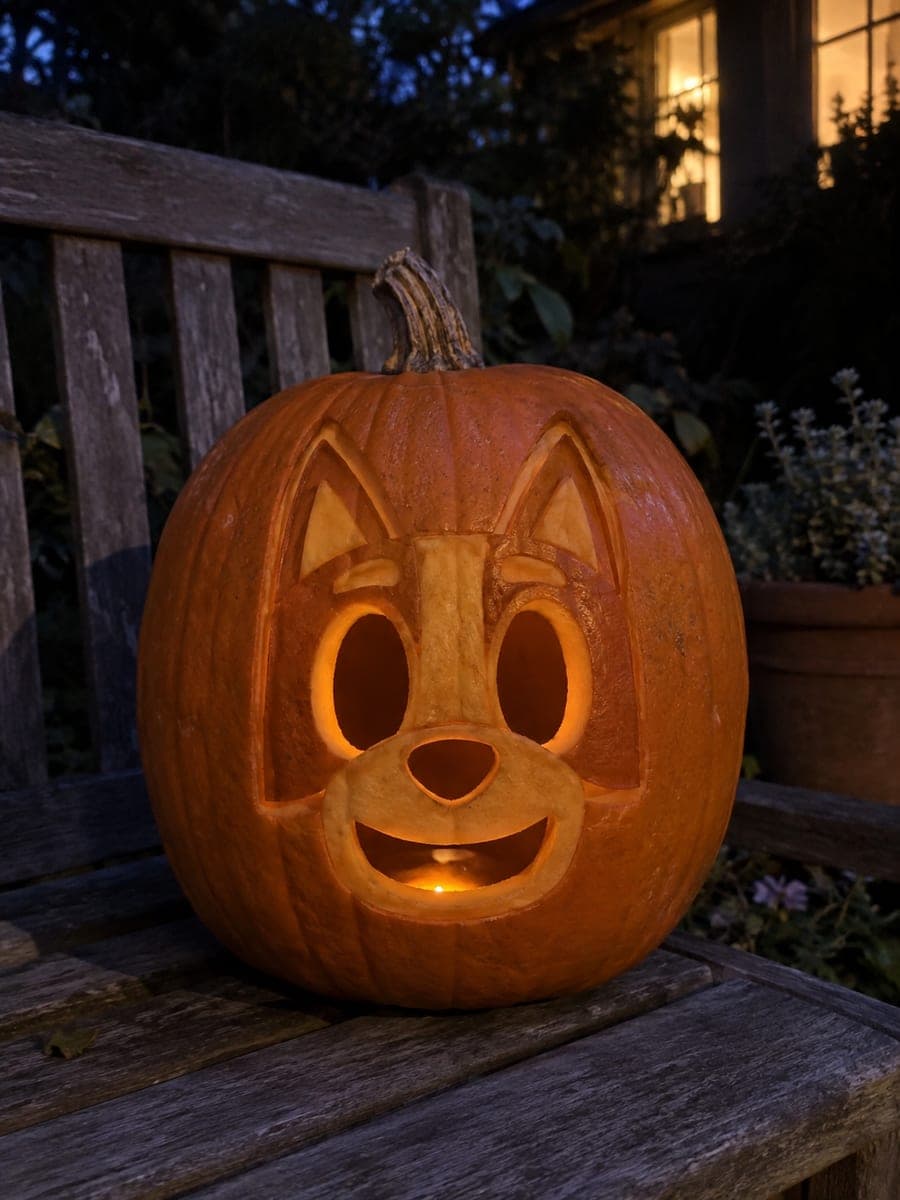
Open round eyes and a nose glow at the center of this easy labradoodle pumpkin carving, while the smile and shaggy outer head are carved as shallow backed contours rather than full cuts, keeping the whole face connected. Because the entire head rests on solid rind backing, this is a forgiving first dog design. Transfer the stencil with a pin tool and cut the two eyes and nose before touching the backed contours. Set a warm amber light inside to show off the fluffy outline.

No ratings yet · Sign in to rate

Comments (0)

  • No comments yet — be the first.

Save without an account. Sign in to like or comment.

Our tips for carving a similar design

Two round eyes and a small nose are cut all the way through, while the shaggy head outline and smile stay as shallow backed marks on solid rind. Because the entire face remains on backing, there are no fragile bridges to manage and the design is very forgiving for first-time carvers. The backed shaggy outline creates a fluffy silhouette visible in both daylight and candlelight.

From pumpkin to porch

  1. Hollow the pumpkin

    Cut the lid from the back and scoop the interior to a half-inch wall. Pay attention to the outer shaggy head zone where the backed contour will sit; a consistent wall lets you carve to a predictable depth. Dry the outer surface before attaching the stencil.

  2. Transfer the stencil

    Tape the stencil and pin-punch every line, then mark the two eyes and nose in one color and the shaggy outline and smile in a second. Removing the paper and seeing the two categories clearly mapped on the pumpkin makes the cutting sequence easy to follow.

  3. Cut the eyes

    Saw out both round eye apertures first. Use short back-and-forth strokes and rotate the pumpkin rather than bending your wrist around curves. Pop the eye pieces free from the inside once the perimeter is completely cut.

  4. Cut the nose

    Cut the small nose aperture with the same saw or switch to a detail knife for tighter control on a smaller shape. A clean round or oval nose looks best; go slowly around the full perimeter before removing the piece.

  5. Carve the shaggy outline and smile

    Hold a detail knife at a low angle and skim the shaggy head outline to about a third of the wall depth, following the wavy contour in short strokes. Add the smile as a shallow curved groove at the same depth. The slightly uneven wavy edge of the head outline actually enhances the fluffy look.

  6. Light and display

    Insert a warm amber LED tea light and view in a dim room. The eyes and nose should glow brightly while the backed shaggy outline catches the light from within, creating a soft halo effect around the face. A low position on a porch step works well for this design.

Written with AI to match this design

Gather your supplies

Check things off as you get ready.

Work on a stable surface, keep your free hand out of the cutting path, and have an adult handle sharp tools.

Three levels of light

  • Leave intact

    The full face panel backing the entire design, and the rind beyond the shaggy head outline

  • Peel & shade

    Shaggy outer head outline and smile groove carved to roughly one-third wall depth

  • Cut through

    Both round eye apertures and the small nose opening

Learn the carving basics

Before you start cutting

How do I make the shaggy outline look fluffy rather than just wavy?

Vary the direction and length of the individual backed strokes rather than tracing one continuous smooth curve. Short strokes pointing slightly outward from the face center mimic individual fur tufts. Overlapping the strokes slightly at their roots ties them together visually.

The eyes are different sizes. Can I fix them?

Use a detail knife to carefully widen the smaller eye, removing a small amount of rind from the edge in even increments. Compare frequently to the larger eye and stop as soon as they look balanced. Work on the eye from the inside of the pumpkin if the outer edge is already clean.

Can I add ear shapes to this design without it becoming too complex?

Yes, as long as the ear additions are also backed relief rather than through-cuts, they will not add structural complexity. Simply extend the shaggy outline on each side into two hanging ear shapes using the same low-angle backed carving technique.

Your take belongs here, too.

Changed a detail? Made it simpler? Share a photo of your version and tell the community what worked.

Share your pumpkin

More pumpkins like this

You've reached the end · 8 pumpkins
The Patch Report

Fresh pumpkins, in your inbox.

The best new carvings, ideas worth stealing, and how-tos for carving season. Short, seasonal, and gone by November.

A short email during carving season. Unsubscribe anytime. See our privacy policy.