Halloween Pumpkin Carving Contest · Starts October 1st · $500 in prizes
← Back to ideas
@ai_concepts
Sep 25, 2026
Easy Raccoon Pumpkin Carving with Mask CutoutAI
0

Report this carving

Tell us what is wrong. Reports are private.

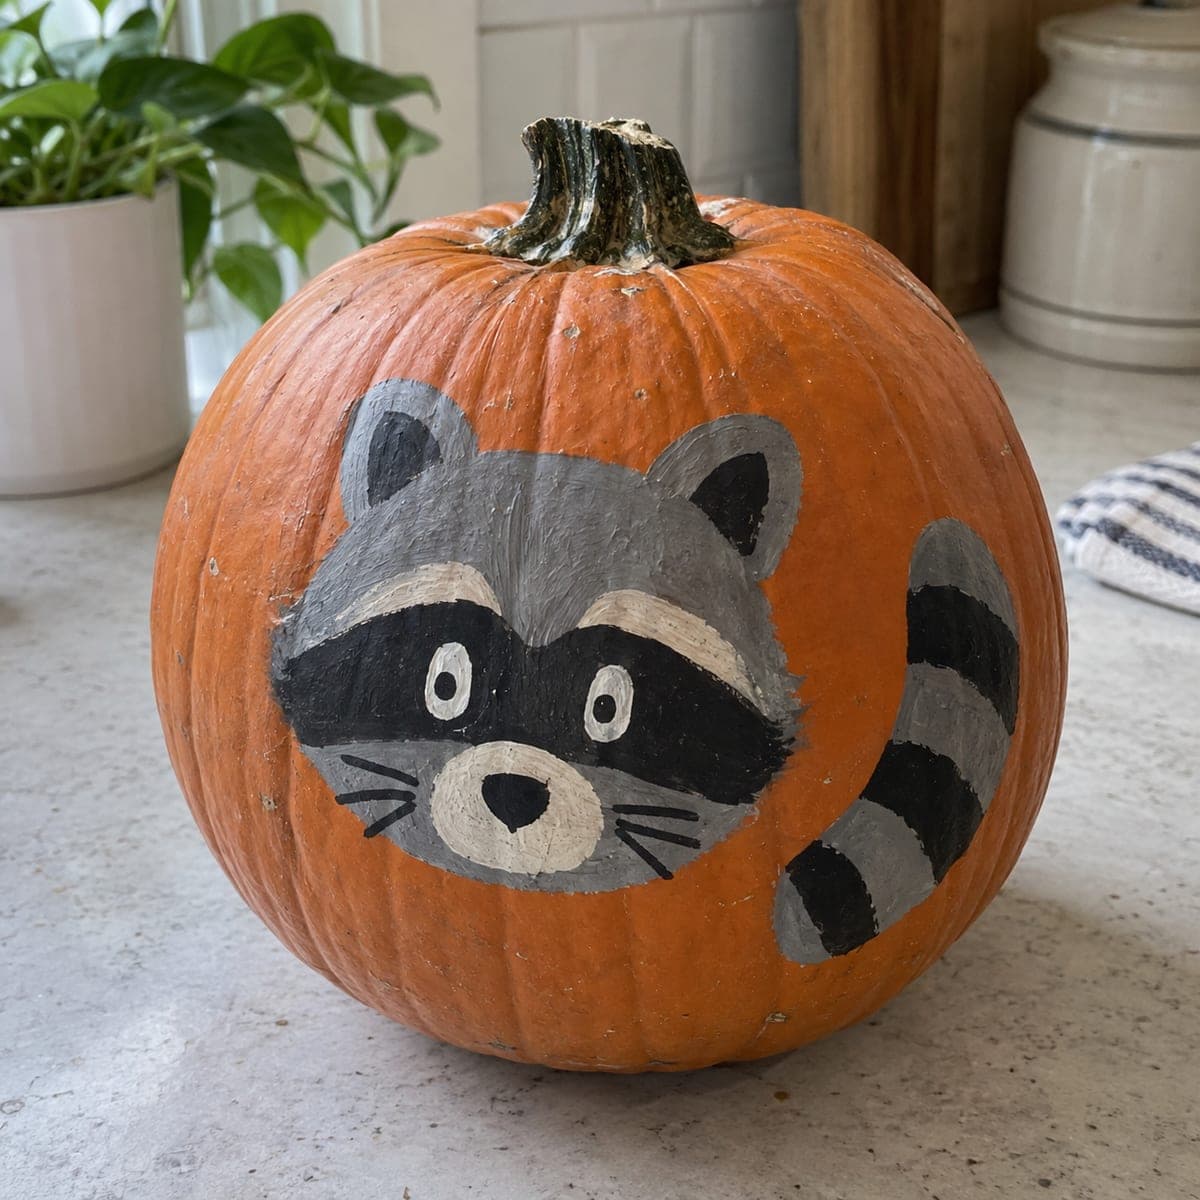
Easy Raccoon Pumpkin Carving with Mask Cutout

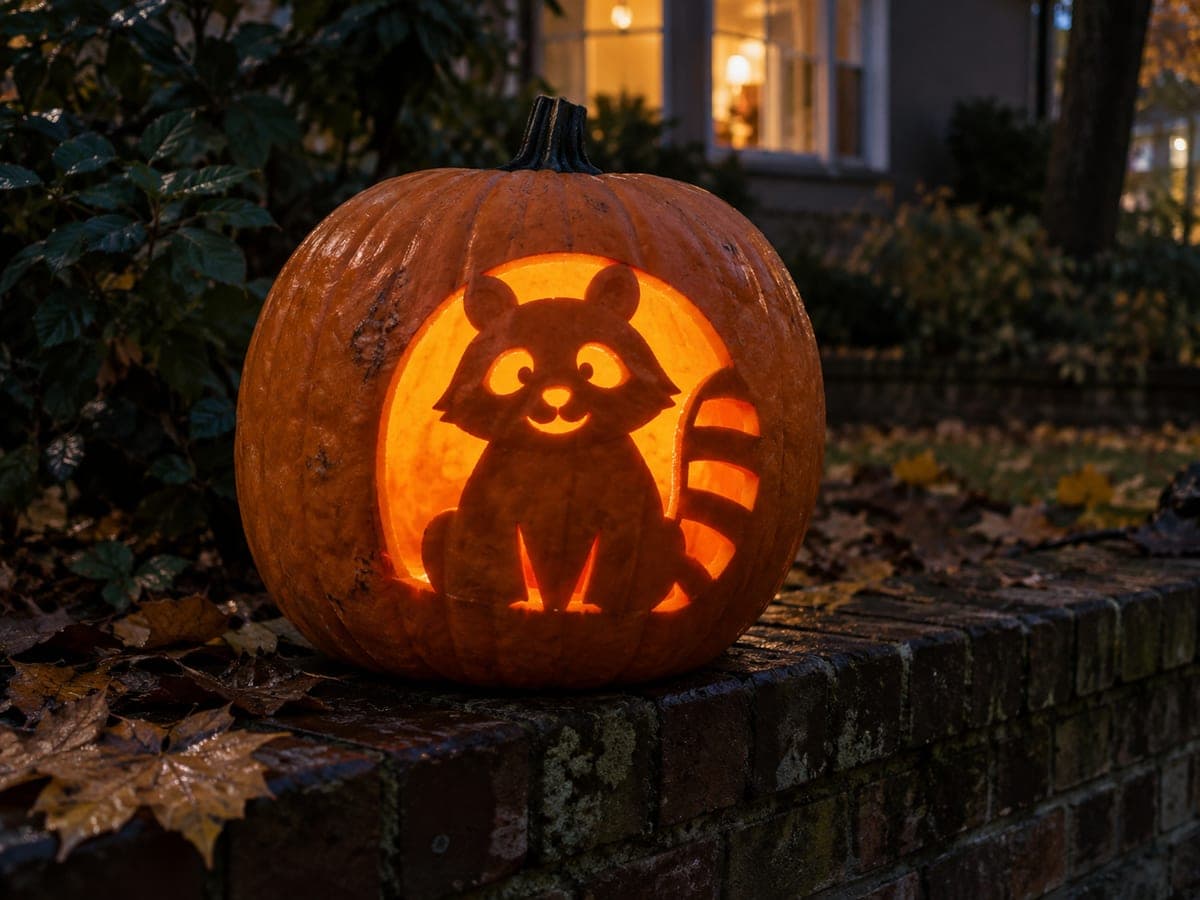
Separate through apertures and broadly rooted retained features capture the raccoon's classic masked face in this easy raccoon pumpkin carving idea, with a satisfying glow from even a single tea light. The facial mask shape is the defining visual element, so keep the bridge between the eye openings and the outer mask solid and wide. Pin-transfer the stencil, then cut the eyes first and work outward into the mask aperture. The striped tail detail, if included, benefits from shallow backed marks over a fully supported rind section.

No ratings yet · Sign in to rate
Comments (0)

  • No comments yet — be the first.

Save without an account. Sign in to like or comment.

Our tips for carving a similar design

The raccoon's facial mask is the defining shape of this design and the element that makes it immediately recognizable. A solid, wide bridge between the two eye openings and the outer mask keeps the structure stable. Cut the eyes first to anchor the face, then work outward into the mask shape, keeping all bridges wide for a first-time carver.

From pumpkin to porch

  1. Prep the pumpkin

    Choose a round pumpkin with a reasonably flat front face. Cut the lid at a slight angle, hollow out the interior to 1 to 1.5 inch wall thickness, and dry the exterior before taping the stencil.

  2. Transfer the stencil

    Tape the raccoon stencil to the pumpkin front and pin-transfer all outlines including the mask boundary. Rub chalk or flour over the dots before removing the paper so the full pattern is visible.

  3. Cut the eye apertures

    Start with the two round or oval eye openings, working slowly with a pumpkin saw. At easy level the eyes are generously sized and well separated, giving each a wide bridge to the surrounding mask rind. Remove each eye piece by pushing it gently inward.

  4. Cut the mask outline

    Cut the outer boundary of the mask shape, which separates the mask zone from the lighter cheek rind on either side. Keep short strokes as the mask edge curves over the nose and back up to the forehead. The bridge between each eye and the mask outer edge must stay solid.

  5. Add backed stripe or tail marks if included

    If the stencil includes a backed stripe on the tail or a cheek contour, use a linoleum gouge to shave only the outer skin in those areas. Check backing depth with a flashlight and stop before breaking through.

  6. Light and display

    Drop an LED tea light inside and carry the pumpkin to its display spot. The glowing mask shape reads clearly even from across a dark yard. Position the pumpkin at a slight downward-facing angle if the top cut is wide, to prevent rain from collecting.

Written with AI to match this design

Gather your supplies

Check things off as you get ready.

Work on a stable surface, keep your free hand out of the cutting path, and have an adult handle sharp tools.

Three levels of light

  • Leave intact

    The solid rind forming the forehead, nose bridge, and outer cheek areas stays fully dark.

  • Peel & shade

    Any backed stripe or cheek contour marks glow at a soft mid-level.

  • Cut through

    The two eye apertures and the mask outline opening glow at full brightness.

Learn the carving basics

Before you start cutting

How do I make the mask look like a raccoon mask rather than just a dark shape?

The key is keeping the bridge between the two eye openings clearly visible as a solid rind strip. If that bridge reads as dark rind between two bright eyes inside a bright mask outline, the shape immediately suggests a raccoon. Widening the bridge slightly makes it more visible.

Can I add ear shapes at easy level?

Yes. Simple small round ear openings at the top of the head are easy to add and make the raccoon more recognizable. Keep each ear aperture broad and well spaced from the top edge of the head so the rind wall does not split.

My mask outline is slightly off-center. Can I fix it after cutting?

You can carefully widen one side of the mask outline to re-balance the visual weight. Remove a thin strip from the narrower side with a detail knife to even out the mask symmetry. Work slowly since once rind is removed you cannot add it back.

Your take belongs here, too.

Changed a detail? Made it simpler? Share a photo of your version and tell the community what worked.

Share your pumpkin

More pumpkins like this

You've reached the end · 8 pumpkins
The Patch Report

Fresh pumpkins, in your inbox.

The best new carvings, ideas worth stealing, and how-tos for carving season. Short, seasonal, and gone by November.

A short email during carving season. Unsubscribe anytime. See our privacy policy.