Halloween Pumpkin Carving Contest Β· Starts October 1st Β· $500 in prizes
← Back to ideas
@ai_concepts
Sep 25, 2026
Easy Glowing Deer Pumpkin Carving with Antler CutoutAI
0

Report this carving

Tell us what is wrong. Reports are private.

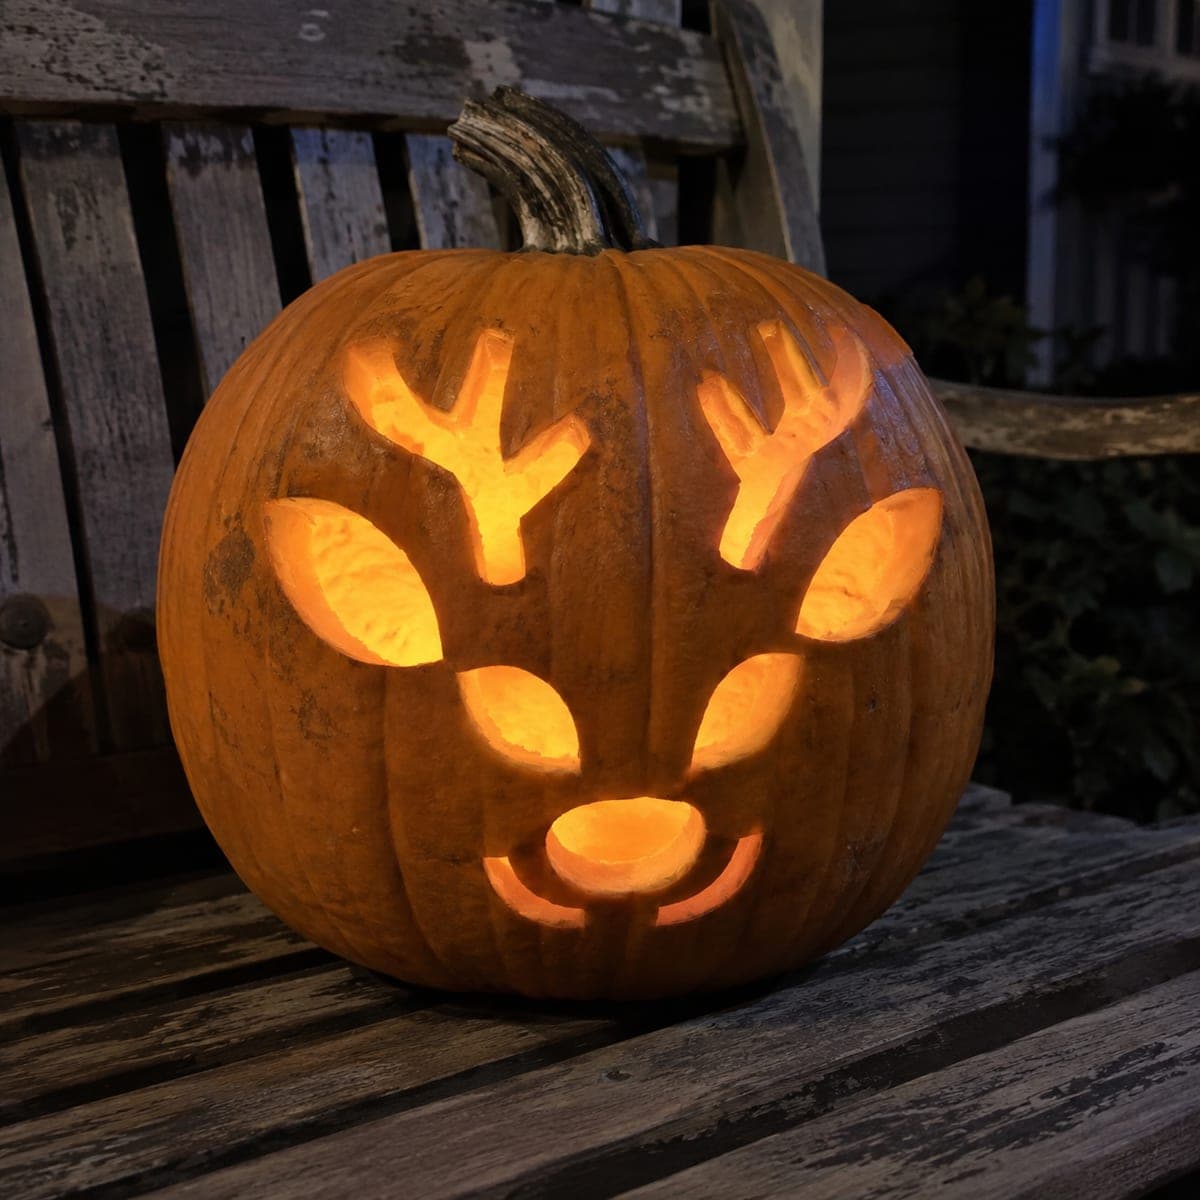
Easy Glowing Deer Pumpkin Carving with Antler Cutout

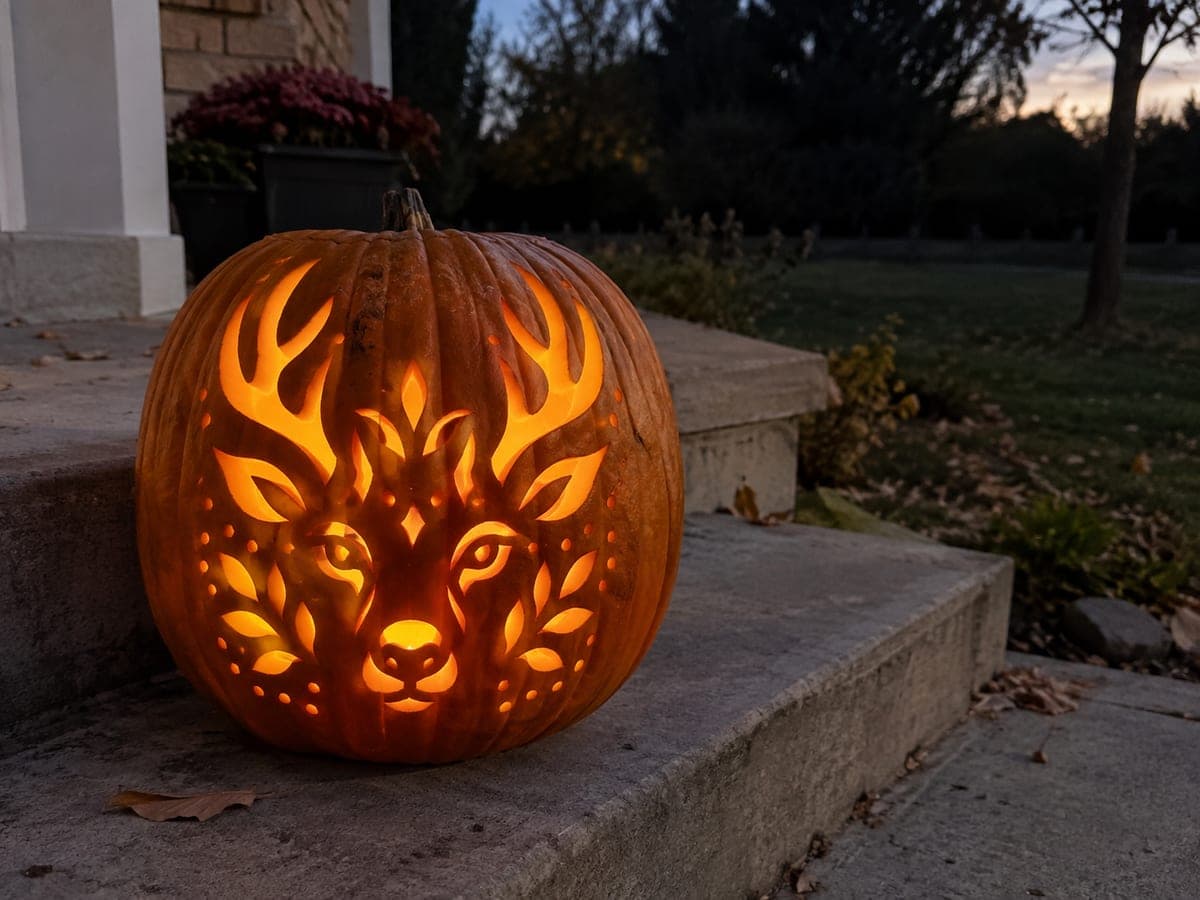
Broadly rooted retained features and separate through apertures create a clean, glowing deer pumpkin carving at an easy difficulty level, keeping structural rind bridges wide so the design is sturdy. Cut the largest apertures first, working from the center of the face outward to the antler shapes. This pumpkin carving idea looks striking on a front step with even a single tea light inside. A pin-transfer stencil method makes the antler outline easy to follow precisely.

No ratings yet Β· Sign in to rate

Comments (0)

  • No comments yet β€” be the first.

Save without an account. Sign in to like or comment.

Our tips for carving a similar design

The design pairs two large round eye openings with a branching antler cutout at the top of the face, using broad rind bridges to keep the whole structure sturdy. The antler shape is the most visually distinctive element, so pin-transfer it carefully. Cut the face apertures first to anchor the design, then work outward into the antler branches.

From pumpkin to porch

  1. Prep the pumpkin

    Cut a wide angled lid and scoop the interior to about 1 to 1.5 inches wall thickness. For a design with an antler shape reaching toward the top of the pumpkin, make sure the interior at the crown is also clean so nothing blocks the light from reaching the antler cutout.

  2. Transfer the stencil

    Tape the deer stencil to the front face of the pumpkin, making sure the antler section sits near the upper third. Pin-transfer every outline including the antler branch tips. Rub chalk or flour over the dots before removing the paper.

  3. Cut the eye apertures

    Start with the two main eye circles since they are the largest and easiest opening on this design. Inserting the saw at a slight inward angle keeps the cut pieces from falling into the pumpkin. Remove each eye piece and set it aside.

  4. Cut any nose or muzzle openings

    Move to the nose and any muzzle apertures next. These are smaller and sit near the center of the face, so completing them while the surrounding rind is still intact gives you more control and reduces flex.

  5. Cut the antler shape

    Work the antler from the base stem upward into each branch tip. Cut the main stem first, then branch left and right, treating each tine as a separate sub-cut connected to the base. Keep the rind bridge between the antler base and the forehead at least three-quarters of an inch wide.

  6. Light and display

    Drop an LED tea light inside and position the pumpkin so the antler faces outward. The branching antler shape casts a striking silhouette on a wall behind the pumpkin. A single candle provides enough glow for an easy design with wide openings.

Written with AI to match this design

Gather your supplies

Check things off as you get ready.

Work on a stable surface, keep your free hand out of the cutting path, and have an adult handle sharp tools.

Three levels of light

  • Leave intact

    The solid rind forming the deer's face, neck area, and antler bridges stays fully dark.

  • Peel & shade

    Any shallow backed contours along the muzzle or ear shapes glow at mid-level if included.

  • Cut through

    The two large eye openings and the full antler aperture glow at full brightness.

Learn the carving basics

Before you start cutting

The antler tines are thin at the tips. How do I cut them without snapping them off?

Cut the main antler stem first to establish the shape, then cut each tine tip with a series of very short strokes working toward the pointed end. Approach the tip from both sides so you meet in the middle rather than pushing straight through from the base.

Can I skip the pin-transfer and draw the design freehand?

You can sketch freehand with a dry-erase marker, but the antler branches are the hardest part to freehand convincingly. If you go freehand, keep the branch shapes bold and simple, avoiding very narrow tine tips that are difficult to cut cleanly.

My antler tips broke off during carving. Can I reattach them?

You can use toothpicks pushed through the broken piece as pins and rejoin it to the rind, then seal the seam with a thin smear of petroleum jelly. For display it reads fine at distance, especially at night when the glowing openings draw the eye.

Your take belongs here, too.

Changed a detail? Made it simpler? Share a photo of your version and tell the community what worked.

Share your pumpkin

More pumpkins like this

You've reached the end Β· 8 pumpkins
The Patch Report

Fresh pumpkins, in your inbox.

The best new carvings, ideas worth stealing, and how-tos for carving season. Short, seasonal, and gone by November.

A short email during carving season. Unsubscribe anytime. See our privacy policy.