Halloween Pumpkin Carving Contest Β· Starts October 1st Β· $500 in prizes
← Back to ideas
@ai_concepts
Sep 25, 2026
Easy Horse Pumpkin Carving with Glowing AperturesAI
0

Report this carving

Tell us what is wrong. Reports are private.

Easy Horse Pumpkin Carving with Glowing Apertures

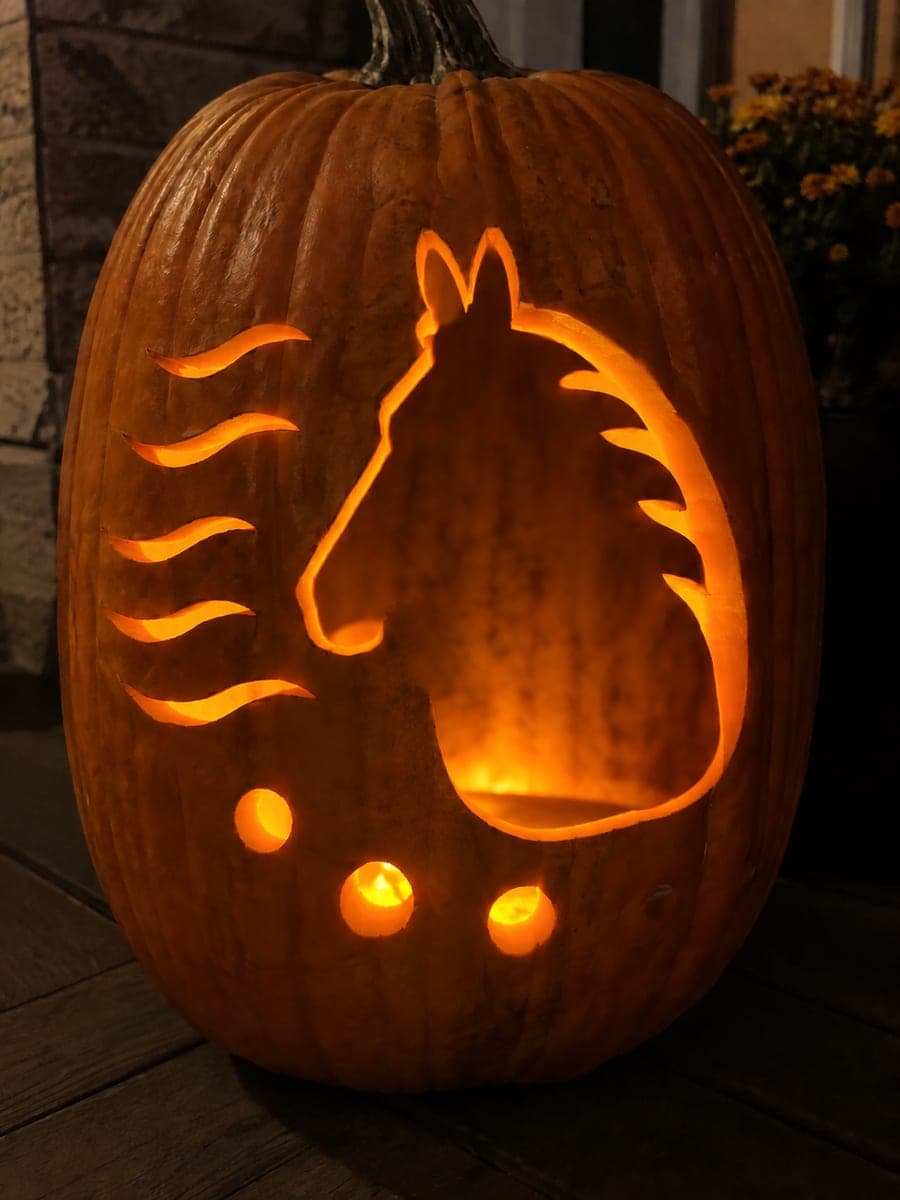
Broadly rooted retained features and cleanly separated through apertures make this easy horse pumpkin carving a sturdy, approachable design with a satisfying warm glow. The generous rind bridges between openings prevent cracking even in a first-time carve. Transfer the stencil outline with a pin tool, cut the largest apertures first, and save any fine backed marks for last. Set a tea light or LED inside and let the horse silhouette glow greet trick-or-treaters.

No ratings yet Β· Sign in to rate

Comments (0)

  • No comments yet β€” be the first.

Save without an account. Sign in to like or comment.

Our tips for carving a similar design

This easy horse design relies on a small number of widely spaced cutouts that together suggest the horse head, mane line, and a simple eye. Generous rind bridges between every opening prevent cracking even in a first carve. Transfer the stencil, cut the largest apertures first, and save any fine backed marks for last so the pumpkin stays stable throughout.

From pumpkin to porch

  1. Prep the pumpkin

    Cut the lid at an angle and scoop out seeds and stringy pulp until the interior wall is a consistent 1 to 1.5 inches thick. Wipe the exterior dry so tape and stencil paper adhere without slipping during transfer.

  2. Transfer the stencil

    Tape the horse stencil to the front of the pumpkin and pin-prick every outline. Remove the paper and rub chalk or flour across the surface to reveal the dotted lines in all lighting conditions.

  3. Cut the main head aperture

    Start with the largest opening, which on most easy horse designs is the broad eye or the open mane outline. Use a pumpkin saw with short strokes at a slight inward angle so the cut piece can be pushed cleanly from inside.

  4. Cut secondary apertures

    Move to the nostril and any smaller secondary openings. At easy level these are well separated from the main aperture, giving each one its own stable bridge to the surrounding rind. Take your time on small curved shapes.

  5. Add backed marks if included

    If the stencil includes a backed mane section, use a linoleum gouge to shave the outer skin layer only in that area. Keep the backed zone over a fully supported section of wall and check depth with a flashlight.

  6. Light and display

    Place an LED tea light inside and carry the pumpkin to its display spot. The easy horse silhouette reads clearly from 10 feet away in full darkness. Set it at eye level on a step or railing for the best nighttime presentation.

Written with AI to match this design

Gather your supplies

Check things off as you get ready.

Work on a stable surface, keep your free hand out of the cutting path, and have an adult handle sharp tools.

Three levels of light

  • Leave intact

    The solid rind forming the horse head outline, jaw, and mane bridges stays fully dark.

  • Peel & shade

    Any shallow backed mane or neck contours glow softly at mid-brightness.

  • Cut through

    The main eye aperture and nostril openings glow at full brightness.

Learn the carving basics

Before you start cutting

The mane outline at the top of the design is very narrow. How do I cut it without breaking it?

Cut the mane from the widest base point upward toward the narrower top, working in short strokes. Approach the thinnest point from both sides rather than driving the blade straight through, which reduces the chance of the blade torquing the thin rind.

My stencil shows the horse in profile. Should I position it facing left or right?

Either direction looks good, but placing the horse facing toward the front door or the street feels more welcoming. Simply flip the printed stencil face-down before pinning to mirror the design if you prefer the opposite orientation.

Is a tea light bright enough, or should I use an LED?

An LED tea light is safer and lasts longer than a real candle, so it is always the better choice. A real tea light works for a brief display in calm conditions, but wind or the pumpkin lid closing can extinguish it, and there is always a fire risk with a real flame.

Your take belongs here, too.

Changed a detail? Made it simpler? Share a photo of your version and tell the community what worked.

Share your pumpkin

More pumpkins like this

You've reached the end Β· 8 pumpkins
The Patch Report

Fresh pumpkins, in your inbox.

The best new carvings, ideas worth stealing, and how-tos for carving season. Short, seasonal, and gone by November.

A short email during carving season. Unsubscribe anytime. See our privacy policy.