Halloween Pumpkin Carving Contest · Starts October 1st · $500 in prizes
← Back to ideas
@ai_concepts
Sep 25, 2026
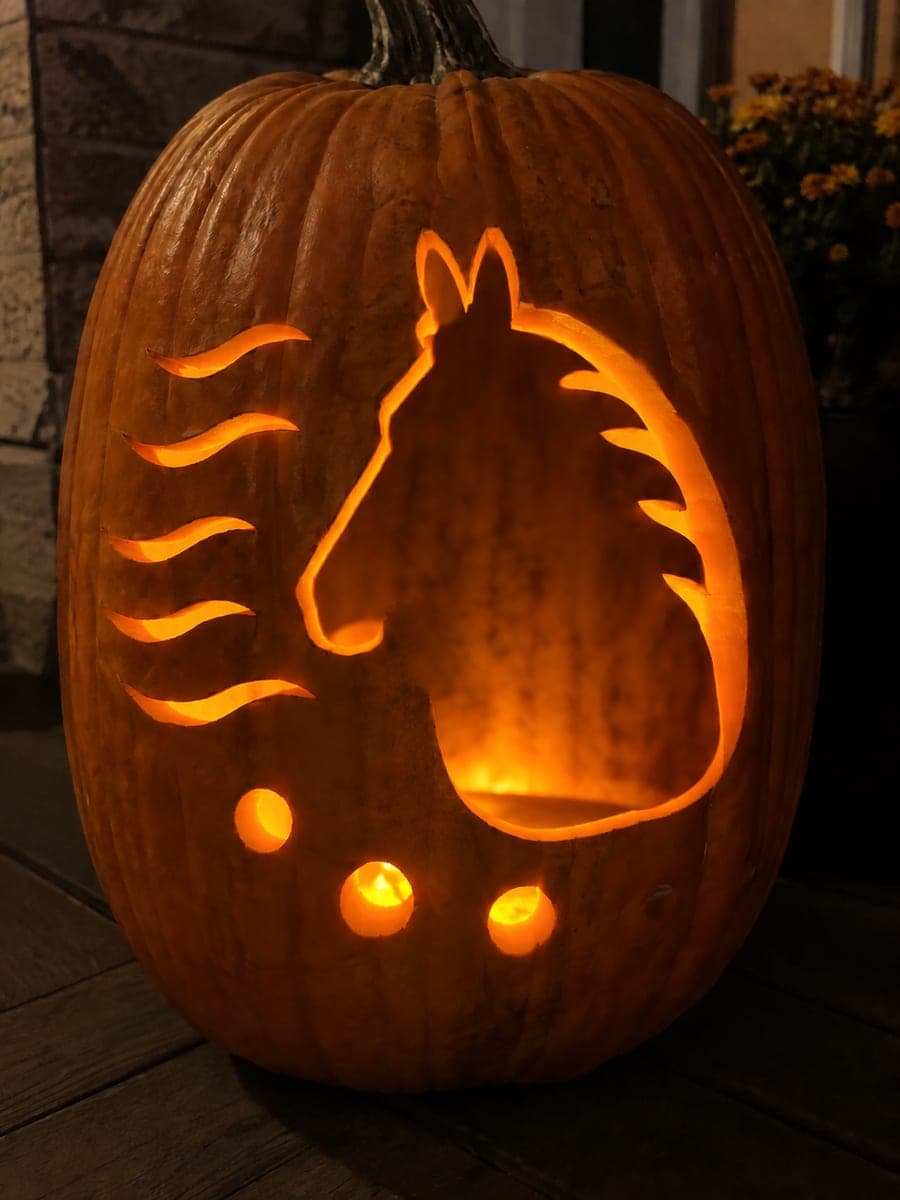
Intermediate Horse Jack-O-Lantern with Mane DetailAI
0

Report this carving

Tell us what is wrong. Reports are private.

Intermediate Horse Jack-O-Lantern with Mane Detail

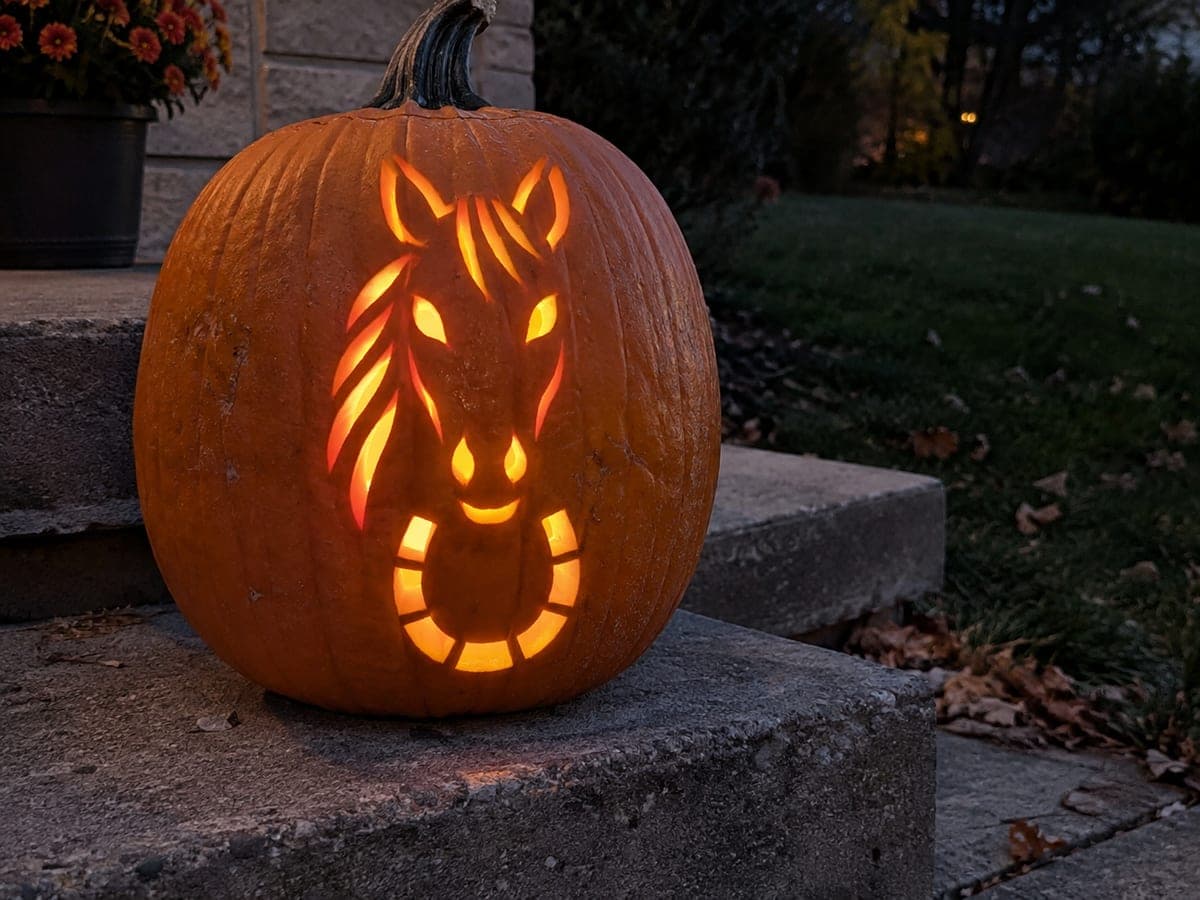
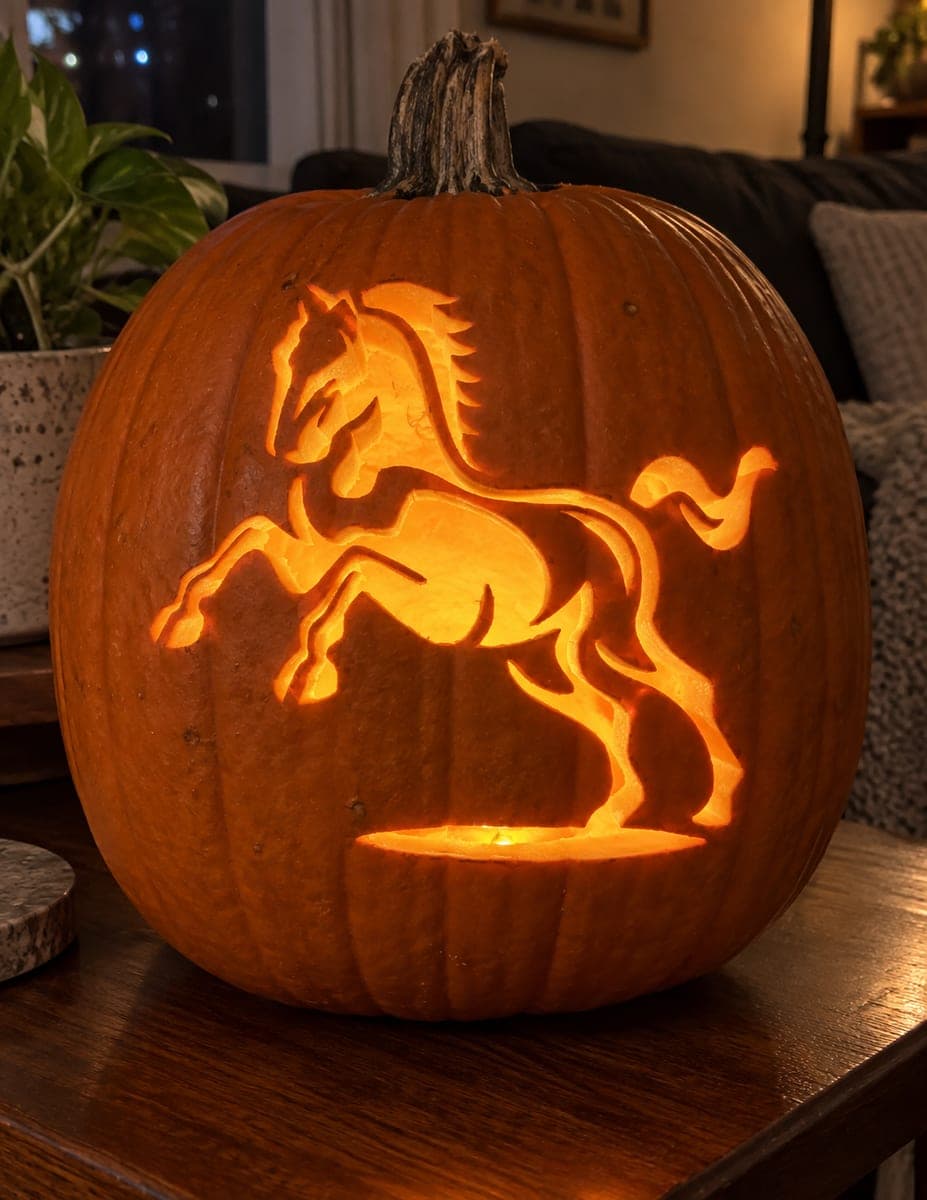
This intermediate horse jack-o-lantern introduces more apertures and finer retained shapes, with shallow backed contours giving the mane a flowing look against the solid rind. Keep your rind bridges wide across the forehead and jaw so the design holds steady as you cut the smaller interior openings. A pin-transfer stencil makes it easier to lay out the mane's curves accurately before picking up the knife. Warm amber lighting makes the mane contours cast gentle curved shadows.

No ratings yet · Sign in to rate

Comments (0)

  • No comments yet — be the first.

Save without an account. Sign in to like or comment.

Our tips for carving a similar design

The mane is the star of this design. Shallow backed contours along the flowing mane give it dimension against the solid rind, while multiple facial apertures build a more expressive horse face than the beginner version. Keep the rind bridges across the forehead and jaw wide as you cut the smaller interior openings, and use a pin-transfer stencil to lay out the mane curves accurately before picking up the knife.

From pumpkin to porch

  1. Prep and hollow

    Select a pumpkin with a gently curved front to let the mane contours flow naturally. Hollow to 1 inch wall thickness for a better cut response on the mane's curved backed lines.

  2. Transfer the stencil

    Tape the stencil carefully, noting where the mane backed area sits relative to the facial apertures. Pin-prick the mane boundary with a lighter pressure than the through-cut lines so you can distinguish them after removing the stencil.

  3. Cut the main facial apertures

    Begin with the eye openings and the main nostril. At medium level there may be two to three apertures on the face, sitting closer together than at easy level. Use short strokes and check each bridge between openings before moving on.

  4. Cut the mane outline apertures

    The mane's outer edges are cut through to define where the backed section begins. Cut these outline apertures to create the separation between the mane and the surrounding rind. This is the frame that makes the shallow backed mane read as a distinct zone.

  5. Gouge the backed mane contours

    Work a linoleum gouge in flowing strokes across the mane area, following the natural direction hair would fall. Keep the depth even at about half the wall thickness. Test with a flashlight as you go to check the mid-glow level before removing too much material.

  6. Light and display

    Insert a bright LED disc light inside and position the pumpkin near a light-colored wall to catch the mane's shadow cast. Warm amber lighting makes the flowing mane contours cast gentle curved shadows that enhance the equine character of the design.

Written with AI to match this design

Gather your supplies

Check things off as you get ready.

Work on a stable surface, keep your free hand out of the cutting path, and have an adult handle sharp tools.

Three levels of light

  • Leave intact

    The solid rind above and below the mane and the jaw bridge stays fully dark.

  • Peel & shade

    The gouged mane section glows at a warm mid-level, creating the flowing hair effect.

  • Cut through

    The eye apertures and nostril opening glow at full brightness.

Learn the carving basics

Before you start cutting

How deep should the backed mane contours be to get a good mid-glow?

Remove roughly half the wall thickness in the backed zone. At 1 inch wall thickness, that means gouging to about half an inch deep. Check the glow against the LED frequently, as the optimal depth varies by pumpkin density.

My mane contour lines are uneven and jagged. How do I smooth them?

Use a loop tool or the curved end of a linoleum gouge in a light scraping motion across the tops of the ridges. Working at a low angle with light pressure blends the transitions between contour lines and removes high spots.

Can I add the backed mane contours before I cut the through-holes?

It is better to do the through-cuts first so the rind is still fully rigid during the backed work. If you do the backed section first, the thinned wall area is more prone to flexing and cracking when you apply saw pressure nearby for the through-cuts.

Your take belongs here, too.

Changed a detail? Made it simpler? Share a photo of your version and tell the community what worked.

Share your pumpkin

More pumpkins like this

You've reached the end · 8 pumpkins
The Patch Report

Fresh pumpkins, in your inbox.

The best new carvings, ideas worth stealing, and how-tos for carving season. Short, seasonal, and gone by November.

A short email during carving season. Unsubscribe anytime. See our privacy policy.